
Step by Step: How-to Paint Furniture for Beginners
The best step by step guide you’ll find on how-to paint furniture the right way!
If you’re a beginner, you might be wondering if you have the skills to paint furniture.
Or maybe you’ve tried to makeover a thrifted furniture find only to be disappointed in your results.
Luckily, I LOVE to teach and am the Queen of Painting Everything! I’ve literally painted furniture for 30 years.
From hand applying different types of paints to using every type of applicator brushes to a HVLP sprayer, I’m an expert on painting furniture.
Oh and I have an ACT (architectural coatings technologist certification) so I know the science behind paint too.
You are in good hands and I’ll make sure you have everything you need to know, before you get painting your furniture!
WANT TO PAINT SOMETHING YOU CAN’T MOVE?
We’ll cover everything from choosing the right paint and brushes to the proper techniques and finishing touches.
Get ready to DIY furniture the right way!
Contains hand selected products, with affiliate marketing links where I may earn a small commission if a purchase is made. {full disclosure here}
Furniture Painting for Beginners Guide
We will start at the very beginning and talk through just the basics when it comes to getting ready BEFORE you ever paint furniture.
Step by step: Painting furniture (stained or painted):
- Areas to protect (when you can’t move the furniture)
- Remove knobs, pulls and hinges.
- Sand smooth failing areas and clean.
- Fill in drill holes or damage.
- Clean the furniture and de-gloss.
- Prime to create a “sticky” surface for the paint and block stains.
- Apply 2 or 3 thin coats of paint.
- Try an antiquing glaze or driftwood finish (optional)
- Protect the Finish
- Reattach Hardware
But first let’s go through the details about what products to use, before you get applying.
Choosing the Right Furniture Paint
There are several types of paint suitable for furniture, such as latex, chalk paint, milk, mineral paint, and acrylic. But which one is best for your furniture painting project?
Each type has its advantages and drawbacks, you can read in detail all about the different paint types here: Best Paint by Project
I’ll make this simple, 9 times out of 10 the paint I recommend for painting furniture is a hybrid oil enamel paint or an acrylic enamel.
The best sheen for durability and cleaniblility a semi gloss finish.
You can use a regular latex paint, but you will likely have to apply a clear coat sealer to protect it.
My favorite furniture paint is Valspar Cabinet and Furniture Enamel (read my review here) and my other favorite is Sherwin Williams ClassicPro Acrylic enamel.
Painting furniture with a water based enamel paint is the best option because it masks brush marks and dries to a hard durable finish.
For most furniture painting projects, I don’t recommend chalk paint (my review on Krylon Chalk Paint) or Annie Sloan’s Chalk Paint because it requires that you have to seal the paint with a clear coat adding an extra step.
If you like the look of chalk paints, choose Valspar Cabinet and Furniture Enamel in SATIN.
It will have the same matte finish and feel, but be more durable and doesn’t require a top coat like chalk paint.
Choosing the Right Primer for Painting Furniture
I’m going to keep this really simple! You can consider a general primer, BIN shellac based primer or an oil based primer.
I recommend a Bonding Primer because it will ENSURE the paint adheres to painted, stained furniture, or shiny surfaces without sanding. Plus will prevent stain bleed.
Bonding Primer is user friendly and is soap and water clean up. It’s like super-glue for paint!
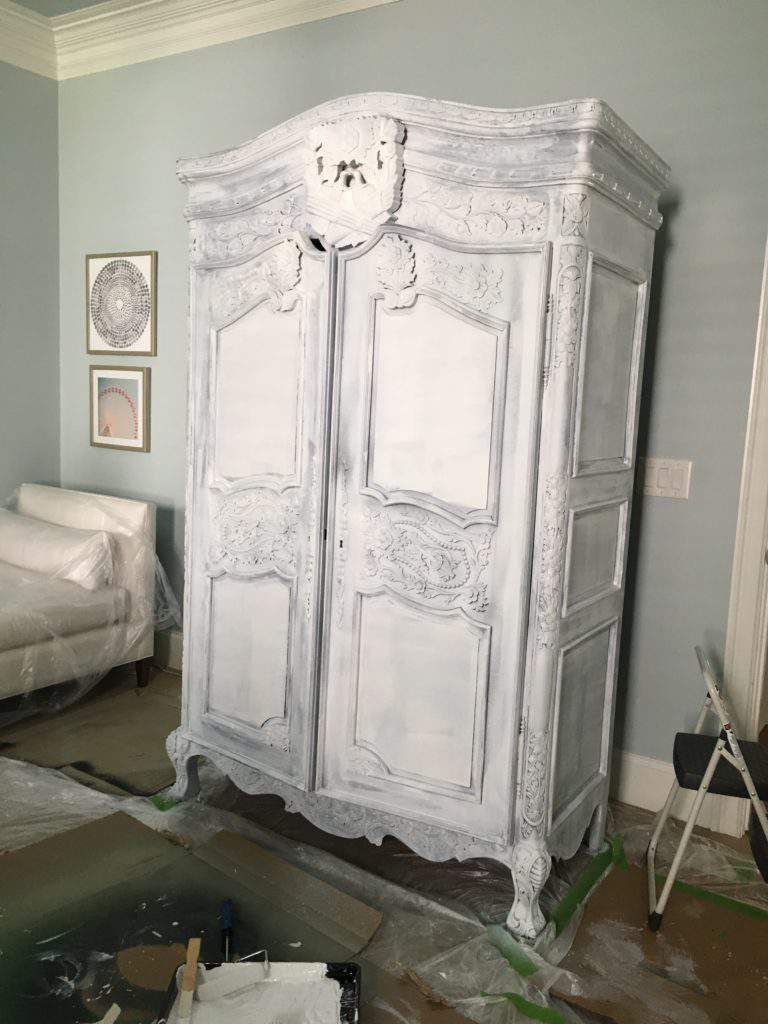
It’s ugly going on, but amazing to ensure all potential tannin bleed is blocked and the paint with stick to the surface.
Magic in a can! I recommend Valspar Bonding Primer (you can buy online or a Lowe’s Home Improvement Stores nationwide).
Paint Applicators for Painting Furniture
Selecting the right applicator is crucial for achieving a smooth, professional-looking finish on your painted furniture.
The type of applicator you choose depends on the paint you’re using and the desired outcome.
Here’s a breakdown of the different applicators and how to choose the best one for your project.
Brushes
Brushes are versatile and can be used with various types of paint. They come in different sizes, shapes, and bristle types to cater to different purposes.
Typically all water based paints and enamels recommend using a nylon polyester brush. Oil paints typically recommend a natural bristle brush.
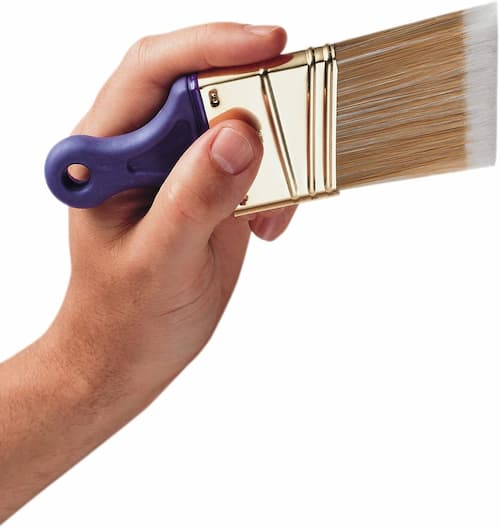
My preference is an angled brush to get into detailed areas. The one I use and always recommend to reduce brush marks is from Wooster.
Rollers
Rollers provide a fast, even finish on large, flat surfaces. They’re perfect for painting dressers, tabletops, and cabinet doors.
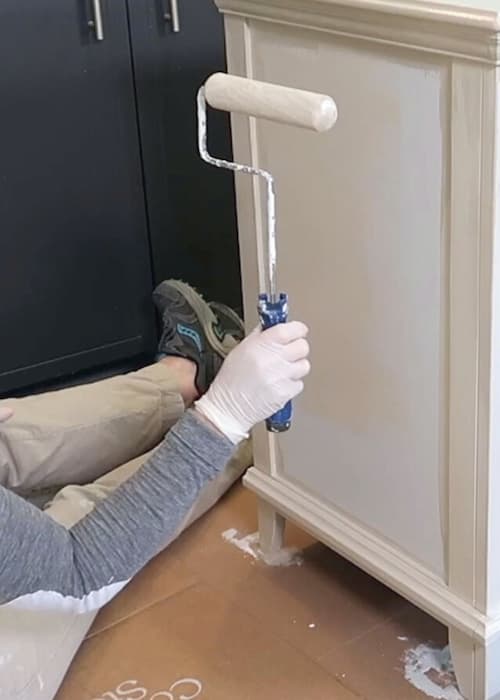
- Foam Rollers: Suitable for water-based paints, foam rollers provide a smooth finish with minimal texture. They’re great for furniture with a flat surface and no intricate details.
- Knit Rollers: I don’t recommend these rollers for furniture. These rollers work well with both water-based and oil-based paints when painting walls.
If you want more details about each type of roller, read Are you using the wrong roller cover?
My advice when you paint furniture (cabinets too) is to ALWAYS use a foam roller for the smoothest finish possible.
Paint Sprayers
A paint sprayer, such as HVLP (high volume, low pressure) sprayers offer an even, smooth finish with NO brush or roller marks.
It’s how you get the smoothest factory like paint finish. I’ve got several articles about paint sprayers:
- When it’s time to buy a paint sprayer
- Paint Sprayer Turned a Dreaded Project into the BEST Ever!
- PRO Finish on a Budget with a HVLP sprayer.
They’re ideal for painting intricate or detailed furniture pieces and they also speed up painting furniture too! You can apply fewer coats of paint faster.

benefits of Using an HVLP Sprayer:
- No air compressor needed (it’s considered airless)
- Quick and easy set-up and fairly easy to clean.
- You can spray any primer or any type of paint
- It can even spray polyurethane and stain
Choosing the Best Applicator for Painting Furniture
To select the right applicator paint furniture, consider the following factors:
- Paint Type: Ensure your applicator is compatible with your chosen paint type. Use a synthetic bristle brushes for water-based paint and natural bristle brushes for oil-based paint.
- Surface Area: For large, flat surfaces, opt for a foam rollers for a smoother finish. For smaller, detailed areas, brushes work best. For intricate furniture or carved furniture, consider a paint sprayer.
- Desired Finish: If you’re looking for a factory-like, smooth finish, consider using paint sprayer. Brushes and rollers are suitable for hand applying paint but won’t provide as smooth of a finish.
Now let’s talk about the essential supplies you’ll need for painting furniture. I have an entire shopping list of my favorite paint tools here.
Checklist for Beginners: How to Paint Furniture
Want a checklist and supply list for the next time you paint furniture?
Essential Furniture Painting Supplies
- Sandpaper (220 grit)
- Microfiber rag (I avoid tack cloth to not deposit wax)
- Painter’s tape
- Drop cloths or plastic sheeting
- Screwdriver or drill (to remove hardware)
- Wood filler (if needed)
- Paint tray and liners
- Nylon/Polyester Brush
- Foam Roller
- Valspar Bonding Primer
- Valspar Cabinet and Furniture Enamel (Semi-Gloss)
How to Prepare Your Furniture and Area Before Painting
Prep is the MOST important step to make sure you get the smoothest most durable paint finish possible.
Plus we want to protect areas that shouldn’t be painted and protect the surrounding areas from paint spills and splatters.
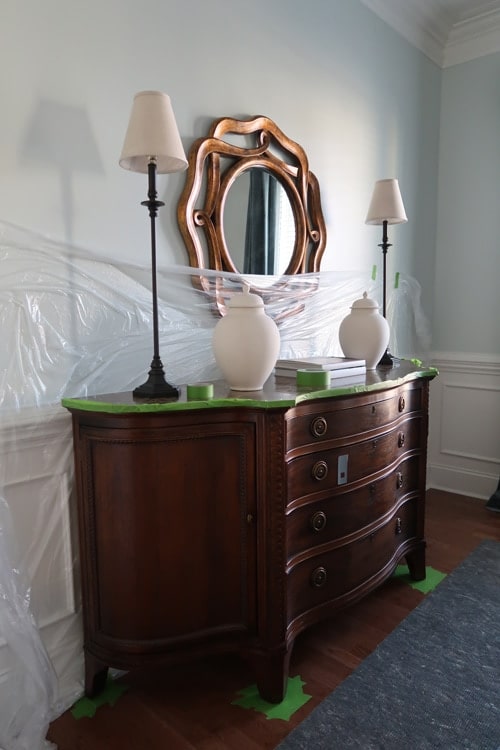
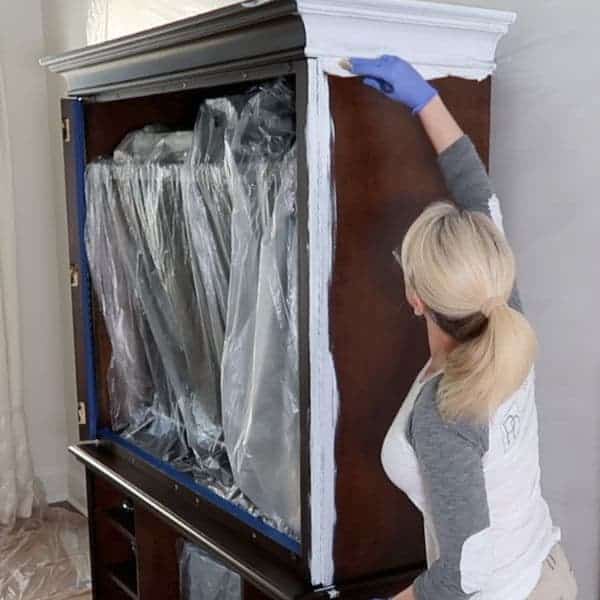
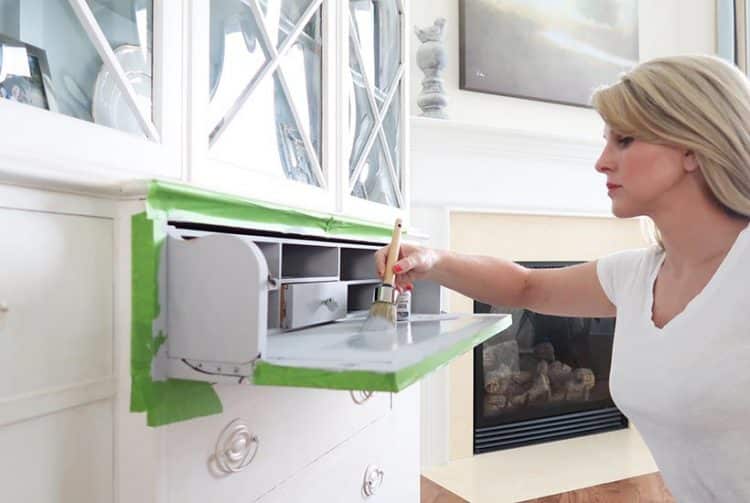
Protect Surfaces Prior to Painting
- Use painter’s tape and plastic sheeting to protect areas you don’t want to paint (like along drawer edges).
- If you can’t move your furniture, add painter’s tape under the base and feet so you can get in close.
- Lay drop cloths and or cardboard under and around the piece of furniture.
- Hang painter’s plastic on walls behind the furniture and over other furniture you aren’t painting.
Remove the Hardware
To prevent brush marks and drips you need to remove the hardware. It will make it easier to roll on the paint as well.
After you remove the hardware, make sure you leave open doors and doors and they don’t close.
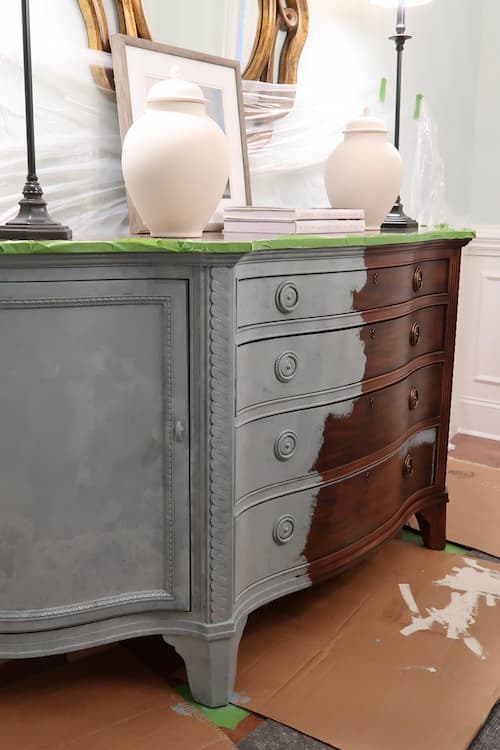
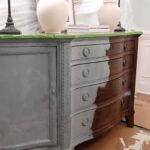
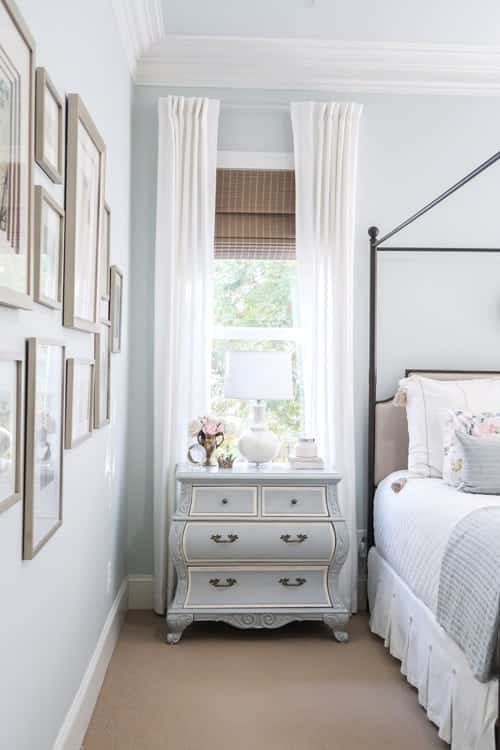
When painting the chest above, I wasn’t able to remove the hardware and painted right over it.
Then I sanded the paint off down to a soft gold finish that was highlighted by the new paint color. Gorgeous 🙂
I’ve also painted directly over the hardware and left it. It’s up to you!
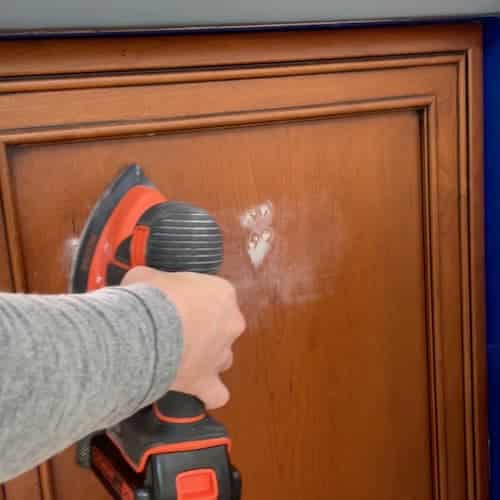
Sand Failing Areas
NO! You don’t have to sand off the finish before painting over stained furniture. Or going over another paint color.
However, if you have any peeling or flaking areas you must sand those smooth first.
Painting over a failing area means the paint will fail too. Some light sanding may be necessary.
Most of the time you can use a 220 grit sanding block to sand any areas smooth. If it’s a lot of sanding, using a battery operated sander can be really helpful.
After sanding, wipe the surface with damp microfiber rag to remove ALL dust.
Those little dust particle can cause the paint not to stick or even worse leave marks underneath of the latex paint or enamel.
Want to fill hardware drill holes prior to painting your furniture?
Here’s comprehensive tutorial that tells you what the best wood filler is to use and how to fill the holes!
Clean the Furniture Prior to Painting
Thoroughly clean your furniture to remove dirt, dust, and grime. Degreasing is important so the primer sticks.
You can use a Pre-Paint Cleaner or a mixture of a mild dish soap (like Dawn Liquid) and water solution and a microfiber rag, then allow the furniture to dry completely.

If you are painting over stained wood or polyurethane, spray on a de-glosser to cut through the shine and wipe clean with a microfiber rag.
Wait 10 minutes prior to painting.
QUICK Painting TIP
Between coats wrap brushes and roller in plastic wrap and cover your tray with plastic wrap to keep the paint wet.
How-to Paint Furniture (Beginner Guide)
Step 1: Applying Bonding Primer
You likely can only apply 1 coat if you are thorough, but it’s perfectly fine to apply 2 coats for more even coverage.
Just make sure you wait 2 or more hours before the 2nd coat of Bonding Primer!
- Begin by stirring the primer thoroughly to ensure even distribution. Place a plastic liner into a paint tray. Pour the primer into a tray.
- Using a paint brush, start by brushing on all detailed areas first and creating a frame as you go.
- Maintain a wet edge between brushing and rolling. Use your foam roller to roll and fill in the frame.
- More detailed pieces of furniture like a chair you will exclusively brush since it’s detailed.
- Use long, smooth strokes and avoid overloading the brush or roller to prevent drips.
- Pull any tape that you coated with primer within 30 minutes. Re-tape after the primer has fully dried before painting.
- Allow the primer to dry according to the manufacturer’s instructions, which is between 2 hours before adding another coat.
- KEEP DOORS AND DRAWERS OPEN WHILE DRYING. You can paint them shut, so avoid this by keeping them open.
Painting a dresser?
Paint in this order: Sides, drawers, and then the top. If you get paint onto the top, feather it in as you go. Then roll the top last. I have specific instructions on how to paint a dresser (of course!).
Sand After Priming if Needed
If you over applied the primer or found drips, you may need to sand those areas smooth before painting.
After the first coat is dry, lightly sand the surface with fine grit sandpaper (220 grit) to remove any imperfections. Wipe away any dust with a damp microfiber rag.
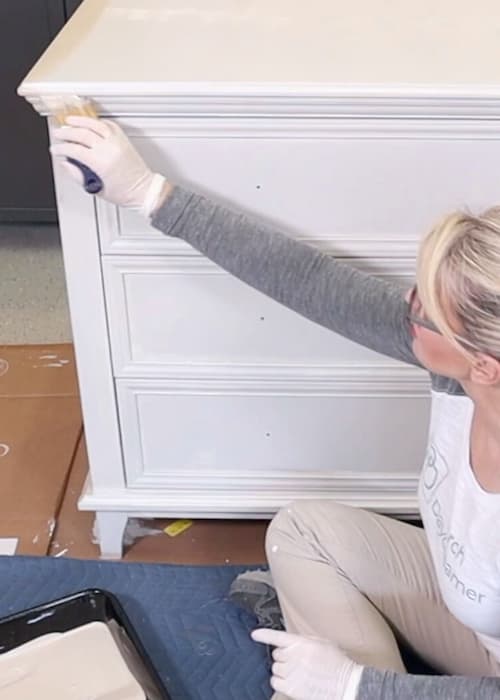
Step 2: Apply the First Coat of Paint
- Begin by stirring the paint thoroughly to ensure even distribution (don’t shake to mix and create bubbles). Place a plastic liner into a paint tray. Pour the paint into tray.
- Using a paint brush, start by brushing on all detailed areas first and creating a frame as you go. It’s best to avoid thick coats and overwork the paint. 2 thin coats are better!
- Maintain a wet edge between brushing and rolling. Use your foam roller to roll and fill in the frame.
- More detailed pieces of furniture like a chair you will exclusively brush since it’s detailed.
- Use long, smooth strokes and avoid overloading the brush or roller to prevent drips.
- Pull any tape that you coated with paint within 30 minutes. Re-tape prior to applying the second coat of paint.
- Allow the paint to dry according to the manufacturer’s instructions which is typically 4 hours OR MORE before adding another coat.
- Valspar Cabinet and Furniture Enamel paint MUST dry 4 hours between each coat of paint.
- KEEP DOORS AND DRAWERS OPEN WHILE DRYING. You can paint them shut, so avoid this by keeping them open.

Step 3: Apply Additional Coats of Paint
Apply a second coat of paint, following the same technique as the first coat. For optimal coverage you may need to apply 3 coats.
Sand Between Between Coats if Needed
If you over applied the paint, found imperfections or drips, you can sand those areas smooth before the next coat of paint.
After the first coat is REALLY dry (4 hours), lightly sand the surface with fine grit sandpaper (220 grit) to remove any imperfections. Wipe away any dust with a damp microfiber rag.
CLEAN UP
After the final coat, wash out brush, toss roller, pour any paint back into can and label with your project name and color.
Step 4: Reattach Hardware
WAIT 24 HOURS and make sure the paint is completely dry. The paint won’t FULLY cure for 7 days, so baby it and avoid placing heavy objects.
If you damage your painted furniture, use the same sanding method to sand down imperfections as you did above.
Then reapply one coat of primer and 2 to 3 coats of paint.
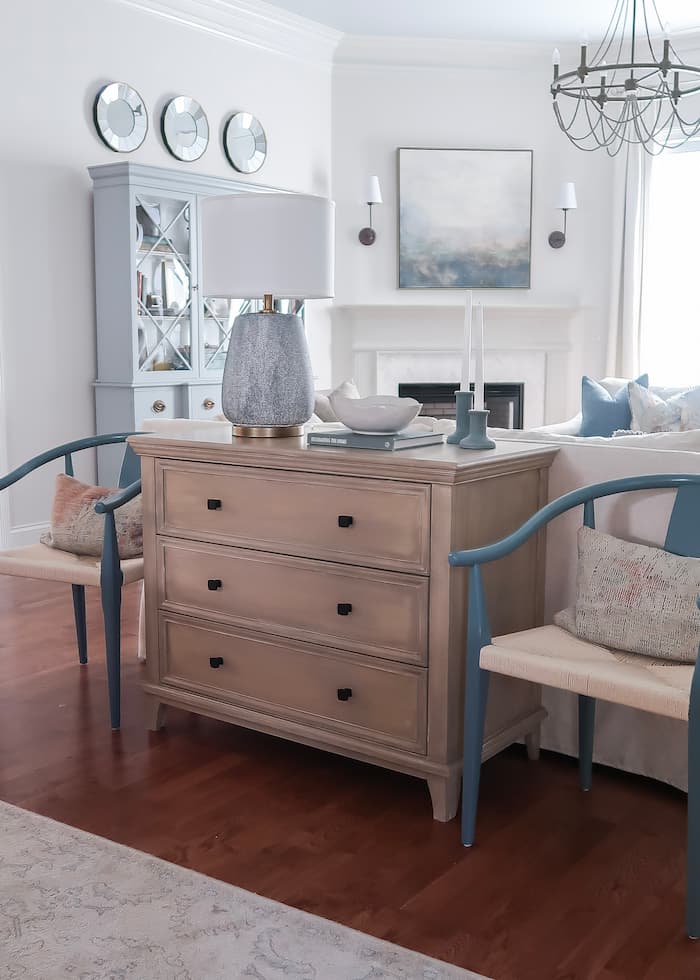
Antiquing Glaze or Faux Wood Finish (Optional)
If you want to give your painted furniture a little extra character you can apply an antiquing glaze.
This will highlight the architectural detail and give the solid painted finish depth and dimension.
Or you can try my faux driftwood or seadrift paint tutorial. You can paint ANYTHING to look like wood!
Seal and Protect Your Painted Furniture
Because I recommend hybrid enamel paint for furniture, most of the time you can skip a top coat or clear coat.
However, if your newly painted furniture is something that gets heavy use then it may require a top coat of a sealer to protect it.
Read: When to Polyurethane Painted Furniture
Adding a layer of protection to your painted furniture will enhance its durability and cleanability, ensuring your hard work lasts for years to come.
You’ll need to select a clear coat that is compatible with your paint type and follow the manufacturer’s instructions for application and drying time.
Types of Sealers and Clear Top Coats for Painted Furniture
There are various sealers available on the market, and choosing the right one depends on the type of paint you’ve used and the desired finish.
Some popular options include:
Furniture Wax
Let’s talk about furniture wax first because I NEVER recommend using it.
It’s a popular choice for sealing chalk paint and milk paint, as it provides a soft, matte finish that highlights the natural texture of the painted surface.
It’s available in different colors and can be buffed to achieve a subtle sheen. Wax requires periodic reapplication to maintain its protective properties.
Why I don’t recommend wax as a sealer is because it isn’t easy to paint over wax, when you want to change the color. Polyurethanes are better.
You can use bonding primer over polyurethane.
Oil Based Polyurethane
Polyurethane is a versatile sealer that works well with oil-based paints. DON’T USE OIL POLYURETHANE OVER A WATER BASED LATEX PAINT!
Oil based polyurethane can yellow overtime and has a yellow appearance. It’s much better over stained wood or bare wood furniture.
So what do you use over chalk paint, latex paint and hybrid enamel water based paints? That’s next!
Water Based Polyurethane
My favorite option is Polycrylic as a water-based alternative to oil polyurethane that offers a clear, non-yellowing finish.
It’s suitable for light-colored furniture and works well with water-based paints, such as latex and acrylic enamels.
Polycrylic is easy to clean up, dries quickly, and provides a durable protective layer. I recommend the satin sheen for most painted furniture.
Clear Top Coat Application Tips
To ensure the best results when sealing your painted furniture, follow these application tips:
- Ensure the paint is completely dry before applying any type of sealer.
- I’d recommend drying the paint a FULL 48 hours before applying any water-based polyurethane.
- Choose a sealer compatible with your paint type and desired finish.
- Use a high-quality brush nylon polyester brush to prevent streaks and brush marks.
- Apply in thin, even coats, following the manufacturer’s instructions.
- BE AWARE: Polycrylic looks milky in the can and dries clear.
- If you get streaks when applying, you are applying it too heavily.
- Allow to dry fully between coats, and lightly sand the surface with fine-grit sandpaper (320-400 grit) to promote adhesion and achieve a smooth finish.
- Wipe away any sanding dust with a microfiber cloth before applying additional coats.
- Follow the manufacturer’s recommendations for the number of coats and drying times to achieve optimal protection and durability.
By sealing your painted furniture with the appropriate clear coat, you’ll ensure a lasting, beautiful finish that stands up to daily wear and tear.
FAQs about Painting Furniture
Q: Should I paint inside or outside?
A: All water-based paints are low VOC (volatile organic compounds), so they are low odor and don’t have much smell. They are safe to use indoors.
If you are using an oil based paint, keep the windows open if you are painting indoors.
Q: How long does it take for the paint to dry?
A: Paint dry time is influenced by how think the coats of paint are and how much humidity is in the air.
- Paint Dry time is how long it takes to touch the paint
- Paint Re-coat time is how long until you can add the next coat of paint
- Cure time is how long it takes for the paint to dry to it’s full hardness
It’s important to follow the manufacturer’s instructions for all three.
Applying paint coats too close together can make the paint stick to itself and never dry! That’s called blocking – when you touch the surface it feels tacky and leaves a white mark.
Q: Can I paint over an existing painted or stained finish?
A: Yes, but you must properly prepare the surface by cleaning and applying a primer to ensure proper adhesion.
Q: How do I prevent brush strokes in my paint finish?
A: Use a high-quality nylon polyester brush, work with thin coats, and maintain a “wet edge” by painting in small sections. Sanding between coats can also help minimize brush strokes.
Choosing a high-quality furniture enamel will also limit brush strokes because it will flow and level better than a wall paint will on furniture.
Using the “strike-off” method after you paint a section will help on both brushing and rolling.
Run your brush in the same direction across an expanse to align the paint. Do the same using a light touch after rolling a section.
I hope this all helped build your confidence and you are ready for a furniture paint makeover.
Flip that furniture! It’s the most affordable way to update an outdated piece.
Check out these other furniture painting tutorials!
- Step by Step: How-to Paint Furniture for Beginners
- Paint IKEA Furniture: Easy hack for a peel proof finish!
- How-to Paint IKEA Furniture the Pottery Barn Seadrift Finish (aka driftwood)!
- How-to Spray Paint Outdoor Resin Wicker Furniture!
- Easy Nightstand Makeover with Paint
- How-to Give New Life to Old Furniture
- Easy Driftwood Paint Finish for Outdoor Furniture
- Painting Furniture? Avoid these 4 Mistakes!
- When to Polyurethane Painted Furniture
- Yes! You Can Use Chalk Paint Over Stain
- How-To Prep and Paint Stained Stairs White
I used Valspar Enamel furniture paint on a sideboard, waited the required four hours, and put a clear top coat over it. It looked streaky and cloudy, so I ended up having to sand off the water-based top coat and repaint it (thankfully, I had only put the top coat on the top of the sideboard, not the sides and front). It has now been over two days since I repainted it–and I’m nervous now about putting on a top coat. Obviously, it’s dry, but will I still get brush streaks? I have painted furniture many times before with latex paint and never had this problem with a top coat, but this is the first time I’ve used enamel paint. I know you say enamel paint doesn’t need a top coat, but CAN I put on a water-based top coat if I wanted to, or would it interfere with enamel paint?
Thanks for your help!
~Laurie
Hi, Laurie! Thanks for your question. So the “recoat time” for the enamel is 4 hours, but it doesn’t fully dry for 7 days and fully cure in 30 days. It sounds like you applied the polyurethane too soon and too heavy. I’ve added some notes in this blog post to help others.
Make sure you apply the clear coat in THIN layers. It flows and levels to a smooth finish. You need to sand between coats and that will help “knock down” any brush strokes. You drag the 300 or 400 grit sandpaper in the same direction across the finish to smooth. The last coat you don’t sand at all.
I’ve used this method apply 5 coats of Polycrylic to my painted granite counter and it looks FLAWLESS! You can read that post for more info. I clean it with windex too 🙂 You should be safe since you let it dry over 48 hours.
Hope this helps!
Tracey