How-To Prep and Paint Stained Stairs White
Yes! If you have stained wood stairs, you can paint them without having to sand off the finish first! With the right primer, a bright white staircase can be yours!
Painted staircase before and after photos are the best! A fresh coat of paint to update the risers makes and entryway staircase look fresh and new highlighting the architectural details.
After living with my natural wood staircase for 9 years, it was time to prep and paint the stained risers white for a whole new look.
Learn how-to prep (and how NOT to prep) stair risers for the most durable paint finish that will last!

Avoid This Disaster When Painting Stair Risers
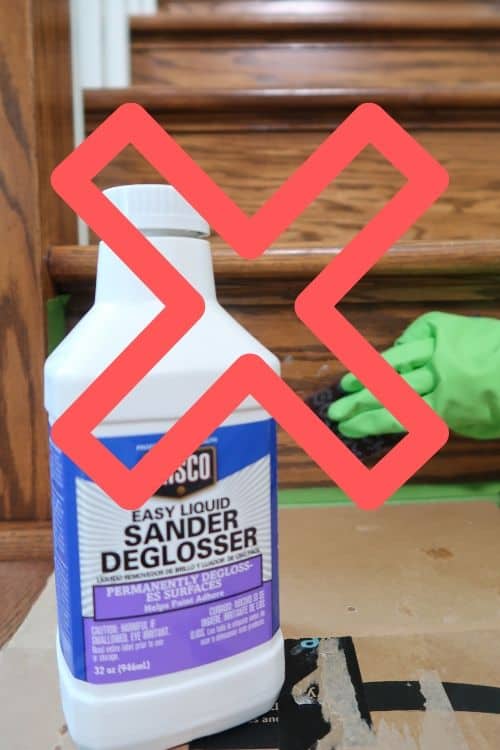
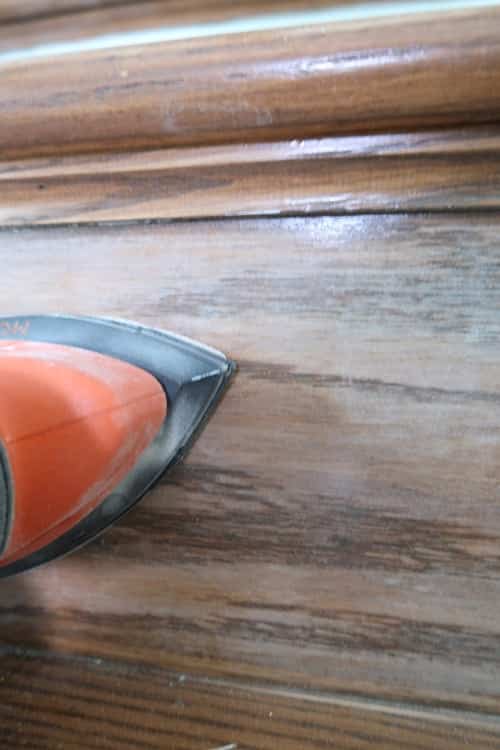
DO NOT USE a water based de-glosser / liquid sandpaper! I repeat do not use a water based de-glosser / liquid sandpaper to prep your stairs or stair risers for painting.
Why? Well, stairs when stained are coated with MANY layers of polyurethane which make them durable.
Latex paint will NOT ADHERE TO POLYURETHANE because it is slick and will peel right off!
In order to create a surface the paint can adhere to, it must be “roughed up” by chemical or physical means.
Technically, a de-glosser should be able to handle this task. But what I found is the water-based version just didn’t remove enough of the polyurethane.
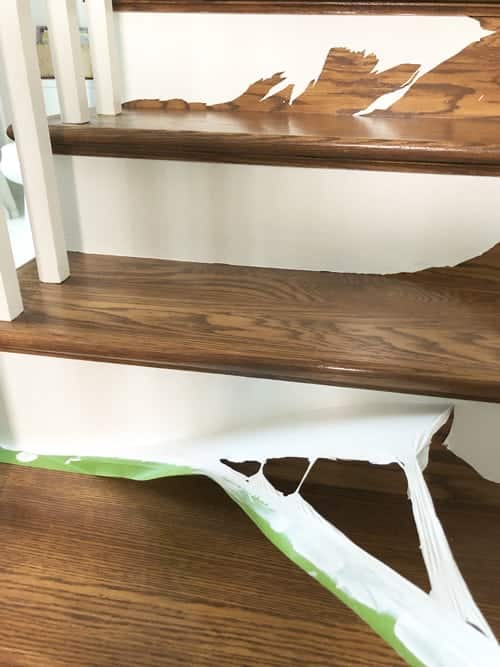
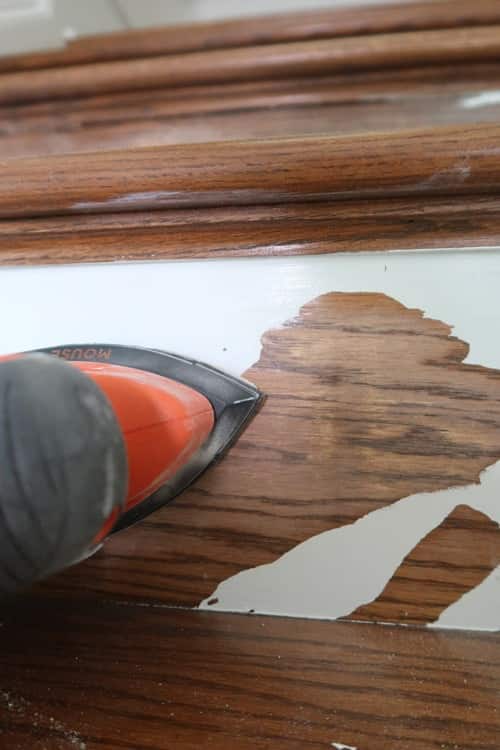
A DISASTER ensued, where all of my hard work and paint peeled off the minute I removed the tape. This is the FIRST time I tried this method of preparation.
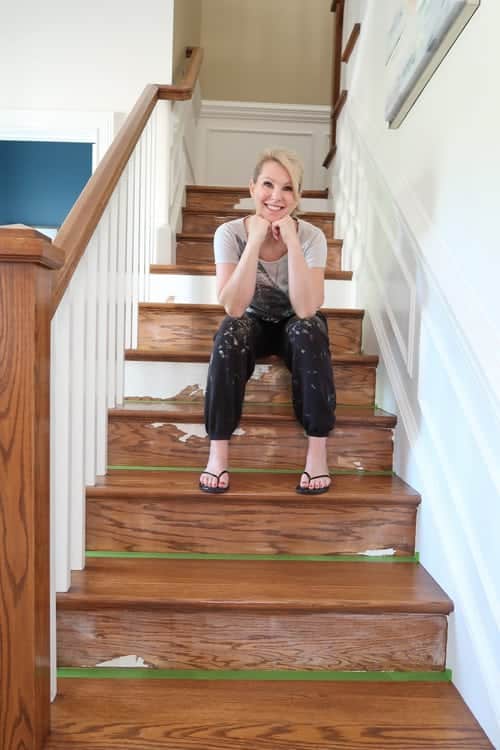
Yes, even DIY bloggers make mistakes and have Pinterest fails like everyone else 🙂
I am now here to tell you I wished I would have used my normal process and didn’t try the easy prep method of liquid sandpaper on my stairs.
Now we are going to talk about how to recover if your paint peels off the risers and how to PROPERLY prepare your risers for painting!
Contains hand selected products, with affiliate marketing links where I may earn a small commission if a purchase is made. {full disclosure here}
Tags: painting wooden stairs, wood stair treads, red oak stair treads, red oak flooring, red oak stair, existing stairs, stair riser height, refinish wood stairs without sanding, cutting stair stringers, stair stringer, stair rise, stair stringers
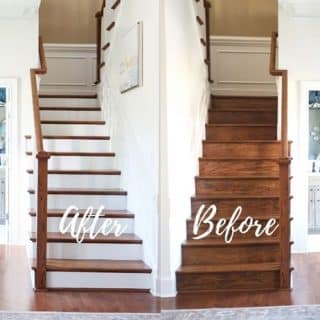
Before and After Stair Riser Makeover with White Paint
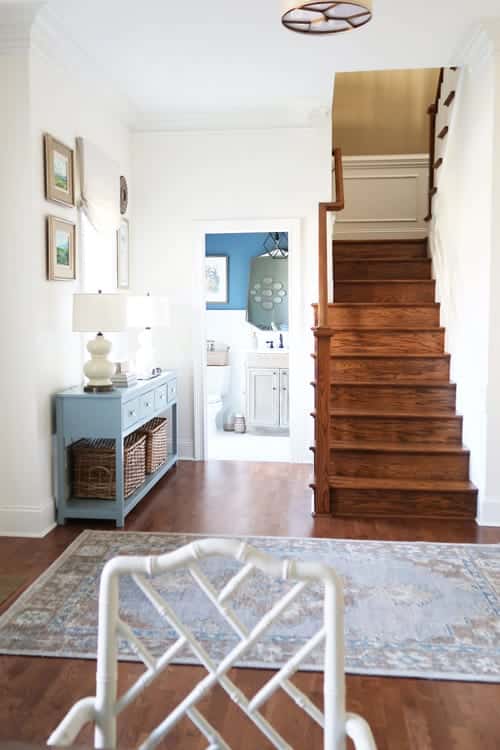
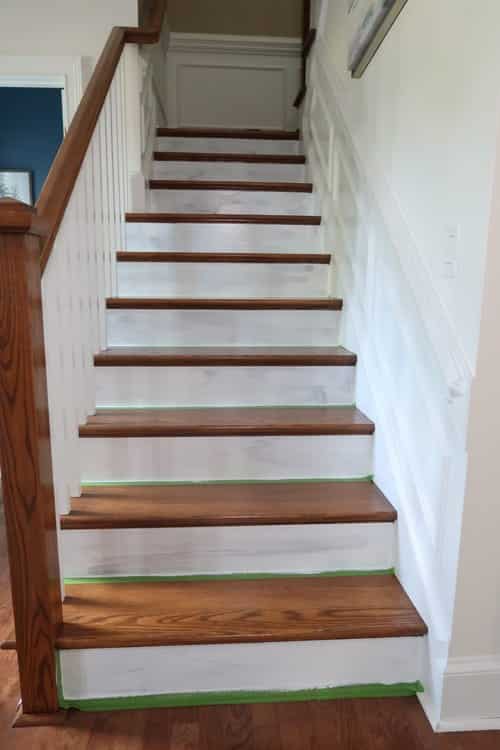
Here is what my stairs looked like originally. After making over my foyer and powder room during the One Room Challenge, the stained stairs just looked off.
They were hunk of brown in a sea of whites and blues. I wanted a more modern coastal look and for the staircase to match the rest of my downstairs.
Having an open concept home has it’s challenges because you can see ALL rooms together. Coordinating paint colors that are complementary becomes more more important.
The easiest and cheapest update was to paint the stained risers white!
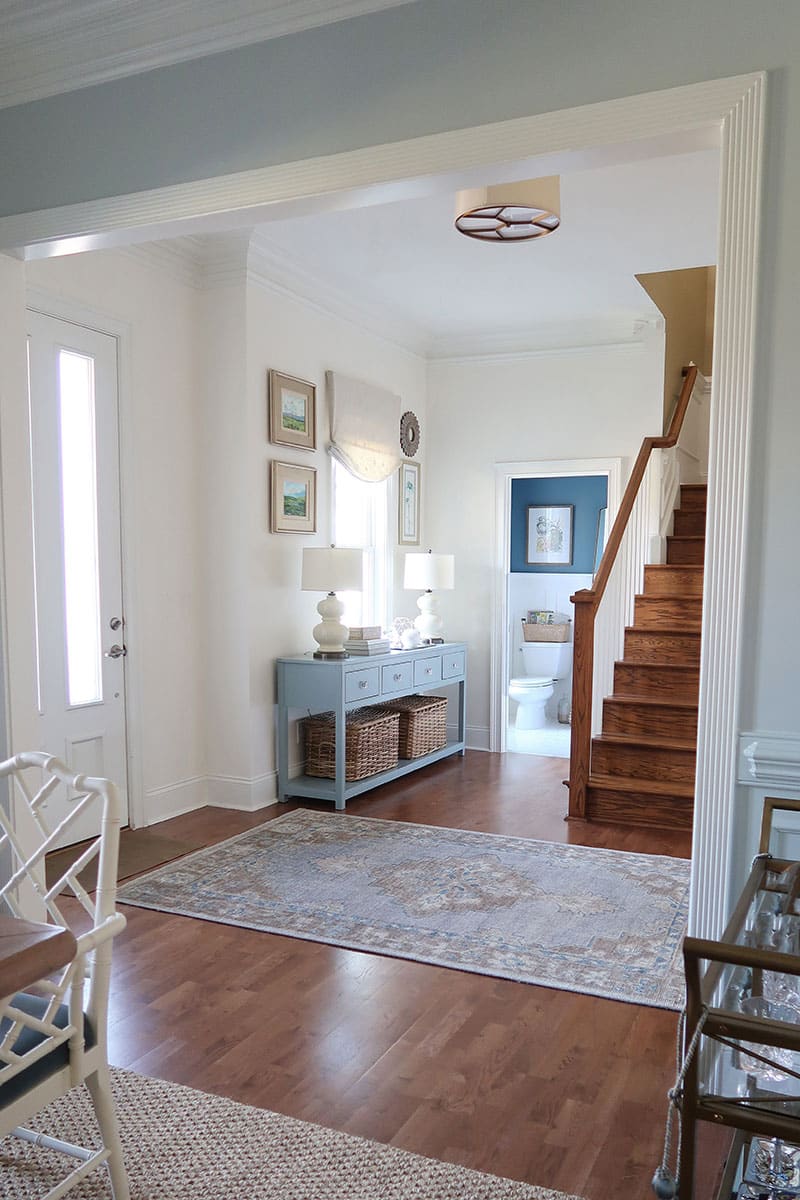
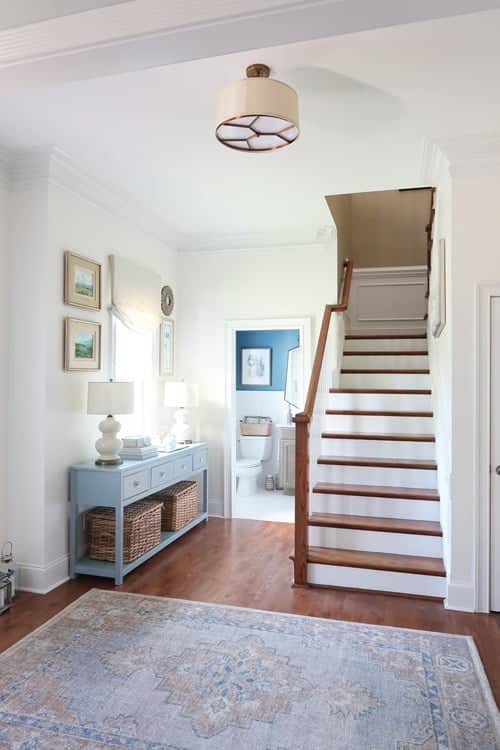
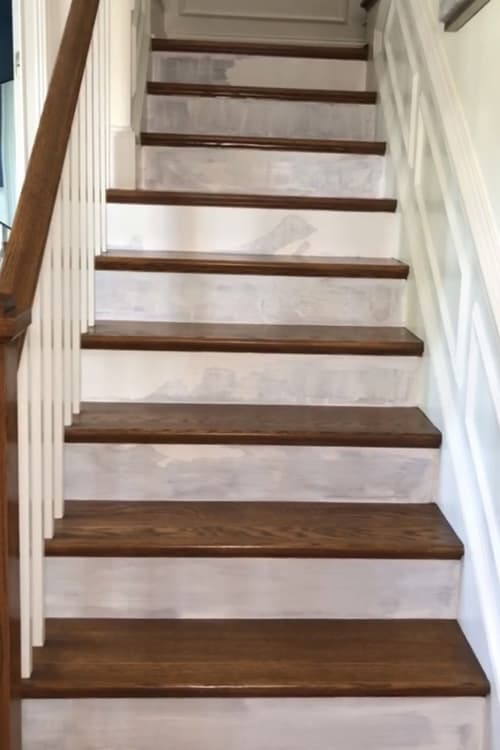
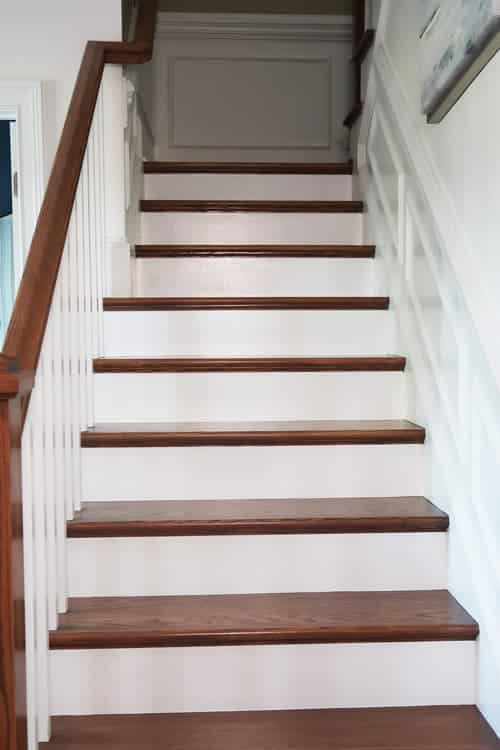
Here is what they look like now…and I spent about $100 including tools.
I love how the new white paint on the risers cuts the red in the stain and improves the look of the tan paint at the top of the stairs.
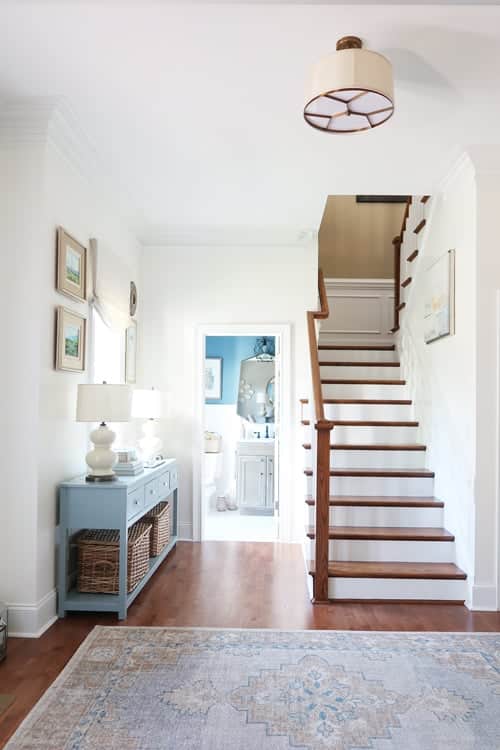
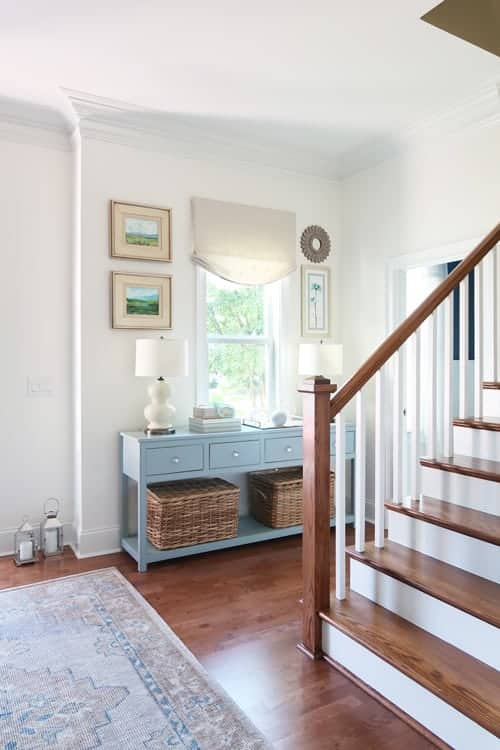
The new white stair risers even look better with the rest of the foyer including the newly painted credenza.
Mick fits right into the white stairs. Now you can see how truly little he is 🙂
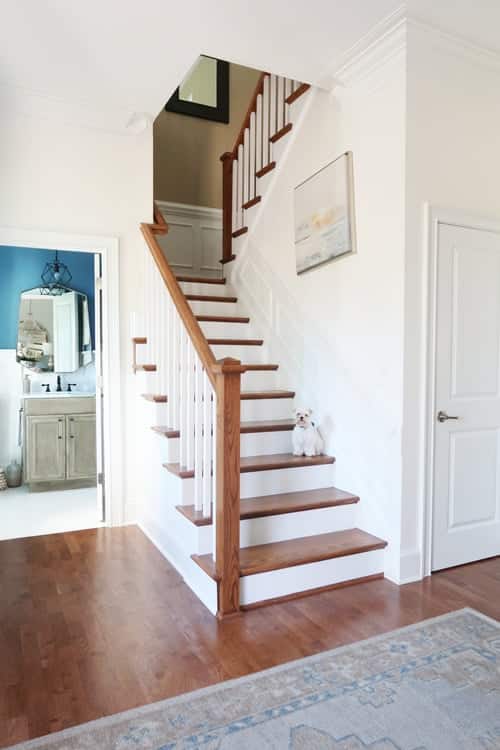
As you enter my home everything looks so much brighter, new and fresh with all of the brown toned down.
Like the before and after? Now it’s time to tackle painting the stained stair risers in your home!
Best Paint for Stair Risers
Many people ask me for what I recommend for paint options and sheen types by application. Stairs are really straight forward.
You want the most durable surface that can be cleaned. Obviously with all of the foot traffic and vacuuming the risers will likely get scuffed at some point.
The best and most widely used paint sheen for stairs is a Semi-Gloss paint. Semi-gloss paints dry to a harder finish and have enough of a gloss they can be easily cleaned.
Comprehensive Interior Paint Sheen Guide
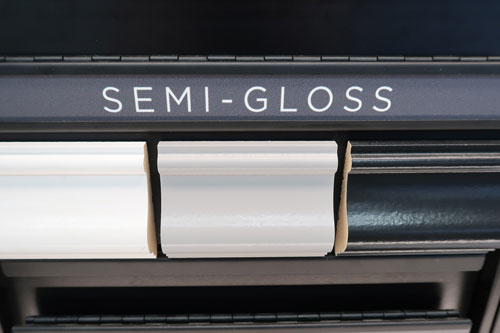
The best paint that I used for my own stair risers and recommend is Valspar Signature Paint in Semi-Gloss available at Lowe’s.
I used to work at Valspar and know that this paint has the MOST titanium dioxide, which is what makes the paint white.
It covers better than any other white paint I’ve tried. Fewer coats is better, right? My stairs have been beaten up with vacuum cleaners and shoes of course and 5 years later still look good!
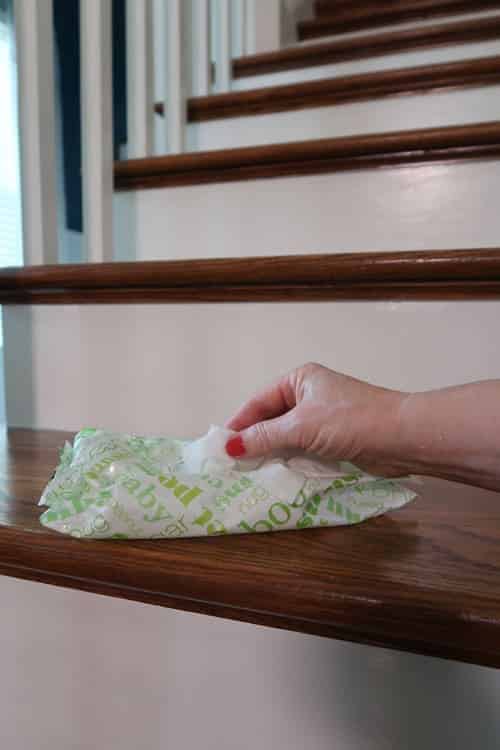
However, I’ve easily been able to clean off the scuffs with a Magic Eraser or for minor marks baby wipes. The painted finish will be that durable, if you follow my advice 🙂
What is the Best Paint for Stair Treads?
Stair treads (the place you step) requires a TOTALLY different type of paint.
stair tread paint needs to be able to:
- Resist scuffs and scrapes from everyday foot traffic
- Not be SLIPPERY
- Handle regular cleaning
- Not peel or flake
OK Tracey, I get it but can I follow this tutorial for painting stair risers? YES, BUT…
You can follow the exact same tutorial for painting stair risers, BUT you MUST use a different type of paint for stair treads.
Luckily, there are paints specifically designed for use on STAIR TREADS and can withstand the wear and tear better than a regular semi-gloss paint.
The BEST paint for stair treads is porch, FLOOR AND PATIO and paint!
You may think this type of paint is only for outdoor projects, but they can be tinted into a wide variety of colors and are perfect for interior stair treads.
You aren’t limited to two shades of gray with a sandy texture…you were wondering weren’t you?
They are designed to not be slippery and come in both a satin and gloss sheen, so you can choose the level you prefer.

For interior treads, I’d recommend the satin finish so it blends in with your other interior paint finishes.
So find that perfect paint color to complement your stair risers and follow the rest of this tutorial.
Prep and Paint Supplies for Stairs
First let’s talk about supplies, so you are ready to jump right into this project.
Invest in a battery operated sander – you won’t regret it!
This is the one that I used during this project that saved the day. It pulls much of the dust in and creates less of a mess.
- Battery operated sander
- Portable vacuum with brush attachment
- Frog tape – it really is the best!
- Paper towels
- Medium grit sandpaper
- Baby wipes
- Small angled brush
- Foam roller with tray
- Craft brush
- 1 Qt. Valspar Bonding Primer (available at Lowe’s)
- For stair risers, 1 Qt. Valspar The Perfect White Paint Semi-Gloss (available at Lowe’s)
- For stair treads, 1 Qt. Valspar Porch, Floor and Patio in the color of your choice.
I know it seems like a lot, but most of these you likely have and to buy are not very expensive!
Want to know more about bonding primer? When Bonding Primer is a Must Before Painting
How-to Prep and Paint Stained Wood Stair Risers White
Now onto the tutorial! In one day, you can transform your staircase.
How-to Prep and Paint Stained Stair Risers
Your guide to prepping, choosing the right paint, and painting stained stair risers.
Materials
- 1 Qt. Valspar Bonding Primer from Lowe's
- 1 Qt. Valspar The Perfect White Paint, Semi-Gloss Paint from Lowe's
- Frog Tape
- Paper Towels
- Baby Wipes
- Medium Grit Sandpaper
Tools
- Battery operated sander
- Portable vacuum with brush attachment
- Small angled brush
- Foam rollers
- Craft brush
- Small paint tray
Instructions
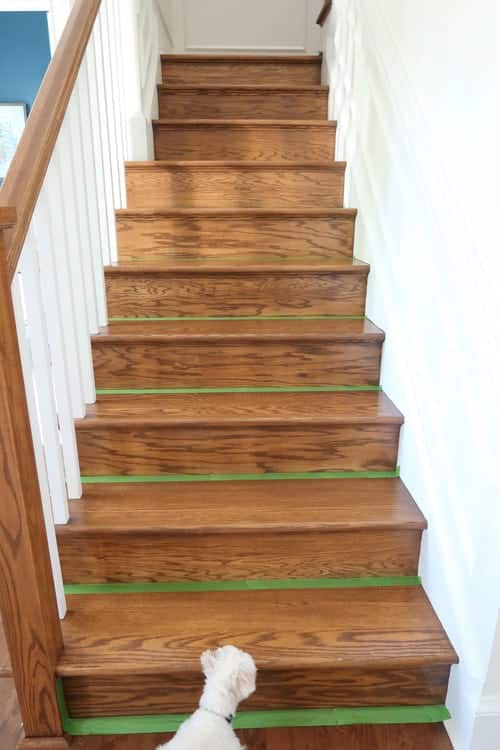
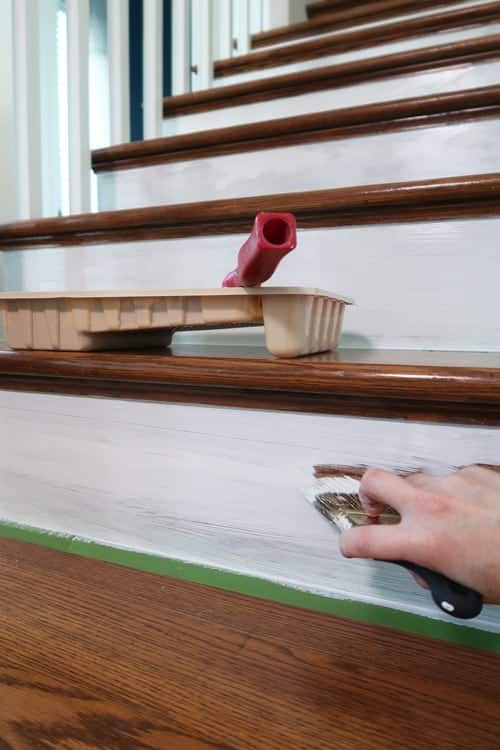
- Tape off tread just below the bottom of the riser. I had a nice edge to paint under, but if you don't tape off the top of the riser too. Make sure tape is STRAIGHT and secure to ensure a nice clean line.

- Using a battery operated sander and medium to coarse grit paper, sand down the polyurethane or existing paint so a rough surface is present on the ENTIRE riser. It should look dull.
- If you are sanding off chipped or existing paint, FEEL with your hand to make sure the surface is smooth between the paint and the wood.
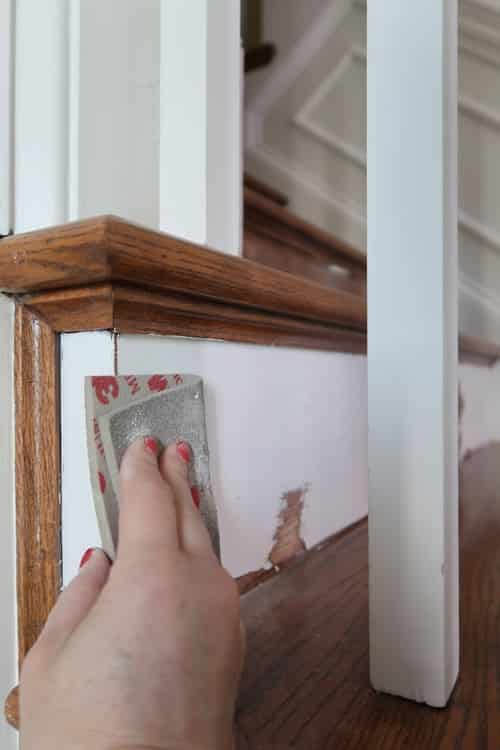
- In areas you can't reach with the sander, use medium grit sand paper to rough up those areas.
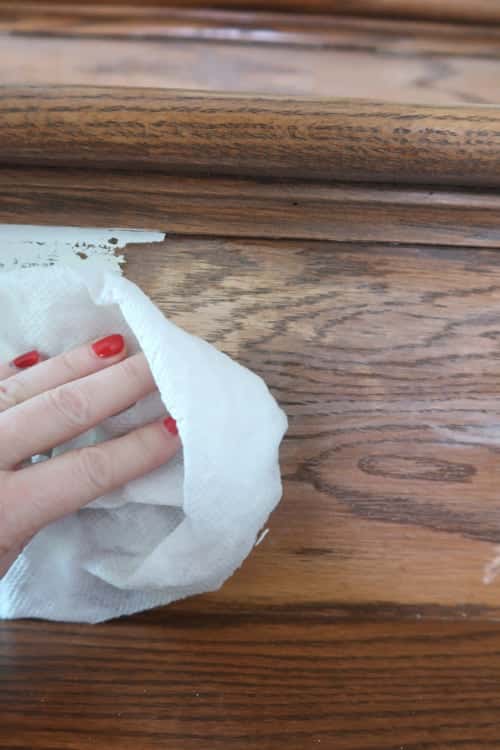
- Vacuum ALL sanding dust with a brush attachment.
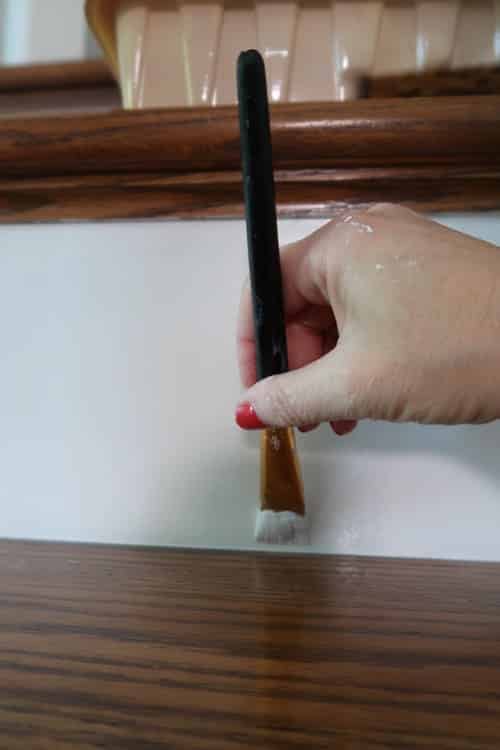
- Fill the tray with bonding primer. Working top to bottom of staircase use a brush to apply primer around edges or fully paint the riser.
- While primer is still wet, pull up tape at a 90 degree angle.
- Let primer dry a minimum of 1 HOUR. Carefully, tape the treads again matching the primer line.
- Working top to bottom of staircase apply white paint as you did the primer using a small tray, brush, and roller.
- Apply 2 to 3 coats to completely cover the primer. I found that once I completed the bottom step, I was safe to start painting the top step again.
- Pull up tape and use a baby wipe and your fingernail to clean edges, so they are straight.
- Use a craft brush to touch up any areas that may have been damaged when removing tape to get a straight line.
- Let paint dry overnight, before any real foot traffic.


Notes
- Make sure to work top to bottom of the staircase to avoid touching newly painted areas.
- It is CRITICAL to make sure all sanding dust is removed, before priming. Dust won't allow the primer to adhere properly creating a weak spot, where the paint could chip.
- If you feel more comfortable using a tack cloth to remove dust, that is an option too. I've had success with just a damp set of paper towels.
- You may want to use a utility knife and run it along the edge of the tape and paint before removing to ensure a clean edge and no paint is peeled off with the tape.
- IMMEDIATELY clean any errors or areas that drip of bonding primer, since once it dries it will be adhered!
In reality, you are painting a very small area so you can tackle this stair makeover in one day.
If you want more paint project tutorials and helpful hints, click on my paint resource guide.
Sign-Up for my Weekly Emails!
Straight to your inbox sharing can’t miss decorating and painting tips for your home.
Please consider following me on Pinterest and Instagram for daily inspiration.
Until next time…
Porch Daydreamer
Tracey
is it ok to use the white primer if I’m painting them black? Thank you!
Absolutely! You can always try a tinted primer. Ask the paint store and they will throw a little black into the white primer so it’s gray and will be easier to cover.
Is there any reason you wouldn’t want to use the porch paint on the entire project?
Hi! Porch and Floor has a LONG recoat time and is more expensive than regular paint. It isn’t necessary for the risers 🙂
Love your tutorial I’m excited to tackle this project but I plan on painting my stair treads and stringers as well both the riser and stringers will be the white and my tread will be a charcoal color which order would you recommend doing so tread the riser or visa versa.
Wow! You are painting all of it. It’s always easier to paint dark over light. So you could do the risers and not have to tape off since you are painting the treads a dark color. My friend is painting her treads now and painted every other one, so they can still use the stairs. Once the painted ones fully dry, they will paint the other treads. Brilliant idea you may want to try.
Hello! Your end result looks great. I cannot seem to find the full tutorial on this page, however. Was it taken down?
Julia! What an angel you are telling me the tutorial is missing! Thank you. There have been a lot of updates happening to the backend of WordPress websites and it changes things without our knowledge. I appreciate you letting me know. It’s now been fixed!
OK, lol good to know I’m not crazy haha! I was searching high and low and then suddenly it appeared (unbeknownst to me you had just fixed it). So happy to be able to access the tutorial now, yay!!
You weren’t “seeing things” a little gremlin was behind the machine LOL 😉
Is the reason why the risers needed to be sanded as opposed to simply applying bonding primer, because the polyurethane is thicker than let’s say on cabinets or furniture (is it considered a varnish in this case)?
Do you have any advice on removing the polyurethane on the bannister in order to stain virgin wood?
Hi, Julia! I had to sand because of the mistake I made, but I have had luck only using bonding primer over poly and not sanding – read: No, You Don’t Have to Sand Before Painting Over Stain. The reason I recommend a light sanding is when the poly is really glossy or shiny, it isn’t the best surface for adhesion. You could test one riser with just bonding primer and paint to see how it wears. If it works, do the rest and if not sand:) To get to virgin wood, you will always have to sand down to the bare wood. Hope this helps and good luck!
While sanding the risers, did you have trouble scuffing up the wood treads? Do you have any tips to avoid this?
Maybe add a couple of layers of painter’s tape? I didn’t run into that the way my stairs are built. Good luck and thanks for using my tutorial!
Do you have an issue w painted stairs being slippery?
Since my stair treads are stained/polyurethaned, I can’t say. I just painted my risers. My stairs are slippery in socks though! Paint would be a little less slippery.
I am about to remove carpet from my stairs, any advice about the best product for filling small holes that will be left by tack strip? Also, the trim pieces on the side of the stairs are all matching the steps, which are 1980’s oak. I am leaving the treads alone, but keep debating about painting only the risers or all of the side trim also.
The look of my stairs will be similar to yours if you just paint the risers. I’ve had lots of luck with Minwax Wood Filler! It dries hard and is sandable. Just be warned it’s stinky stuff.
I was just curious as to why you didn’t just keep the tape up after priming and before painting?
Hi, Rose! I address this in the post and show a picture of how if you let the paint and primer dry it can pull up all of the layers ruining the job. You should always pull up tape when the product is wet.
Your stairs look great! How well do the risers have to be sanded? I bought the same sander you used and it seems a little weak. It has definitely taken off the shine (poly), and feels smooth but doesn’t necessarily look perfect as far as being completely even in color. Just want to know if I should try to re sand again or try the primer. Your stairs look great!!
If you’ve removed the gloss and it feels smooth, you are good to go with the primer!
Thank you for the easy to follow tutorial. My stair risers are not stained. Last year when we had hickory floors/stairs installed we went with white risers. They were installed white, but never painted by us or the painters. Do I need to use the bonding primer on these?
Hey, Berta! If they are white now, that may mean they are pre-primed? You wouldn’t need to invest in bonding primer, but a general purpose primer as a safety net. If they are pre-primed then you should just be able to paint. The way to tell is if the finish is flat or matte then you can paint right over that finish without issue.
This tutorial was amazing! I just finished my stairs and they came out beautiful! They look professionally done. Thank you for giving me the courage to try this on my own. 🙂
Carol, I’m so happy to hear this! Thanks for letting me know 🙂
Is it recommended to seal with a polycrylic or something like that?
Hey, Kaci! No, just leave it painted and then you can easily touch up or wash scuff marks. That is what is typical and what I did at my house!
I am sorry, but I laughed out loud when I read this. I can relate so well to your frustration. Great tutorial and it’s always nice to know what doesn’t work! Now, how will you keep scuff marks off the nice white stairs? Thanks for sharing!
Cecilia, laugh away! If I didn’t laugh I would have cried 🙂 Seriously, I don’t want anyone to have the same trouble I had and am happy to put my mistakes out there to help too! My plan for scuffs is to touch up the paint every so often. BABY WIPES are my friend and I’ll use those to remove the surface scuffs on an everyday basis.
Your comments and directions are so easy to follow.
Please keep them coming.
Did you fill in any seams between the wood planks with wood putty?
That wasn’t an issue in my home, but if you need to that is a good option prior to priming.
Great project Tracey. Enjoyed the detailed instructions and tips. The stairs look amazing.
Thanks, Carol! Paint can do wonders 🙂