How-to Paint Cabinets Using a Paint Sprayer (for beginners)
Ready to paint your cabinets, but too scared to use a paint sprayer? In this beginners guide to painting stained wood cabinets, I show you EXACTLY how to prep, prime and paint your cabinets with a sprayer.
It’s the best way and fastest way to paint bathroom cabinets and achieve a smooth durable long lasting finish that won’t chip or peel.
Even as a beginner, by using the right process and best cabinet paint your cabinets look like they were painted by a pro.
The best part is you won’t have to sand off the stained finish first! Please read through and follow the video on YouTube.
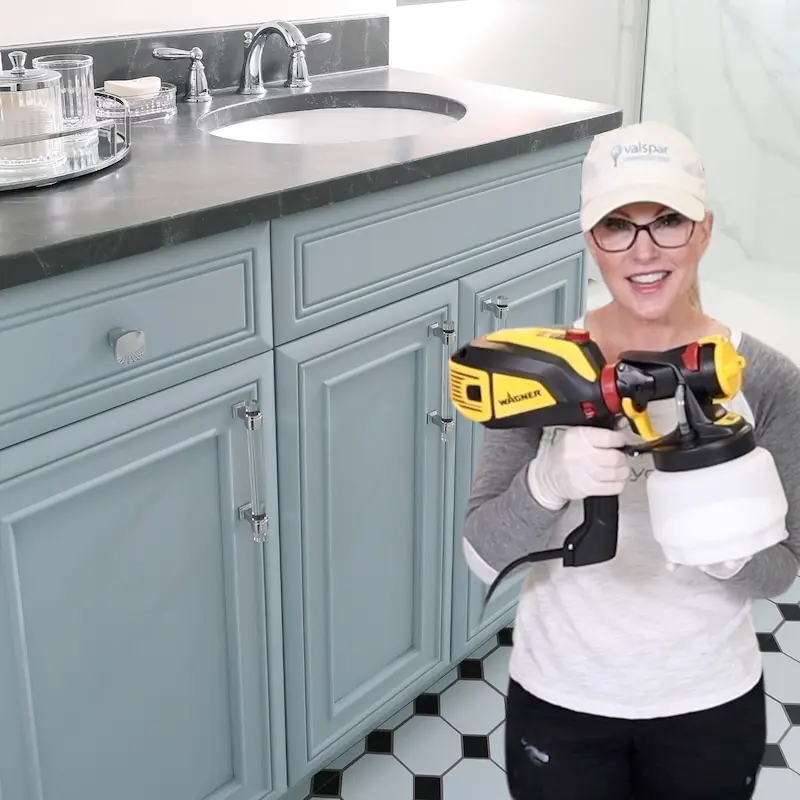
Painting Bathroom or Kitchen Cabinets: A Beginner’s Guide to a Paint Sprayer
Do you feel intimidated by using an airless paint sprayer? Or maybe you are a true beginner to painting cabinets?
What you may not know about me is that I am the QUEEN of Painting Everything! I’ve painted all of my home’s bathroom cabinets with a paint sprayer.
Plus worked for one of the largest global paint manufacturer’s teaching home improvement paint desk staff about our products. I promise I can teach you step by step exactly what you need to know.
I’m here to hold your hand and make sure you know EVERYTHING there is about using a sprayer for painting bathroom or kitchen cabinets.
Even if you are a true beginner I’ll build your confidence, so you know you can do this!
We will start with the basics of course and then move to EXACTLY how-to use a HVLP paint sprayer for a smooth finish on your cabinets that you just can’t achieve by hand painting alone.
Even though I am painting my bathroom cabinets, you can use this SAME tutorial for kitchen cabinet too!
Contains hand selected products, with affiliate marketing links where I may earn a small commission if a purchase is made. {full disclosure here}
I wrote an article all about how to decide when it’s time to buy a paint sprayer that you may want to read first.
There is a financial investment to buying a paint sprayer and spray shelter, but once you learn how to use one you can use it to paint:
- Kitchen cabinets
- Office cabinet doors and drawers
- Indoor furniture
- Outdoor furniture
For around $150 you can buy both the sprayer and shelter, but you will use them to SAVE $1,000+ not having to hire a professional painter to spray paint your bathroom cabinets.

YouTube: Paint Sprayer for Beginners Painting Cabinets
Need help deciding on a paint color for your cabinets?
While I can’t choose a color for you, instead I did some of the heavy lifting to narrow down the paint color options.
These are the top 20 traditional or “classic” cabinet paint colors to help you get started:
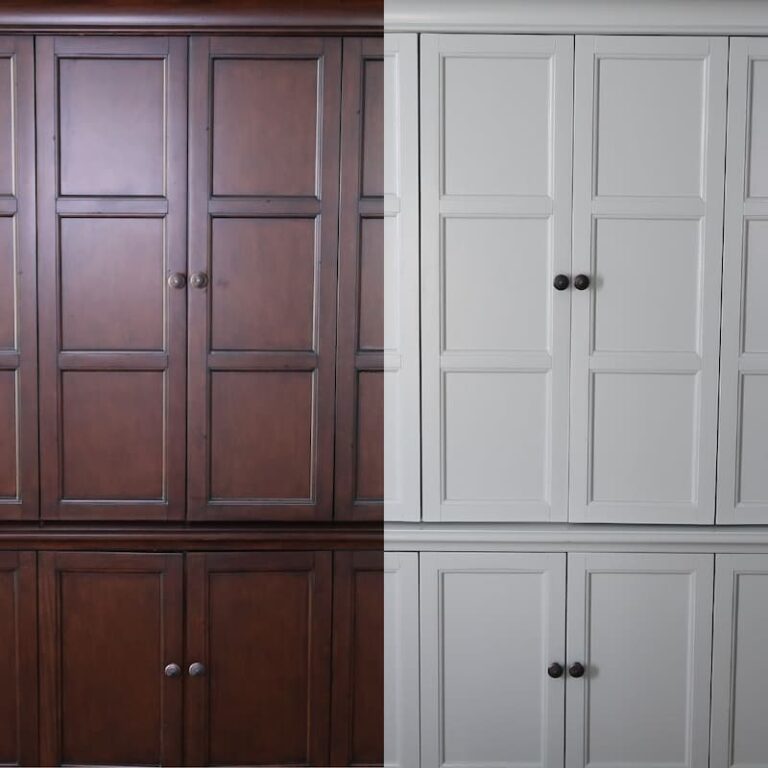
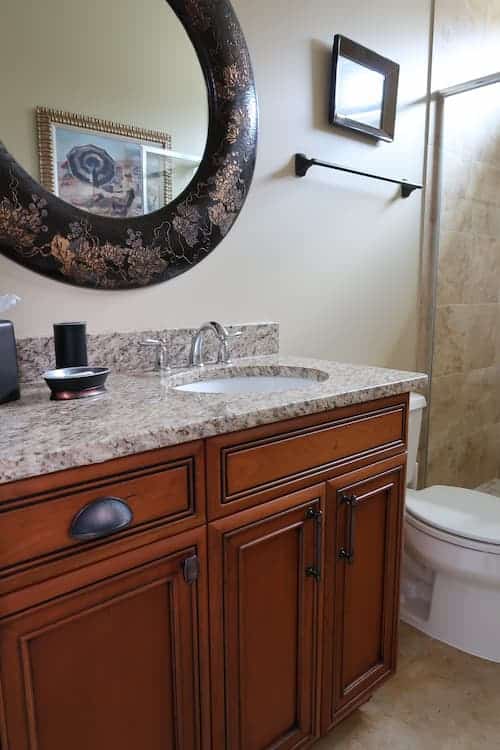
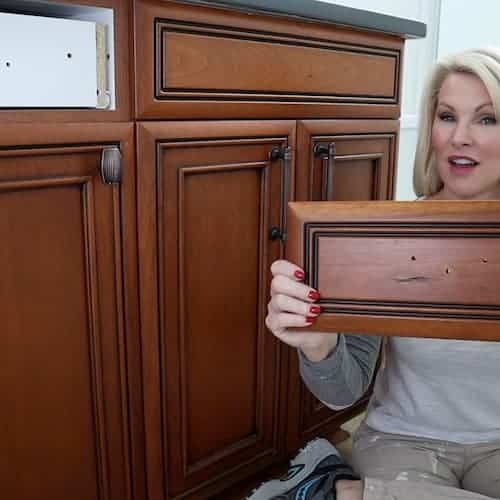
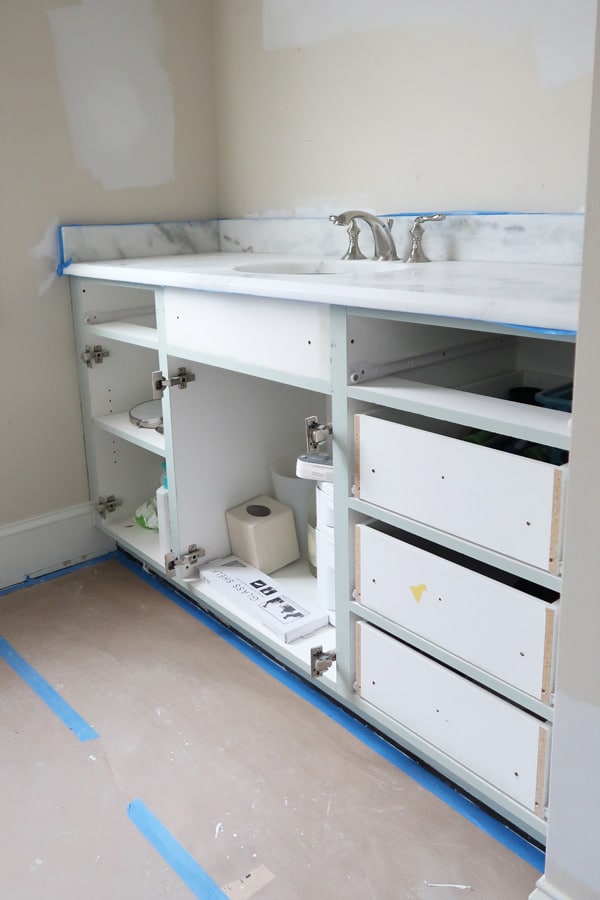
The Before: My Stained Wood Cabinets
My home is 14 years old and when I built this spec house stained wood cabinets were the trend.
So was beige tile! You can see the full makeover of this budget friendly bathroom makeover here. I only spent $400 and looks like I spent $1,000s!
Seeing what I am starting with and was able to achieve will hopefully inspire your own makeover.
The After: My Painted Bathroom Vanity
Deciding what color to paint bathroom cabinets is probably the hardest part!
Please test the paint color first you can follow my guide here.
Cabinet Vanity Makeover Paint Color: Sherwin Williams, Neibla Azul SW 9137.
It’s a cool blue blue that paired well with the Sherwin Williams, Pure White SW 7005 walls.
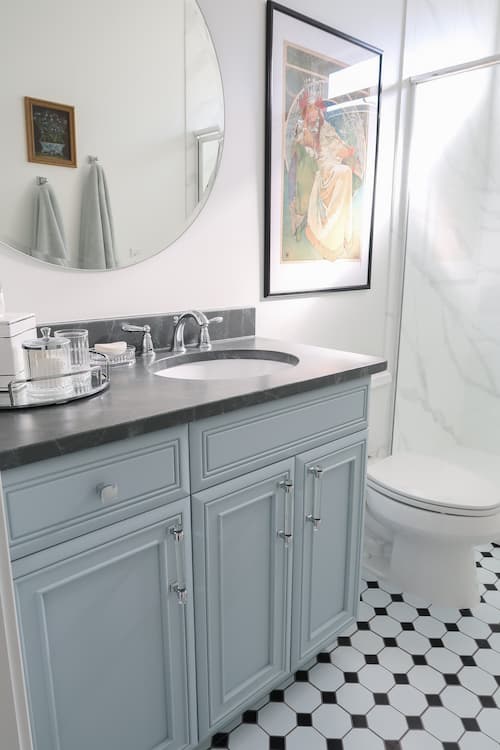
Oh and yes I painted the granite counter to look like black honed marble too! (How-to Paint Granite Counters to Look Like Marble).
So let’s dive in and I’ll teach you how to paint bathroom cabinets like a pro with a paint sprayer!
PAINT SUPPLIES: PAINTing CABINETS with a sprayer
Here are the key supplies you’ll need to spray your your cabinets. You only need a quart of primer and paint.
Order to Painting Cabinets with a Sprayer
This is just a suggestion, but if you want to paint bathroom cabinets as fast as possible here is your timeline!
Basically if you keep moving, in 2 days you’ll have the bathroom vanity primed and painted.
- Spray on primer to the backside of the cabinets
- Hand apply the 1st coat of primer to the bathroom vanity while the spray is drying.
- Once you finished priming the base cabinets dry 2 hours, head back to spraying.
- Flip and spray the face of the cabinets with primer.
- While they are drying 2 hours prior to painting, go inside and apply the 2nd coat of primer to the base.
- Pull the tape in 30 minutes after the last coat and dry primer overnight.
- In the morning, flip the primed cabinets and spray paint on the backside. Dry 2 hours.
- Hand apply the 1st coat of paint to the bathroom vanity while the spray is drying.
- Once you finished painting the base cabinets dry 4 hours, head back to spraying.
- Flip and spray the face of the cabinets with paint.
- While they are drying 24 hours, go inside and apply the 2nd coat of paint to the base cabinet frame.
- Pull the tape in 30 minutes after the last coat and dry everything 24 to 48 hours.
Step 1: Prep BEFORE Painting Cabinets
Please protect all areas from dripping and splattering paint! It’s good idea to lay down cardboard over the entire floor.
You will be setting down your paint tray on the floor, so you need to protect it.
Also, have paper towels and baby wipes handy for any touch ups or spills that may happen.
Prepare the Bathroom for Painting
With painter’s tape, tape off where the cabinet base meets the floor and walls plus where the counter meets the bathroom vanity base.
If you are painting cabinets in a small bathroom, it may be helpful to take off the bathroom door to give you more room to move (that’s what I did).
Cover the toilet lid too with painter’s plastic or an old shirt or towel so you can use it if needed to set paint supplies on it.
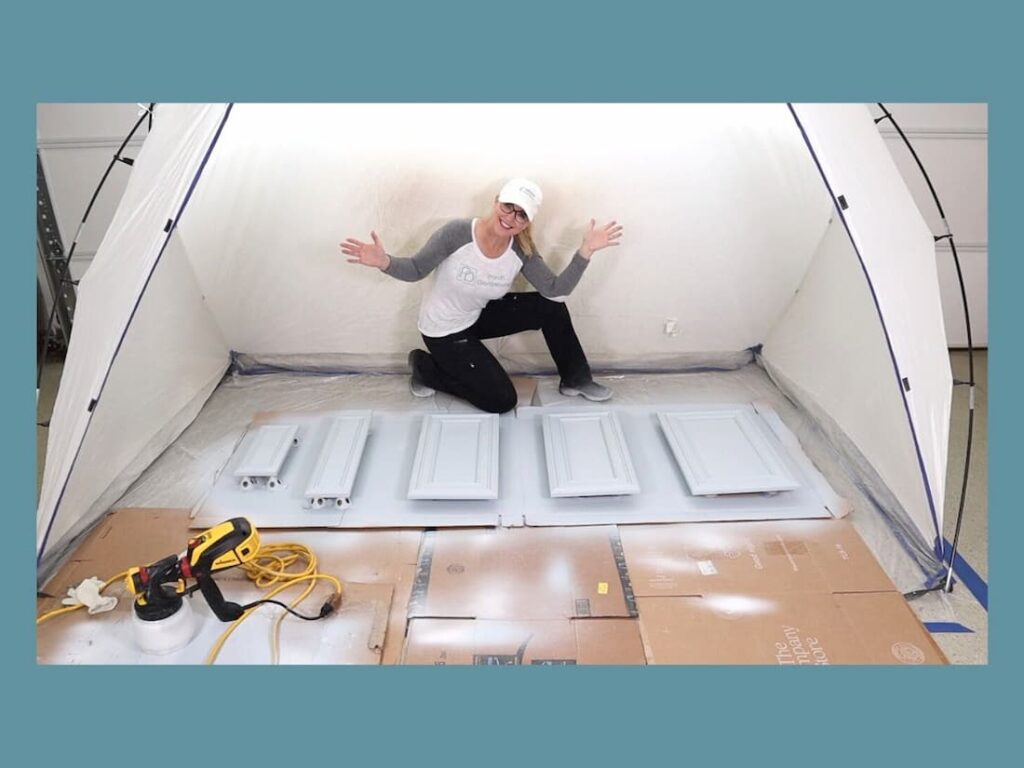
Set-up the Spray Shelter aka Spray Tent
Assembling the spray tent is honestly the hardest part (at least to me) of this project! Make sure to READ the instructions before you get started.
You can use a HVLP paint sprayer inside of your home, but you MUST tape off everything and seal it in with painter’s plastic and craft paper.
I’ll show you a picture of my kitchen for perspective, when they were sprayed.
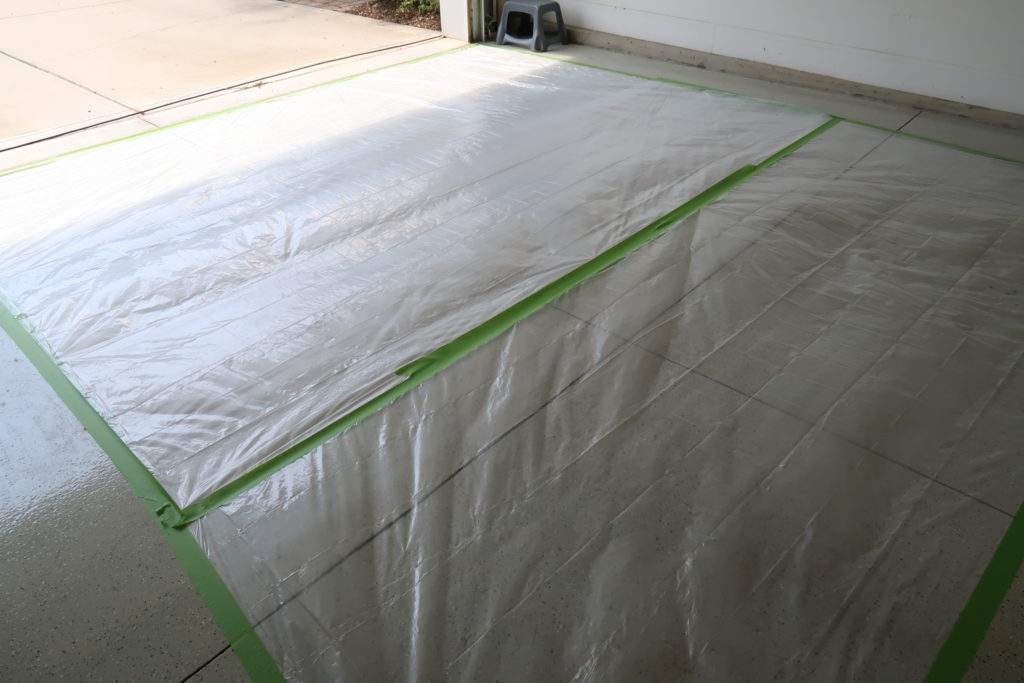
Ideally set up the tent in a garage or protected area from the elements:
- Either tape down painter’s plastic with painter’s tape or lay down cardboard that extends about a foot beyond the spray shelter (do this before you place the shelter).
- Add cardboard for testing the spray just beyond this in one corner.
- Place 4 painter’s cones for each cabinet door and drawer on the cardboard.
- Having a table is helpful for filling the paint sprayer, but you can do this on cardboard on the ground as well.
- Grab an extension cord long enough to reach the sprayer and inside the tent.

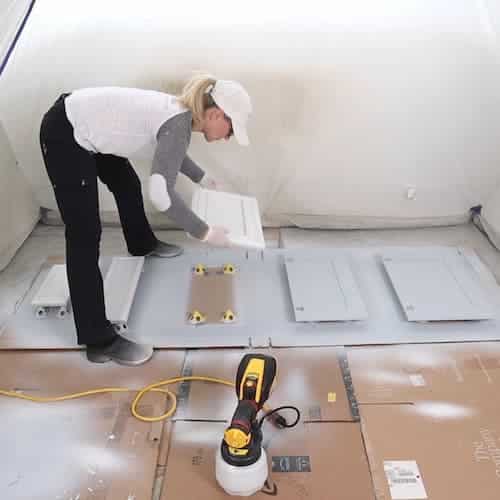
Step 2: Prepare the Cabinets for Painting
Before paint bathroom cabinets with a sprayer, you MUST remove the drawer fronts and doors first.
The bathroom vanity has a base that the drawers and doors are attached to.
That’s what I call the “base cabinet box”. Once you remove everything you will see the cabinet frame.
Disassembling Cabinet Drawers and Hardware
Grab a power drill for this task with a Philips head attachment.
Most cabinet drawers consist of a base box and drawer fronts. You need to remove the cabinet hardware first.
Then remove the drawer fronts – usually there are two screws inside of the drawer.
Helpful TIP: store all cabinet hardware and screws in the drawer box where you removed the drawer front.
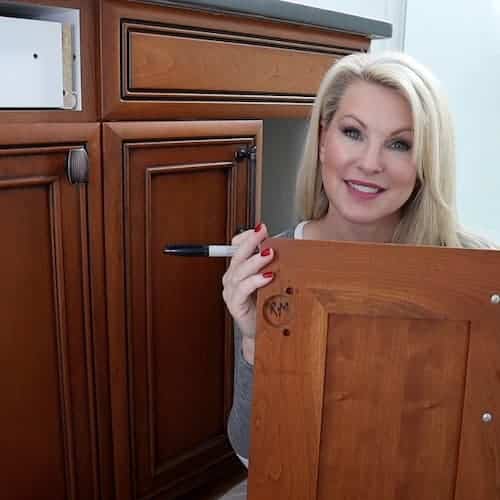
Label each drawer front location with a Sharpie marker paying close attention to the direction you need to REASSEMBLE the front.
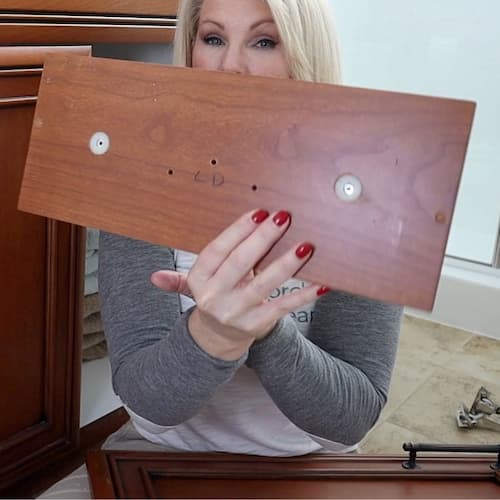
Cover over the label with painter’s tape. This is on the back of the drawer front, so you won’t see it once you attach it back to the box.
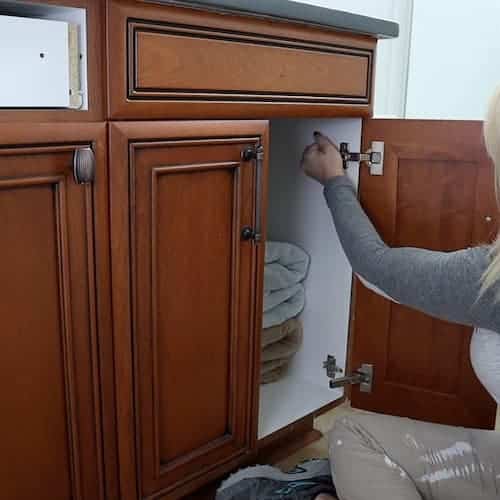
Disassembling Cabinet Doors, Sink Panel and Hardware
Stick your head inside your cabinet to see how the doors are attached to the base.
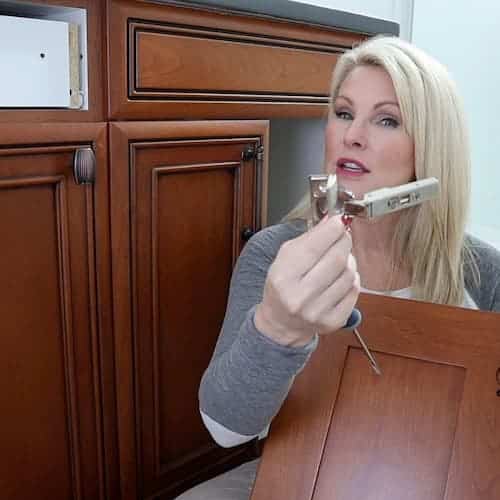
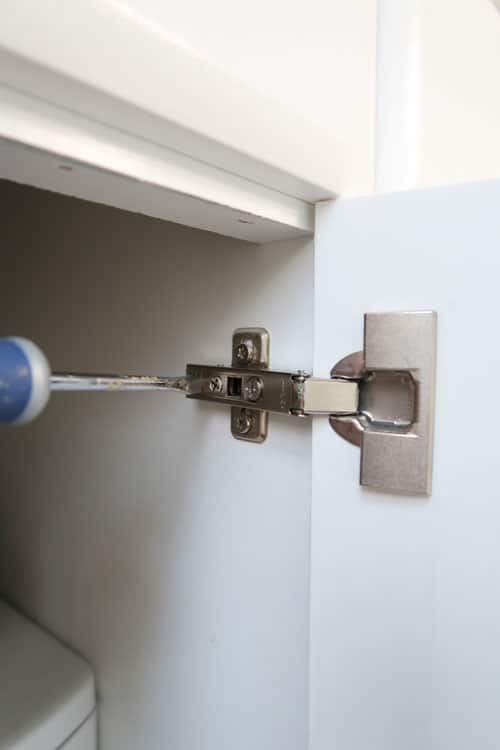
Many cabinets (like mine) have concealed hinges that are quick release. You just pop them off at the back, by pressing a lever.
Remove the hinges from doors by popping them open or unscrewing.
If you have hinges that are attached to the door itself remove them.
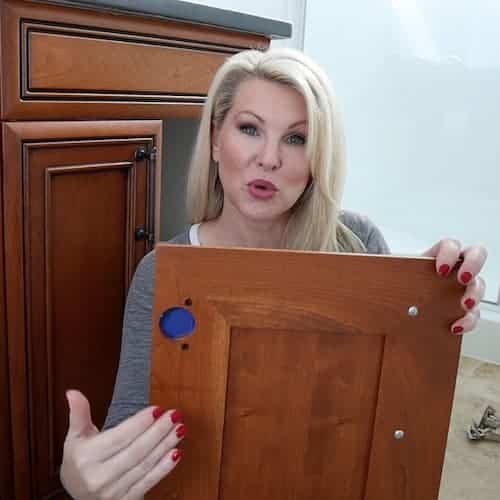
Then label the location of the door under where the hinge was located and cover with painter’s tape.
You will spray directly over the painter’s tape and remove the tape before reinstalling.
Unscrew any knobs or pulls (cabinet hardware) on the doors.
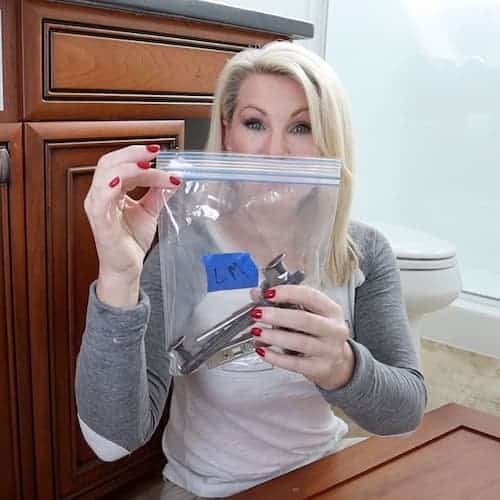
Helpful TIP: Store all hardware and screws in a plastic bag labeled for each door location to make reassembly easier.
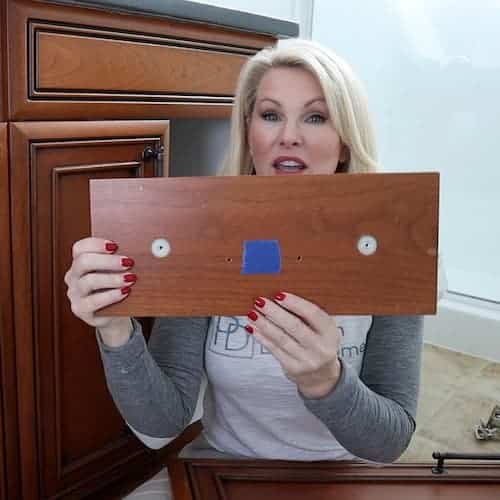
How-to Fill Hardware Holes
If you want to change your cabinet hardware holes, now is the time to do it. In just an hour, you can fill and sand the holes. It’s easy.
My favorite wood filler is called Kwikwood. What’s SO great about this wood filler is how beginner friendly it is.
How to Use Wood Filler (Kwikwood)
- Use 220 Grit Sanding Block sand around drill holes so the area is smooth. Clean sanding dust.
- Cut a piece. Kneed it together for 1 minute.
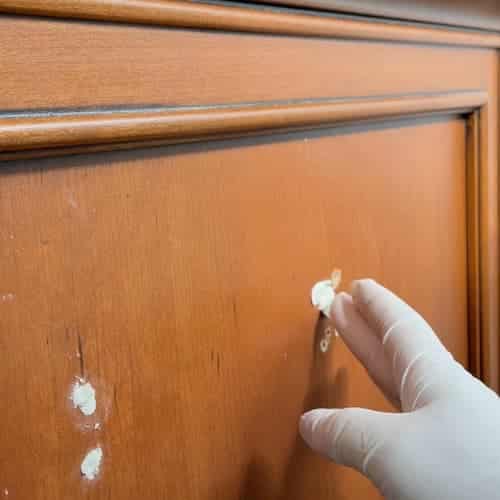
- Push the wood filler into place, dry for an hour.
- Sand cabinets smooth.
- Repeat twice as required to fill hardware holes.
- Remove ALL sanding dust with a damp microfiber rag (don’t use a tack cloth which can leave behind wax).
PRO Tip: Place a piece of painter’s tape behind the hole you are filling, so the wood filler stays in place.
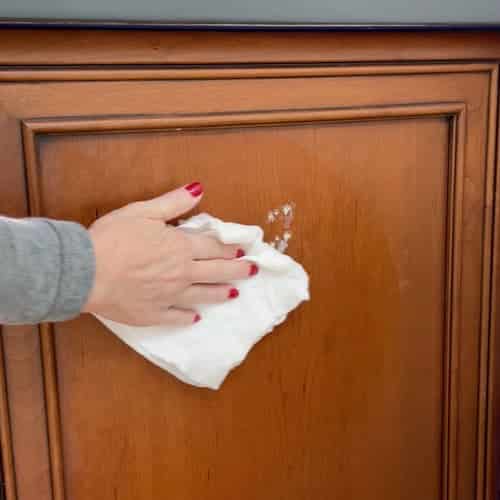
Clean All Cabinet Surfaces (DON’T SKIP)
The MOST important step to prepare the surfaces and get the primer to adhere is cleaning.
This step is for stained wood or a painted bathroom vanity. It’s really EASY. Grab Pre-Paint Cleaner or Deglosser and a microfiber rag.
Spray the base cabinet vanity with the cleaner and wipe EVERYTHING down.
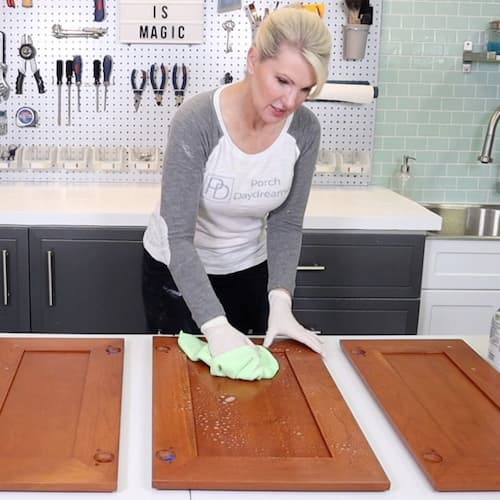
Set up your cabinet doors and drawers somewhere safe like a laundry room, table or counter.
Liberally spray the pre-paint cleaner and clean the front and back. Dry 10 minutes prior to painting.
Place doors and drawer fronts FACE DOWN onto painting cones in your spray tent.
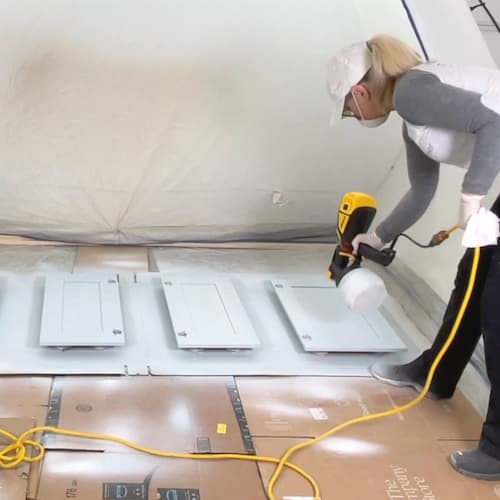
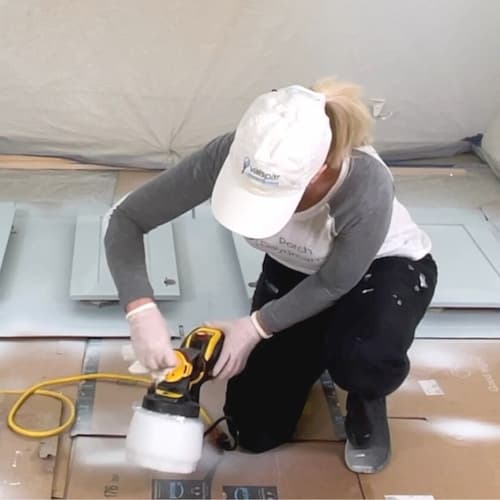
Step 3: Spray Primer Cabinet Doors and Drawer Fronts
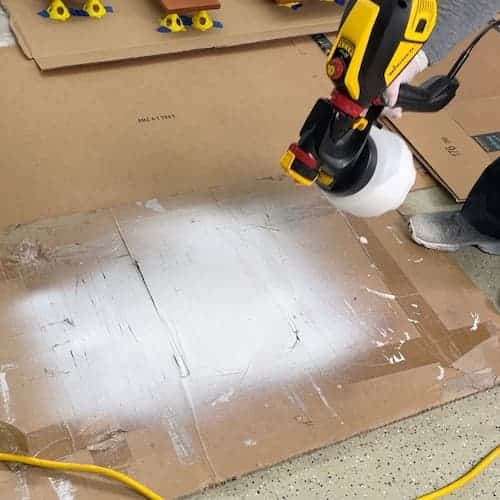
Follow the manufacturer’s instructions to assemble the paint sprayer and test the sprayer with water on a piece of cardboard to learn how it works.
Slip-on shoes are helpful when spraying, so you can easily slip them off when finished and gloves for easier clean up.
Cover your hair, eyes and wear a MASK. You are aerating paint and need to protect your lungs

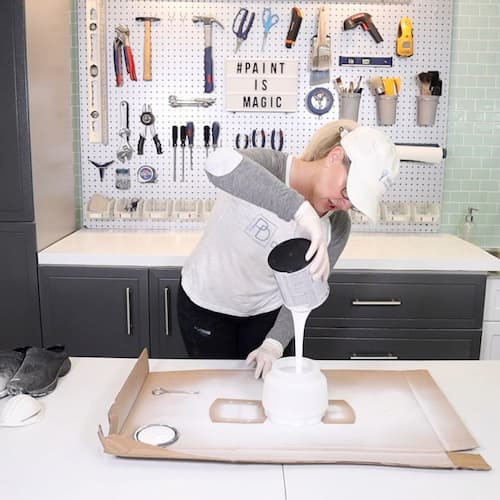
I’m going to share the instructions for the paint sprayer I use:
- Place plastic liner in sprayer cup.
- Pour FULL quart of bonding primer into cup. DON’T thin.
- Attach sprayer to cup and have the spout angled toward the front.
- Plug into an extension cord. KEEP OFF.
- Set air flow to 7 or 8 and product flow to 7.
- Use a wide spray pattern (red dial).
Have a damp paper towel handy to wipe the sprayer nozzle. Flip on the sprayer. Pull the trigger and prime the sprayer.
Test spray onto a piece of cardboard away from your cabinets until you get a nice fine, but even flow of paint.
Pro Tip: Adjust the air higher if the flow is slow and adjust the product flow if you aren’t seeing good coverage.
Note: My body position is so you can see what I am doing and not blocking the camera. You can face the cabinets as you spray!
FYI I was an expert consultant to Better Homes & Gardens for their review of the best paint sprayer. Of course I recommend the one I am using 🙂
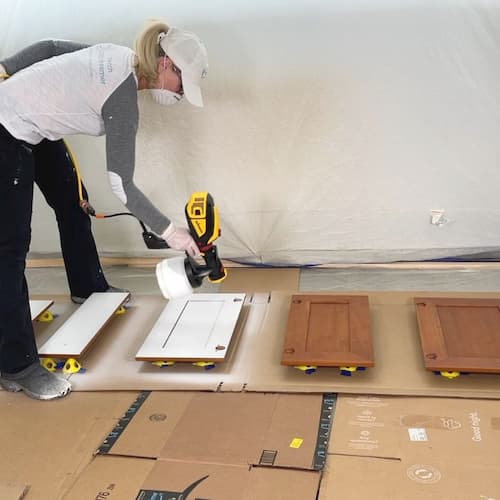
How to Apply Primer with HVLP Paint Sprayer
- START ON BACKSIDE OF CABINETS for the first coat.
- Begin spraying BEFORE the cabinet to make sure the primer isn’t sputtering.
- Stay about 8 inches above the cabinet doors and drawer fronts.
- Use smooth even strokes overlapping slightly spraying back and forth.
- Keep moving and don’t stay in one are too long (thin coats are better).
- Pay attention and make sure to angle the sprayer to get into the details.
- After spraying face of doors and drawers, spray all edges.
- Wipe the sprayer nozzle often with the damp paper towel to remove dried paint.
- You should only need to apply one coat of primer.
DRY CABINETS 2 HOURS. If you are drying longer, you MUST clean out your sprayer.
Gently flip over and repeat for the FACE of the cabinets. DRY IN PLACE OVERNIGHT.
POUR primer back into can and THOROUGHLY CLEAN the paint sprayer until it runs clean (per the manufacturer’s instructions).
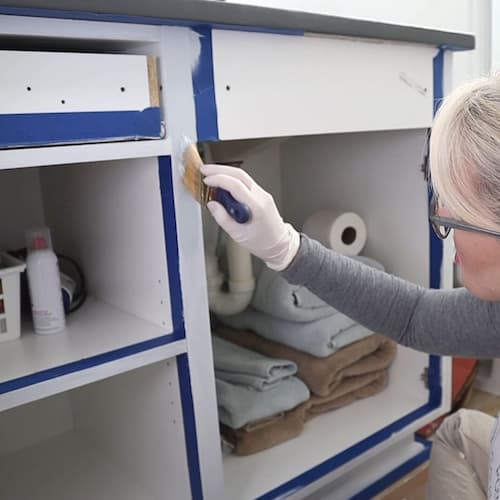
Step 4: Prime the Base Cabinets (While Doors and Drawers Dry)
Now it’s time to get out your paint brush and paint tray plus your foam roller!
Unfortunately, this portion of the paint job will feel a lot slower than spraying.
Make sure to tape off all areas that you don’t want to prime. You can use my bathroom vanity tape locations as a guide.
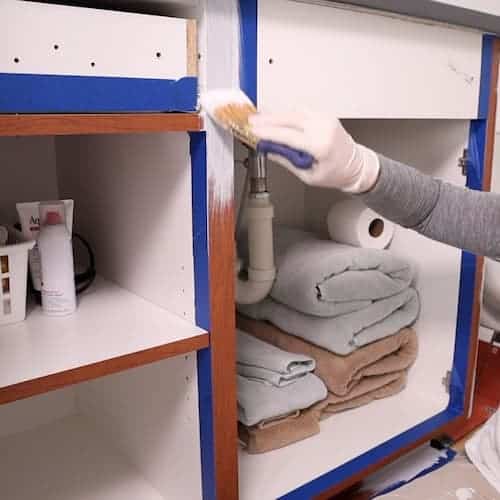
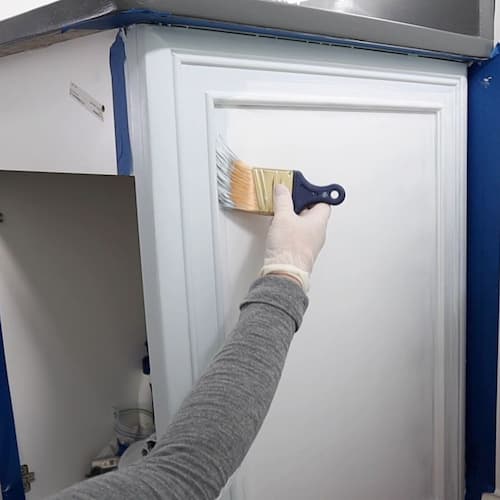
Apply Bonding Primer to Frame and Cabinet Boxes
- Use a tray liner and fill tray with Valspar Bonding Primer.
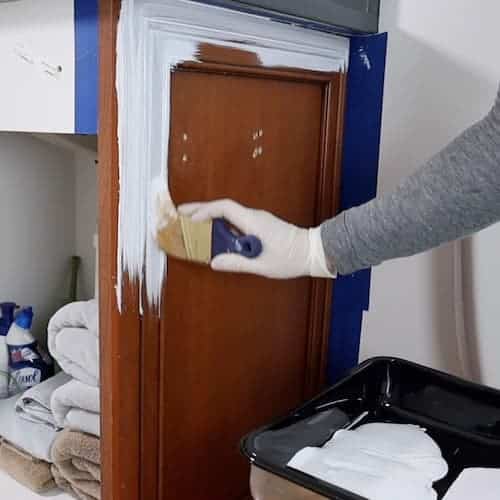
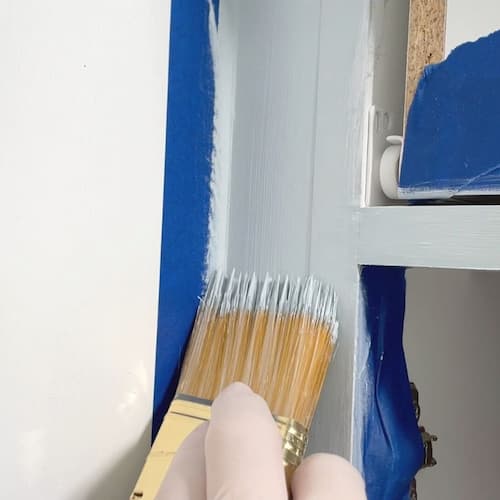
- Use a nylon/polyester brush and create a frame of primer first.
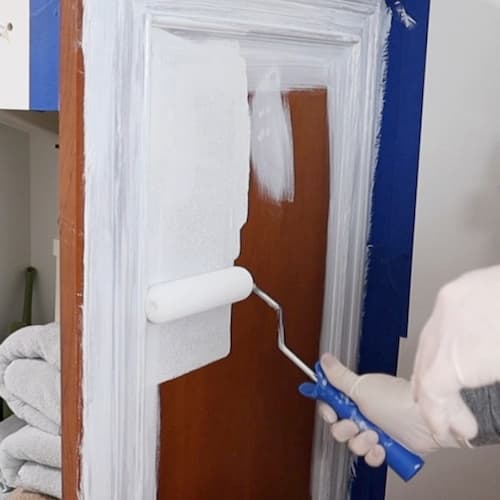
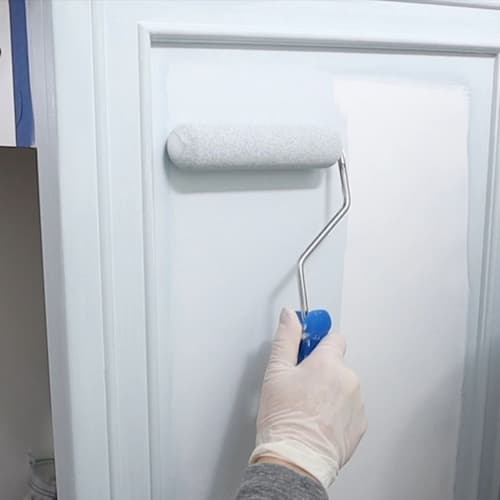
- Maintain a wet edge brushing to rolling. Use a FOAM roller and roll any large smooth areas.
- Apply primer to the frame of the base cabinets down to the floor.
- Dry 2 hours and apply a 2nd coat.
- PULL ALL TAPE within 30 minutes! Never allow it to dry any longer. Set a timer on your phone.
- Clean out brush, toss the roller and tray liner.
Pro Tip: Between coats wrap your brush and roller with plastic wrap – store in a grocery bag tied shut. Cover the primer in the tray with plastic wrap.
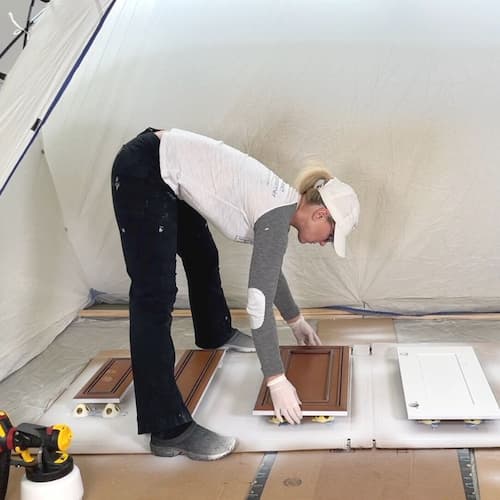
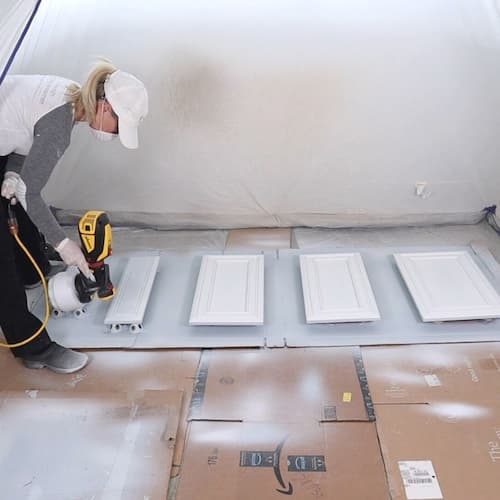
Step 5: Spray Paint Cabinet Doors and Drawer Fronts
Gently flip over the primed cabinets, so the FACE IS DOWN. You always want to start on the back first and end with the outside of the cabinet doors and drawers.
Make sure to STIR Valspar Cabinet and Furniture Enamel. DON’T SHAKE this will create air bubbles that can pop.

Start with a CLEAN and dry sprayer (you should have cleaned it after priming):
- Place plastic liner in sprayer cup.
- STIR the paint thoroughly to mix. DON’T shake.
- Pour FULL quart of paint into cup. DON’T thin.
- Attach sprayer to cup and have the spout angled toward the front.
- Plug into an extension cord. KEEP OFF.
- Set air flow to 7 or 8 and product flow to 7.
- Use a wide spray pattern (red dial).
Have a damp paper towel handy to wipe the sprayer nozzle. Flip on the sprayer. Pull the trigger and prime the sprayer.
Test spray onto a piece of cardboard away from your cabinets until you get a nice fine, but even flow of paint.
Pro Tip: Adjust the air higher if the flow is slow and adjust the product flow if you aren’t seeing good coverage.
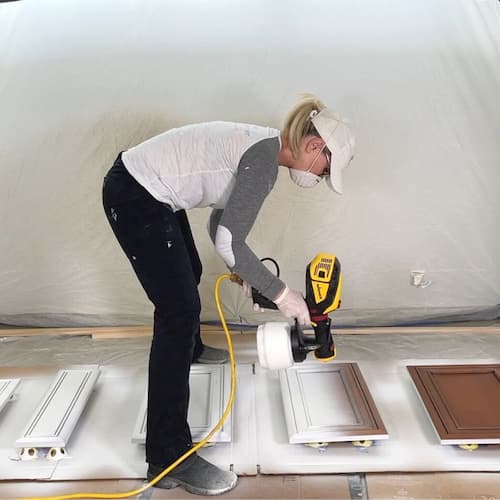
How to Apply Paint with HVLP Paint Sprayer
- START ON BACKSIDE OF CABINETS for the first coat.
- Begin spraying BEFORE the cabinet to make sure the paint isn’t sputtering.
- Stay about 8 inches above the cabinet doors and drawer fronts.
- Use smooth even strokes overlapping slightly spraying back and forth.
- Keep moving and don’t stay in one are too long (thin coats are better).
- Pay attention and make sure to angle the sprayer to get into the details.
- After spraying face of doors and drawers, spray all edges.
- Wipe the sprayer nozzle often with the damp paper towel to remove dried paint.
- With the proper paint flow, you should only need to apply one coat of paint.
- If you want to or need to apply a 2nd coat, let that side dry 4 hours before adding a 2nd coat. Dry 2 hours before flipping to paint the other side.
- The sprayer will keep for 4 hours, but if you have to stop painting CLEAN OUT THE SPRAYER!
Gently flip over and repeat for the FACE of the cabinets. DRY IN PLACE OVERNIGHT.
POUR paint back into can and THOROUGHLY CLEAN the paint sprayer until it runs clean (per the manufacturer’s instructions).
Paint the Cabinet Base (while sprayed items dry)
- Start on the larger areas first.
- Use your nylon/polyester brush and create a frame of paint first.
- Maintain a wet edge brushing to rolling. Use a FOAM roller and roll any large smooth areas.
- Apply paint to the frame of the base cabinets down to the floor.
- “Strike off” each newly painted section running your brush or roller top to bottom to align the paint.
- DON’T OVERWORK or over apply the paint. Thin coats are best.
- Some of the primer will show through between the 1st and 2nd coat.
- Dry 4 hours and apply a 2nd coat in the same manner.
- PULL ALL TAPE within 30 minutes! Never allow it to dry any longer. Set a timer on your phone.
- Clean out brush, toss the roller and tray liner.
DRY CABINET BASE OVERNIGHT! You paint job is now complete.
What to do next…
Painted: Time To Wait and Clean Up
Pulling the tape after the last coat you applied with a paint brush and roller is critical!
Never let the primer or paint fully dry on the tape and pull between 15 and 30 minutes.
Make sure to THOROUGHLY clean out your paint sprayer immediately following spraying the last coat of paint.
It will extend the life of the sprayer and trust me you’ll want to use it again now that you know how easy it is to use.
Let Your Painted Doors And Drawers Fully Cure
Leaving your sprayed cabinets to dry in place for 24 to 28 hours is critical! Dry the base cabinets 24 hours as well.
If you need your garage back, you can pull the cabinets inside to dry in a safe place.
You don’t want to reattach the hardware too soon or damage the bathroom vanity base you just painted.
Attaching hardware too soon can also cause problems way down the line when you want to repaint or change out the hardware.
The hardware can dry into the paint and stick. Then when you go to remove it the paint will pull off…BAD.
Tips for Re-Installing Cabinet Drawers and Doors
You’d be surprised that putting the doors and drawers back in place can be one of the most frustrating parts of painting cabinets!
Hopefully, you labeled the location of each piece and put it back in the same spot! The drill holes on drawers are specific to that drawer.
Of note: I have concealed hinges that are easy release, so my tips refer to this type of hinge
- Wait to attach the cabinet hardware until ALL drawers and doors are in place. You may need to move one or two and it’s one less thing to remove.
- Install top to bottom. Attach drawers and panels before doors.
- Don’t close the drawer or cabinet without making sure it’s aligned first – you can scrape off the paint!
- If a drawer isn’t closing in line with another drawer, it may be in the wrong location. Or you may just need to use your palm to pound one side to make it level.
- Attach the hinge first to the door and then to the base cabinet. A flat head screw driver comes in handy to push the hinge to lock into place on the base cabinet.
- If a door isn’t closing, make sure the hinge is fully inserted into the cabinet door. Or it may just be in the wrong location.
Just remember there will be things that happen like drips, overspray, wrong installation placements, etc.
Use a small craft brush to touch up any areas that you scrape during installation.
It’s just part of the process! Sanding fixes most paint mishaps and patience fixes the rest.
My hope is you are now standing back staring at your bathroom vanity makeover and feeling proud!
There’s nothing like a fresh coat of cabinet paint to cheer up a bathroom!
Cabinet Painting FAQs
If you are a researcher and planner like I am, I KNOW you have a ton of questions about painting bathroom cabinets!
Do I have to sand before painting stained wood cabinets?
I’m a big fan of getting the most durable finish in as few steps as possible. Plus if I can avoid sanding dust I will!
If your cabinet doors and drawers are in good condition, you won’t have to sand off the finish. Even if your bathroom cabinets are stained wood (wooden cabinets) or if your bathroom vanity was previously painted.
What if your cabinets are peeling or damaged do I have to sand? YES! I’ll teach you exactly how to fix those areas.
NEVER paint over a failing or damaged areas and expect to get durable smooth finish. That’s a rookie mistake and you to paint cabinets like a pro right?
Can I paint my cabinets if they are in bad shape or chipped?
Yes! However, you are going to have to put some additional work into preparing the surface prior to painting.
This is the rule about painting chipped cabinets: If the surface is failing and you paint over it the newly painted surface, it will fail too.
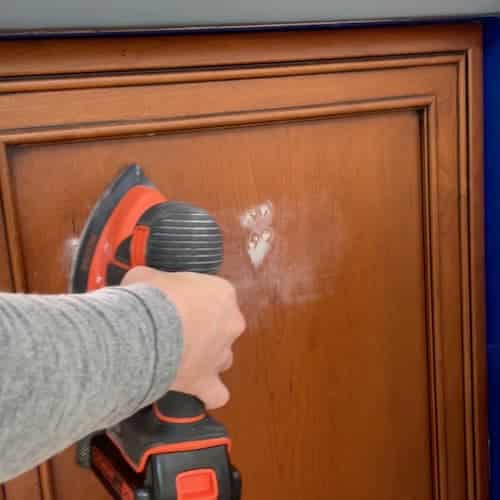
You MUST sand smooth peeling or chipped areas on the cabinet (especially around knobs and pulls), prior to painting.
My favorite battery operated sander is ideal for this task or simply using sand paper.
Just make sure to clean off all of the sanding dust prior to starting the project.
What is the best primer for painting cabinets?
Regardless of whether you are painting over stained wood or painted bathroom cabinets, I always recommend a bonding primer.
If you are new to bonding primer, I have an entire blog post you can read to learn more about it.
Why I recommend this type of primer is because you may not know exactly what you are painting over and a bonding primer will ensure the paint with stick.
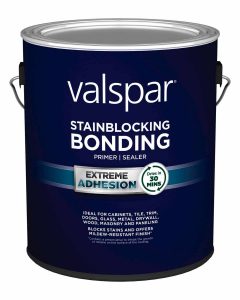
I call bonding primer “super glue” for paint! It will seal in and rough up glossy surfaces so they can except paint.
If you have failing areas on your bathroom vanity, you should lightly sand them smooth. Then clean up the sanding dust.
What is the best paint for cabinets?
This is an easy one! Yes, I recommend a special paint for bathroom cabinets. You can read my guide about which paint is best by project here.
A regular latex paint in semi-gloss could be used on your bathroom cabinet, but I’d recommend a clear coat. Easier to use what I recommend instead 🙂
Valspar Cabinet and Furniture Enamel (my review) is my go to paint product for cabinets. I’ve used it on 10+ painting projects around my home.
I also love Sherwin Williams ProClassic Alkyd Enamel Paint for bathroom cabinets. Avoid oil based paint due to how it can yellow and isn’t soap and water clean up.
Both will dry to a smooth surface that is durable and cleanable, but the Valspar option is less expensive and available at Lowe’s Home Improvement stores.
You can read all about why I think these types of paints are best for a bathroom vanity makeover.
DON’T chalk paint bathroom cabinets please. It’s NEVER ONE STEP and never skip primer with chalk paint I explain why in this post.
Using chalk paint will add SO many steps because you have to top coat the paint to protect it with polyurethane or wax. The paints I recommend don’t require a clear top coat.
What paint sheen for painting cabinets?
The best paint sheen for durability and cleanability in a bathroom is SEMI-GLOSS. We are all tough on our vanity doors and drawers, so we want a hard finish.
You can read all about paint sheen here and what I recommend for each project type.
Satin is another option, but won’t be as easy to clean. Gloss will be too shiny and show flaws on your vanity.
Semi gloss is the best “happy medium” sheen option that will give you a smooth surface.
Can I paint cabinets without removing the doors and drawers?
You want pro level results right? In order to use and HVLP paint sprayer, you must removed all of the cabinet doors and drawer fronts.
Don’t worry I will teach you exactly how to remove and reinstall everything.,
If you are hand applying the paint, technically you can keep everything in place. Why shouldn’t you?
You will create more brush marks, it will be hard to paint around the hinges, and drips are highly likely painting bathroom cabinets without removing the doors and drawer fronts.
I wrote an entire article about why I’ll NEVER hand paint bathroom cabinets again!
Can I paint over the cabinet door hinges?
You can, but that doesn’t mean you should! I’m always going to recommend you remove all hardware from the doors and drawers.
That means removing the drawer and cabinet knobs and pulls (handles) too.
Now if you want to change the finish of the hinges a new color with a can of spray paint, you can ABSOLUTELY do this.
Tips for spray painting hinges: Follow my tutorial, Yes! You can spray paint cabinet hardware even though I demonstrate on pulls you can use it for hinges too.
Should I paint the cabinet interior?
You don’t need to and not painting the inside of the cabinets will save you time and money!
What you will paint is the base cabinet frame or box of the cabinet doors and drawers, but it’s not necessary to paint the inside of the cabinets.
You can if you want too, but I never have. Also, the inside of my cabinets are white laminate so they look great regardless of the paint color I choose.
Sign-Up for my Weekly Emails!
Straight to your inbox sharing can’t miss decorating and painting tips for your home.