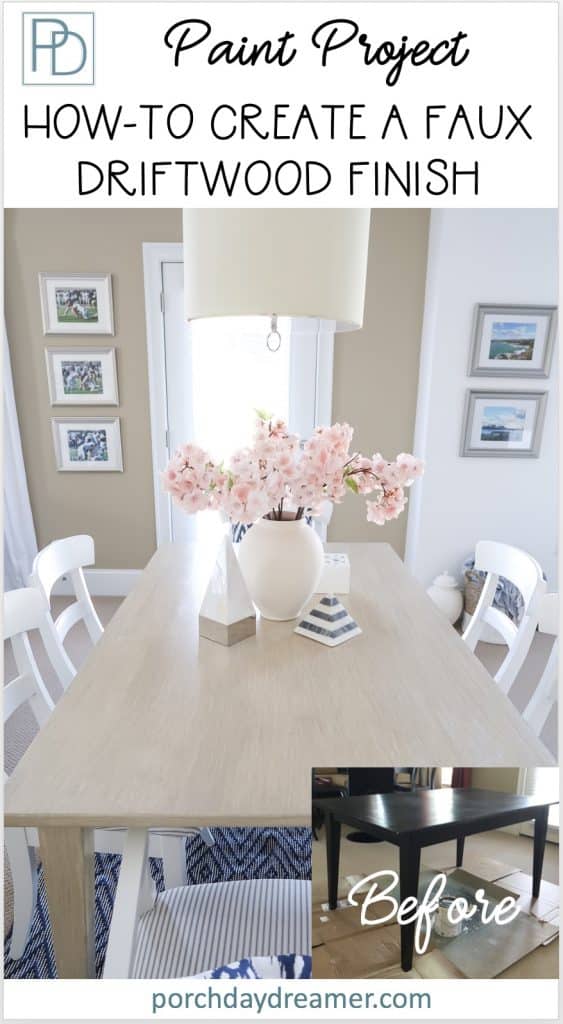
How-To Create the Pottery Barn Driftwood Finish
Do you love the gray wash and driftwood gray finishes in the Pottery Barn catalog? Me too! That’s why I developed my OWN paint finish to replicate the look and DIY it…
Back when I was making over our man cave, office, and loft space I wasn’t working and strapped for cash.
To save LOTS of money I re-used, re-purposed, and re-painted just about everything in the space. If you’d like to see the full reveal CLICK HERE.
The pièce de résistance was the makeover of the loft table from all black to a driftwood gray finish! It always amazes me how paint can transform anything and faux finishes are game changers.
This tutorial will show you how easy it is in just a few steps to create a faux Pottery Barn driftwood finish for your furniture!
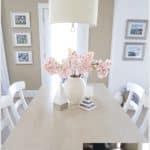
Pottery Barn Driftwood Finish Inspiration
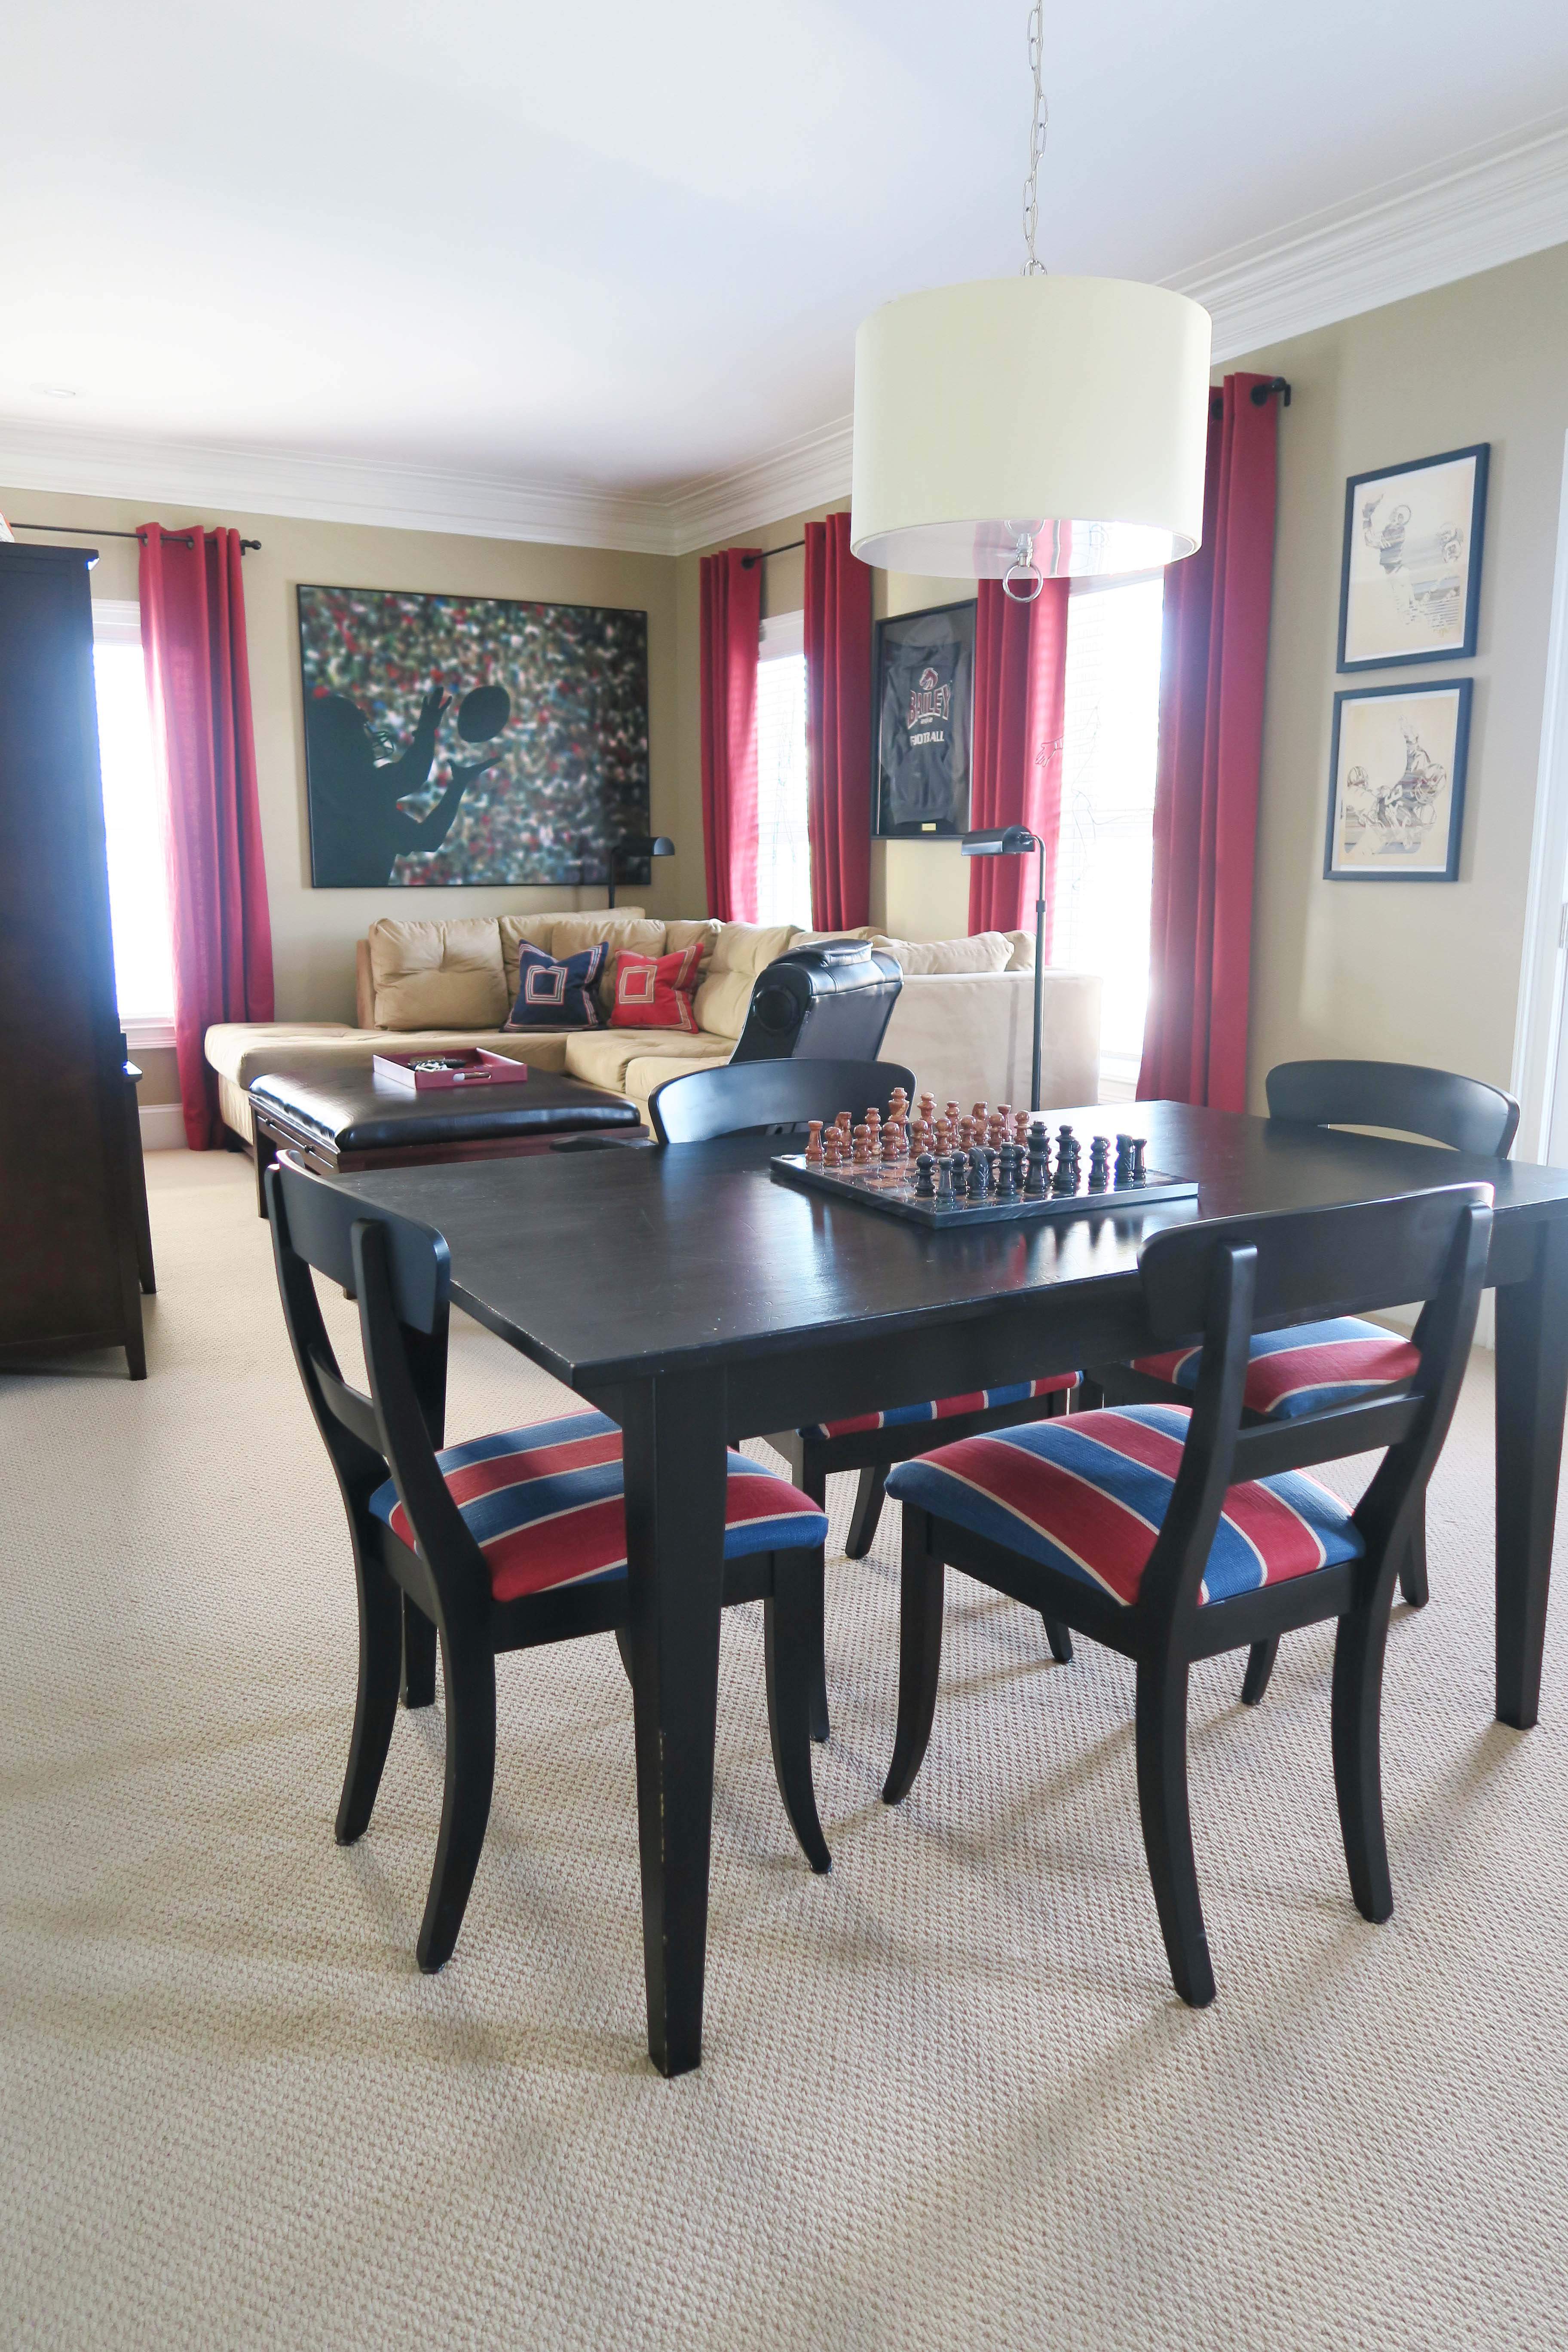
First you must see the “before” to appreciate the after…
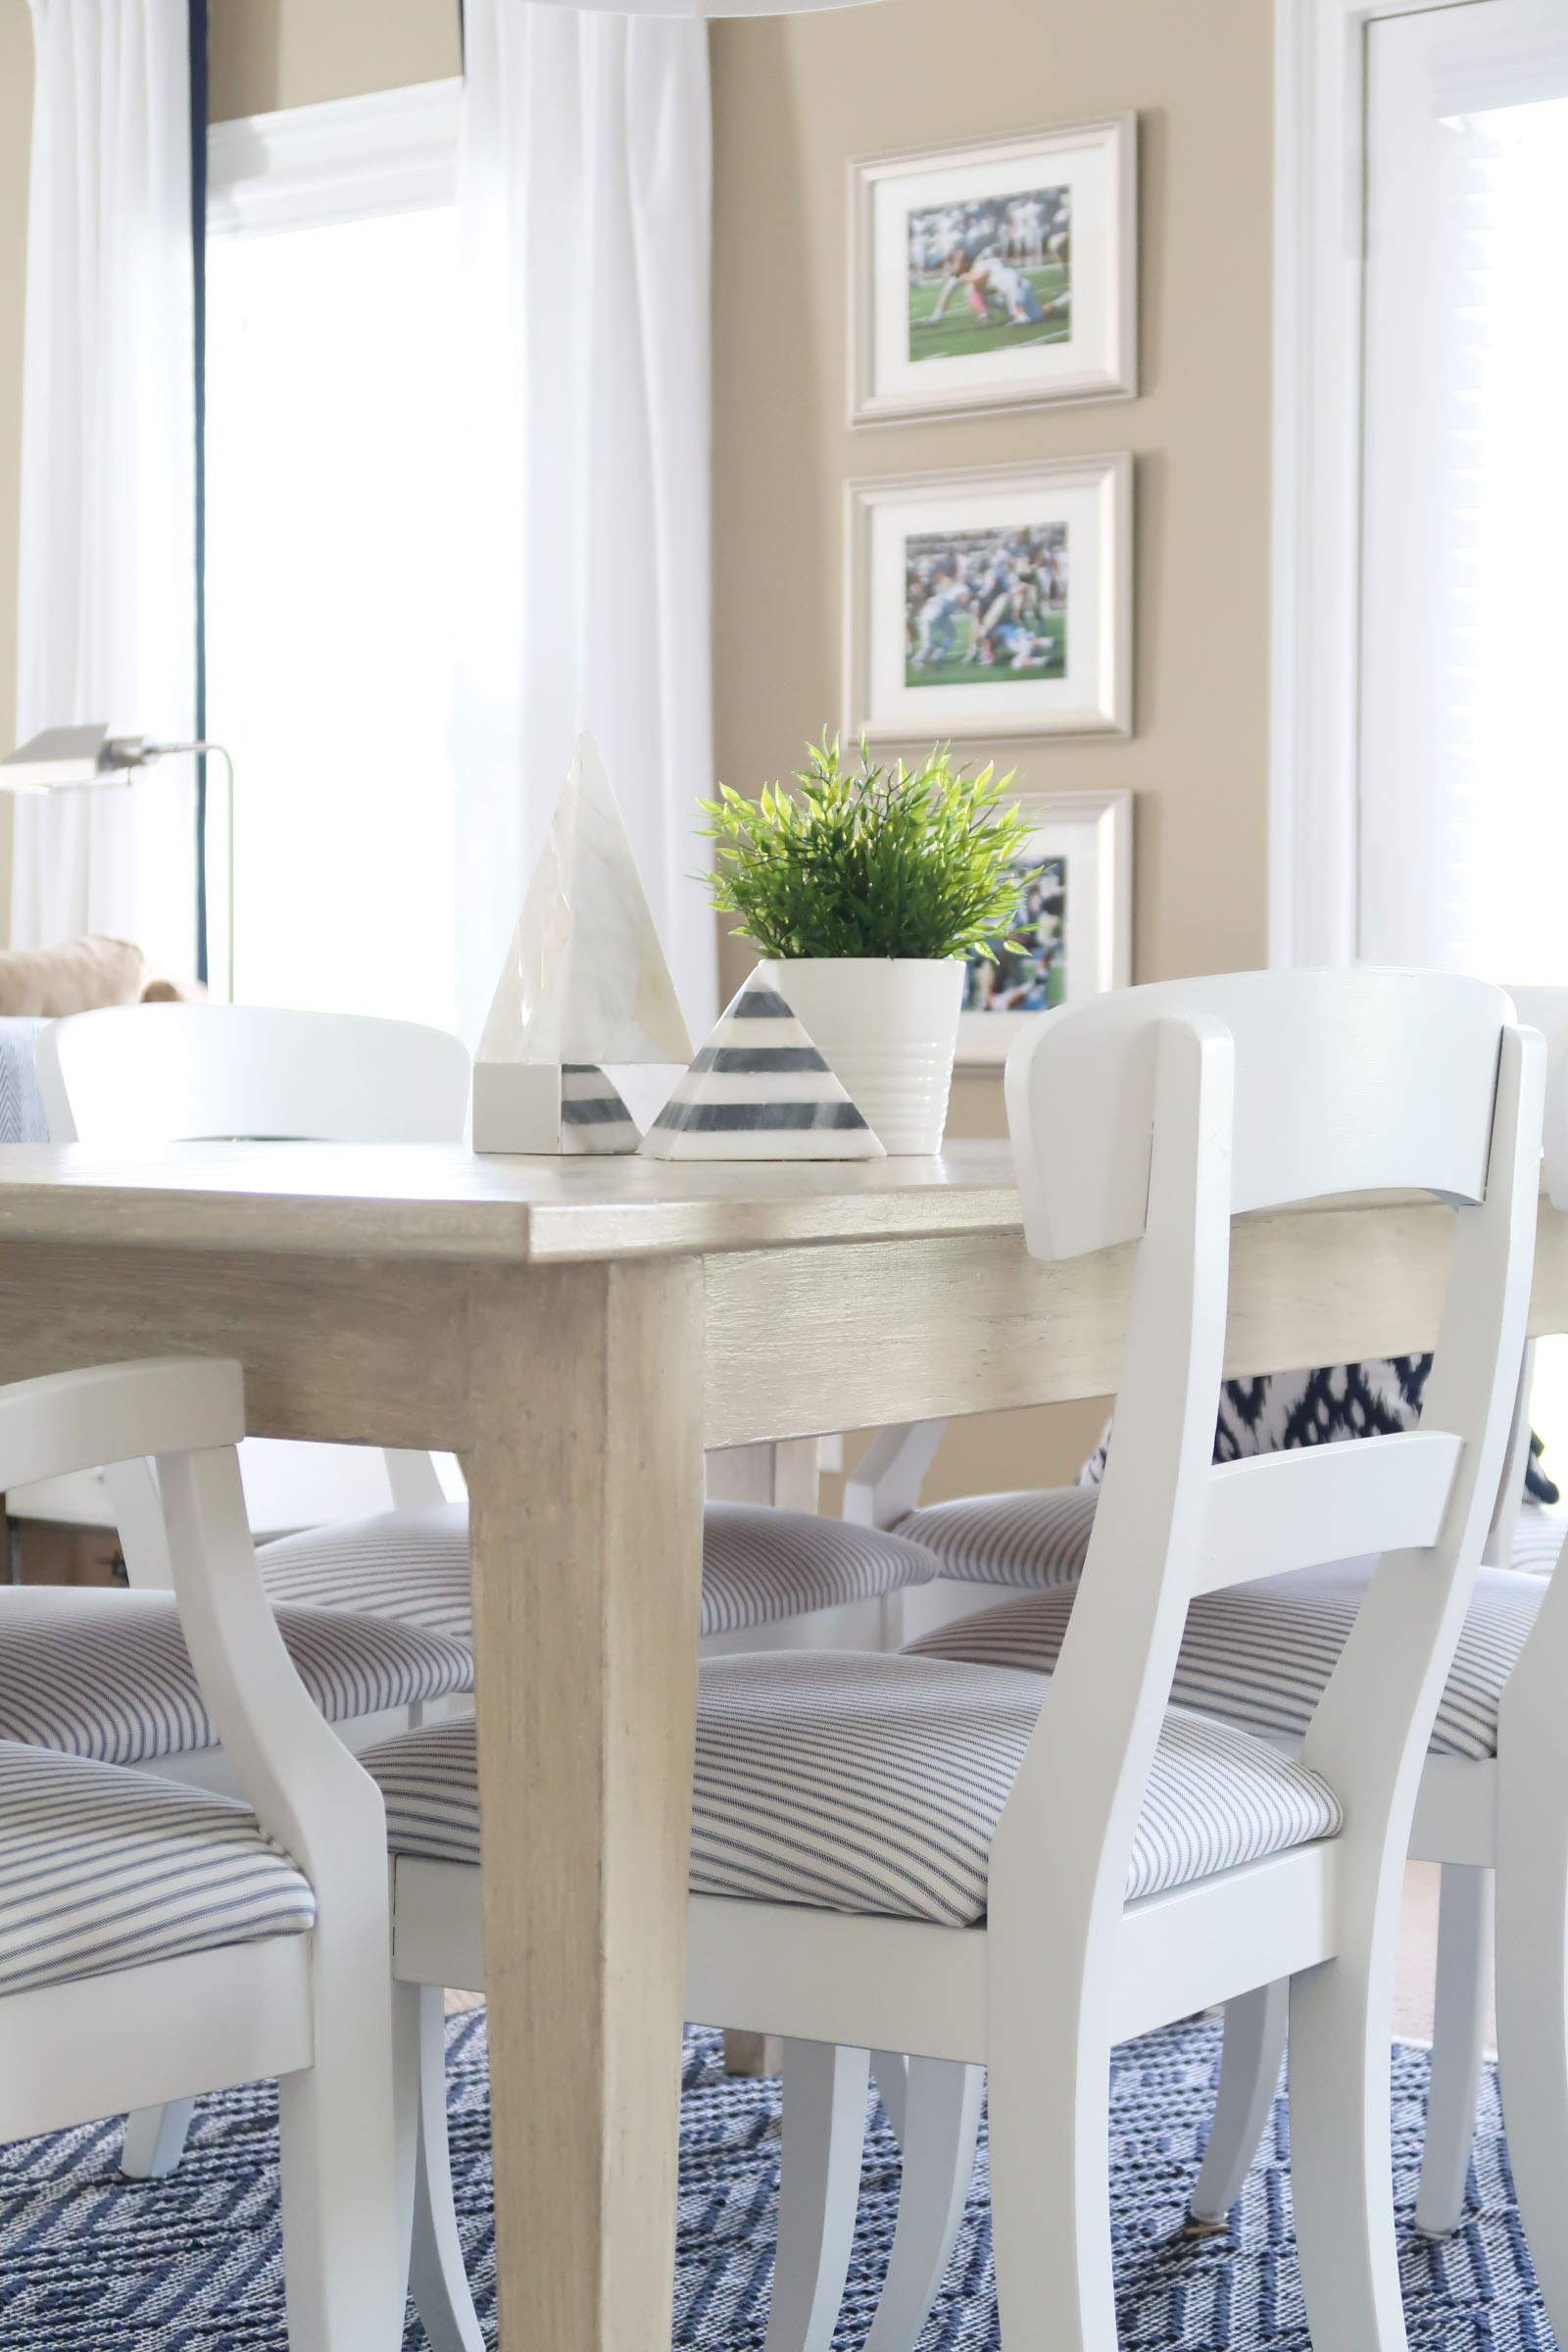
This is the table and chairs I wanted to makeover, from dark and masculine to light and coastal.
First I painted the chairs white, and slipcovered the seats in a ticking stripe.
I thought the driftwood finish would look beautiful mixed into the navy and white color scheme I’d created.
Whenever you are trying to create a finish, it is really important to work from an inspiration piece first.
Mine was this picture of a Pottery Barn bed in Gray Wash.
I knew I didn’t want the table to be as dark or gray, but it gave me a place to start.
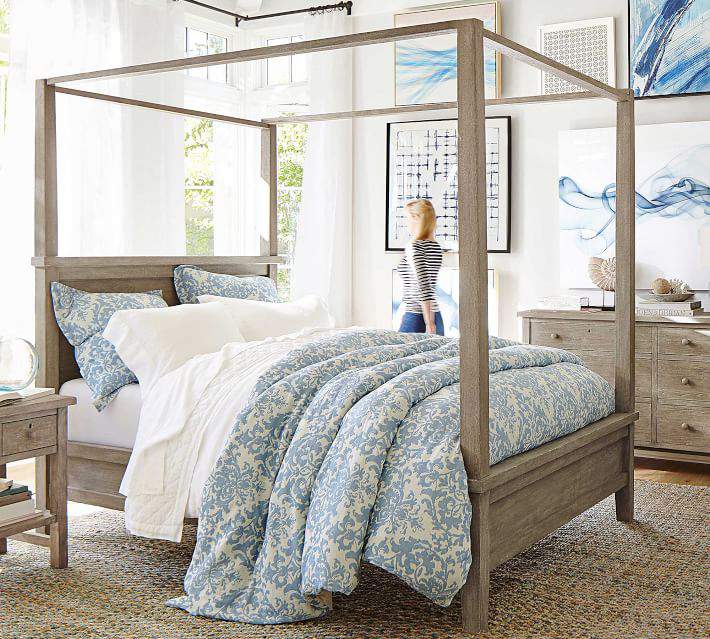
I saw the natural base, with the gray undertones and decided to start with a light color and build the faux finish over it.
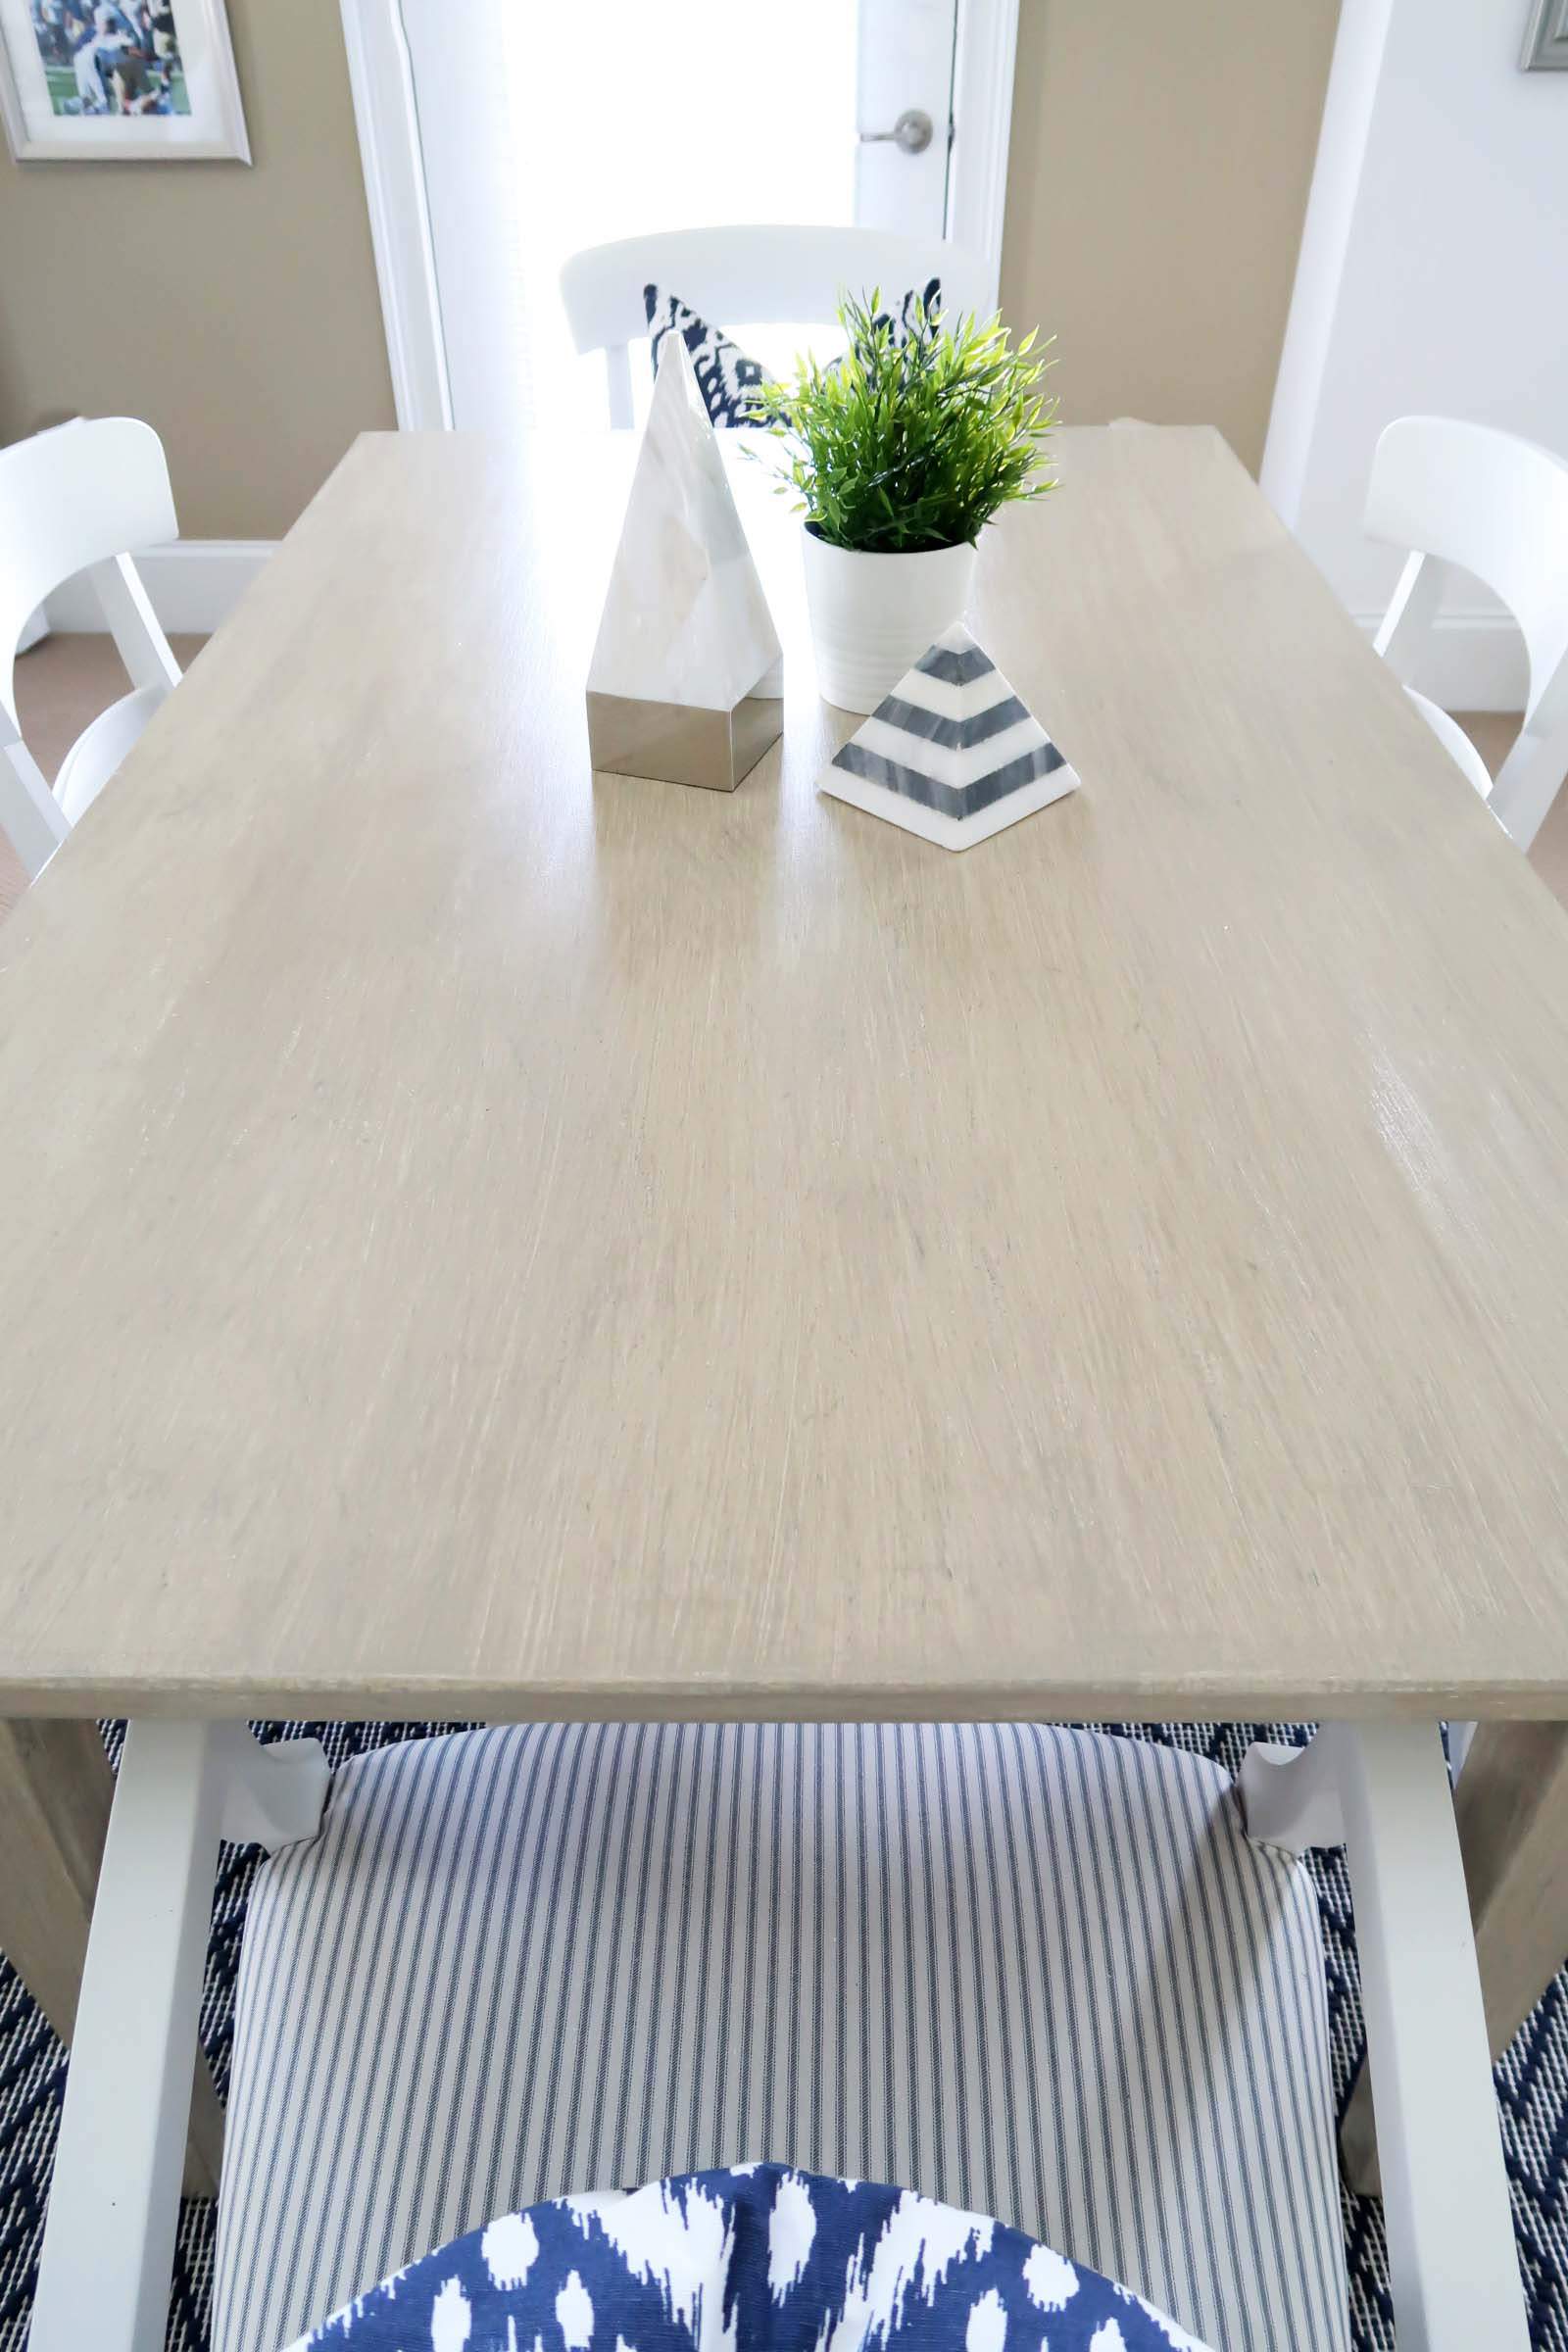
Here is the final result…
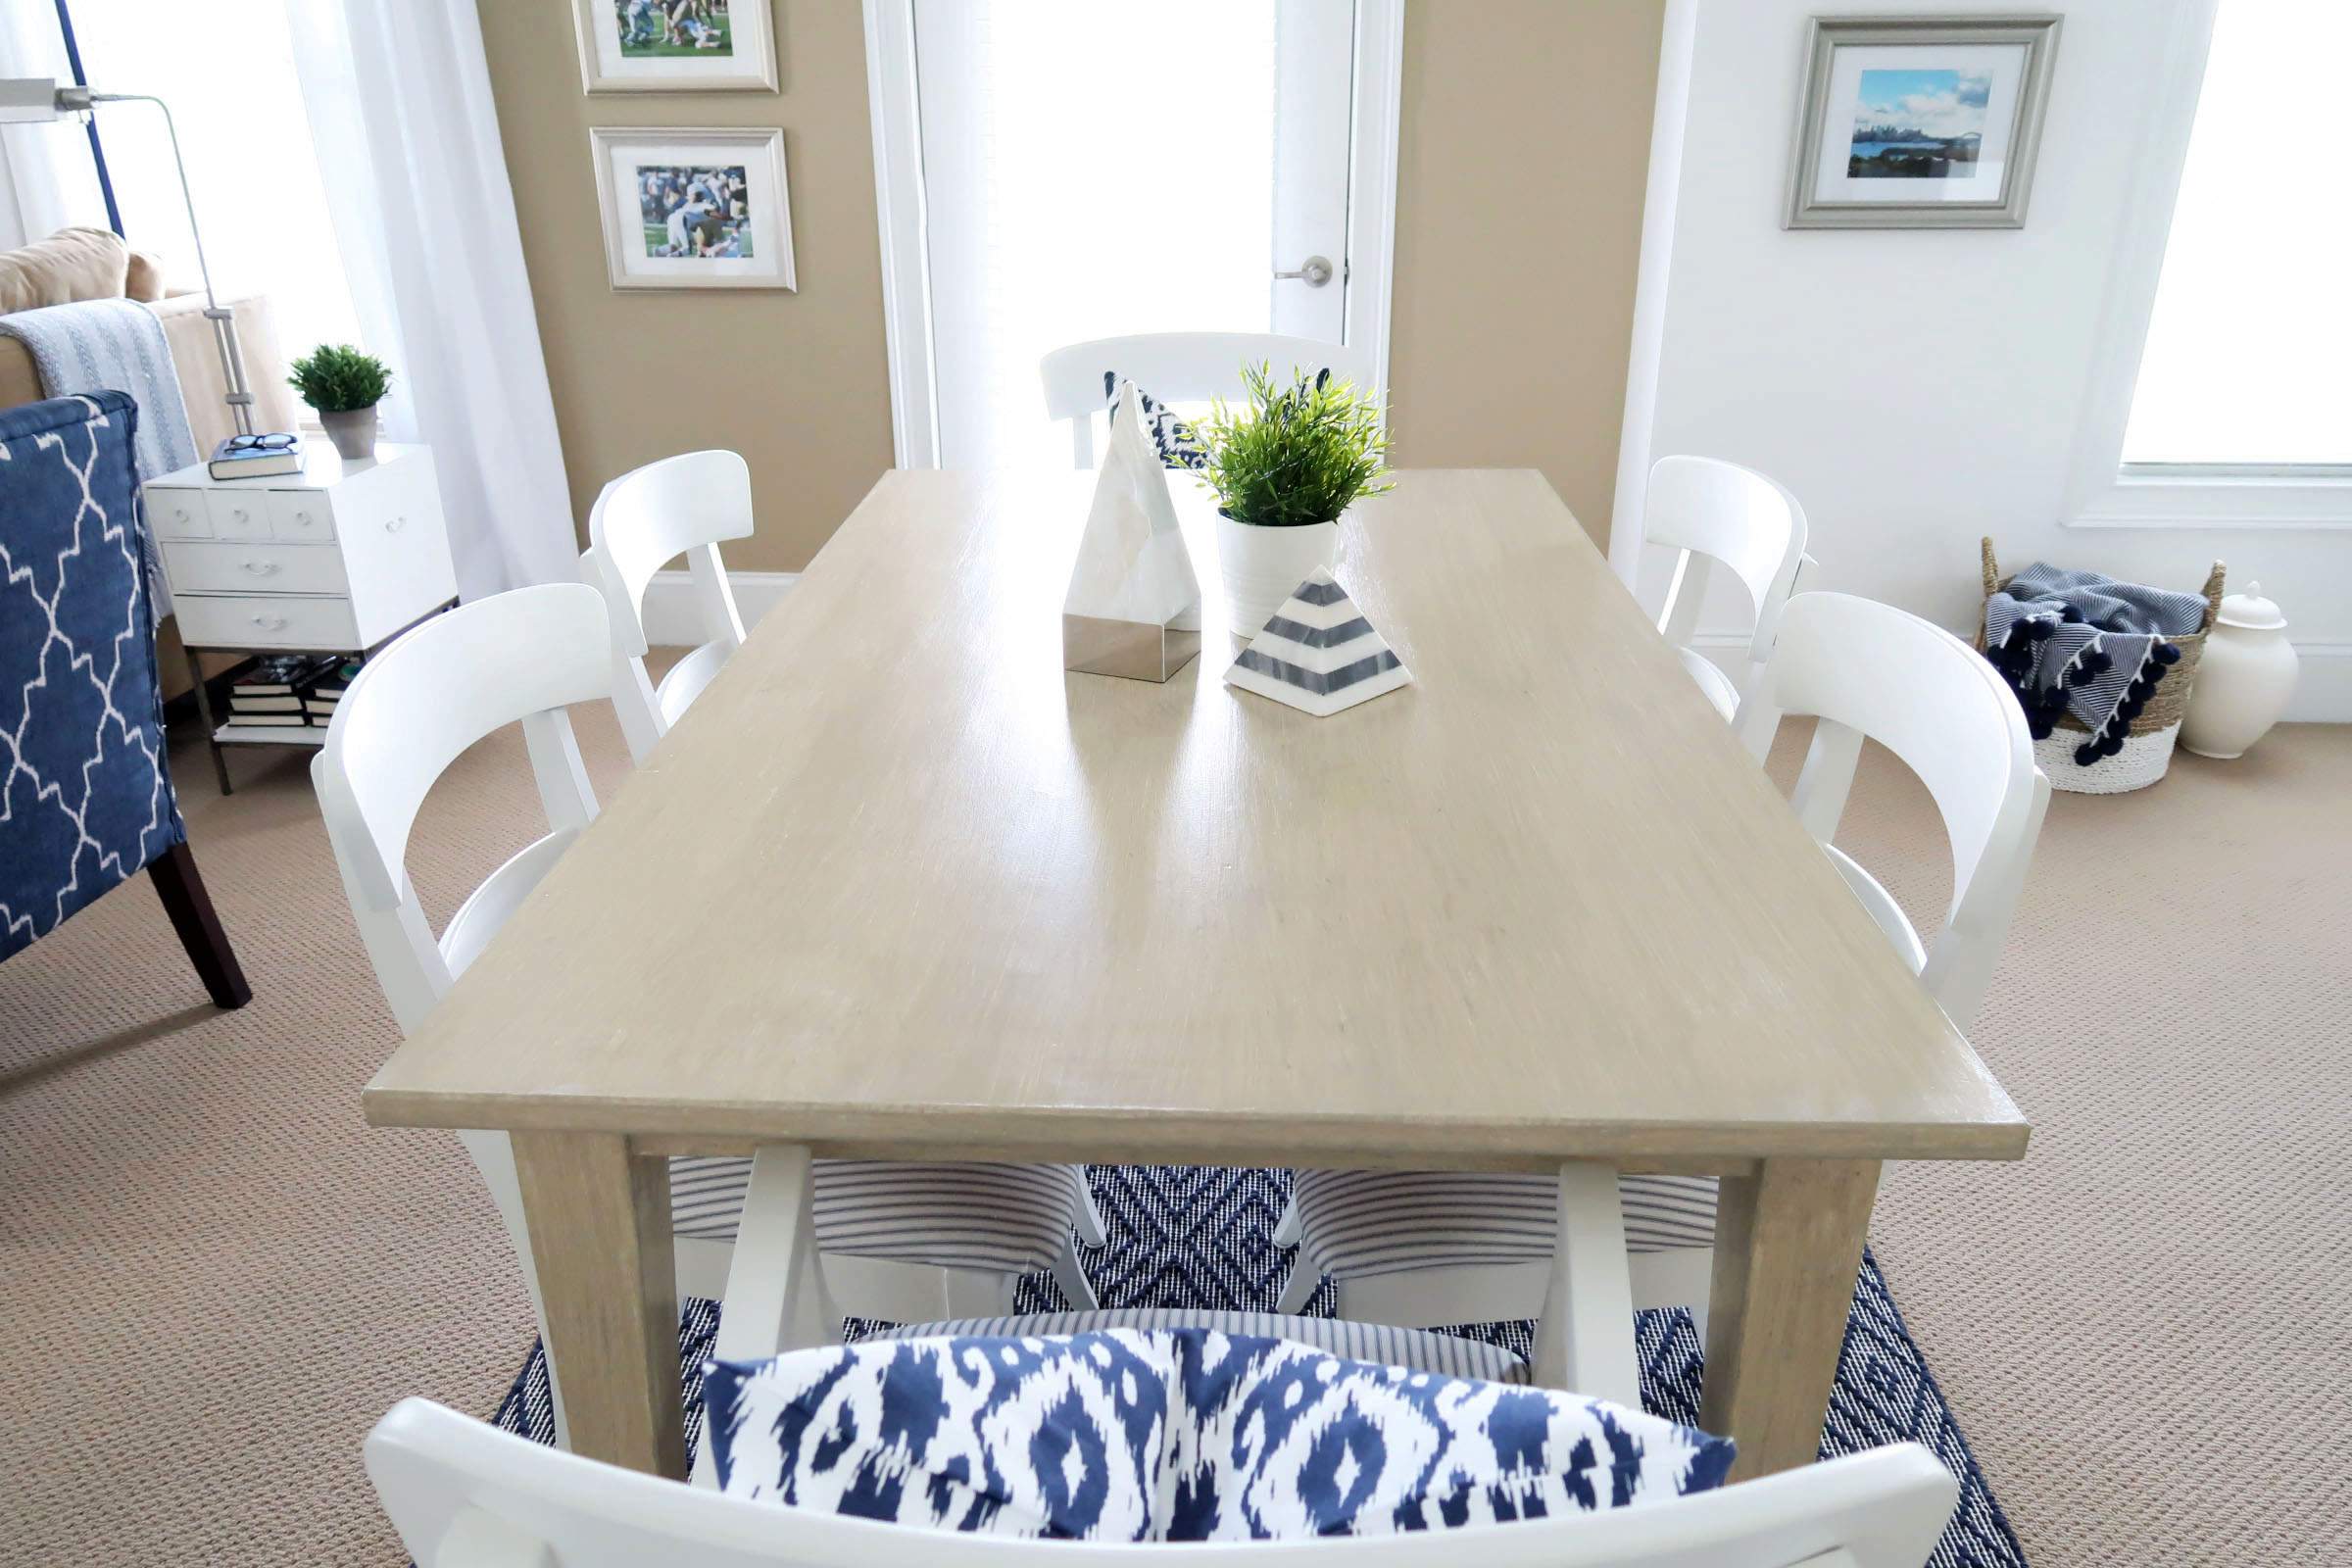
Can you believe it’s the same table and chairs?
Pretty incredible huh?
It went from black and beat up to coastal and fresh!
Now you want to know – HOW did I do this? Well, I am happy to show you!
If you are not familiar with using glazes, you may want to read this first: All About Antiquing Glaze for Cabinets and Furniture
Post contains hand selected products, with affiliate marketing links throughout {full disclosure here}
How-To Create the Pottery Barn Driftwood Gray Finish
Please be patient with this process because it does involve a few layers and dry time, but it’s a CHEAP way to create a driftwood gray type of finish.
Something I want you to be aware of is that I didn’t want the driftwood to be on the gray side and picked a paint color that had more brown to coordinate with the walls and carpet.
If you’d like a more gray tone, look for a paint color with more gray in it!
With that, let’s get started!
painted Driftwood faux finish Supplies
- Valspar Bonding Primer
- Valspar Cabinet and Furniture Enamel Light Raffia 3008-10B
- Clear Mixing Glaze
- Valspar Paint Sample Arid Plains 6007-2A
- Valspar Paint Sample Sable Evening 5006-2C
- Softening Brush here is an alternative if out of stock Color Wash Brush
- Paper Towels or Rags
- Painter’s Plastic
- Plastic spoons
- 2 wide mouth ceramic bowls
- Satin or Matte Polyurethane
- Wooster paint brush
So you understand the layers of paint you will be applying:
- 1st layer is the base coat color that is the lightest
- 2nd layer is the faux wood grain pattern
- 3rd layer is the wash that creates the look of boards and blends the colors
- 4th layer is a protective clear coat
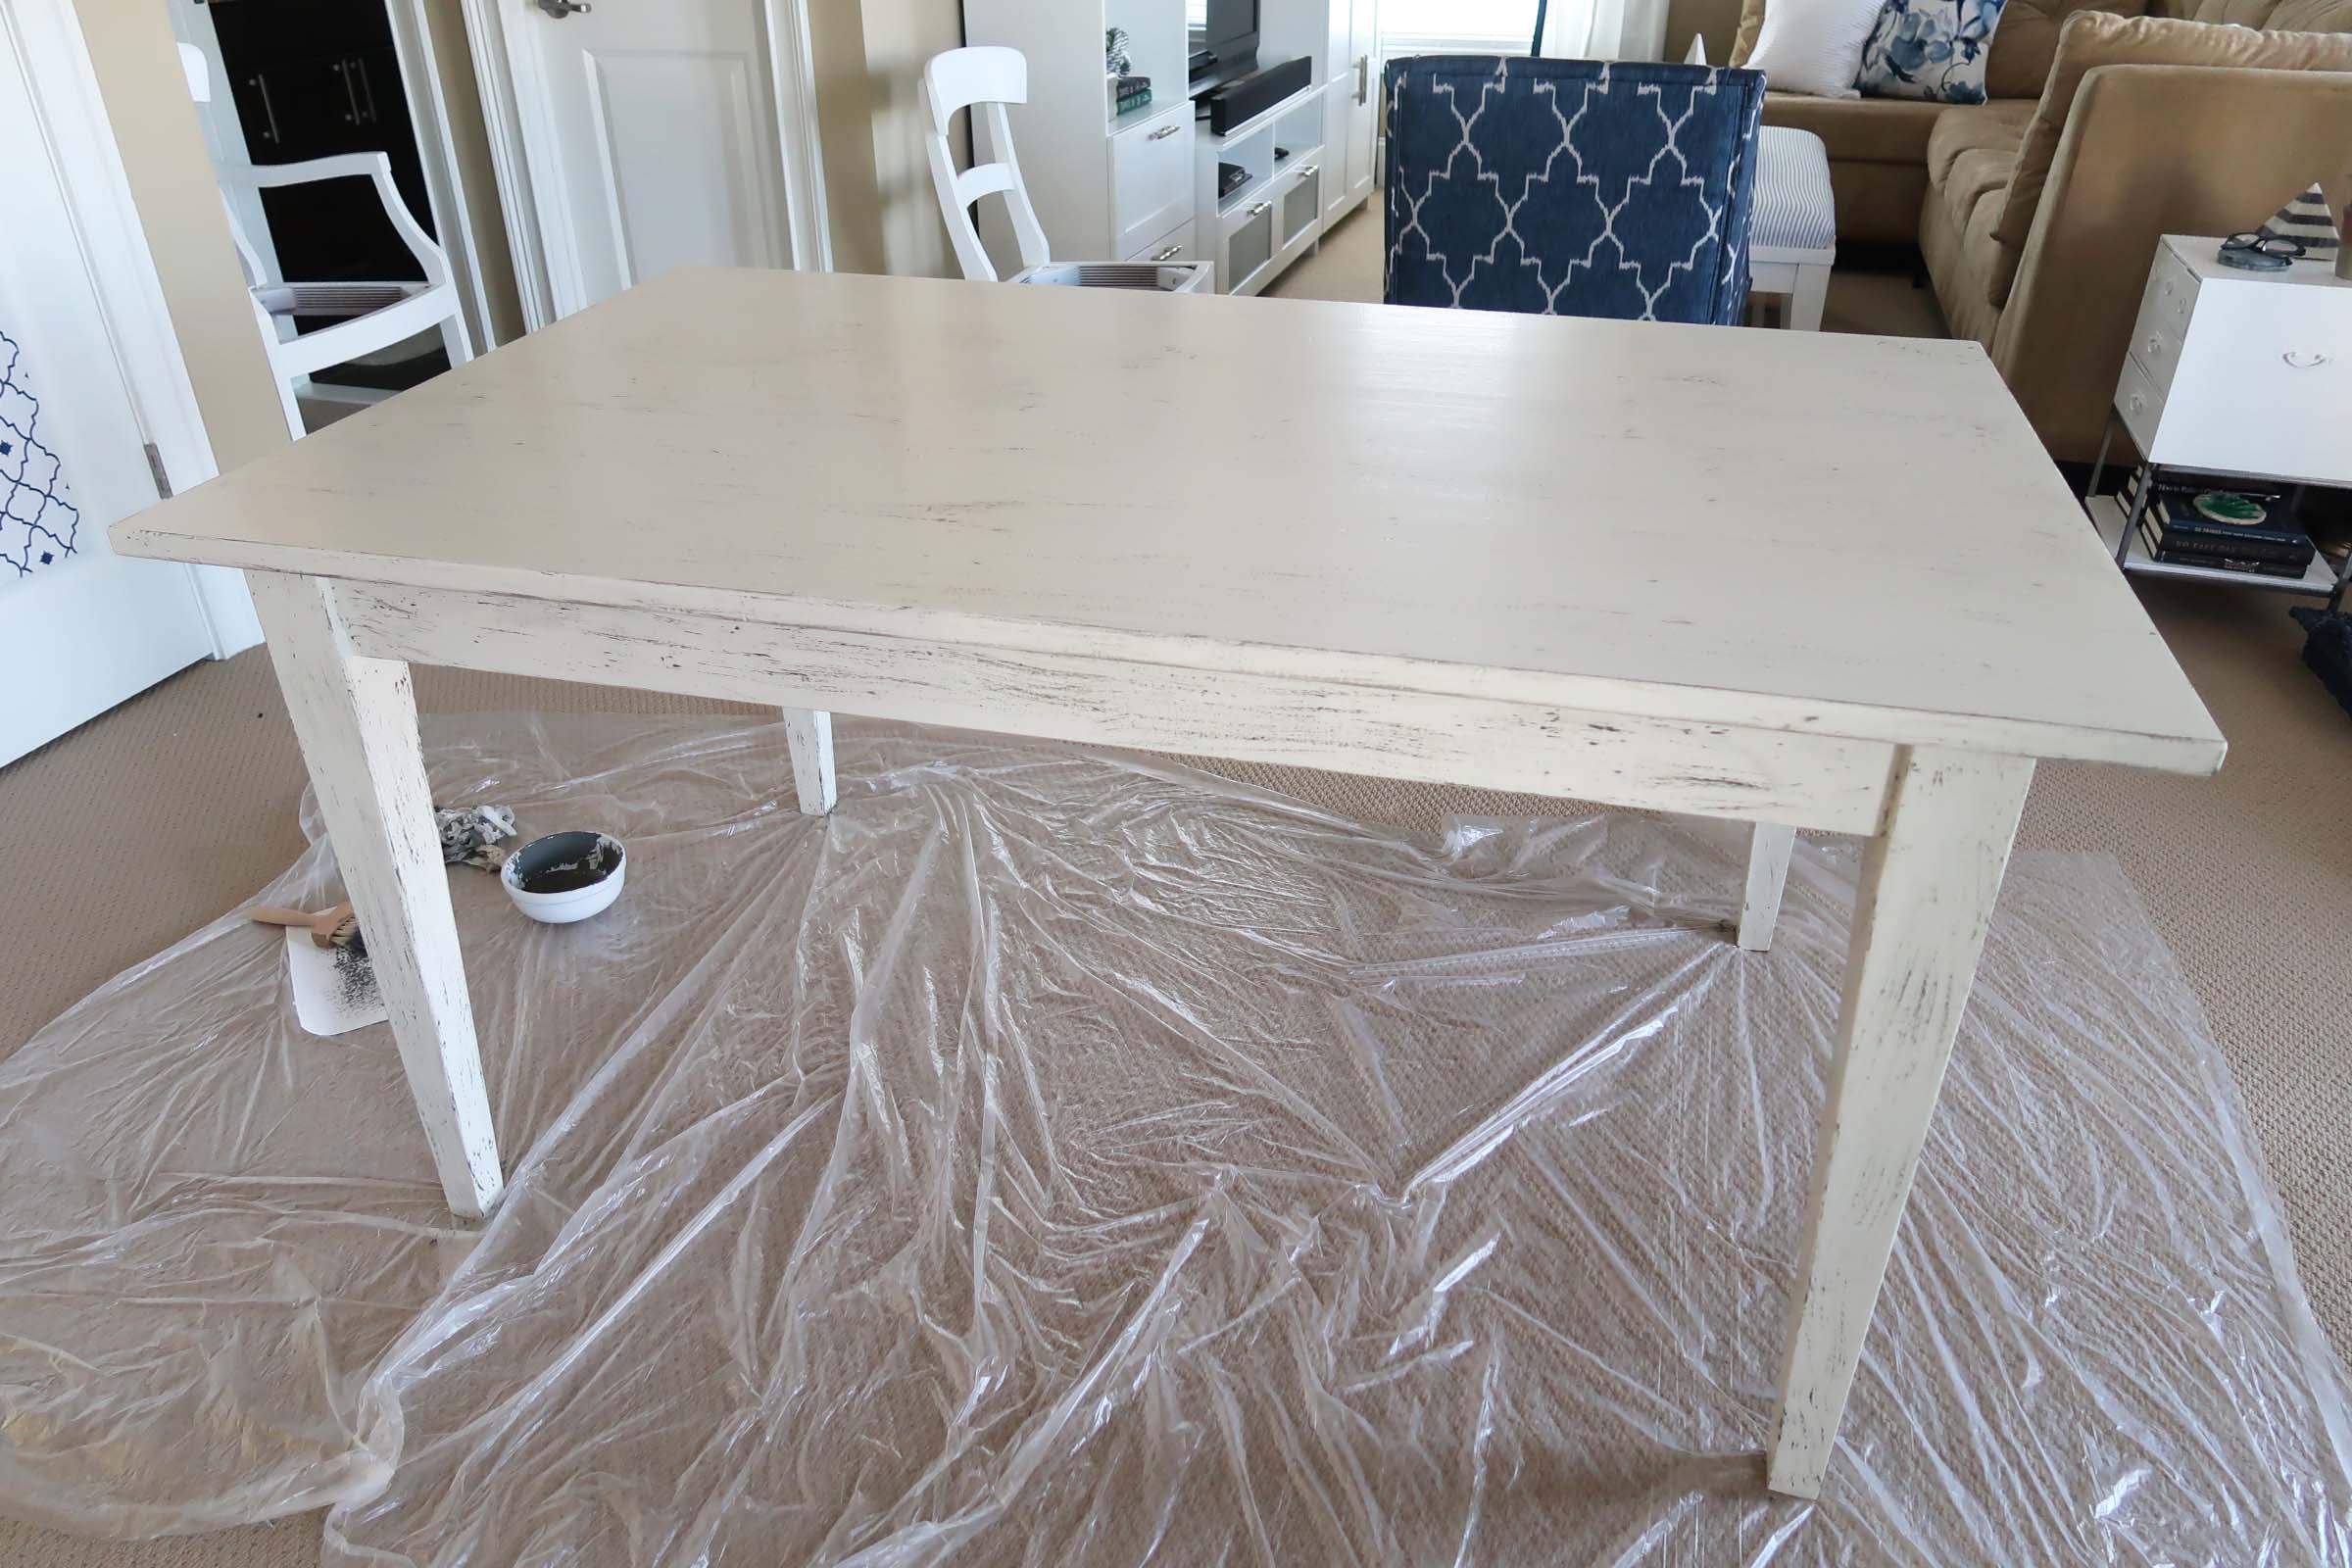
First, prep the area by creating a space to work and laying a protective layer on the floor.
Step 1: Paint the base color
If you are going over a dark color or stain, please start with bonding primer which is what I did over black paint.
Apply the base color in Valspar Cabinet & Furniture Enamel SEMI-GLOSS.
I like the hard finish to work from, when creating the faux finish.
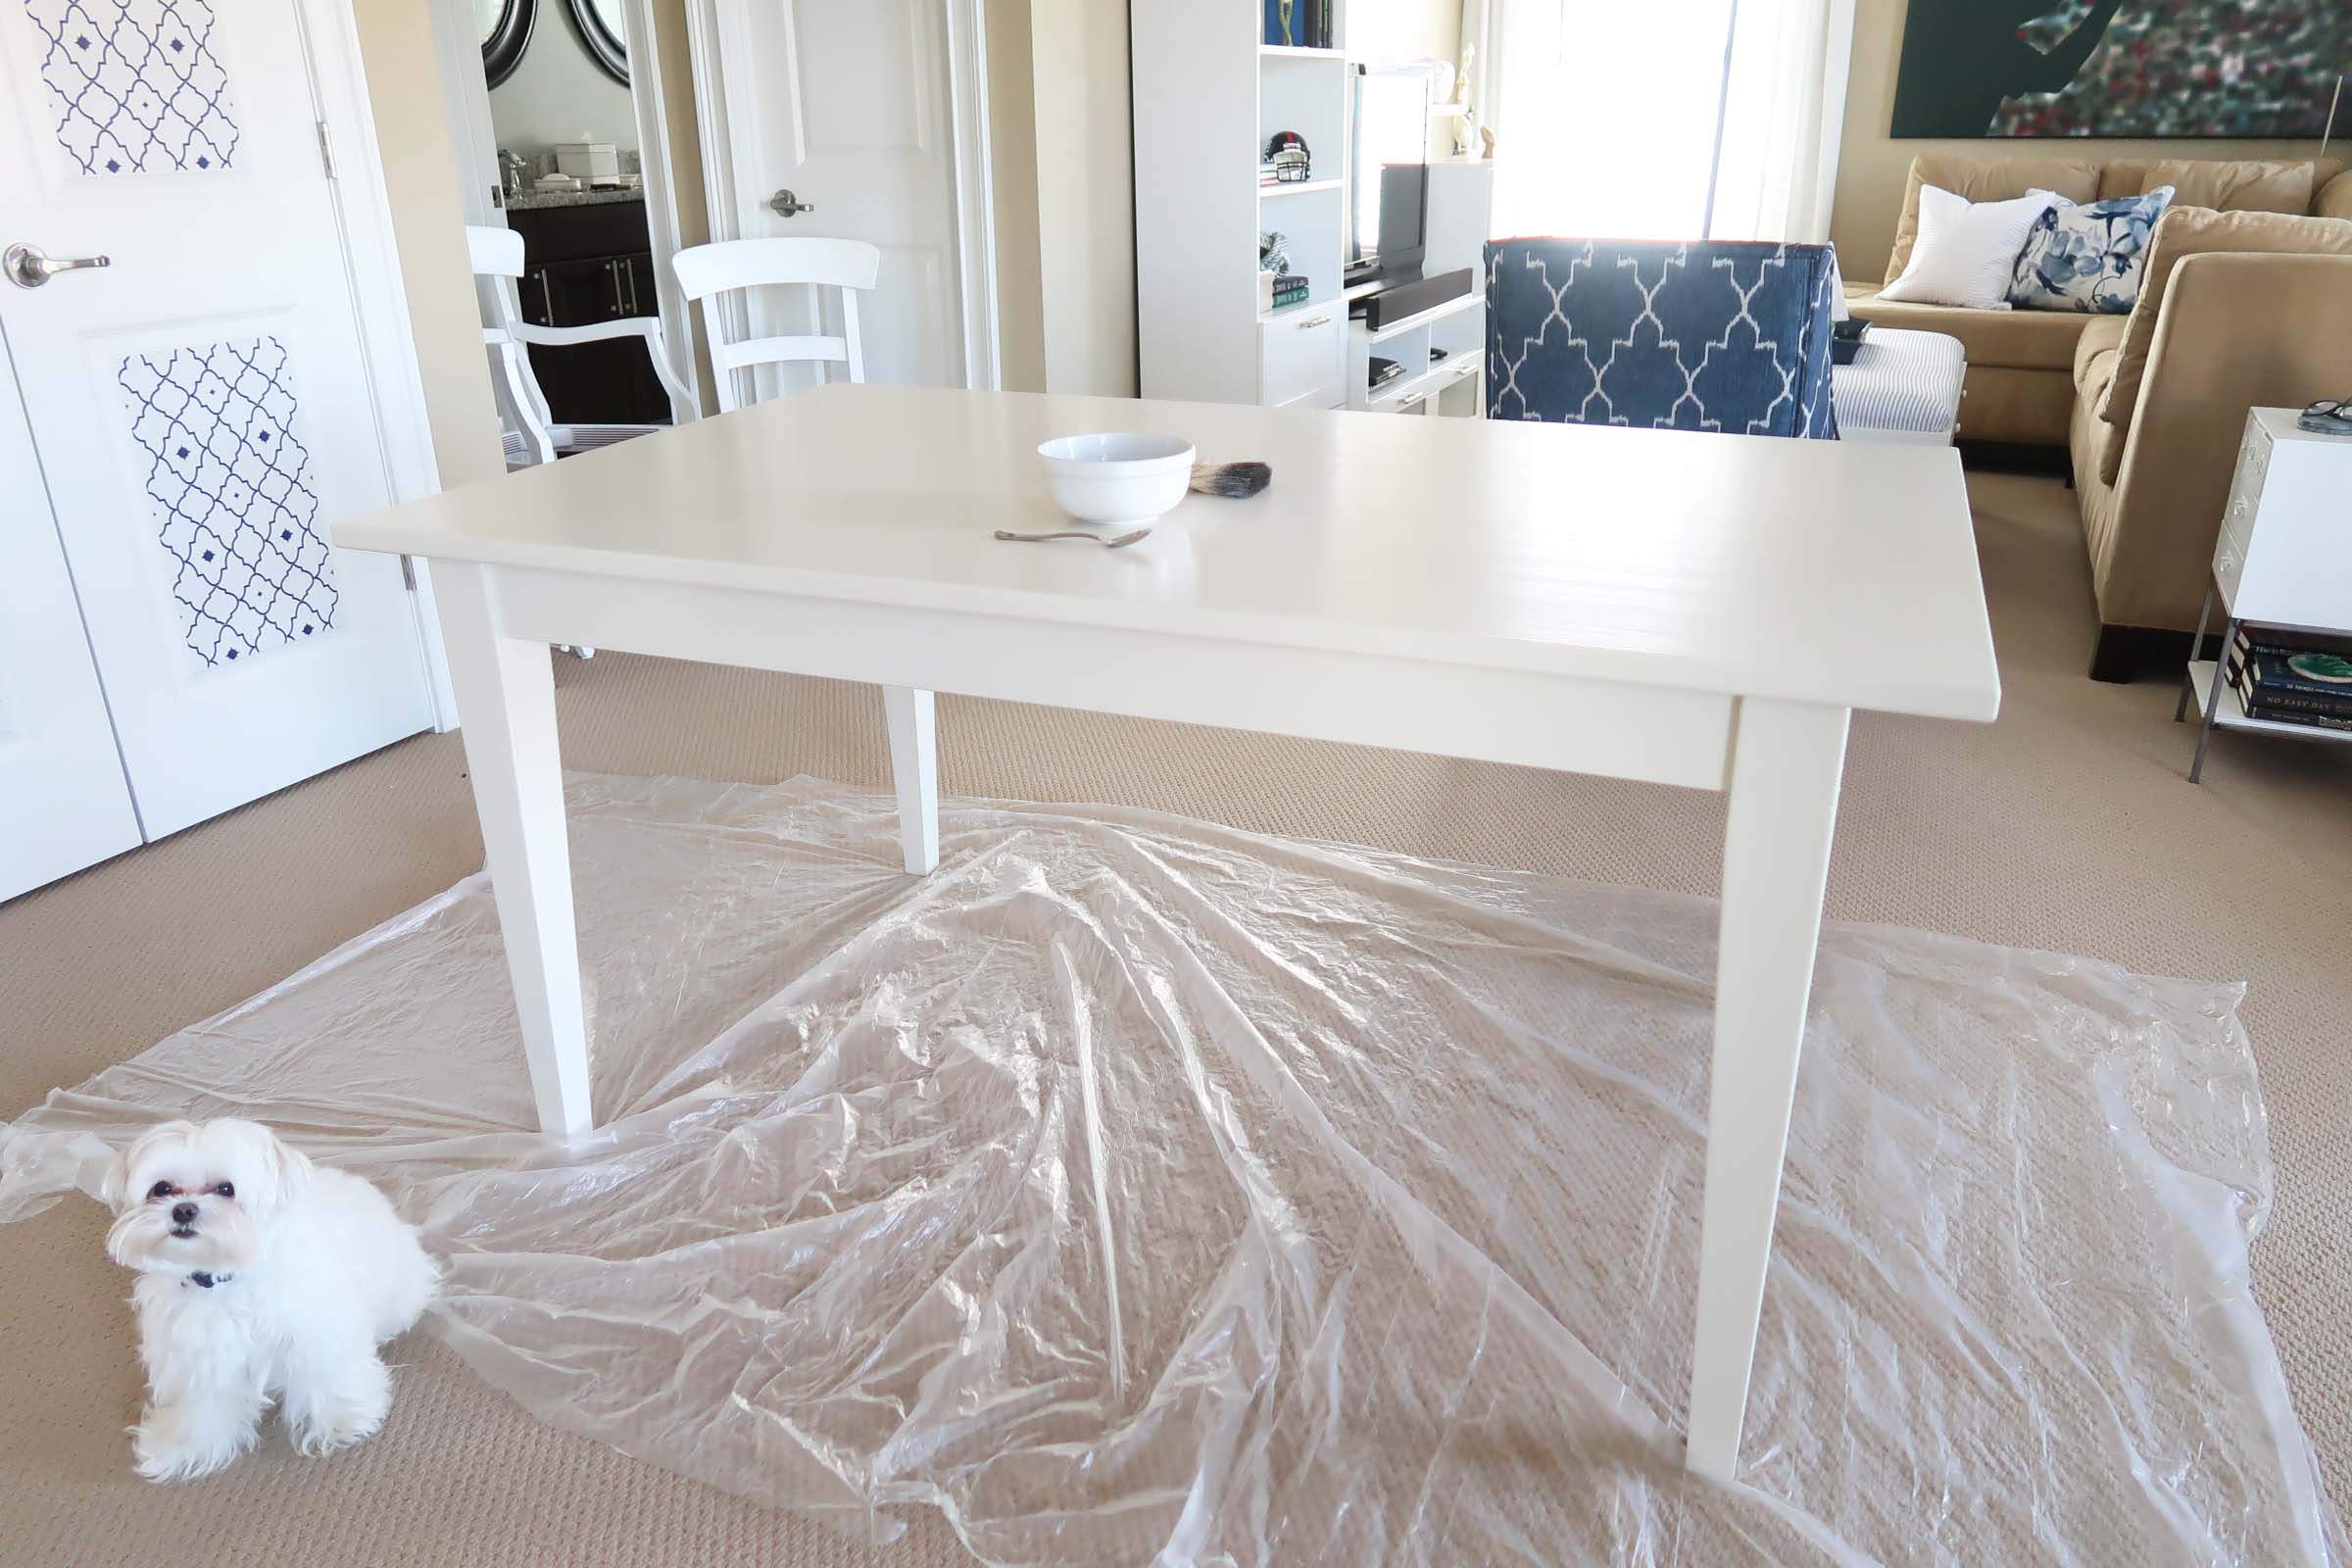
The table has been painted with: 1 coat of bonding primer and 2 coats of Light Raffia Valspar Cabinet Enamel.
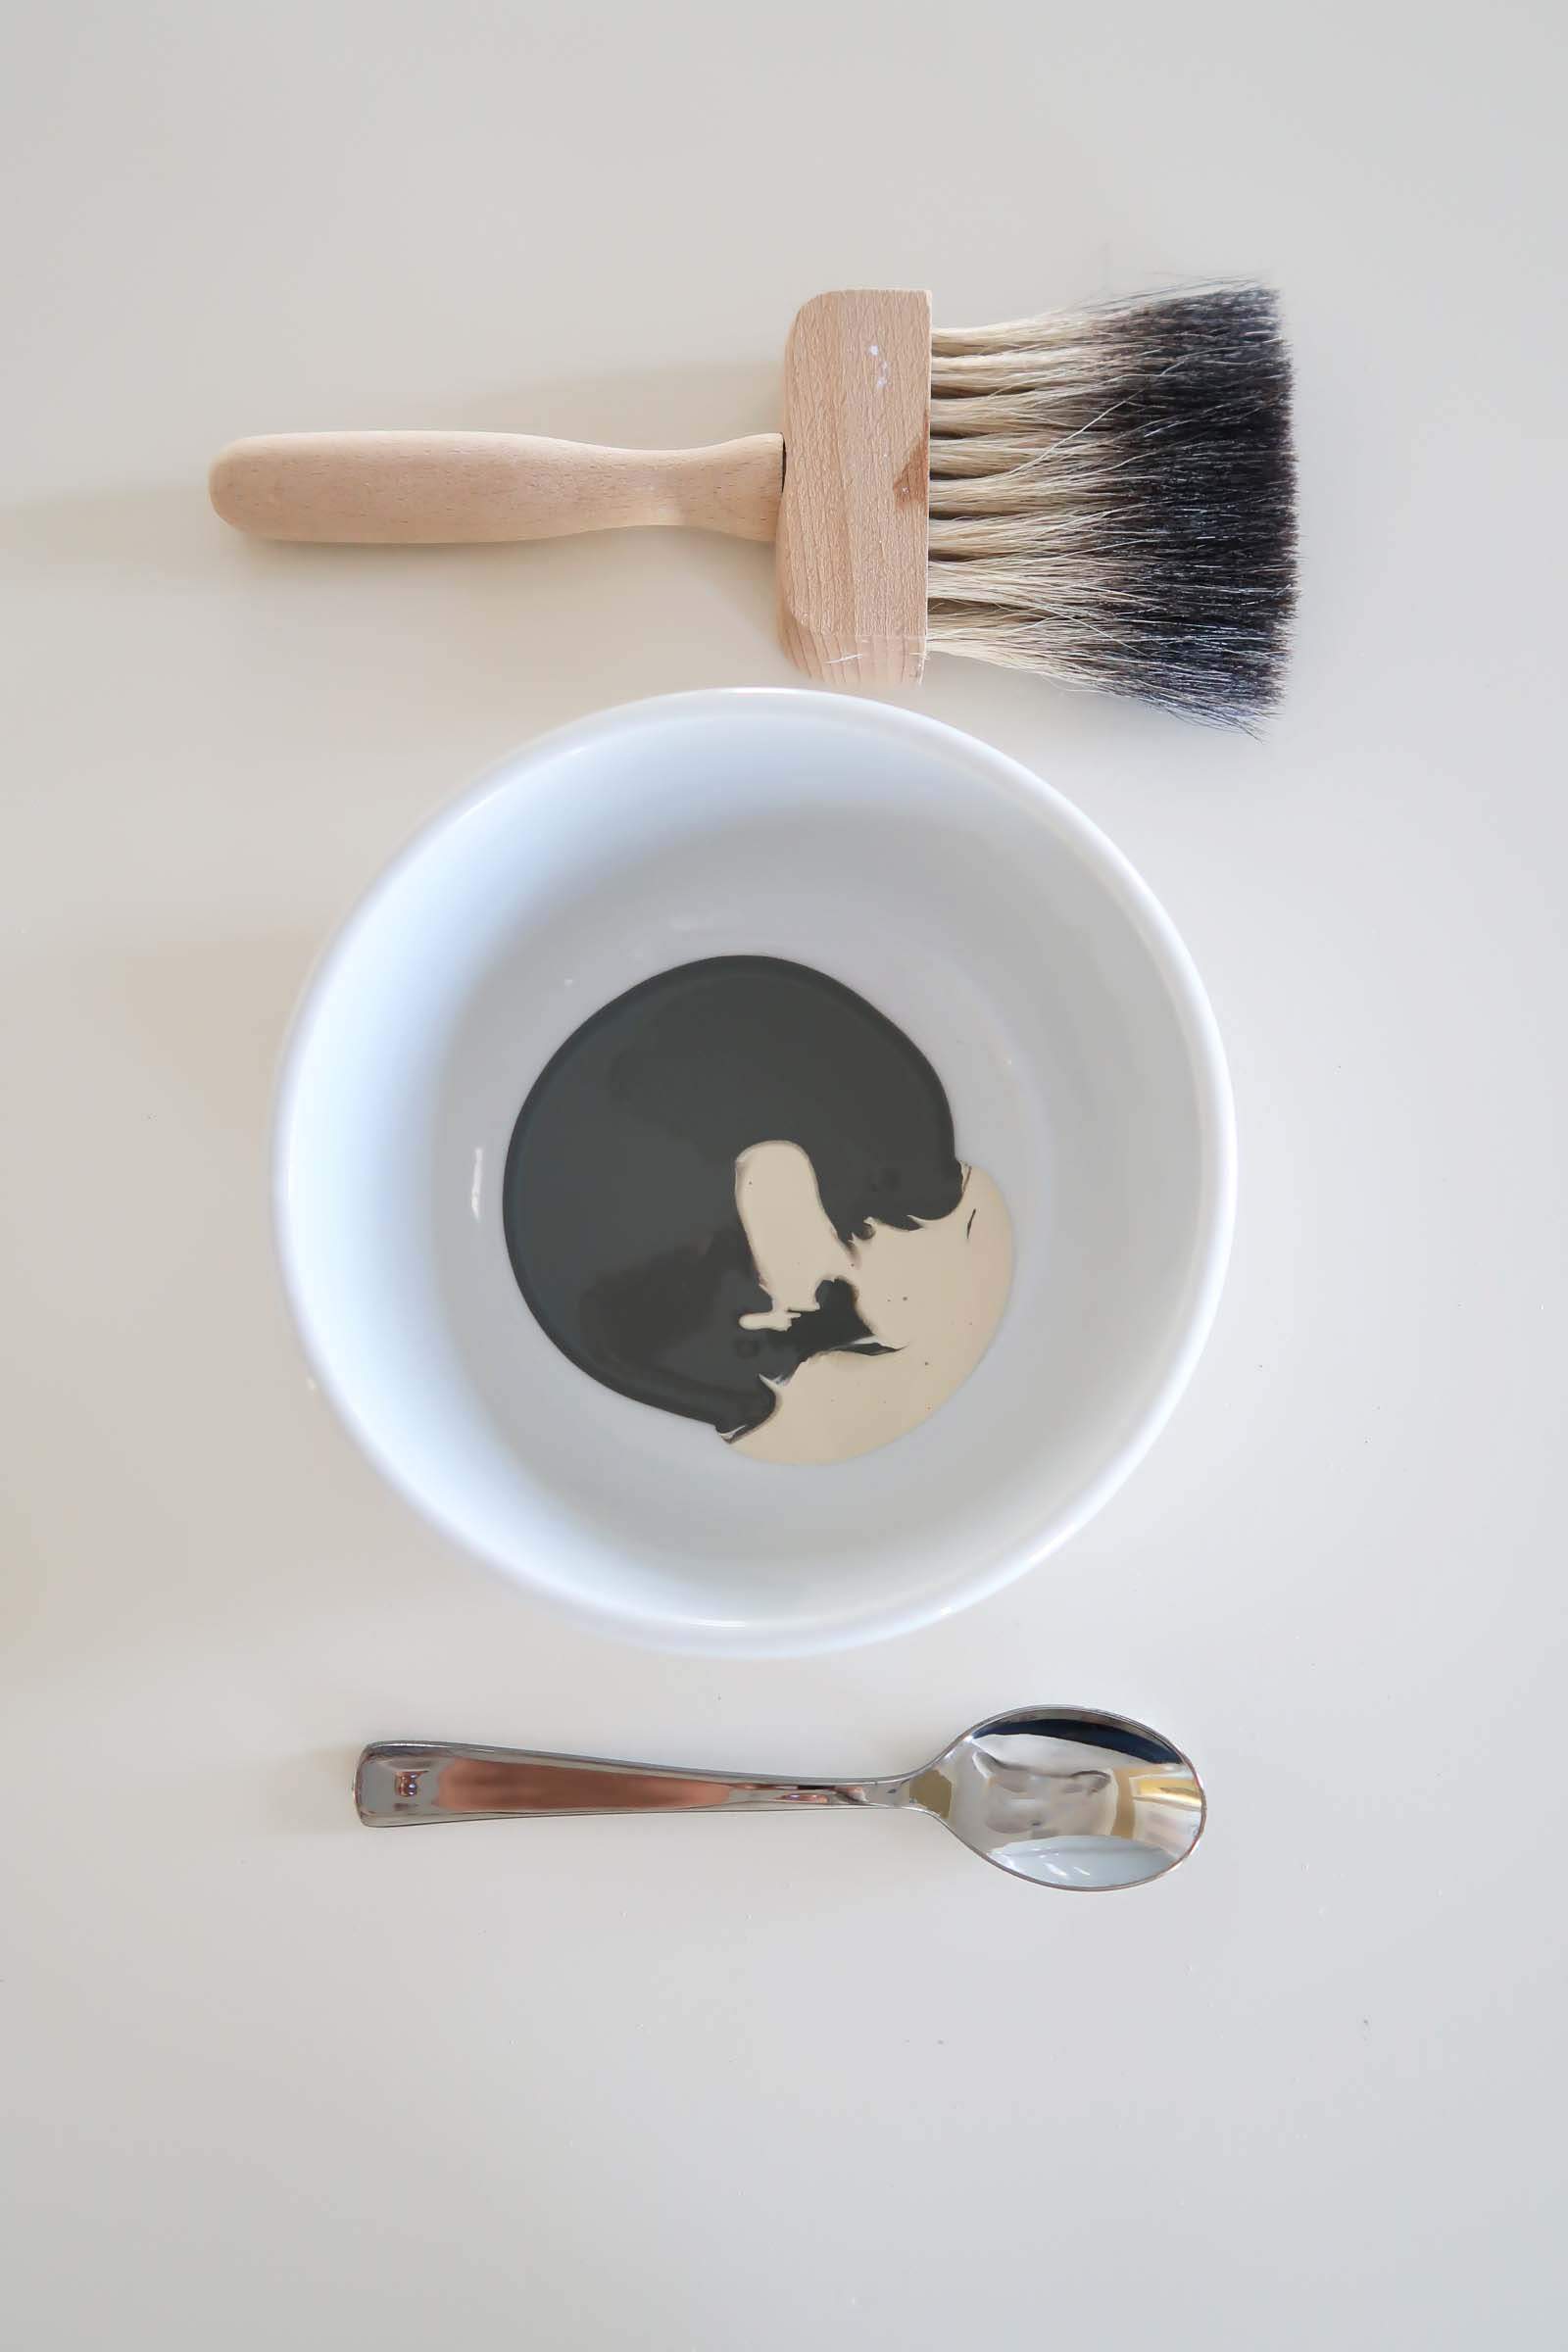
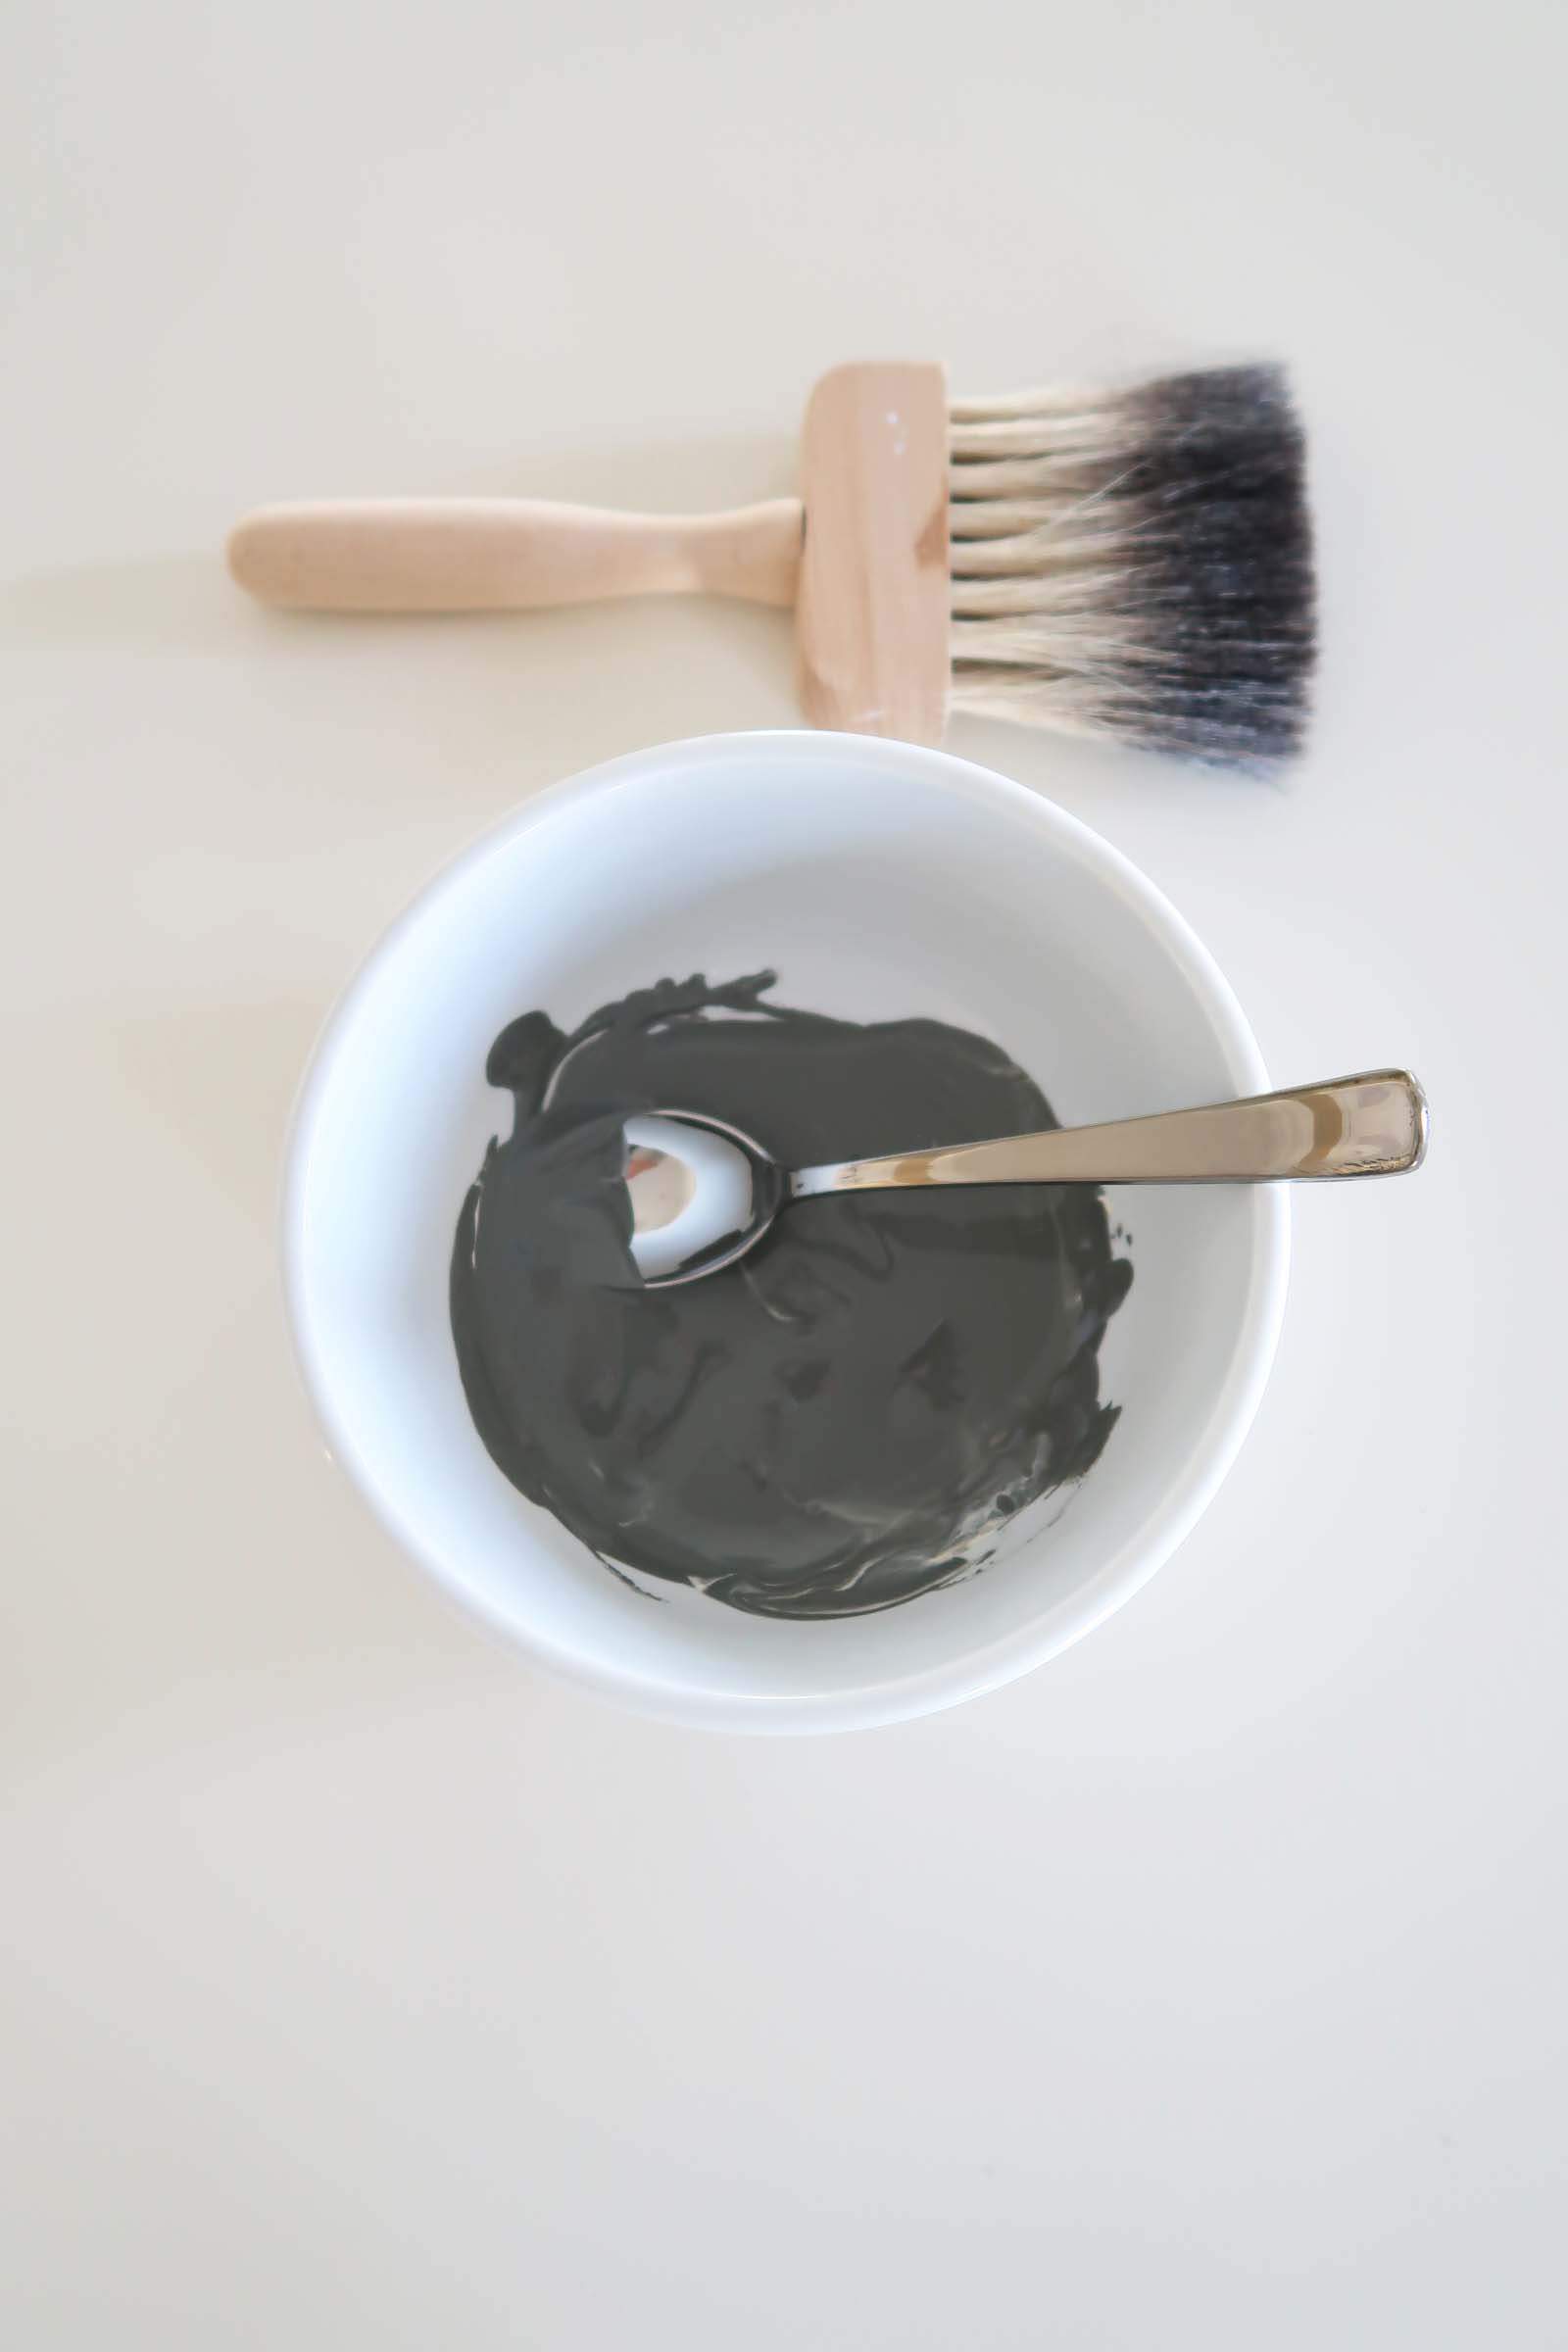
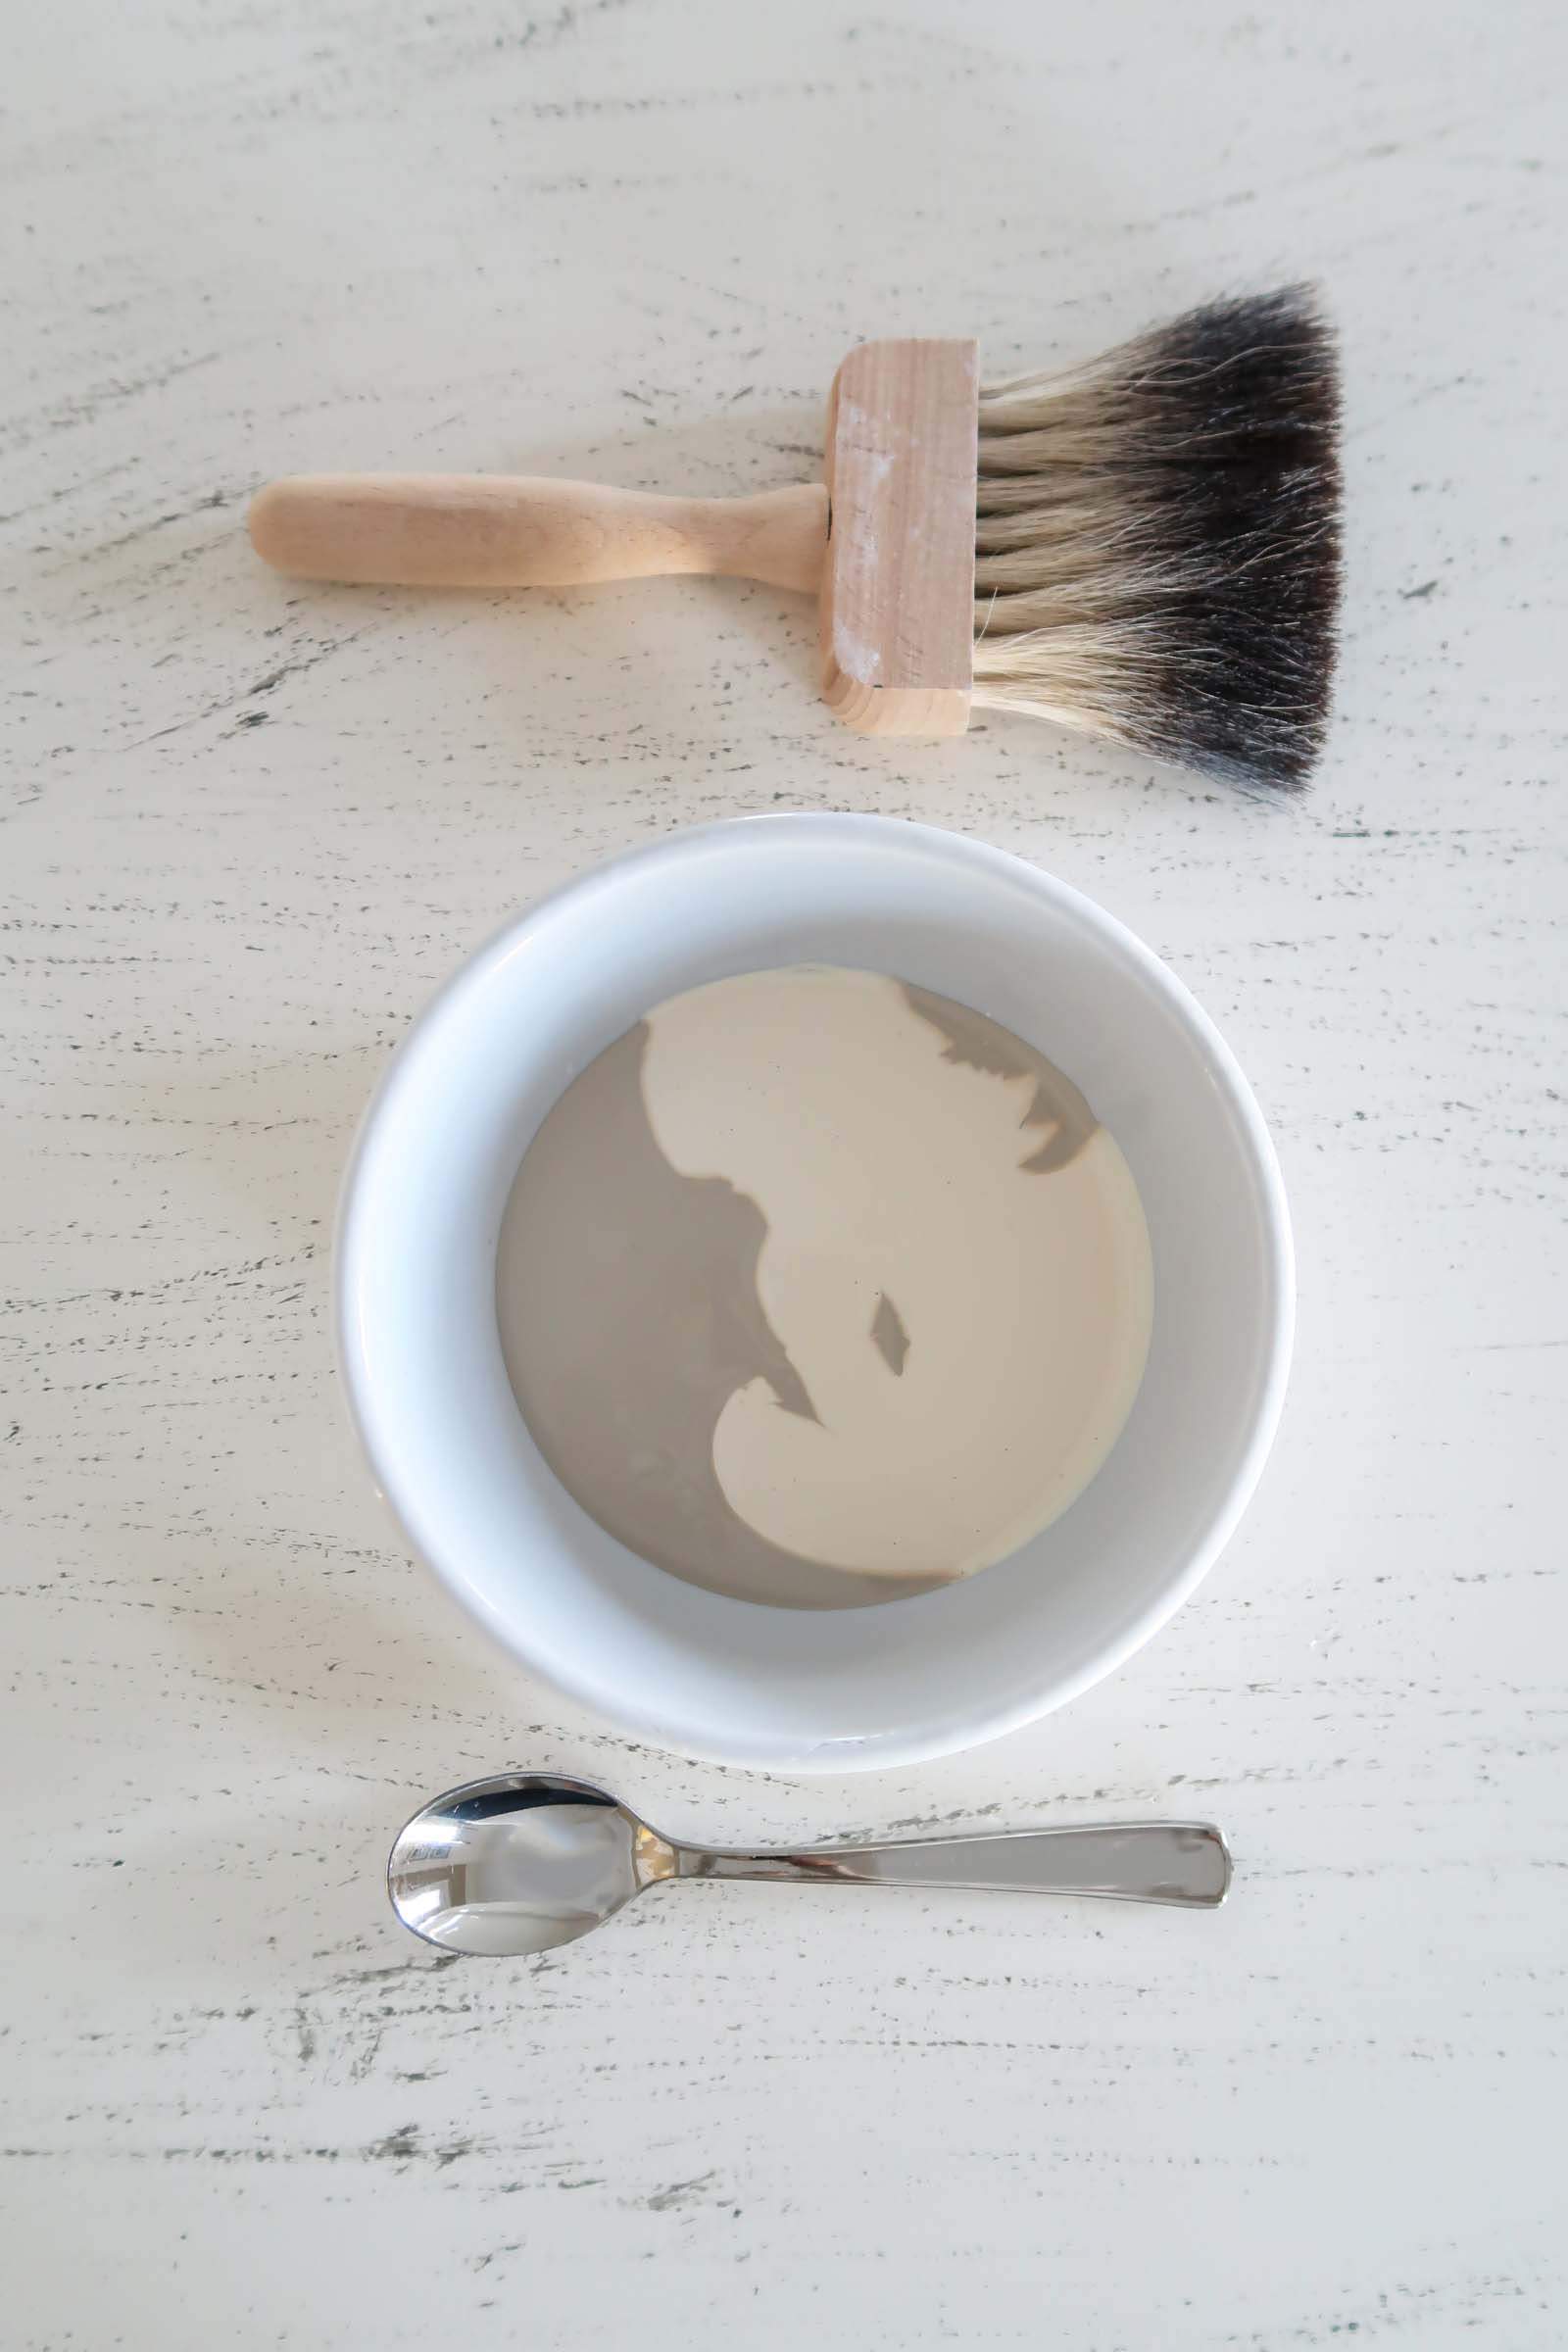
Step 2: mix the first glaze
Using the color Sable Evening (dark gray) mix it with the clear mixing glaze in a 25% glaze to 75% paint ratio. I “eyeballed it”.
Stir until fully combined.
The glaze helps you have more “working time” to wipe or manipulate the paint for different looks or if you make a mistake you can wipe it off!
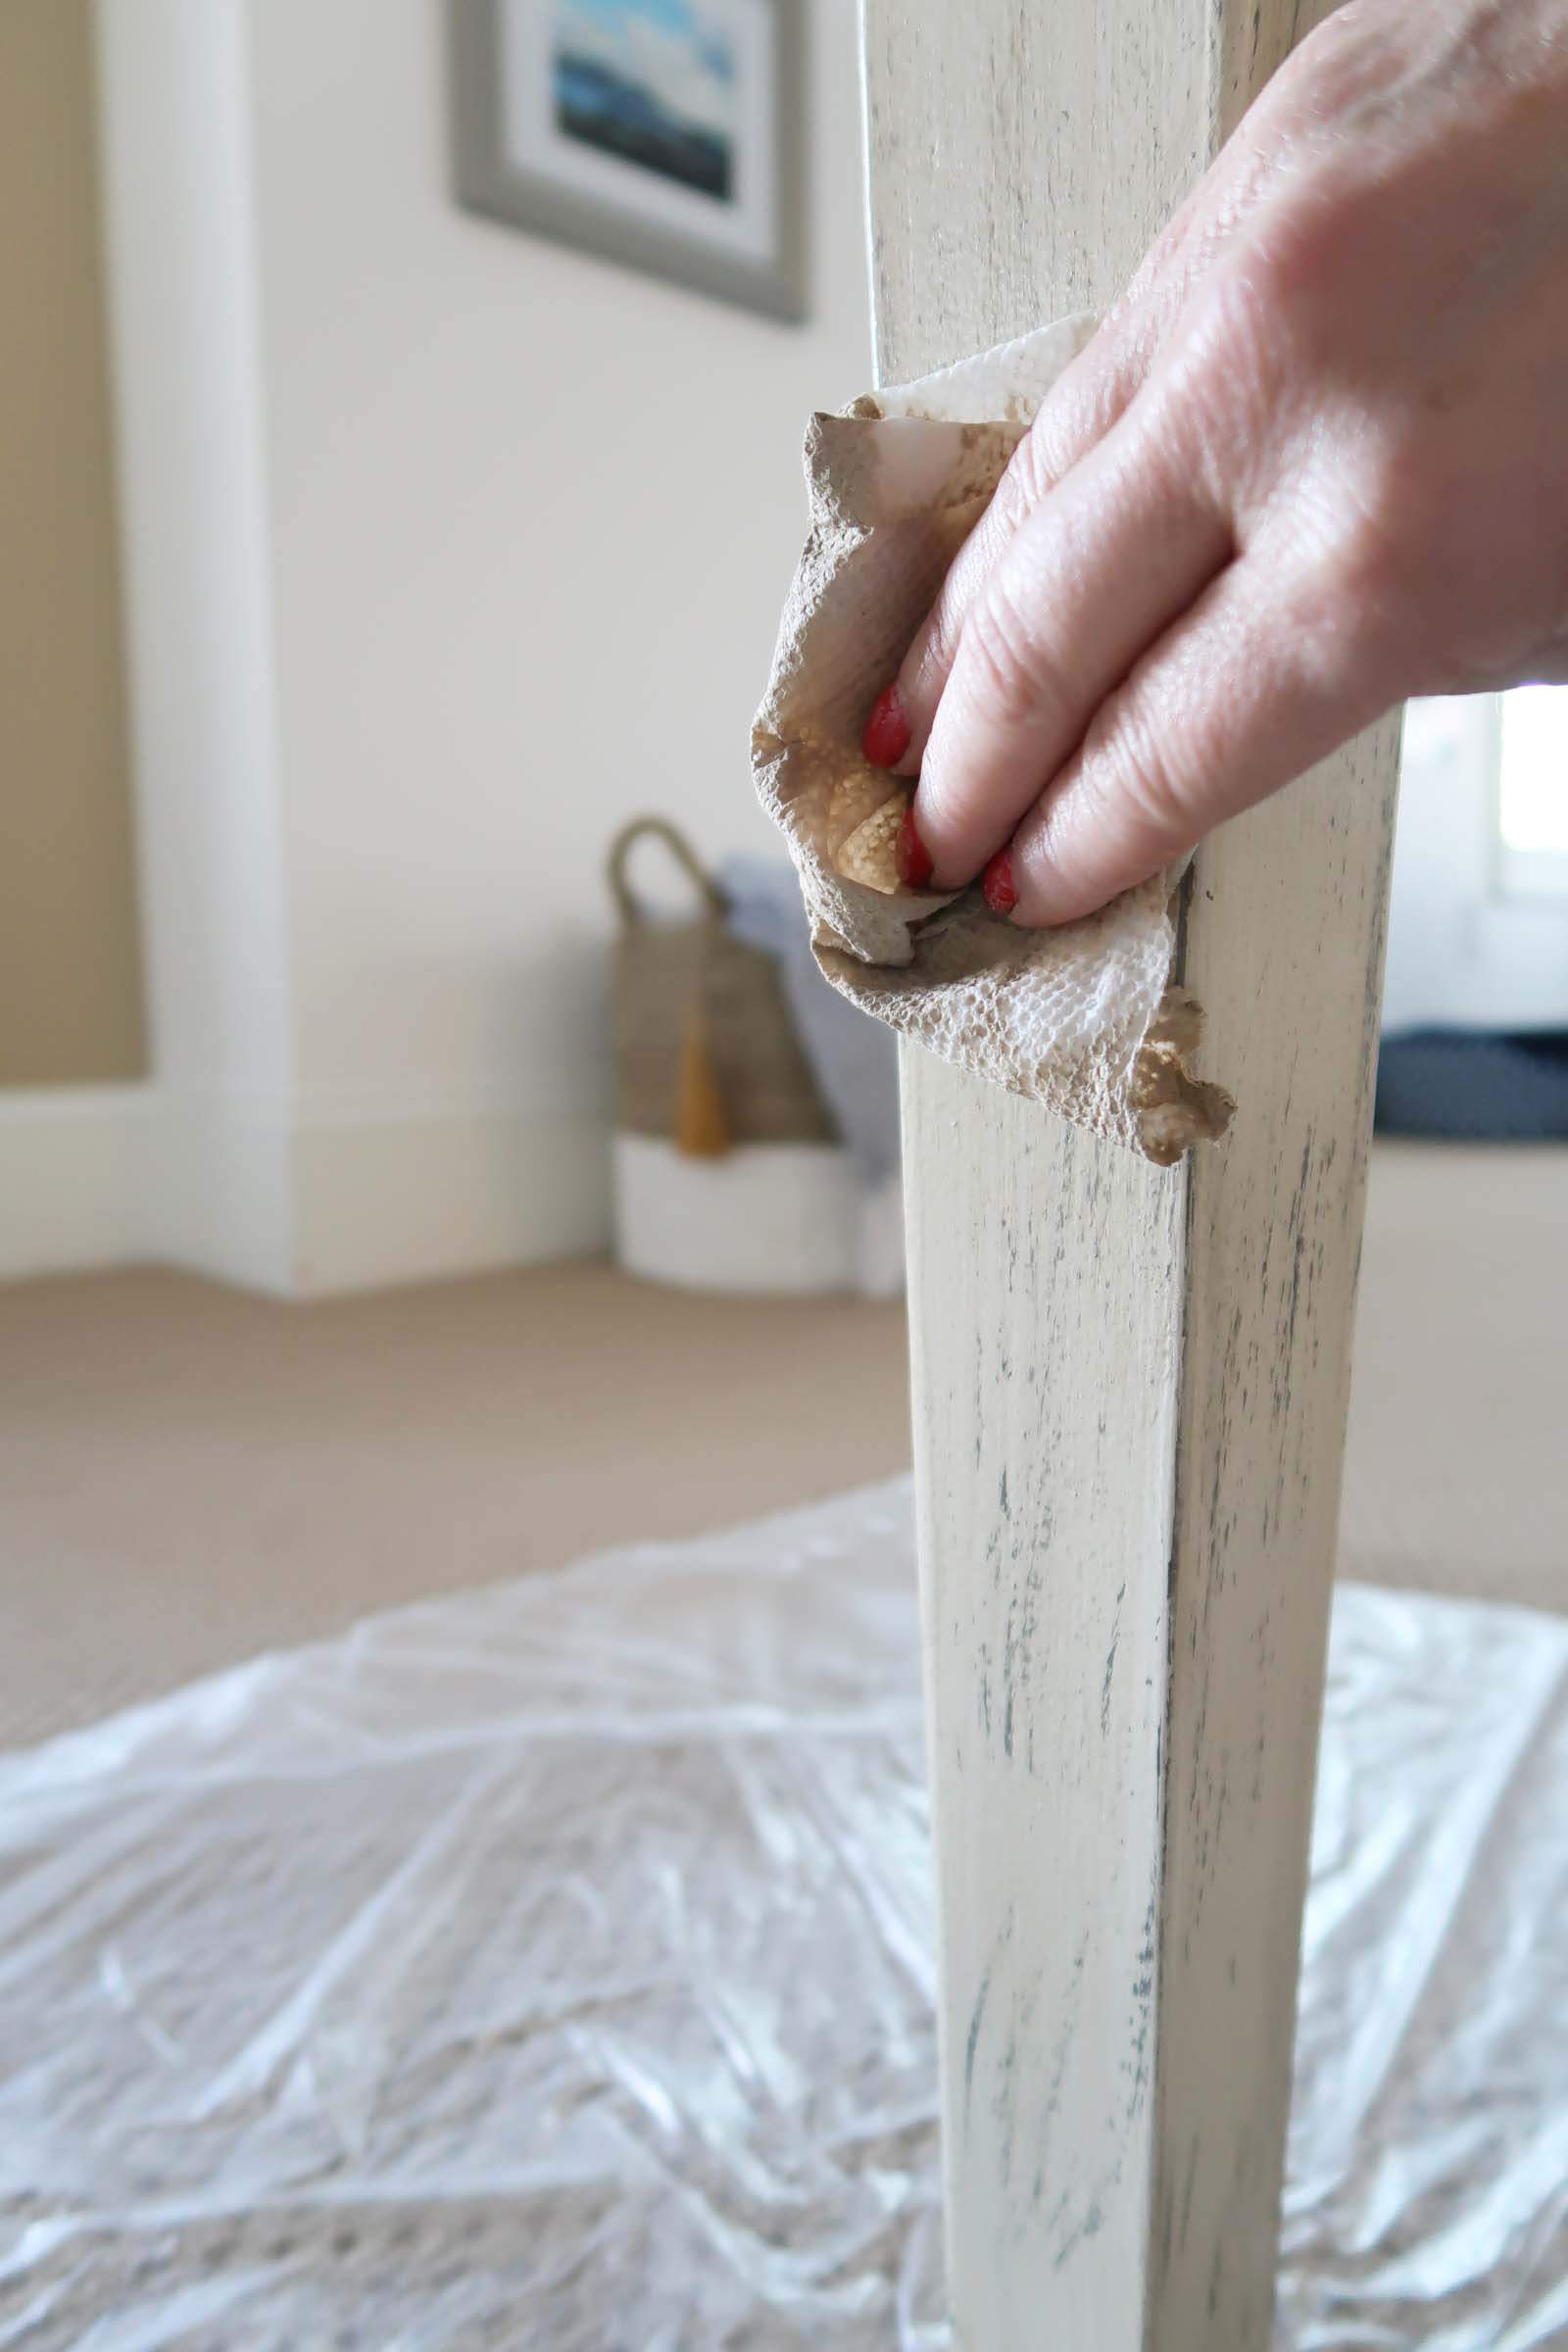
Step 3: CREATE THE FAUX WOOD GRAIN
Dip the tips of the softening brush, which is VERY soft itself, lightly into the Sable Evening glaze mixture.
Blot Excess on a paper towel.
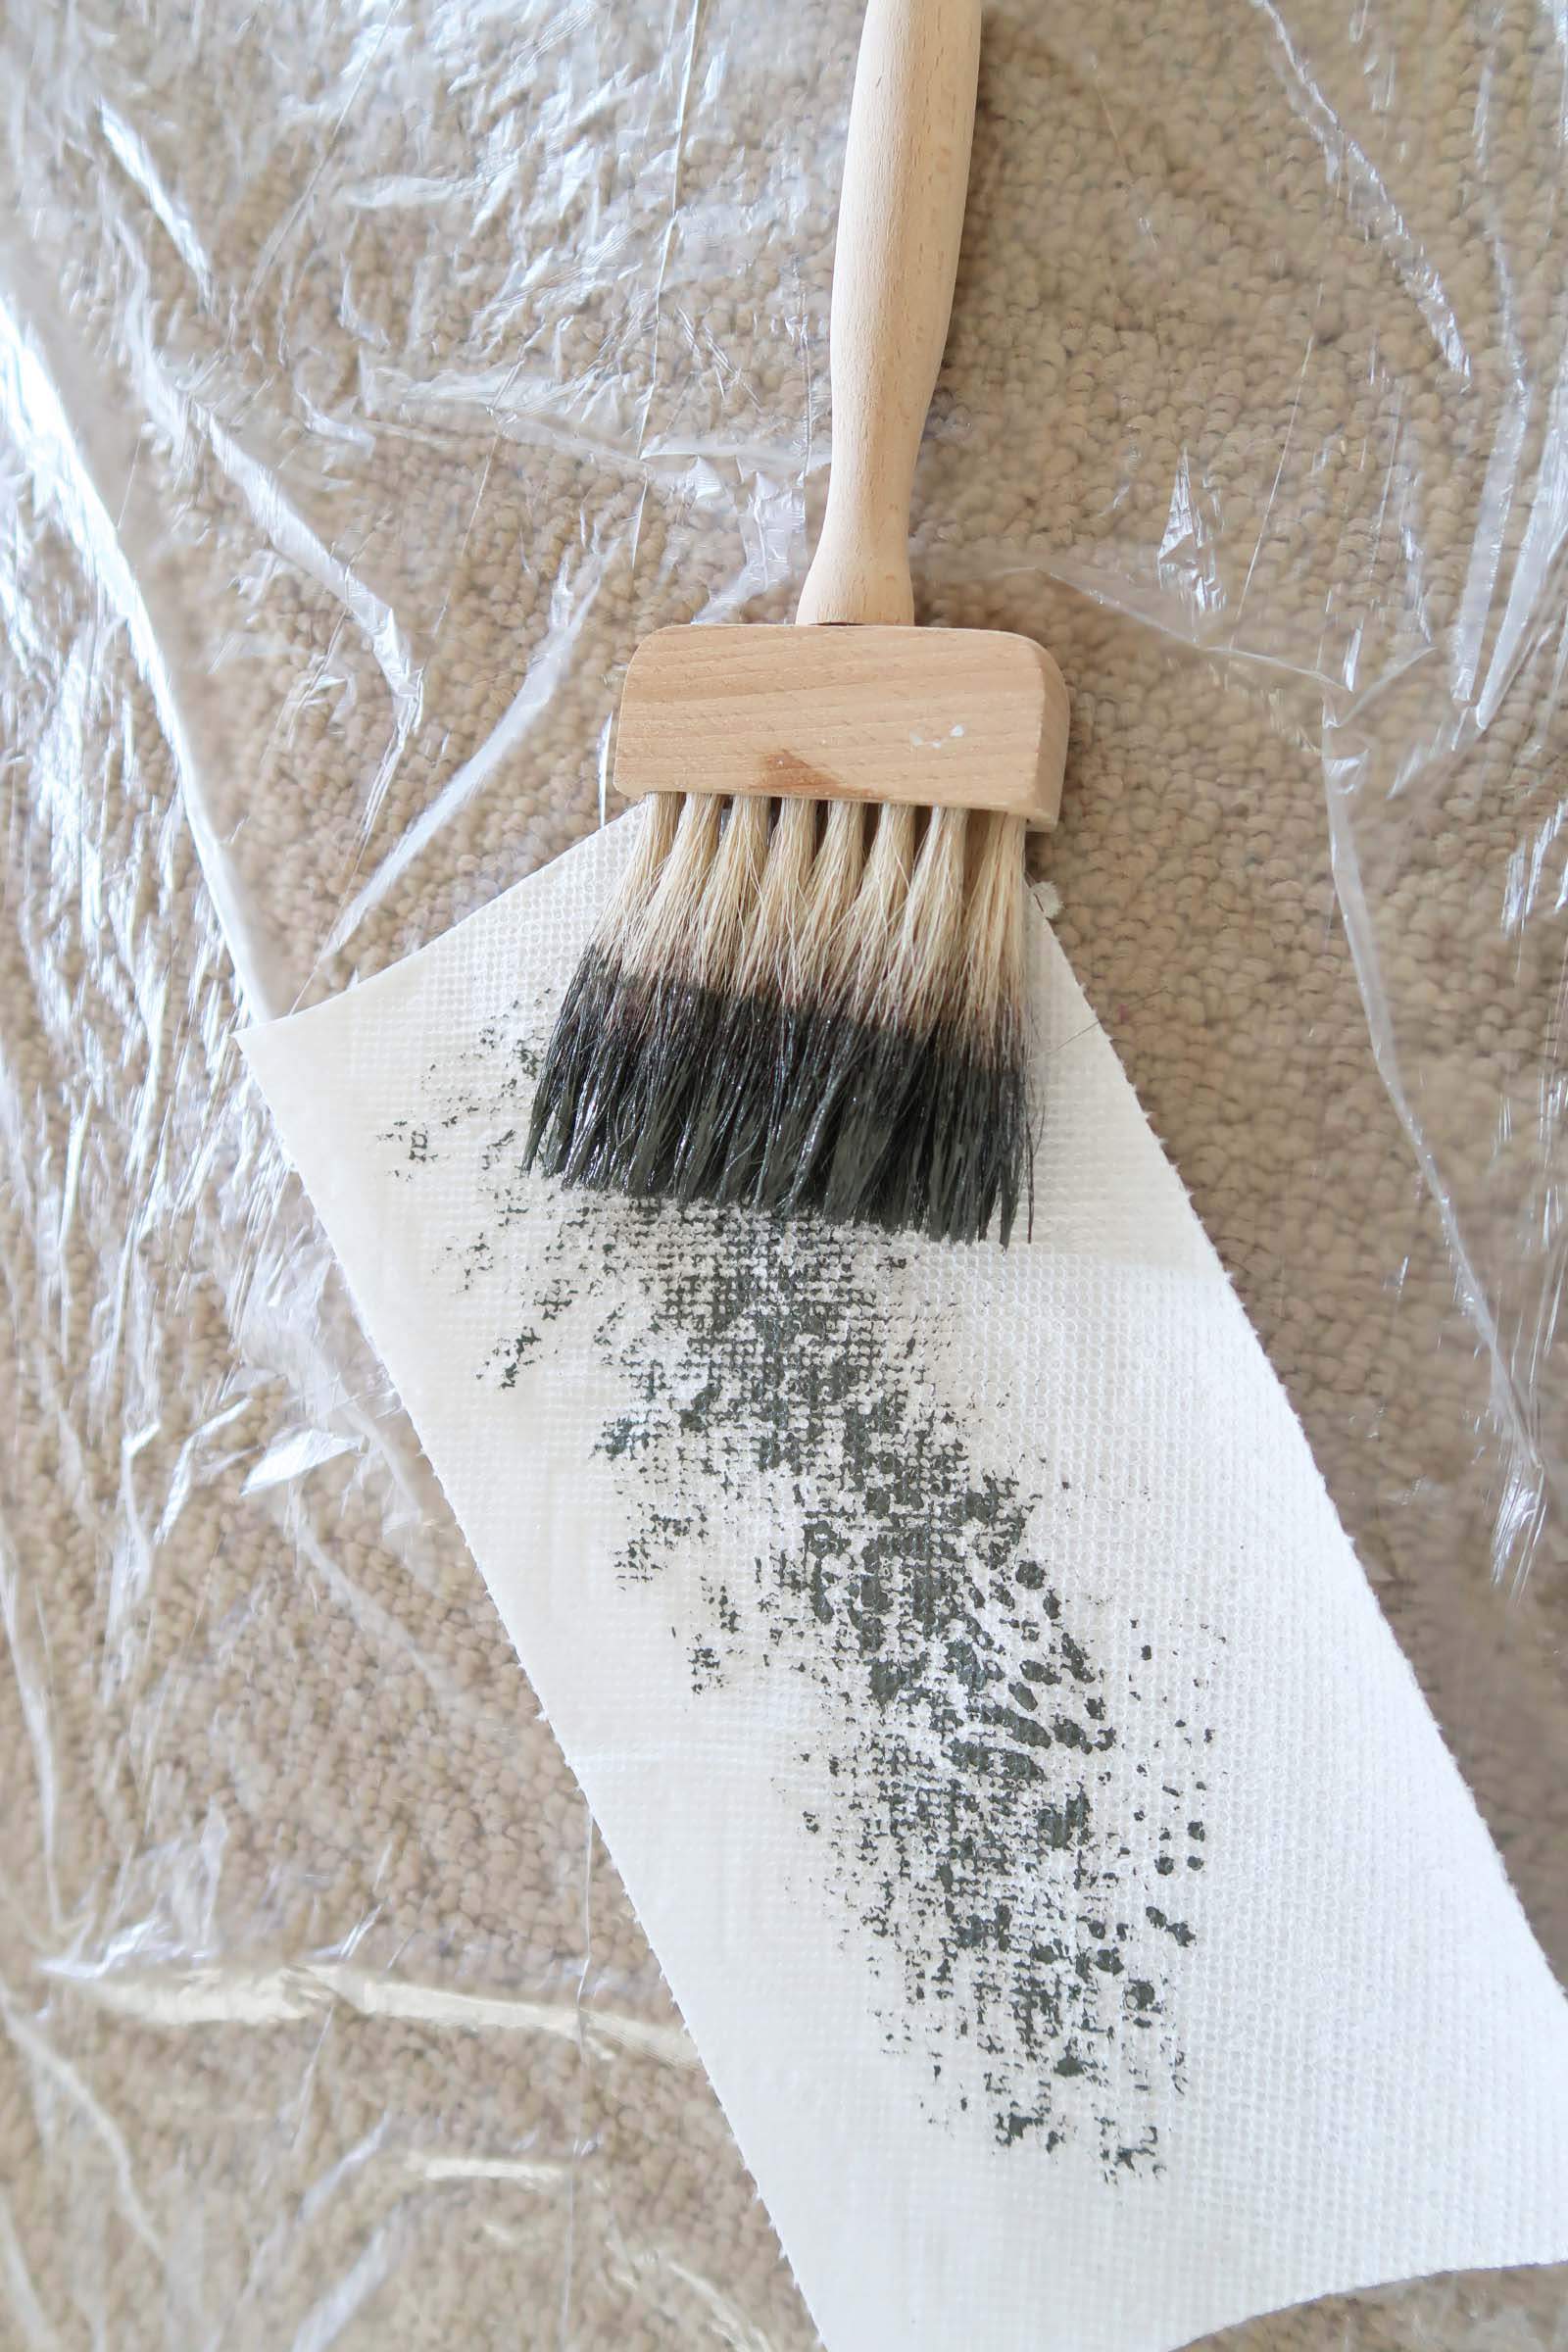
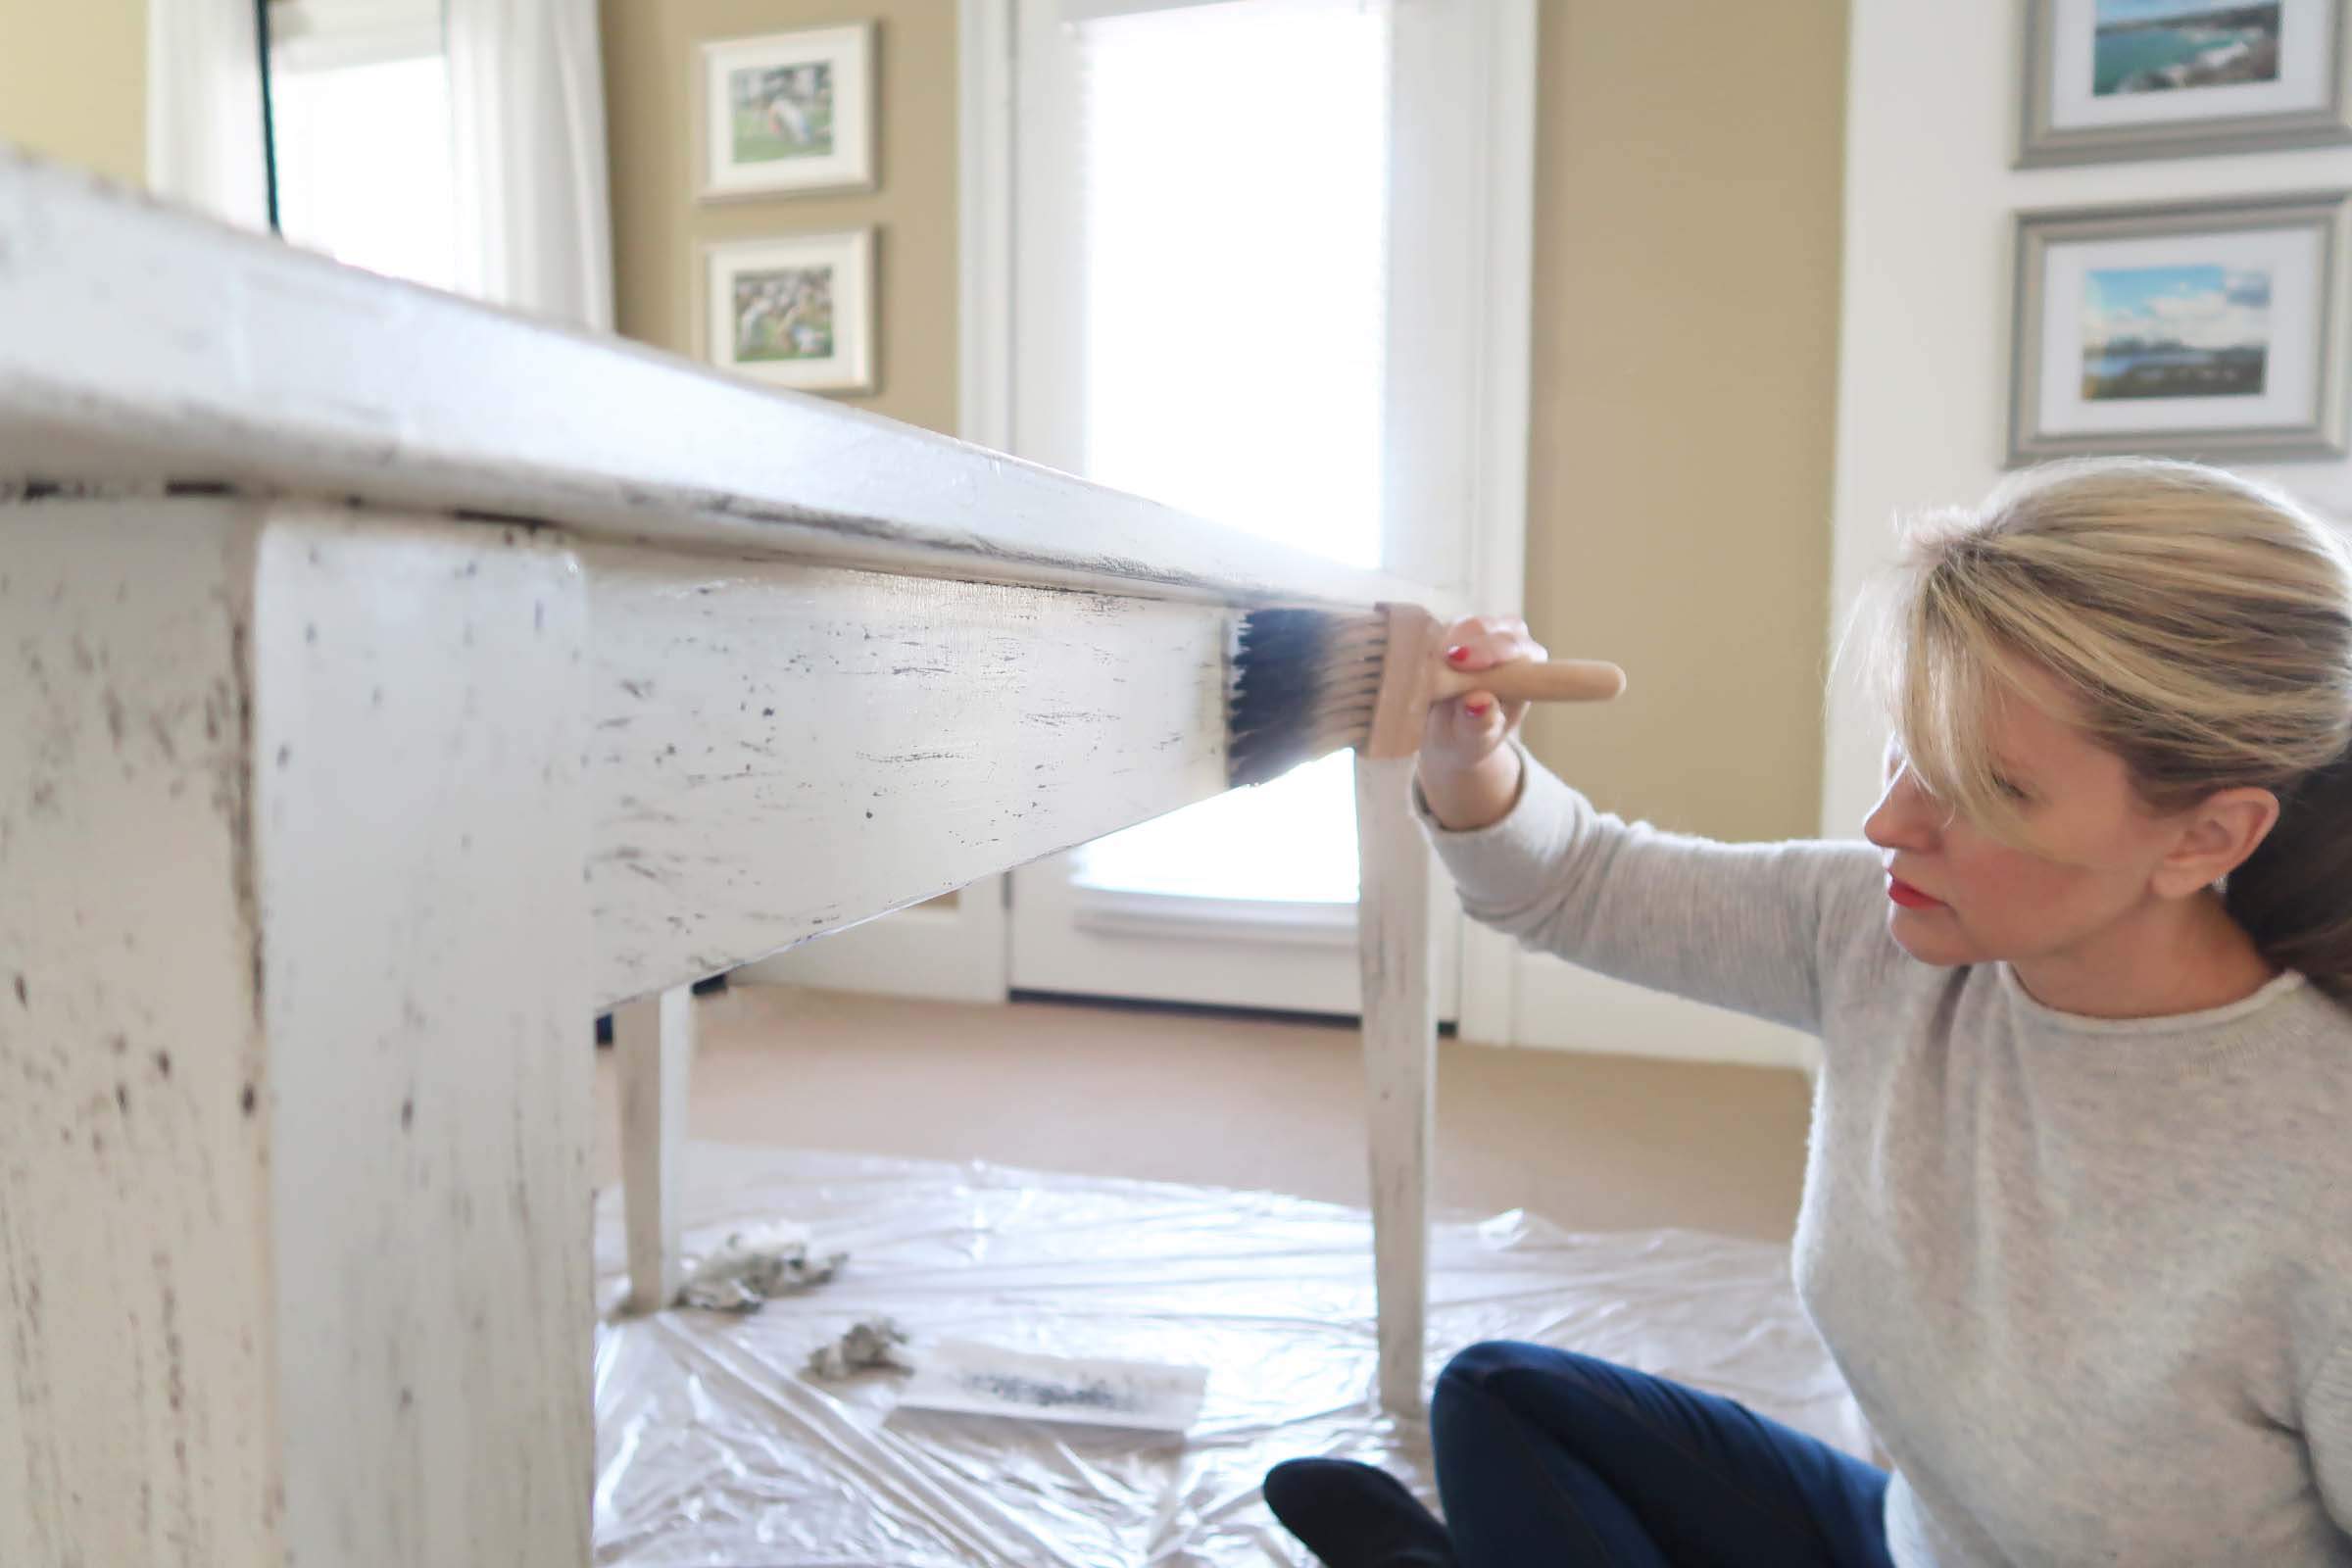
Using an EXTREMELY LIGHT touch drag the brush to create what looks like wood grain. PRACTICE on cardboard FIRST to make sure you like the look.
Work in sections at a time and DO THE TOP of the table LAST, when your technique is perfected 🙂
You can see I am barely touching the surface and skipping along to get the spaced look.
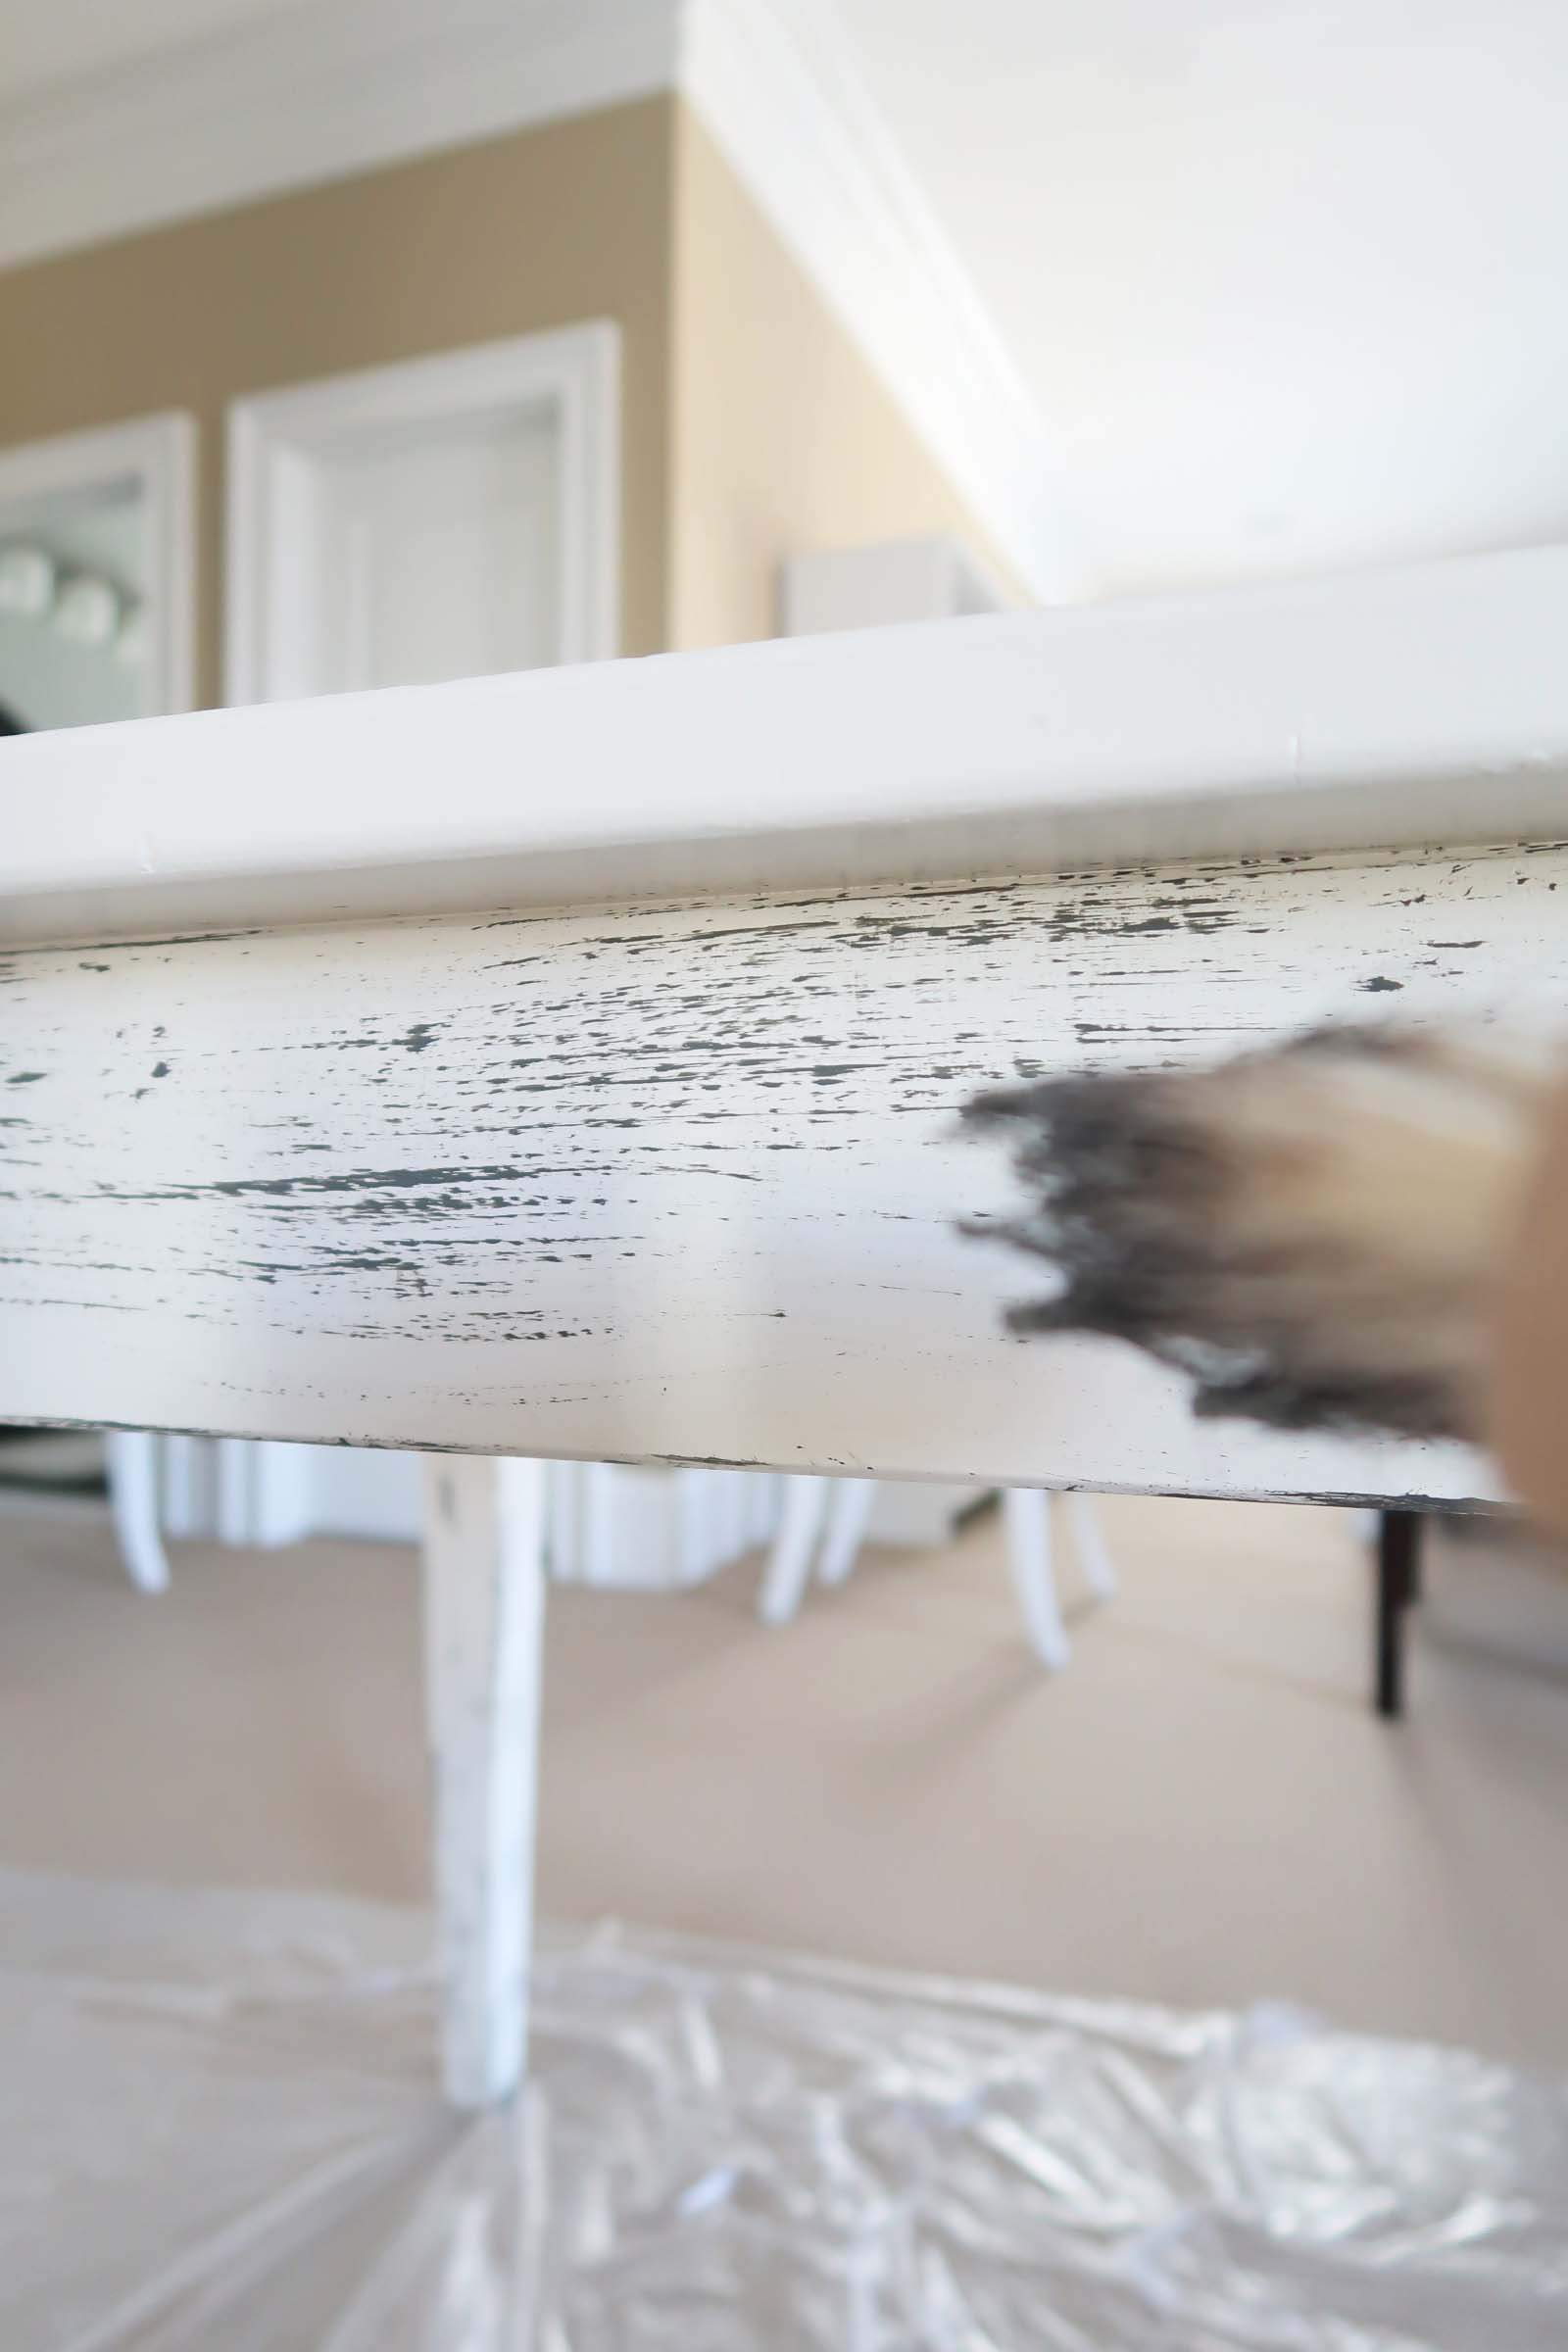
If you over apply or overlap sections like I did, wipe off the excess with a damp rag.

When you are finished, the base “wood grain” should look something like this.
I wasn’t very careful and did some overlapping to create more dimension.
Wash out the brush with soapy water and let the brush and glaze dry OVERNIGHT or longer if it is humid!
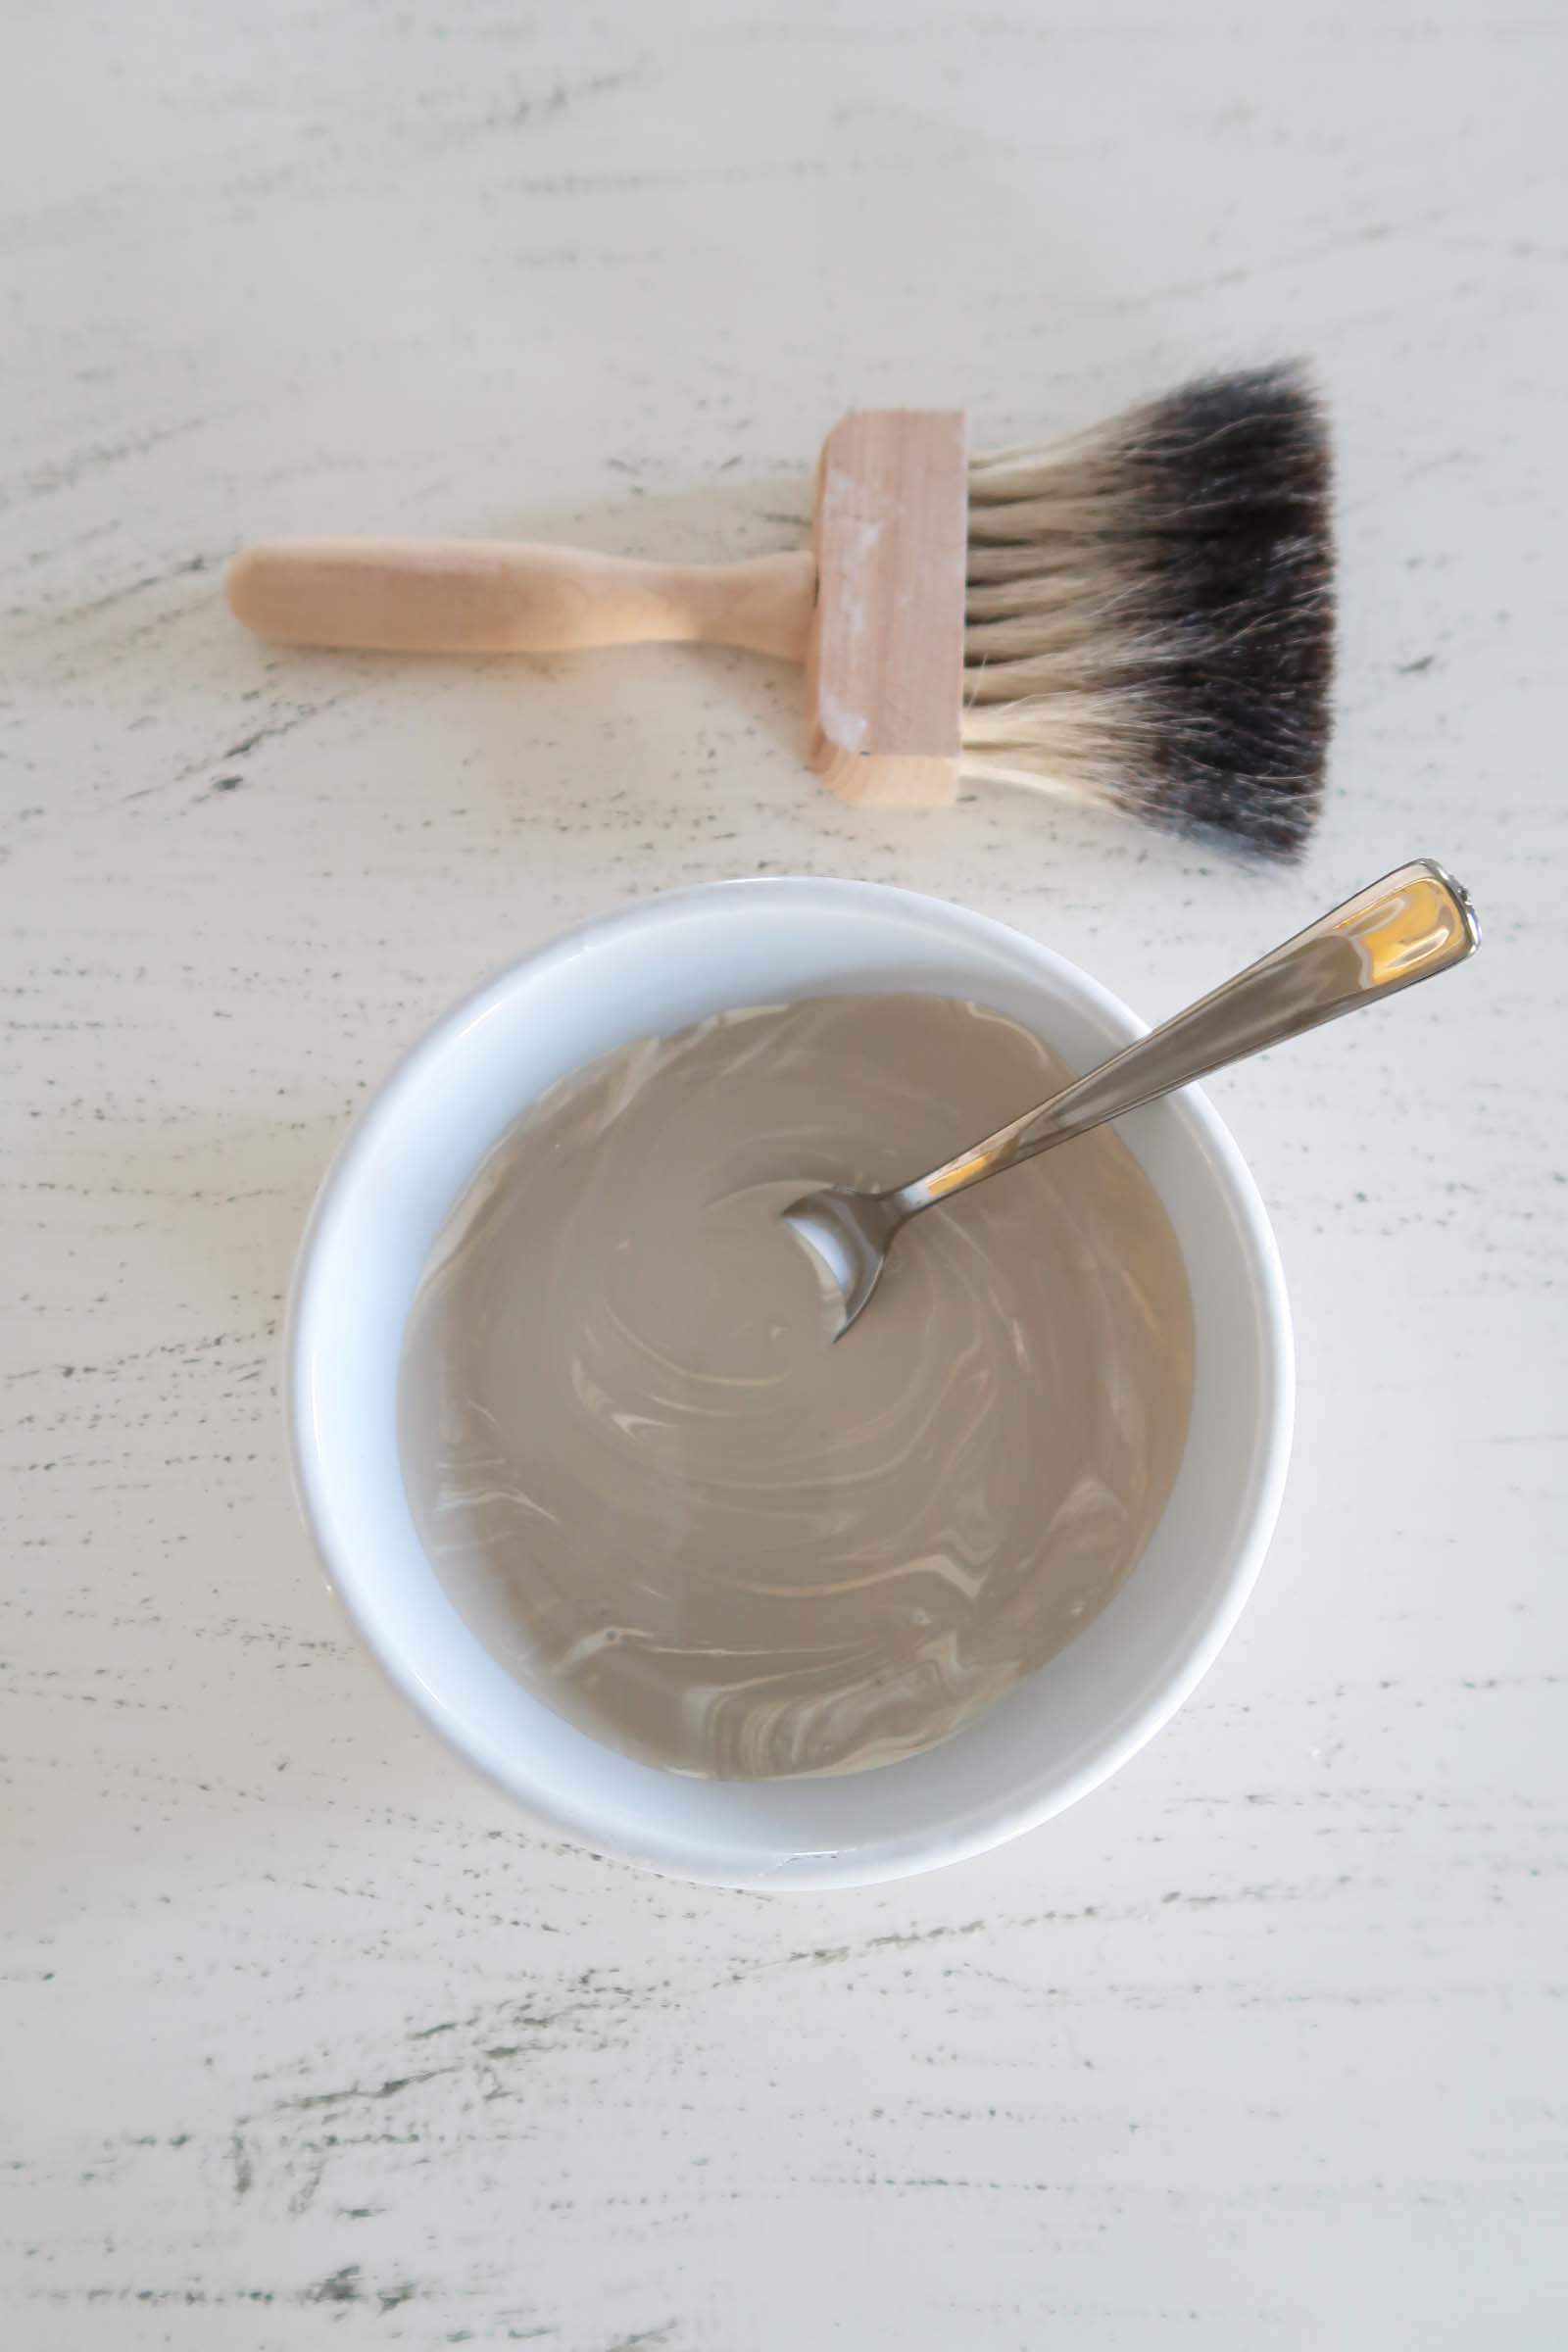
Step 4: Mix the wood toned glaze
Using the color Arid Plains (grayed brown) mix it with the clear mixing glaze in a 50% glaze to 50% paint ratio. I “eyeballed it”.
Stir until fully combined.
The glaze helps you have more “working time” to wipe or manipulate the paint for different looks or if you make a mistake you can wipe it off!
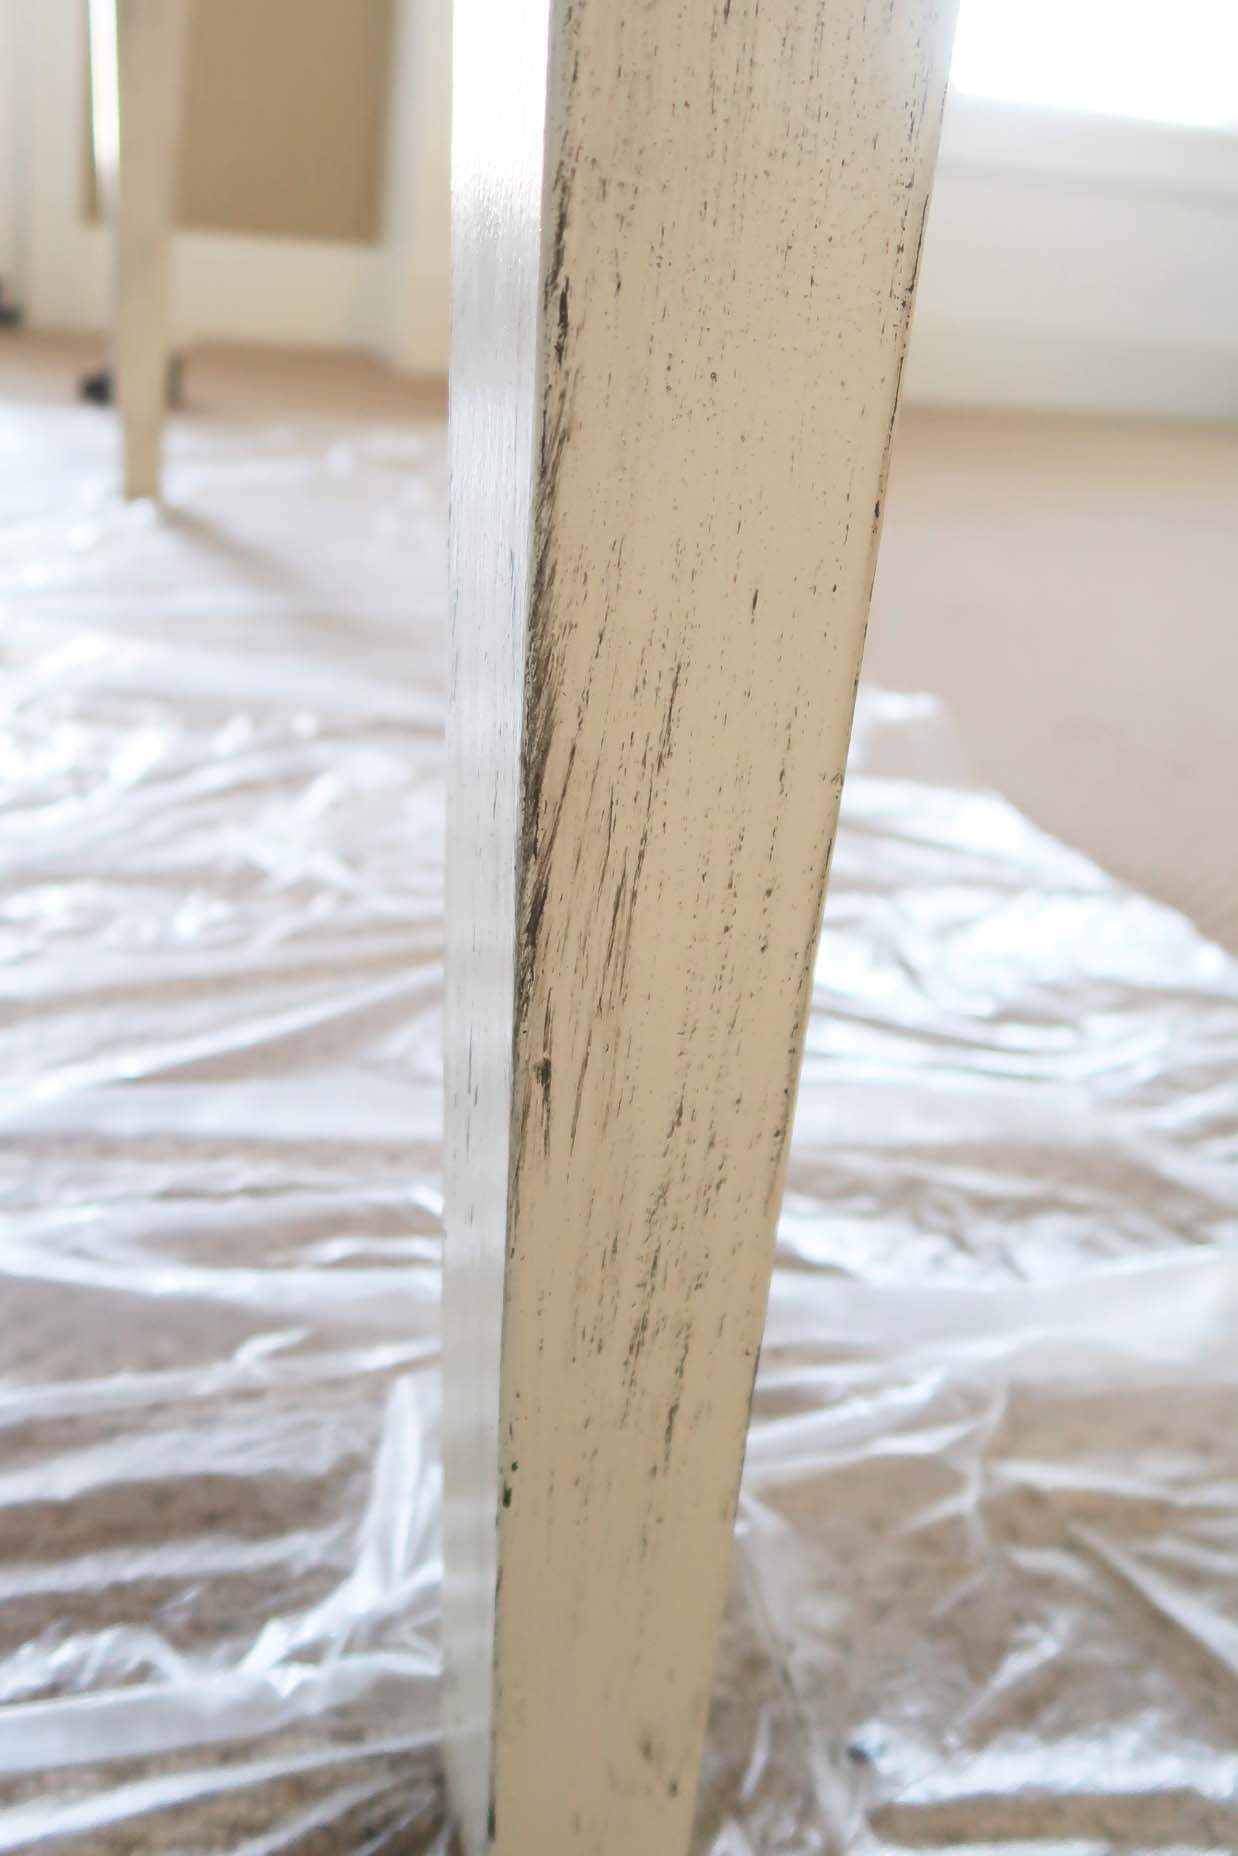
Step 5: apply wood toned glaze
With the softening brush, dip the tips into the Arid Plains Glaze mixture. No need to blot excess.
In CONSISTENT strokes to give the appearance of wood boards, with a medium touch, brush on the glaze.
It is important to WORK fast and keep moving. Go back and forth, back and forth using both sides of the brush.
Don’t overlap the paint much…keep adding more glaze as the brush begins to not apply consistent color.
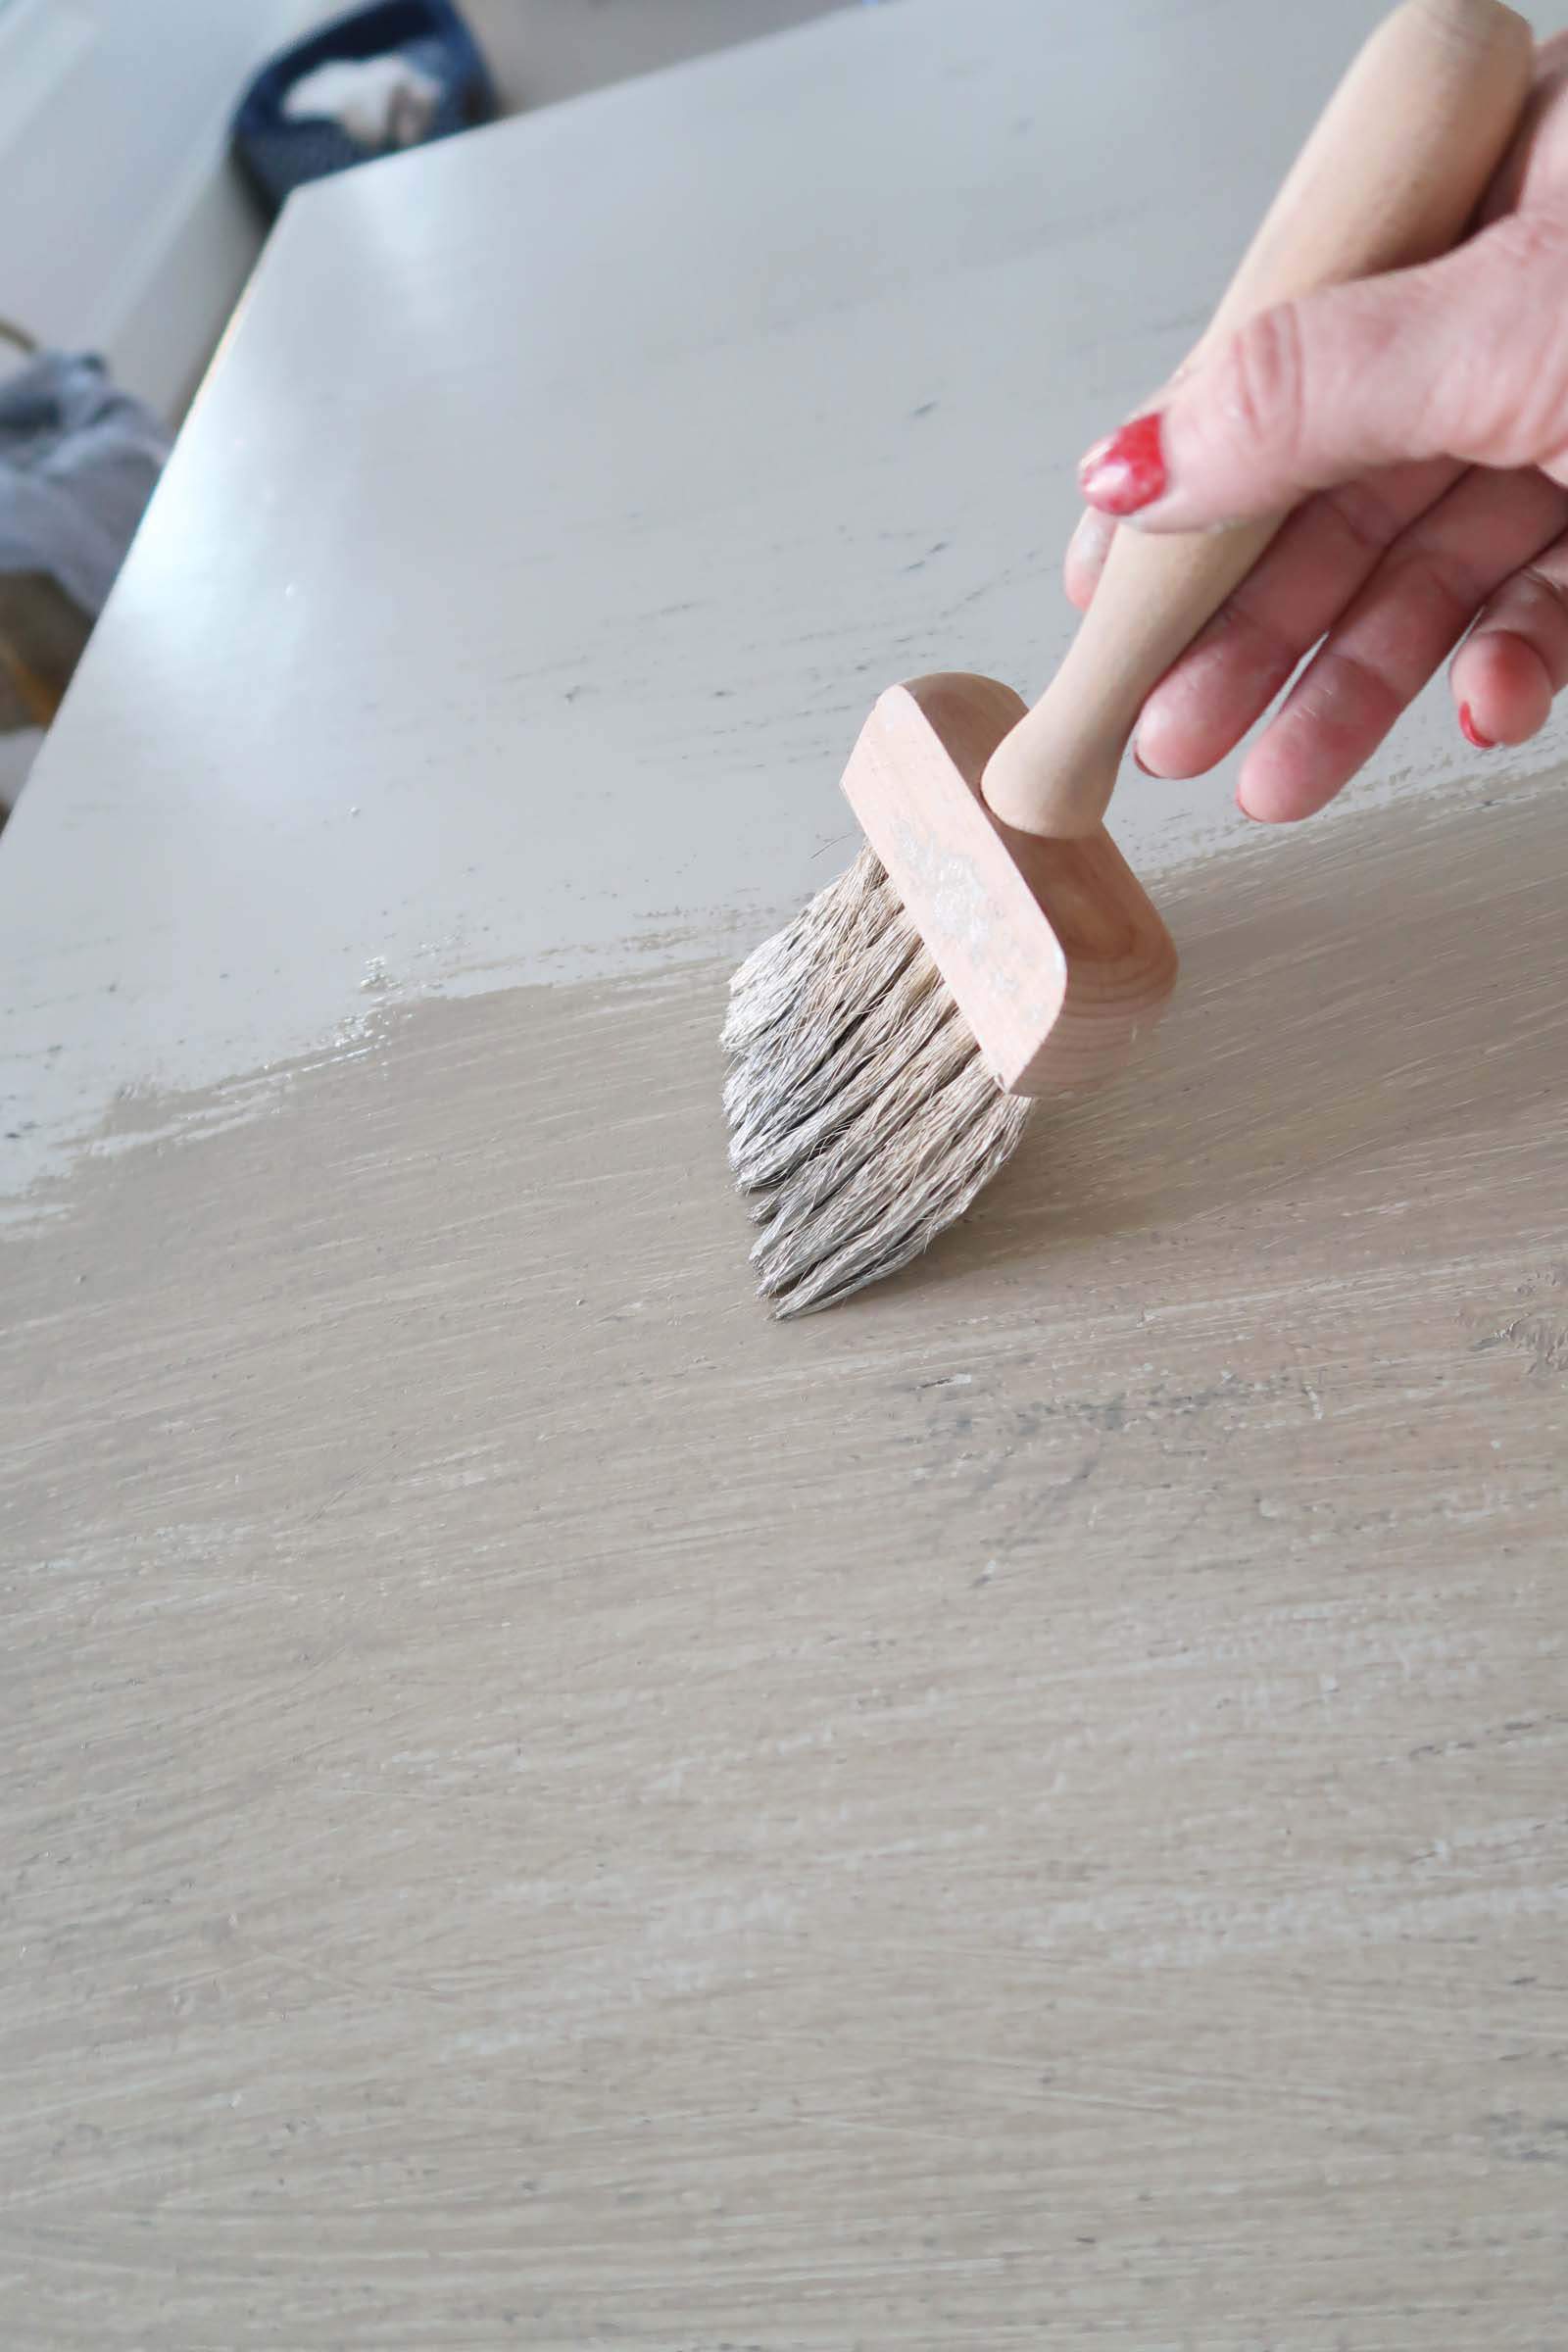
If you over apply? Wipe it off with a rag!
Let the finish dry THREE DAYS and then clear coat with a polyurethane to protect the finish! I applied 2 coats of polyurethane for protection.
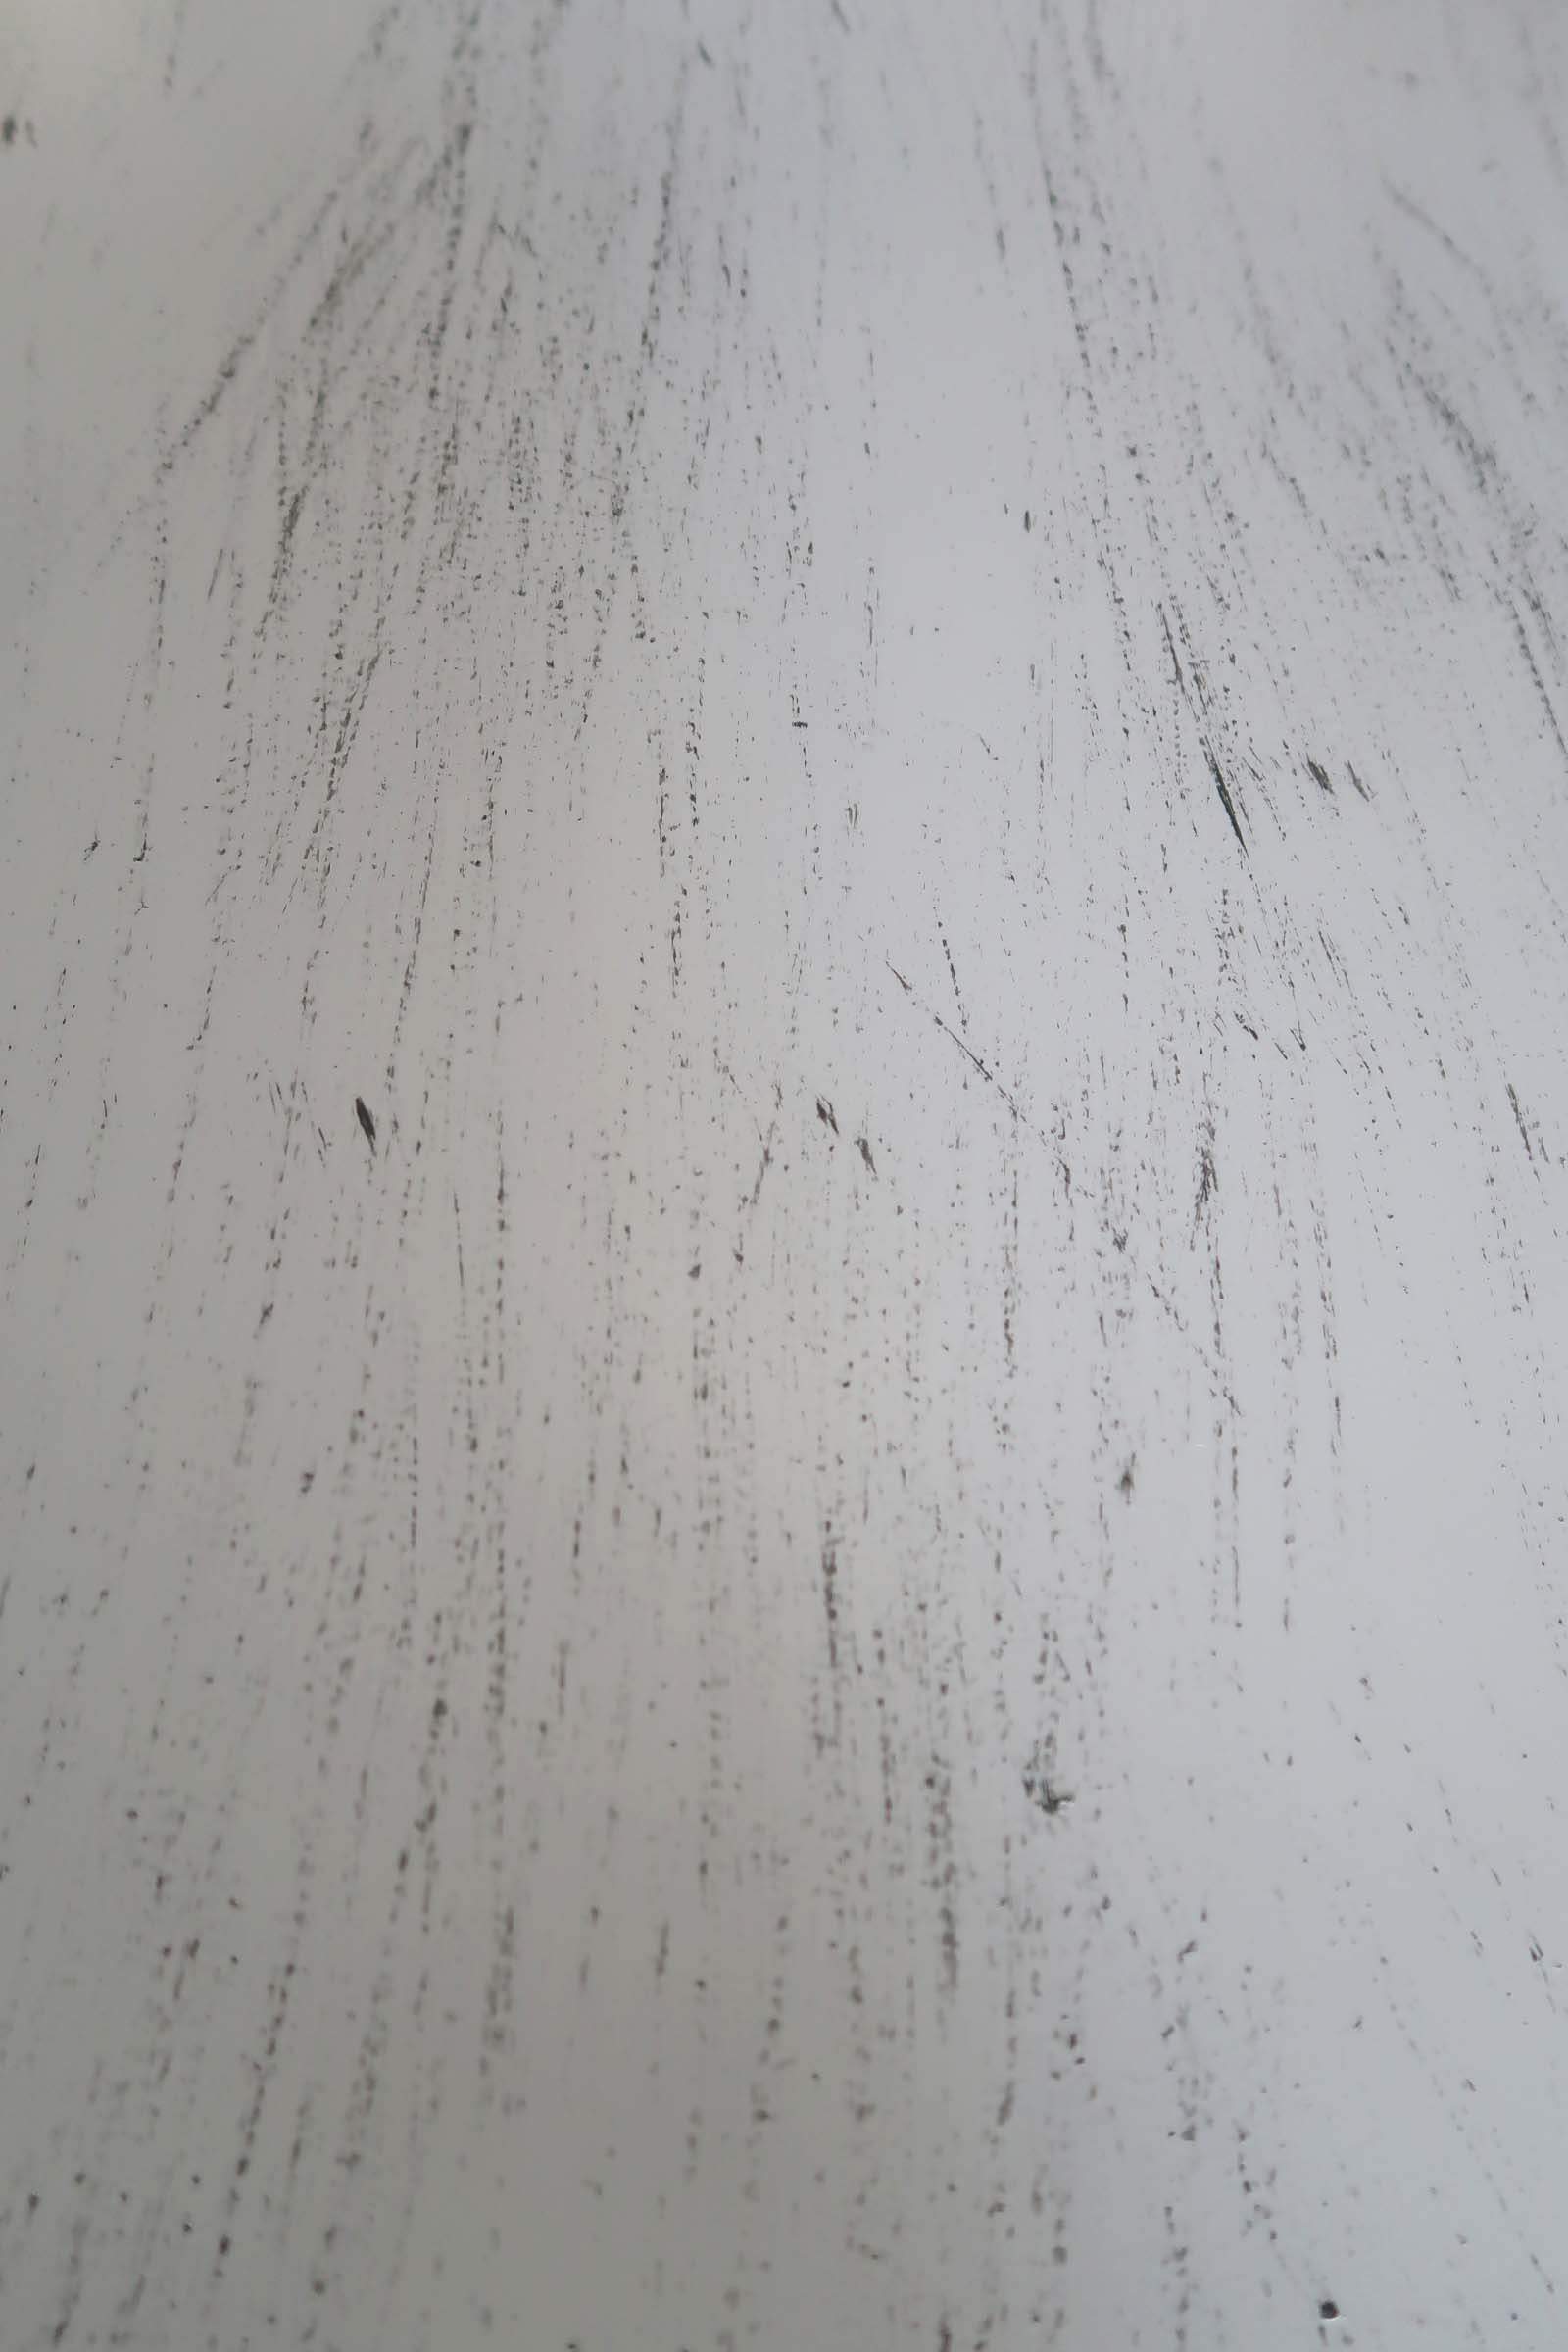
Final Driftwood Gray Finish
Seriously, when I finished I was like WOW I did it.
The look I had in my head turned out to be what I created!
As I mentioned, I didn’t want too gray of a finish, so if you do just pick a paint for the top glaze with MORE gray and LESS brown.
It was a truly easy project and because the clear glaze is so forgiving I was able to wipe off any areas I wasn’t happy with as I was painting.
To me it is amazing that just 3 colors could be layered for so much depth and dimension!

Want to know how to slipcover seat cushions? The Super Simple Way to Recover a Chair Seat
Good luck to you, in trying out a new faux finishing technique. I LOVE creating and learning new skills in my DIY repertoire and hope you do too 🙂
If you want to learn more about Painting Furniture, you may just love My Favorite Furniture Paint and Why
Want more driftwood gray paint tutorials?
Check out these other finishes:
How-to Paint IKEA Furniture the Pottery Barn Seadrift Finish (aka driftwood)!
Easy Driftwood Paint Finish for Outdoor Furniture
How-to Paint the Pottery Barn Seadrift Finish
All About Antiquing Glaze for Cabinets and Furniture
Check out these other furniture painting tutorials!
Pin It for Later!
Please consider following me on Pinterest and Instagram for daily inspiration.
Until next time…
Porch Daydreamer
Tracey
What white paint color is the chairs?
They are Valspar Swiss Coffee (available at Lowe’s)
Hello! I know this post was from awhile ago but I’m wondering if the finish is as light as it appears in the photo? Unless it’s just my screen, it looks almost like a washed or natural wood. The Pottery Barn version appears much darker on their website. The finish you are showing is exactly what I want, not the darker PB. or RH finish. Your table looks beautiful. I have a desk that I am painting and I want the finish to look exactly like your table. If it truly is this light than I know the colors you suggested will work for me. If your table is actually much darker in real life, I will have to adjust my colors a bit. Thank you for sharing the tutorial!
Hi, Cheryl! Yes, it is on the lighter side which is what I wanted. Pottery Barn has a lot of driftwood type finishes and I leaned into the lightest version. My table has been painted like this since 2017 and I STILL love it!
Great info! I am using your “Pottery Barn” driftwood technique to refinish some wood on upholstered chairs. I am curious about the ratio on glaze used in the two steps. One uses 25% glaze, the other uses 50% glaze. I am not familiar with using glaze, so I wondered why the difference in the quantity of glaze on the 2 different steps.
Hi, Holly! As I mention I eyeball the mixture. The more glaze you use the more the color strength will be cut. Here is a post you may like to read that goes into detail.
I was hoping to get this look and color for the top of a Maple dining table I plan to refinish, but painting the legs of the table a black. Would you still recommend doing that white enamel on the legs while doing the top or using a different approach? Any recommendations? Thank you.
You can do what makes you happy and do a solid color like black with the driftwood. It will look great!
Thank you! I’m so excited to try this! Did you sand down the table first or paint right over the black?
I’m excited to hear you will try the finish! Please read step one for what I did prior to apply the driftwood finish steps.
I was wondering if you could recreate this look over a chalk base paint ? I’m trying to paint over an IKEA furniture and in my experience chalk paint goes over it super easily but I don’t want a matte finish to my piece of furniture I rather create this faux wood look over it could it be possible ?
Do you think I could paint my stairs/hallway with this? I’m not sure if it could take the wear and tear. I have oak floors now and would love to lighten them up.
I love the look you created. I am all set with starting on my kitchen table tomorrow. I was wondering if you rolled on the Light Raffia or used the Wooster paint brush. Did you also brush on the clear coat?
How important is using the ceramic bowls?
You did a great job explaining all the steps and the pictures help so much.
Thank you for the inspiration!
Kathy, Thank you!For Valspar Cabinet enamel, when hand applying, I always use a foam roller for the larger surfaces and then the Wooster paint brush for the smaller areas. I did brush on the clear coat, with the same Wooster Brush 🙂 I like to make my tutorials pretty, so I used my everyday white bowls. You can use any non-porous plate or bowl.
I want to try this teachnique achieving a great/sea salt washing the end. Would it work if I used the two first steps and colors, but just replace the top glaze with sea salt color. Let me know how you think it would come out. Thanks.
It sounds like it could be pretty!
Thank you so much! I’m going to give this a go on an old oak entertainment center that I’m repurposing for baskets of toys in the playroom! I do have one question. It appeared that when applying the coat of arid plains you applied it perpendicular to the wood grain strokes… is that correct or does it matter? Thank you!
It may be the angle of the picture, as I took it left handed! No, I am definitely going WITH the grain on all surfaces whether horizontal or vertical. Hope that helps!
Thank you! That does help! Looking at your finished product I couldn’t imagine that you were going opposite your other strokes!
Beautifully done. Great explanation. Thank you!
Deb, I’m glad it helped! Thank you.
Oh my goodness, this is just what I’m looking for! Thank you for being so specific and to the point. So often I read tutorials that have a long story and barely get to the project details! I’m planning on making my table a little more grey of a finish but wow your finished product would fit perfectly in my kitchen, as well. I can’t wait to get started!
Yay! I’m so glad you found this helpful. Once I made over one piece, I just kept going because the technique is easy and forgiving. Good luck 🙂
Do you have another suggestion of where to get a softening brush? The one suggested is no longer available. Thanks!
Man, it was HARD to find one. Here is a link to an alternative version with free shipping. https://amzn.to/2Q14E47
Hi there! Awesome tutorial but this brush is also out of stock :/ is there another kind of brush you’d recommend?
I the list of supplies, there is a 2nd link for another softening brush. It shows that it’s available.
You did an excellent job with this tutorial! Both the instructions and the pictures are detailed and consice.
I used this technique back in the ’60s to paint the furniture in my bedroom. The paint store recommended it. I haven’t seen it mentioned in years. Back then, I kind of considered it fake, but now, everything that’s faux is on trend. Love it!
Karen, thank you! I appreciate that so much 🙂
Great post, Thank you. I am looking at used dining room tables and NOW I know how to achieve the look i wanted!
Great instructions too!
Lori, Yay! I am so excited this helped! Literally, I was shocked at how easy this was and how cool it looks ?