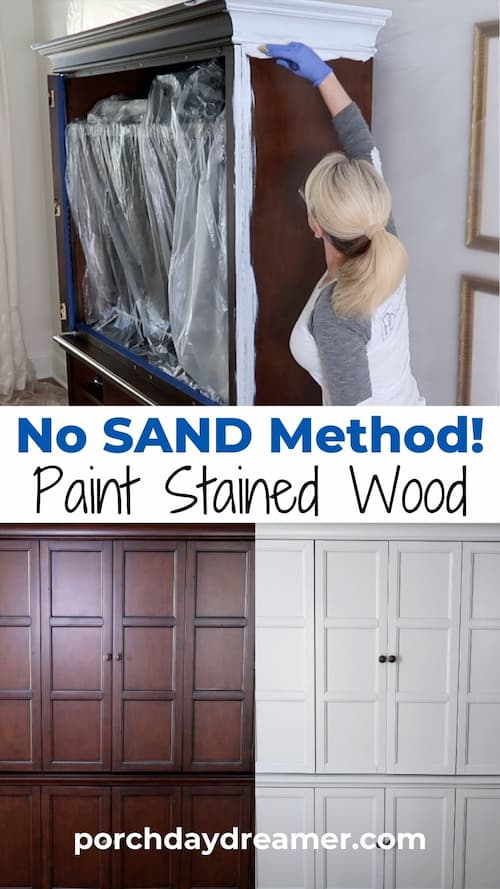
Yes! Paint Over Stained Wood without Sanding
Thinking about painting a piece of stained wood furniture or cabinets and are dreading having to strip or sand? Guess what – you don’t have to!
It’s time to tackle painting that stained wood piece you have been avoiding because you thought you had to sand or even strip off the finish first!
If you properly clean the surface and use the correct primer, you can avoid sanding altogether. I promise!
I’ve developed a proven method of painting over stain that completely cuts out stripping, sanding and the mess! Oh and this works for PAINTING over POLYURETHANE too.
Literally, I’ve painted countless pieces of furniture and cabinets over the past 20 years and have NEVER sanded-off the finish before painting.
You read that right! Call me lazy or educated. You be the judge 🙂
Yes! Paint these stained wood items without standing or stripping:
Using my method the paint will adhere and won’t chip with normal wear and tear!
You’ll get a durable long lasting finish you can be proud off. Plus the paint project will be SO much faster and easier without having to sand or strip first.
My Paint Passion and Knowledge
For 25 years, I’ve tackled a lot of cabinet and furniture painting! To add to that, I worked for Valspar (the Lowe’s paint brand and owned by Sherwin Williams) for 5 years.
Within my various roles I learned EVERYTHING I could about paint and how to paint the right way. I’m a seriously curious person!
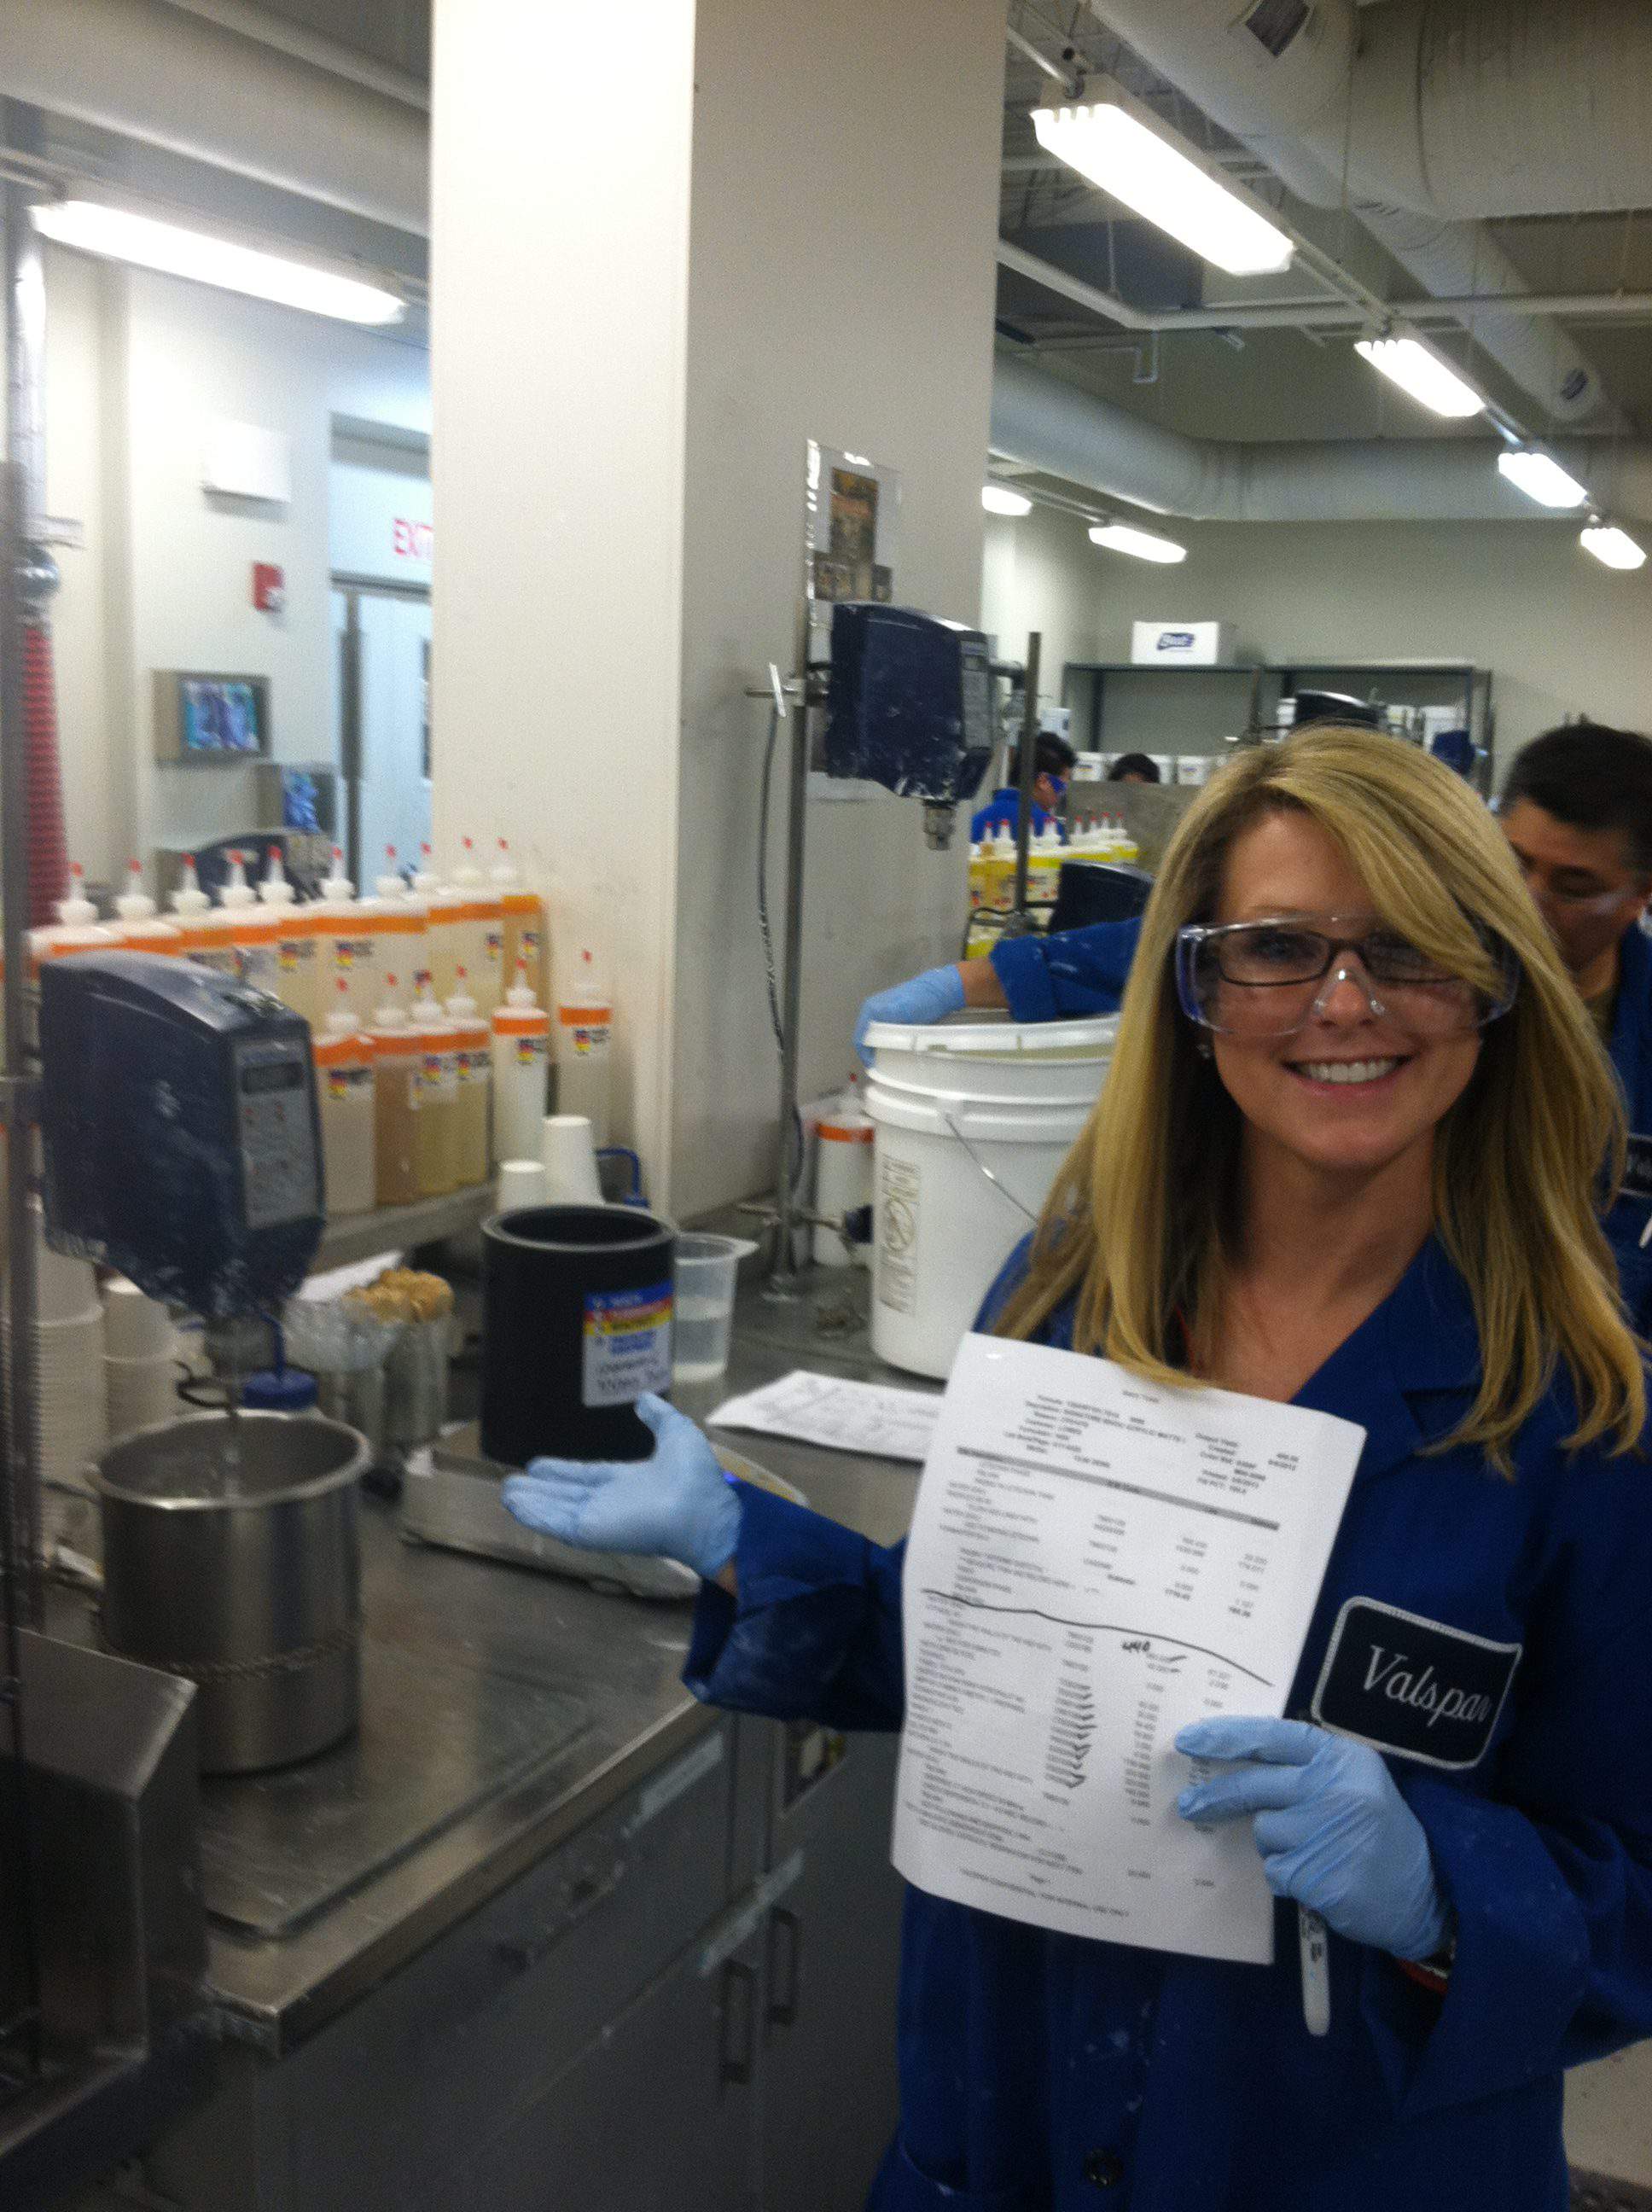
It included learning how to make paint and gaining The Master Painters Institute – Architectural Coating Technologist Certification.
Here’s the proof 🙂 Gotta love rocking the glasses with the eye protection. Sexy…
When I say I know something about how to paint everything, you’ll now believe me.
Post contains hand selected products, with affiliate marketing links throughout {full disclosure here}
What Type of Paint is Best for Painting Over Stained Wood?
Don’t roll your eyes at me, but it’s not the paint that you need to worry about. It’s the preparation that is key!
What’s important is cleaning to degrease, dulling the surface with a deglosser, and priming with a stain-blocking primer that’s a bonding primer.
You literally can paint over any stained wood with that combination. Then over the top you can you can use any latex paint.
However, the paint I recommend doesn’t require a top coat. Can we say hallelujah! Time and money saved.
SKIP oil-based stain. They aren’t environmentally friendly, hard to use and yellow over time.
project Supplies


Painting Over Stained Wood No Sanding or Stripping
To help convince and inspire you, I’ll be walking you through 9 of my paint projects. When I built this home 15 years ago, dark stain was in and now it’s not.
Cabinet by cabinet, room by room, furniture by furniture piece I’ve transformed my home with paint.
My hope is you will see the results I’ve been able to achieve and prove to you how confident I am in not sanding before painting. That way you’ll feel confident too!
Pin It for Later!
Something that is important to note…in all of these projects the surfaces were in almost perfect condition before I painted them.
If you have an unsound surface that is chipping and peeling, you will have to sand it smooth first. However, you won’t have to sand or strip off the finish completely.
Cleaning and Priming Stained Wood
What am I doing before painting to make sure the paint adheres without sanding? Don’t use liquid sandpaper please (see why here).
When I am painting a piece of furniture or cabinets I clean with chemical cleaner, which is the most important step.
- Cleaning the cabinet or furniture thoroughly with DEGREASER and a DEGLOSSER.
- Applying a BONDING PRIMER prior to painting.
It is REALLY IMPORTANT to use a chemical cleaner because there is likely a greasy residue that has built up over time.
Oil and grease from hands and cooking just naturally builds up on surfaces.
The de-glosser comes in handy to make a shiny surface (like polyurethane) a bit more tacky.
That will prepare the surface for the best adhesion of the bonding primer possible.
Why to use a chemical cleaner prior to painting over stained furniture:
- Produces more “grip” for the primer to adhere to prior to painting.
- Degreases the surfaces and softens it slightly taking down the gloss so the primer will adhere.
- Doesn’t remove the finish or create a mess!
You’ll get the best adhesion of primer following cleaning with a chemical cleaner.
That means that the final painted finish will be more durable, not chip, peel or scratch. Good right?
Best Primer to Use Over Stained Wood Furniture
My favorite and the one I’ve used the most of course will be from Valspar.
You will see it mentioned throughout my paint projects and I wrote an entire post about Valspar Bonding Primer for you to enjoy!
What makes a bonding primer special?
It creates a rough surface over glossy surfaces like: polyurethane, varnish, tile, glass, oil based paints, lacquer, etc.
Bonding primer also seals water stains and even stain bleed through.
Plus it only requires ONE coat and blocks general stains and a mildew-resistant finish!
Here is what bonding primer is ideal for:
- Cabinets
- Tile
- Trim
- Doors
- Glass
- Metal
- Drywall
- Wood
- Masonry
- Paneling
READ ALL ABOUT BONDING PRIMER AND WHERE IT CAN BE USED
Here are multiple bonding primers that get great customer reviews:
Use the brand you prefer, but Valspar Bonding Primer is what I used on ALL of my projects and the one I stand by.
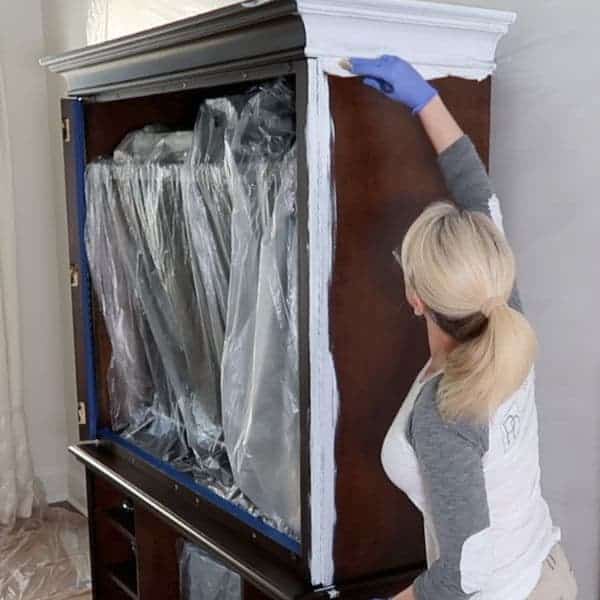
What One Coat of Primer Looks Like
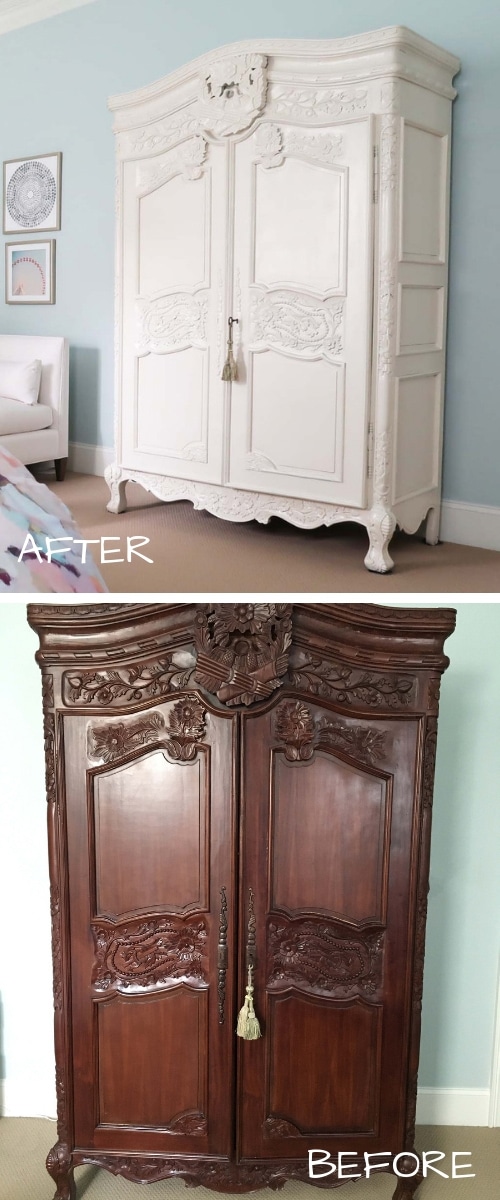
Here is bonding primer applied to a large carved stained armoire, so you see what it looks like when applied.
This was applied with a high-quality brush and foam roller so it’s smooth

Bonding primer is not designed to COVER and the stained surface will show through.
Typically you only need one coat, but you can apply two if needed.
It will look blotchy and rough, but it’s doing its job locking in the stain and creating a rough surface so the paint will adhere to it.
DON’T SCRATCH AT THE BONDING PRIMER TO TEST ADHESION!
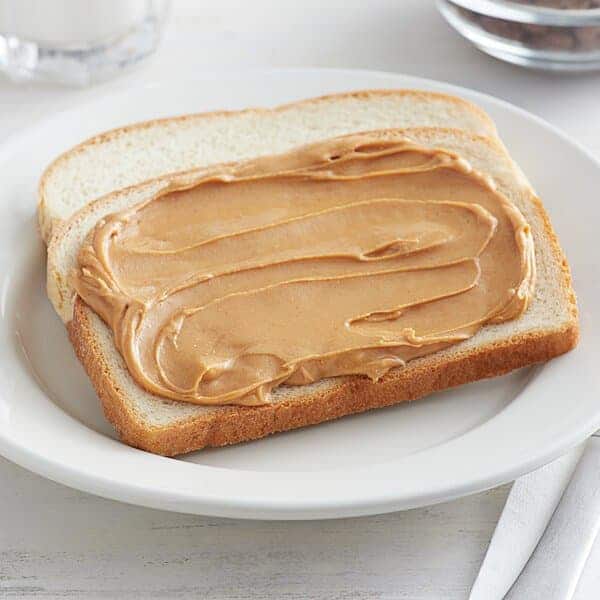
The adhesion occurs after your final coat of paint fully cures…typically in 7 days. Bonding primer acts like peanut butter between two pieces of bread making them stick together.
That’s the best analogy I can give you 🙂
When to Sand Wood Furniture Before Painting It
There are times that I will recommend sanding before painting.
It depends on how glossy the surface is that you are painting.
When I say “sanding” I mean ROUGH UP THE SURFACE…not sand it off.
When you should rough up the surface by sanding:
- Laminate (looks like wood)
- Melamine (looks like wood)
- Varnish
- High-Gloss Finishes
- High foot traffic areas like floors, stair treads and risers
Just use a medium grit sand paper to “rough up the surface” and remove ALL traces of dust with a damp microfiber cloth.
Clean with a de-glosser (here is what I use) and then apply the bonding primer.
Painting Over Stained Wood for Beginners on YouTube
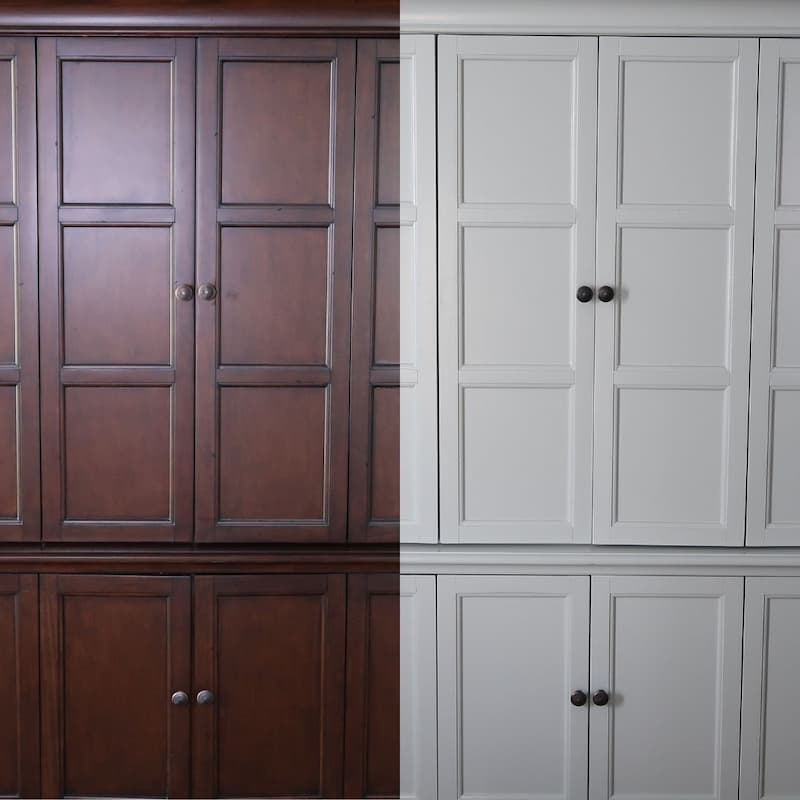
Before and After Painting Over Stained Wood
Here is a great sampling of the projects I’ve completed painting over polyurethane and stain.
What you can see is that dark stains were really popular 11 years ago, when I purchased this house.
Paint is the cheapest and most impactful makeover there is!
Click each link to be taken to additional details and or tutorials for the individual paint projects.
For your convenience, I’ve listed the general products used but colors and process are in the linked posts 🙂
Cabinets: Paint Over Stained Wood No SANDING
There’s only one bathroom out of my 3 1/2 bathroom home that still has stained cabinets.
That would be my son’s bathroom and I’ve left them the dark espresso stain because it feels more masculine.
Every other cabinet is now painted! Even my office cabinets, which I plan to repaint SOON!
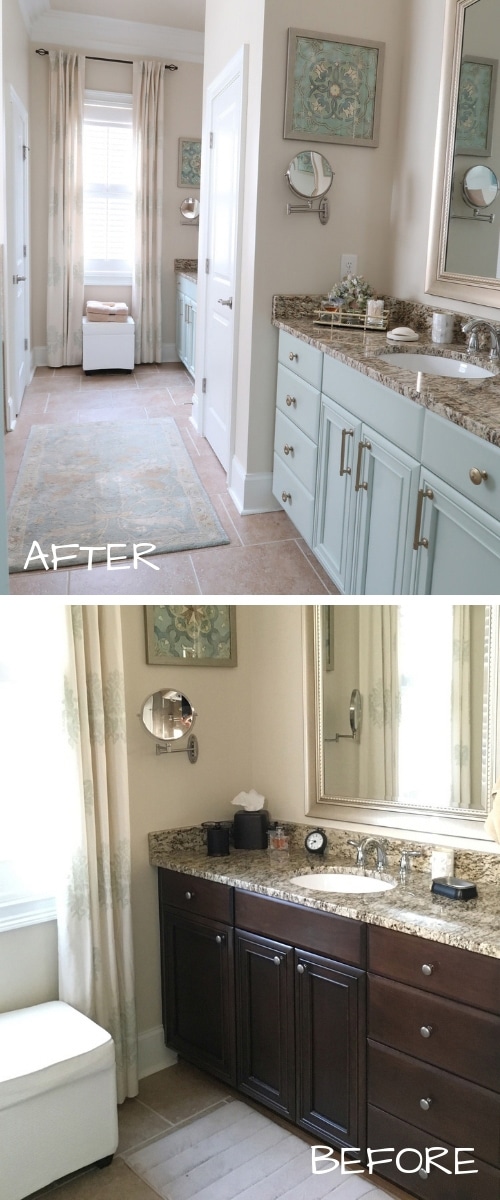
PROJECT: Powder Room Vanity Paint Makeover

Paint Stained Cabinets on YouTube
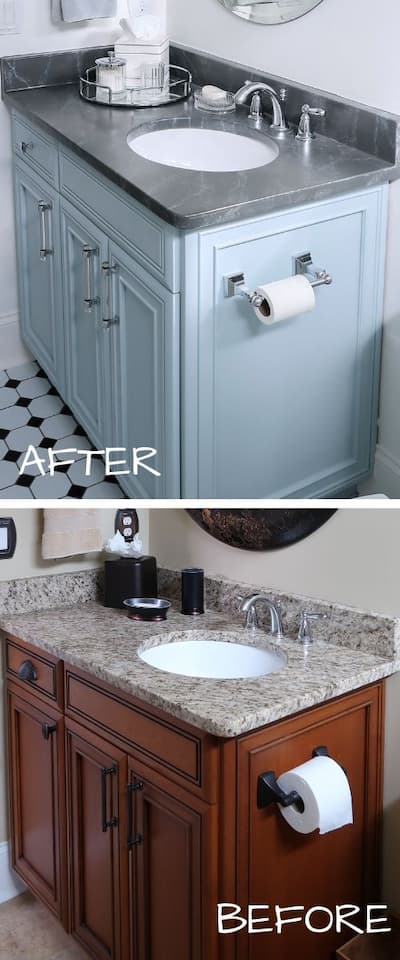
PROJECT: Guest Bathroom Vanity Makeover
Products Used:

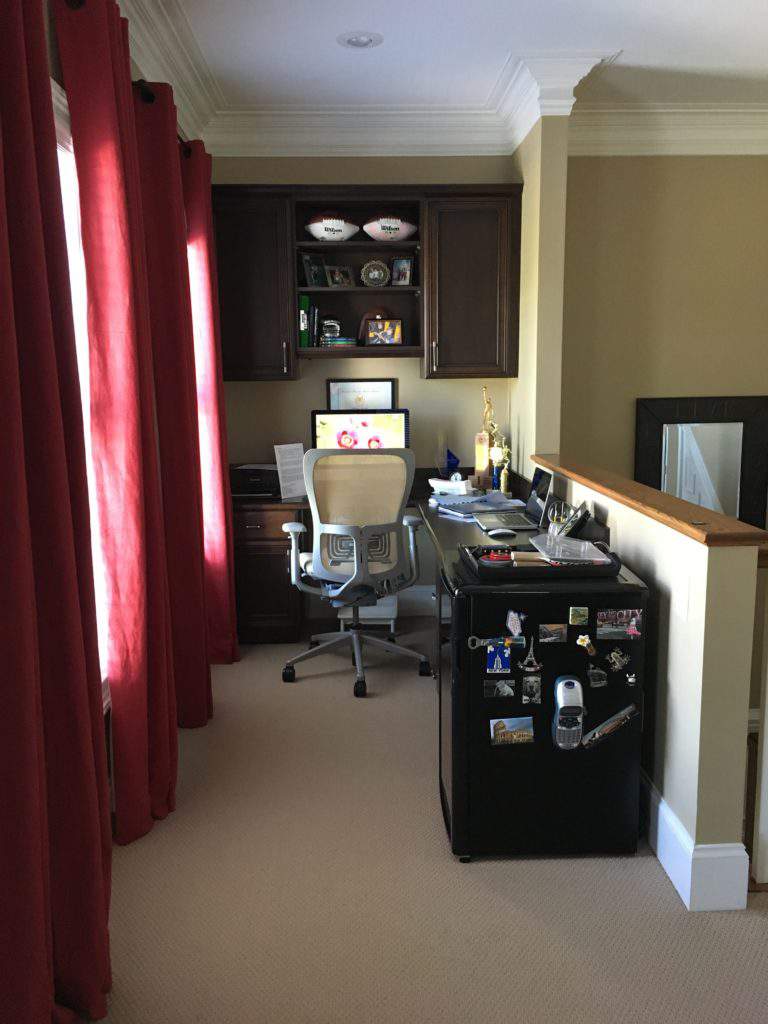
PROJECT: Office Cabinet Makeover
Products Used:
PROJECT: Don’t Paint Your Cabinets White
Products Used:
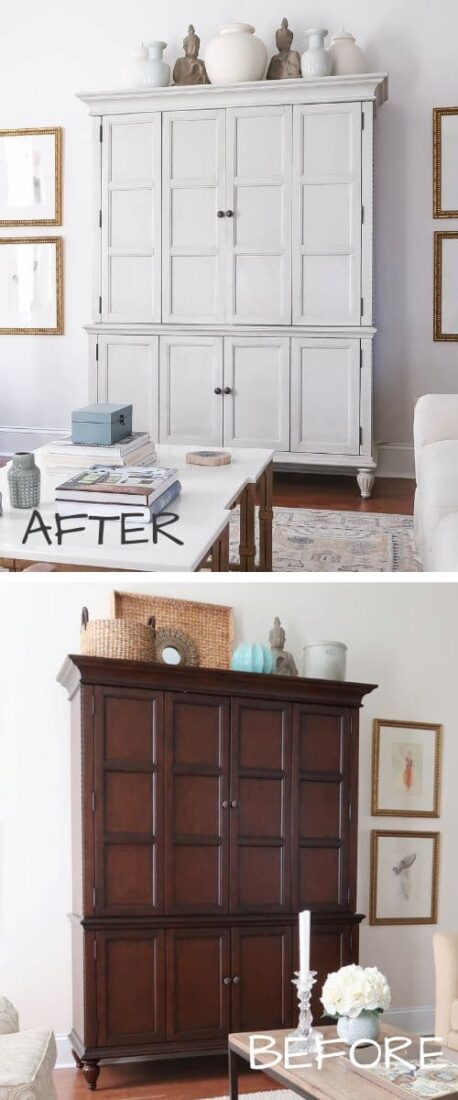
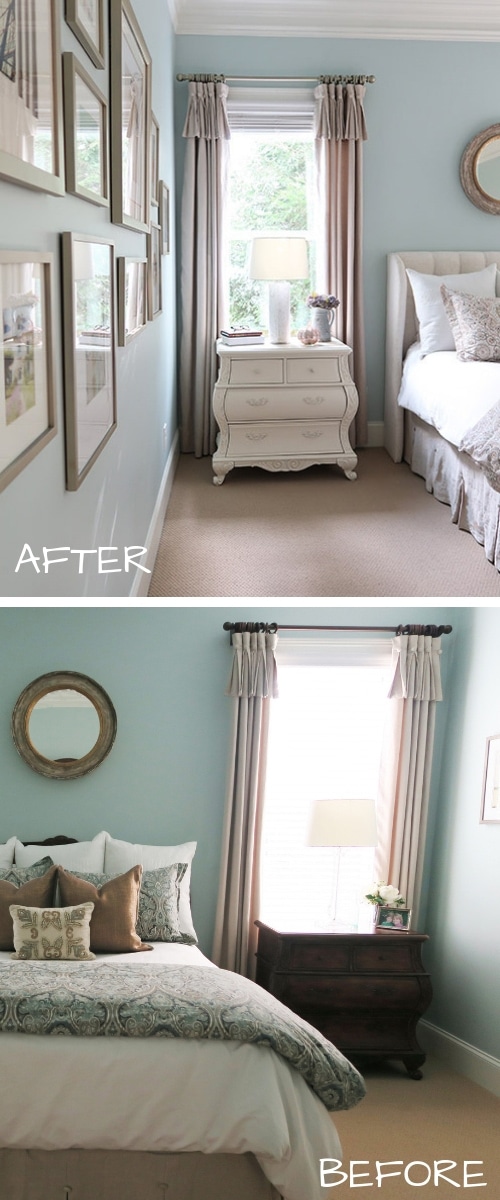
Stained Wood Furniture Painted without Sanding
Lots of furniture was stained in my home and piece by piece I’ve made over EVERY SINGLE piece.
Do I have any regrets? Heck no! My home feels lighter and brighter now.
With an open concept home, now all of the colors and tones blend together room by room. I’ve given all of my old furniture new life!
PROJECT: Beginner’s Guide to Painting Furniture
Products Used:
PROJECT: Yes! Use a Paint Sprayer INSIDE to Paint Furniture
Products Used:
Stairs: Paint Over Stained Wood
This was a project I long avoided, but knew it would be a great change!
Guess what? In this project I tried to prep with something other than a bonding primer and had a major FAIL.
Luckily, Valspar Bonding Primer saved the day so read all about the project!
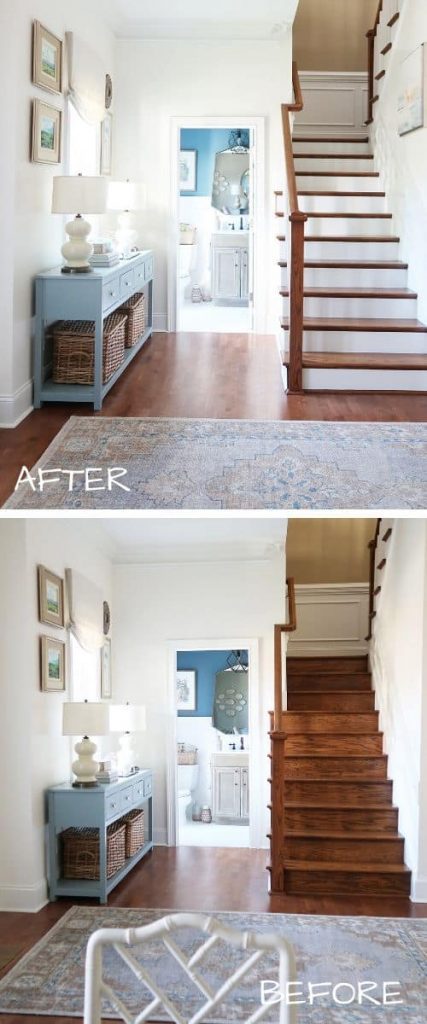
PROJECT: How to Paint Stair Risers White
Products Used:
Can you believe how the white risers changed the look of the foyer?
Now all of the pretty blues pop! This took me one weekend and it made the BIGGEST difference.
The stairs don’t feel so dark and now they blend in with the rest of my home decor. It adds SO much light to my north facing foyer.
Chalk Paint: Stained Wood Furniture Makeover
Guess what? On this project I avoided sanding and priming altogether!
It’s by far my FAVORITE paint makeover and the first time I used chalk paint.
BUT I got LUCKY….and didn’t experience bleed through which can be a major issue.
Don’t know what that is and why priming what what I SHOULD HAVE DONE? READ: Why You Must Prime Before Chalk Paint
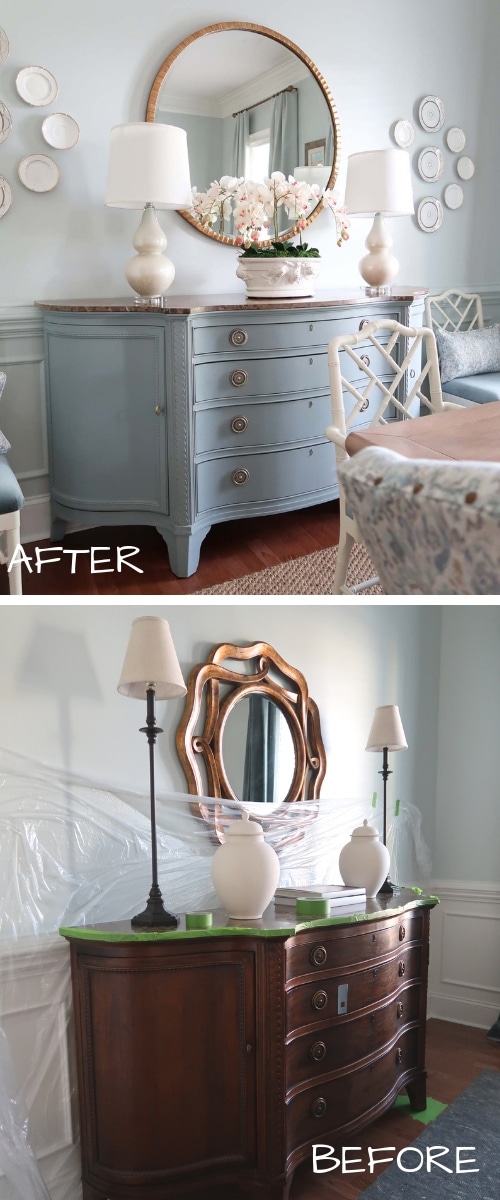
PROJECT: Dining Room Credenza Paint Makeover
Products Used:
Are you feeling inspired to makeover a piece of a furniture at your home?
Paint is truly the fastest and cheapest way to give new life to a perfectly good piece of furniture.
Stained wood furniture typically is QUALITY furniture, so why not make it look like a new piece?
When to Paint Stained Wood Cabinets and Furniture
OK, there are purists who would NEVER paint over stained wood. Clearly I’m not that person LOL.
So let’s go through that decision process next. If you need more help, read Should You Paint Over Stained Wood? How-to Decide
When should you paint over stained wood?
- You can’t afford to replace it, but want a change
- The look you want can’t be bought
- Add light or color to an area
- Create visual interest
- Embrace a new home decor trend
- Highlight carved details
- Update an outdated piece
When to replace
- You want a new look that can’t be achieved with paint
- Your budget allows for a new purchase
- The piece is beyond repair
- An item is associated with a negative time in your life
When not to paint
- It’s a family heirloom
- An antique with value that would be lost by painting
- Stain brings a rich warmth to your home decor
- You love the beauty of stained wood more than a painted finish
Not everyone wants a painted finish and there are gorgeous pieces of furniture that it would feel like a sin to paint.
So don’t feel pressured to paint, if you love your stained pieces!
Please consider signing up for my weekly email newsletter and following me on Pinterest and Instagram for daily inspiration.
Sign-Up for my Weekly Emails!
Straight to your inbox sharing can’t miss decorating and painting tips for your home.
Until next time…
Porch Daydreamer
Tracey
I want to paint my crown molding on top of my kitchen cabinets black, can I use a paint brush or will it leave brush marks? It has several grooves so you can’t really roll it.
If you use my favorite Valspar cabinet paint and a high quality brush, it will help to hide the brush marks. Just apply thin coats and let each coat dry per the “recoat” time on the can.
I’d like to paint a wall and some built-in shelves that are next to it. It looks like the previous owner used some kind of wood paneling or possibly even plywood that he stained. My question is do I still use the recommended paint that you have listed here Or should I go with something different?
Yes! You can use the same method to clean, prime with bonding primer, and paint – you may want a higher sheen like a Satin or Semi-Glass for a harder surface. That’s what I recommend for trim. Good luck 🙂
Hi, this is going to be my first time trying this. My parents left me this small , beautiful little house but the furniture is so dark. Is it possible to paint over wooden glossy furniture please? Thank you 🙏
Absolutely! I have a ton of tutorials about painting furniture linked through this post. Everything in the pictures had stain and polyurethane. Bonding Primer is the answer!
Hi Tracey,
I am a newbie at this. I have my mother’s old quilt rack. It is stained and I think it is oak or maple wood. I want to paint it white and then I want to paint or stencil a pattern on it. What kind of paint can I use, so that I can either paint or apply a stencil to it. HELP
Thank you for your help. It is much appreciated
Hi, Kathy! What a fun idea 🙂 If you are using a stencil, you can clean it just like I recommend, first pounce on bonding primer, let it dry 30 minute, then apply the paint. Let everything dry over night and then spray on several layers of clear coat here’s what I recommend.
What about painted cabinets? I have cabinets without doors(deep bookcases) in my embroidery sewing room.
The thing is my multi needle machine is a beast to move and my other machines at
Re not small either and I need to keep dust from nil to none, because these are expensive machines.
The cabinets are all painted black when we built and now I would like a kaki or blue family, my walls are blue and trim is Kaki.
I want to believe this will work die to no dust. Opinion please.
Check out this cabinet painting tutorial, where I paint over my own painted cabinets.
Hello! Complete painting newbie here. Did a search on painting over stained wood and found your post. My question is, would it make any sense at all to try to paint over a stained roll top bread box? Especially knowing that I am new to this, would the roll top surface be ill-suited for painting? Thanks!
Hi, Heidi! Since there is so much motion opening and closing the box the paint may not hold up. My advice to paint something so intricate is to follow my tutorial, but use spray on bonding primer and spray paint. That way you can get into the grooves. If the paint starts to chip, you can always sand smooth and go through the same process to touch up 🙂
I have a home that was built in 1961. It has open beam ceilings and they are painted dark brown. I am doing a major remodel and want to change the beam color to a dark gray. I don’t want to sand if I don’t need to. It will create way too much dust. Can I use your technique to clean, prime and paint? The beams are not smooth so even if I sand them, I will be fighting the rough grain. I’m all about less work and LESS DUST. Thank you!
Yes, you should be able to just make sure to prep/clean really well with a deglosser before you prime.
I love all your tips and suggestions. I like your step by step tutorial on what to do for the what if’s thank you ever so much. I will be using these for winter projects I have. Hopefully it has no fumes
So glad you find the tutorials helpful! That makes me smile.
Hi Tracey:
Thank you for sharing such great information. Is it okay to use a bonding primer vs. sanding over a shiny surface before painting? I want to repaint my mahogany dining table, which has a very shiny top and a few nicks.
Yes, just clean thoroughly with a degreaser and apply the primer. Thanks!
Hi Tracey,
I LOVE your ideas and your story. I’m starting to update our 26yo home ( what were we THINKING, in the 90s?!) You say to sand if chipped paint… most of my Window trim and cupboards look like this… where the paint has peeled/ chipped off in small areas along the beveled edge Would I have to sand all these edges? Or will the primer do?
You must sand, clean off the dust, and then prime.
Great information! I have trim in my sunroom that was originally primed & originally painted with oil base. Second time around latex. Now it’s time to repaint and i was wondering if the cabinet paint would work. Needs some sanding due to the dog! How should I approach this project?
Hmmm, is the sunroom an exterior space? I’d recommend an exterior semi-gloss if it is. Cabinet paint is so expensive, so I wouldn’t recommend it. Instead a semi-gloss is the way to go for trim. I have a free paint sheen download project guide on my home page withe email sign-up that could be helpful!
Should I use Krud Kutter and the Ready Strip or just one of them?
Just one to clean!
Hi there! I want to paint my kitchen cabinets which have polyurethane on them. In some spots, the polyurethane has come off due to over-cleaning. After cleaning with a degreasing chemical cleaner, can I still apply the Valspar Bonding Primer? Or will the uneven surface (some parts bare, some parts with polyurethane) be an issue? Thanks in advance!
Great question! If you can feel the edges where the poly has worn off, I would lightly sand those areas smooth, clean, and then apply the bonding primer.
I was wondering what your thoughts were on paint sprayers. I want to paint kitchen cabinets and a kitchen table and chairs. Should I go with an airless paint sprayer or the HVLP?
I can not find Krud Kutter anywhere – it has said sold out for awhile (at Home Depot)! Do you have another recommendation? We are ready to jump in and get out feet wet with a fairly large project. 🙂
Have you painted your kitchen cabinets? If yes, we’re they stained and shiny? Mine are stained and I’m
concerned the paint won’t hold up for 5-10 years. It’s just the 2 of us – no kiddos. Do you have a procedure for painting kitchen cabinets? Thanks!
I’ve painted my bathroom cabinets twice and just had my kitchen cabinets professionally painted using the same method. Please read these posts and there are videos included as well:
https://porchdaydreamer.com/when-bonding-primer-is-a-must-before-painting/
https://porchdaydreamer.com/best-cabinet-paint-valspar-cabinet-enamel/
https://porchdaydreamer.com/painting-cabinets-get-a-smooth-finish-every-time/
https://porchdaydreamer.com/hand-painting-or-spraying-cabinets-what-is-better/
Tried this no sanding technique with the suggested vaspar bonding primer. Well, it was a complete fail and waste of money. After it was dried I could scratch it off with my hand. If it sound too good to be true then it is. I will go back to the way I’ve alway done it. Major disappointment!
Did you scratch the primer with your finger nail? Or did you paint and the whole project failed? The proper way to test primer or paint adhesion is to lightly score a cross, apply painters tape over the score, and when you pull up if the primer stays it has adhered. If a surface isn’t properly prepared and clean that can cause issues as well. I have painted countless items with this bonding primer and NEVER had any adhesion issue.
These are all beautiful. What is the color on the blue hutch the last project in the line up)?
Thanks, so much! The link to the post with the project is just above the picture. Here it is for your convenience that links to the tutorial on how I achieved that finish: https://porchdaydreamer.com/chalk-paint-stained-furniture/
If I use the Valspar Cabinet Enamel Semi Gloss on an console table that I purchased from an antique store and has a shiny smooth finish over it, like the credenza in this post, do I have to sand, apply a primer, paint 2-3 coats and then a top coat? I will be using it for a TV Stand and I would like it white. True white.
Hey, Hollie! For that I would sand to scuff the surface with 220 grit sand paper, clean dust off thoroughly, prime 1 coat, paint 2-3 coats, and with the Valspar Cabinet Enamel you don’t have to top coat! Here is a recent post on this subject: https://porchdaydreamer.com/favorite-furniture-paint/
The white I used in my office is Valspar Swiss Coffee and is a true white. Good luck!
Thank you! Also, one more question – what primer do you recommend for this project?
In the furniture post, I list a few depending on where you like to shop. My favorite is the Valspar Bonding Primer.
What is that paint color for the half bath wall? I love it! Thanks!
Kristen
Wall Color: Behr S470-5, Blueprint
Thanks, all of my colors can be found here: https://porchdaydreamer.com/category/home-design/paint-colors/
Hi Tracey
On the paint projects would you let us know which were chalk painted and which were not, I had assumed incorrectly all were chalk painted. I know you like Valspar chalk are some Valspar flat latex? Thanks
Only one was chalk painted, but I linked each project so you can read about the details. For convenience, I’ll list under each picture what I used! That will benefit everyone 😉