How-to Paint Granite Counters to Look Like Marble

As they say fake it till you make it. Yes, you can paint granite counters to look like marble (and it’s EASY)!
Tired of your granite countertops and want an inexpensive fix while you save up to replace them?
Guess what? It’s really easy to paint granite counters to look like marble and it’s inexpensive too!
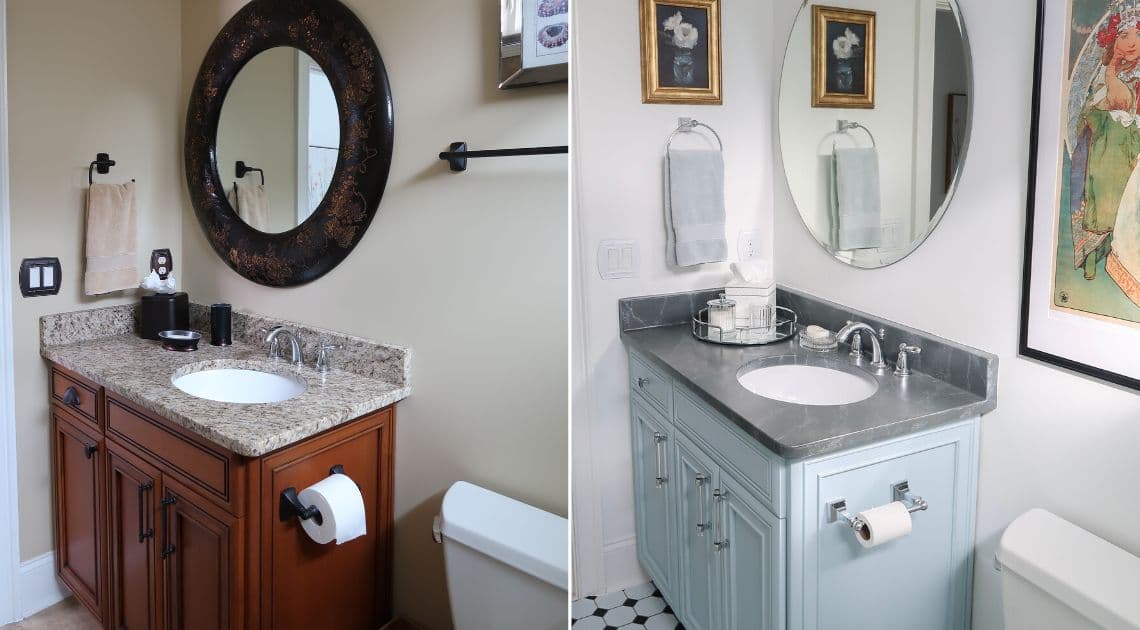
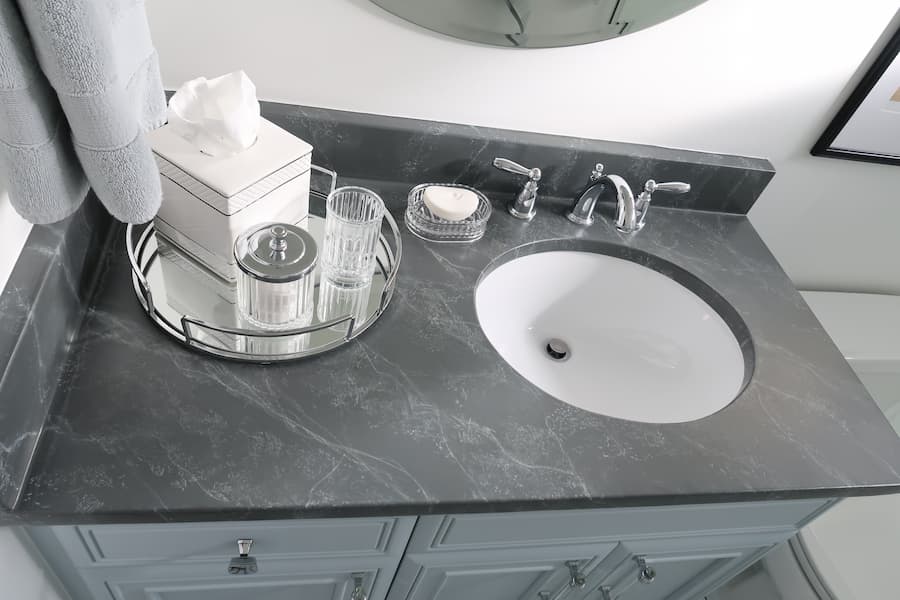
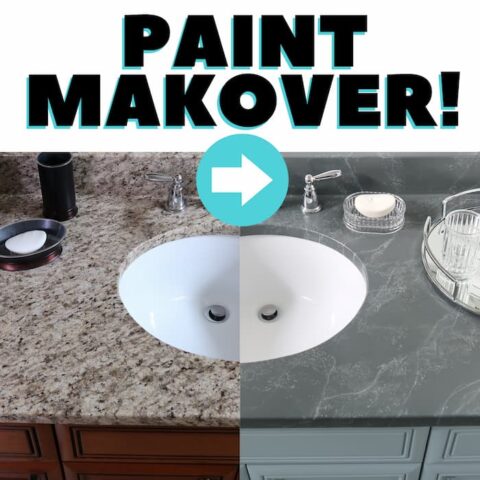
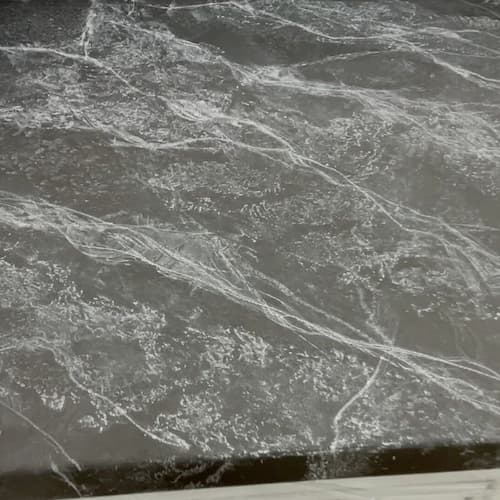
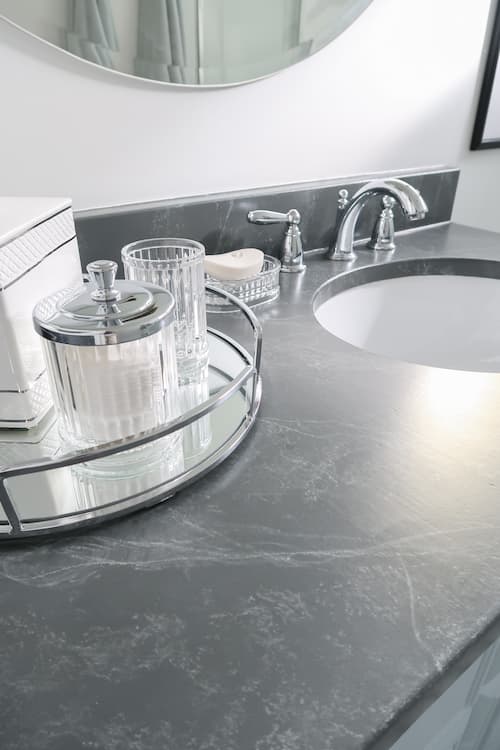
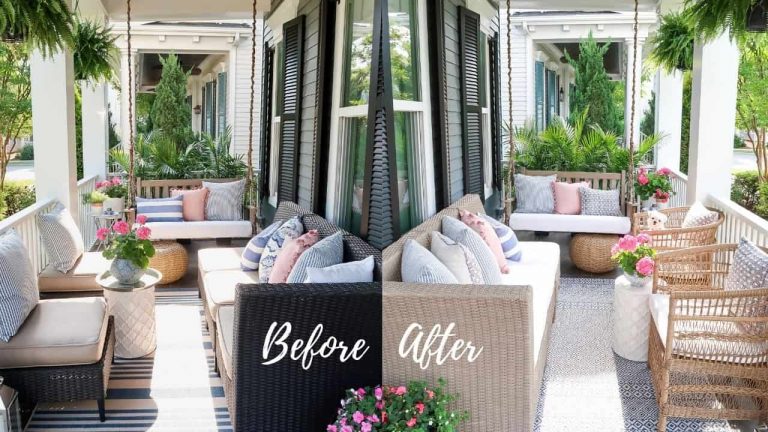
You aren’t going to believe my before and after results that made such a huge difference in my guest bathroom. It literally looks like a swapped out the granite for a very expensive black honed marble.
Want to see the FULL paint makeover of the bathroom? DIY $400 Bathroom Paint Makeover!
Using my unique method it’s going to save you money and it’s beginner friend paint tutorial. If you can paint a wall and are willing to practice creating marble veining, this granite countertop paint makeover is for you!
Why should you trust me? Well I worked for one of the worlds largest paint manufacturers launching to paint technologies and teaching home improvement paint staff.
Plus I have an ACT (architectural coating technologist certification) so I not only do I know how to paint granite countertops, but the science behind it to make them last!
The best part is you don’t have to sand your granite countertop, use an epoxy finish or buy an expensive marbling kit!
Update Granite Countertops without Replacing Them
First let’s talk about the reality of painting granite countertops and when you should or shouldn’t tackle this project.
Paint is NEVER a permanent solution, but it is a great temporary fix to update outdated granite countertops.
What to consider BEFORE painting granite counterS:
- Say good-bye to heat resistant counters. You won’t be able to place hot pots or hair tools directly on the counter once they are painted.
- Water is the enemy of painted countertops. If you don’t coat all surfaces with paint and the clear coat, water can quickly lift the finish.
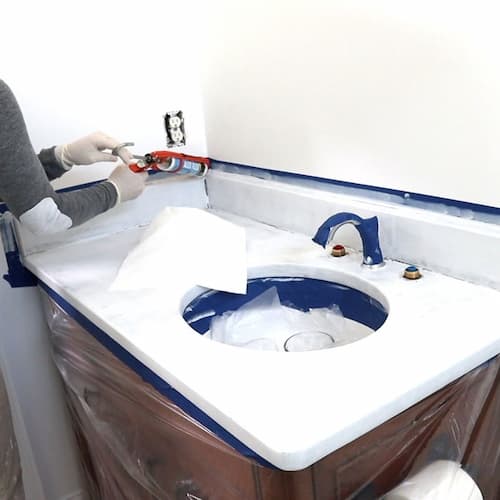
- Silicone caulk is not paintable. Much of the time granite countertop joints are caulked with silicone. You’ll need to be prepared to seal in the silicone with acrylic latex caulk to make the entire surface paintable.
- Attention to detail is important. You must follow the instructions to a T or you may be disappointed.
- Dry time is the enemy. You won’t be able to use the countertop for 7 to 10 days. A remodel would take the same amount of time and cost $1,000s!
My tutorial is for a BATHROOM vanity counter with an under mount sink, which does have its challenges.
You can also paint granite countertops with a drop-in sink. Taping around the sink base will be important.
Yes, it’s possible to paint kitchen counters using this process. However, I don’t cover specifics around challenges you may face in that environment.
If any of that scared you off when thinking about painting your granite GOOD!
I’d rather have you make the decision now that it’s not the fix for you then be disappointed later.
Another option can be to update your counter with vinyl marble contact paper, full tutorial here!
If you are like YES! I totally understand what I am getting myself into by painting my granite to look like marble, then keep reading.
FYI, you can absolutely use this process to transform laminate countertops too.
Let’s cover some of the questions you may have first.
How Will the Paint STICK to the Granite Counters?
I’m sure you are wondering how the paint will stick to the granite. It’s going to be easier than you think.
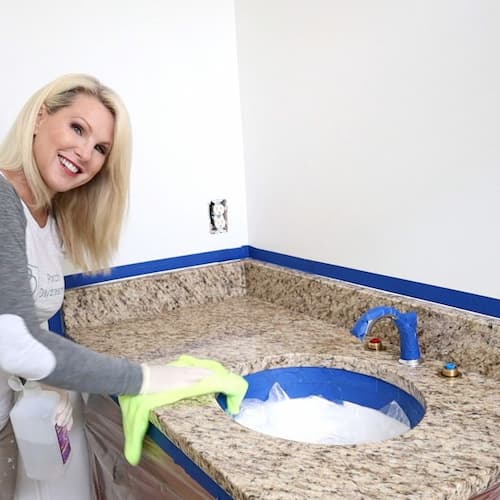
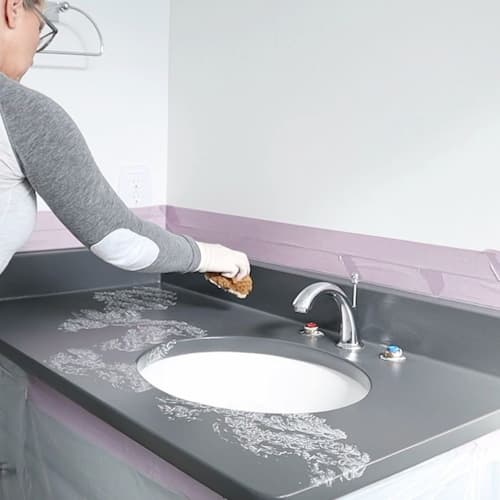
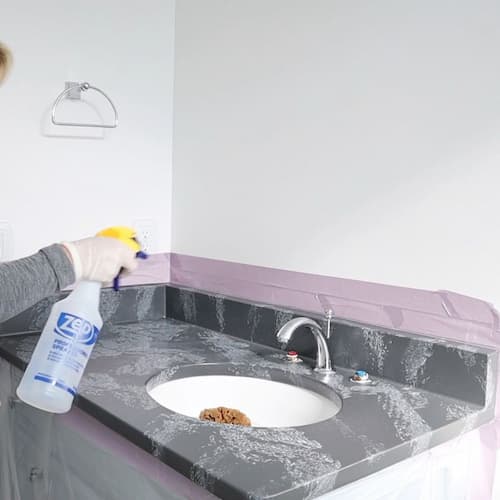
Glossy surfaces are definitely hard to paint, so you have to properly prepare them first. It’s REALLY important to thoroughly clean and degrease the surface.
But to get the paint to stick to the granite, you will use a Bonding Primer. Bonding Primer is like super glue for the paint.
Read all about Bonding Primer here. It’s a great primer for all glossy surfaces.
What Type of Paint for Granite Counters?
After experimenting with different paint types for this project (yes, I’m serious about getting it right), I found wall paint in a semi-gloss finish created a perfectly smooth finish.
Plus it provided a nice base to create marble veining. So you’ll be using high quality, but not expensive acrylic latex to paint the granite countertops.
For you curious friends, what paint didn’t work well was a Porch and Floor paint.
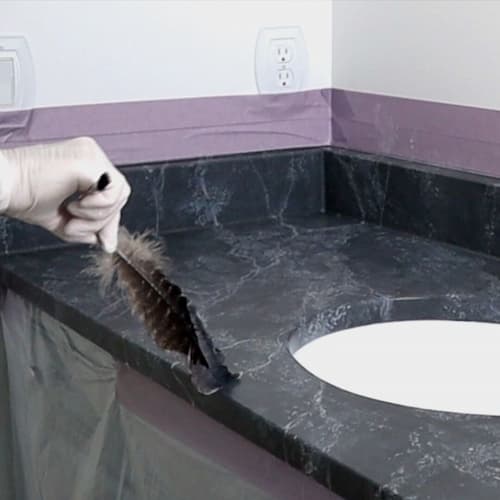
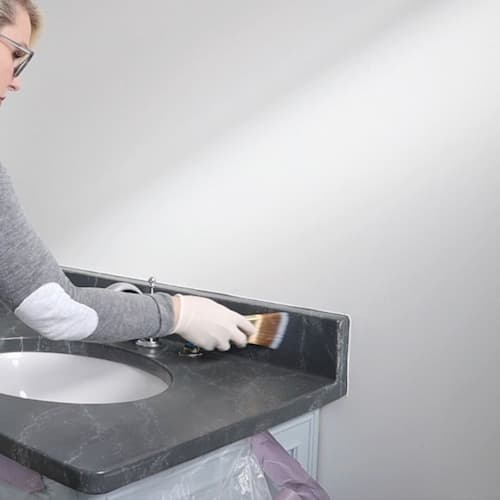
How Do I Create Faux Marble Veining with Paint?
We won’t be using a marble paint kit, which I found to be expensive an also required an epoxy clear coat.
I wanted to avoid using epoxy as the clear top coat because it isn’t beginner friendly and really hard to remove or cover if needed.
We’ll be using a different color of acrylic latex wall paint and some faux finish techniques to create marble veining.
Contains hand selected products, with affiliate marketing links where I may earn a small commission if a purchase is made. {full disclosure here}
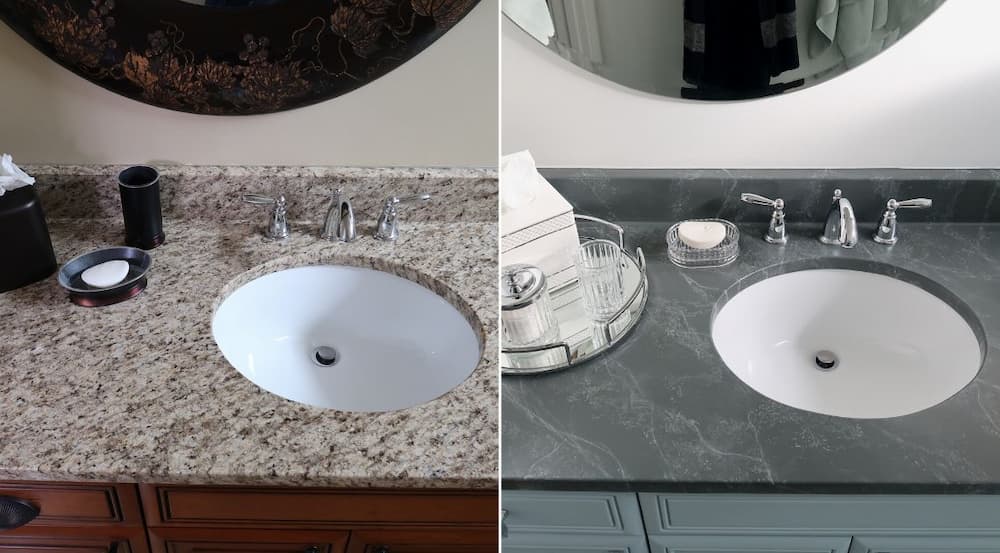
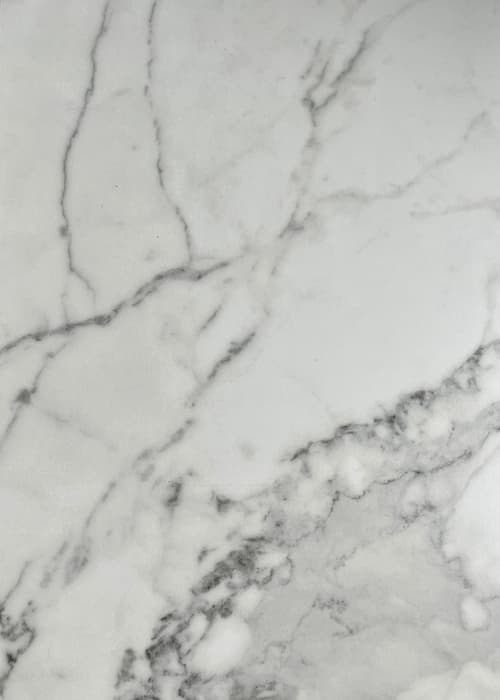
In the tutorial, I’ll give you the alternate option to create WHITE with GRAY marble veining so the end result will look more like Carrera marble.
What’s most important is you find an inspiration piece of marble or tile to follow as you paint the faux marble finish.
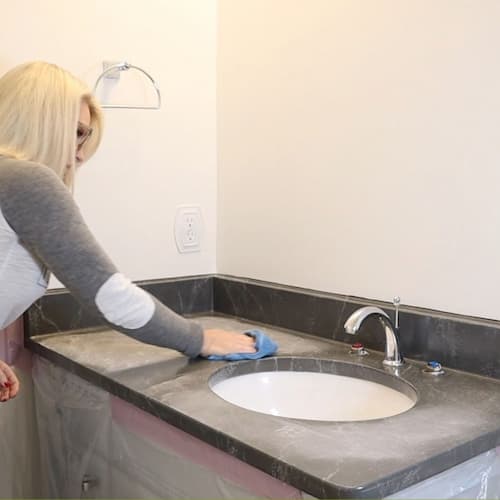
What Type of Top Coat Will Protect Painted Granite Counters?
You may be surprised to hear that you’ll be using a water based polyurethane. 5 coats to be exact and more if you’d like.
What is nice about using Polycrylic is that you can choose the final sheen level and make the counter as matte or glossy as you like.
Satin sheen Polycrylic is what I recommend and what I used on my countertops to protect the painted finish.
It looks smooth and the satin sheen makes the counters easy to clean.
DRAW BACK: If water sits on the surface for an extended period of time, it will create a hazy milky spot. Once the water dries it will disappear.
So it will be really important to wipe off the counters and remove any standing water to preserve the life of the painted granite countertops.
Can I Clean Painted Granite Counters?
Absolutely! The polyurethane we are using is durable and also cleanable. You will be able to spray them down and wipe them clean with a regular counter safe cleaner.
I coat my faux finished furniture with the same product and literally spray the polyurethane down with Windex and wipe clean with a micro-fiber rag.
The main thing is to avoid any harsh abrasive cleaners, which can wear down the top coat. Being gentle will be the key to long lasting durable results.
Is Painting my Granite Counter Permanent?
The nice thing is that anytime you paint something it isn’t permanent!
It’s also why I am steering clear of any type of an epoxy coating, which would be extremely hard to remove (maybe impossible).
Luckily, you can sand and strip off the polyurethane and paint if you decide you don’t love it.
Or on the other hand can use bonding primer and paint right over the polyurethane to change to a new marble look.
There’s very little risk to painting your granite counters because it’s reversible.
Granite Counter Makeover with Paint: Step by Step
Now that you know what’s important with regard to painting over your granite counter let’s dive into the tutorial.
General Timeline of Counter Painting Steps
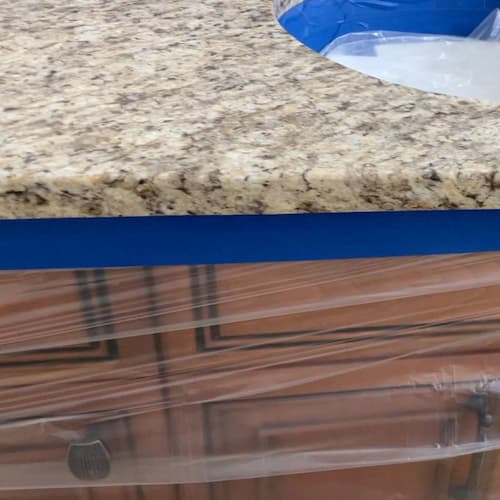
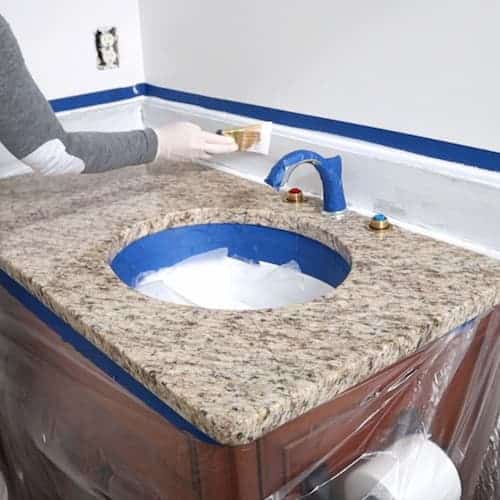
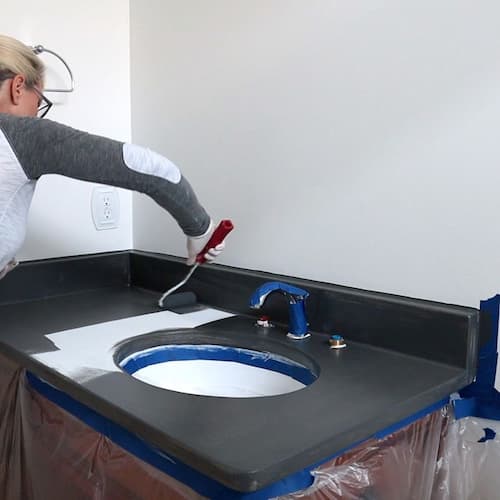
Day 1: Prepare the area for painting, clean the counter, 1 coat of bonding primer, caulk if needed, and pull tape. Dry overnight
Day 2 : Re-tape. Apply 2nd coat of primer, touch up any caulking if needed, pull tape and dry overnight.
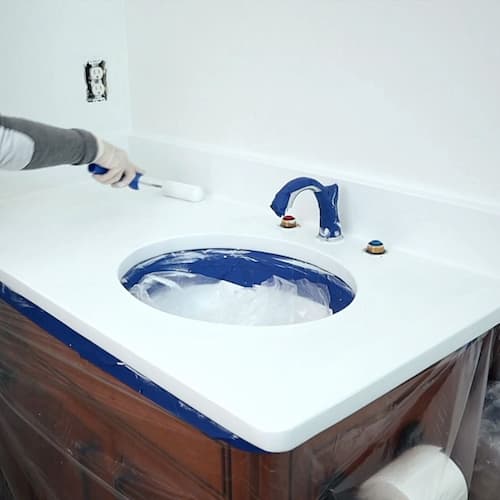
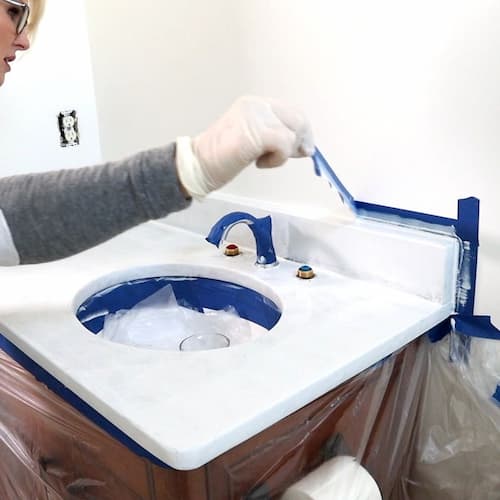
Day 3: Re-Tape. Apply 2-3 coats of paint drying overnight between coats.
Day 4: Faux marble veining application. Dry overnight,
Day 5: Faux marble finish over glaze. Dry Overnight.
Day 6 and 7: 5 Coats of Polyurethane sanding in between coats.
Paint Supplies
You can purchase all paint colors at Lowe’s Home Improvement or find similar colors from your favorite paint brand.
These are the no-fail combinations I’ve used and love.
White with Gray Marble Vein
- Primer: Valspar Bonding Primer
- Base Color: Signature Semi-Gloss Sherwin Williams Pure White 7005
- Marble Vein: Sample Valspar Stone Mason Gray 4008-1C
Black with White Marble Vein
- Primer: Valspar Bonding Primer
- Base Color: Valspar Muted Ebony 4008-2C
- Marble Vein: Sample Sherwin Williams Pure White 7005
Other helpful paint supplies
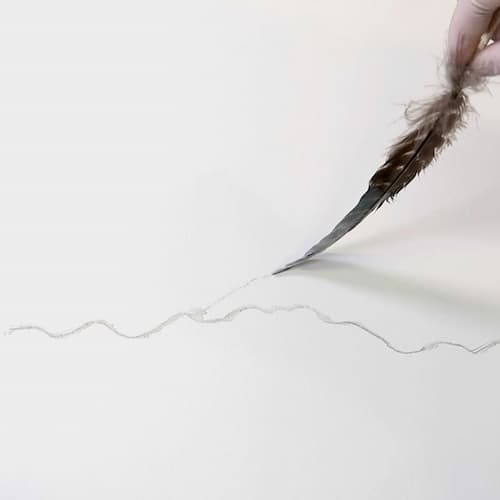
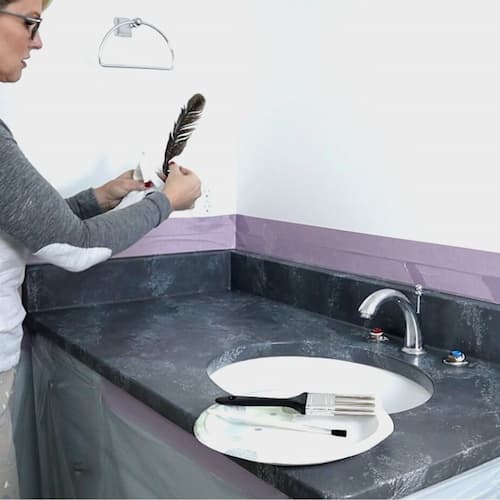
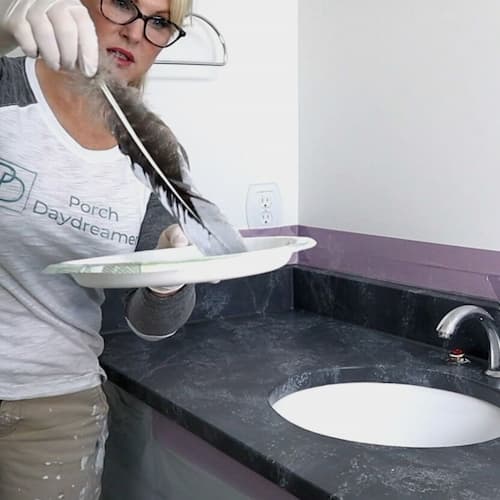
- Turkey feathers
- Sea Sponge
- Paint brush
- Craft brushes
- Foam roller with tray
- 2 inch Foam Brush (x2)
- Polycrylic Satin
- 320 grit and 400 grit sanding blocks
- Old cut up t-shirt
- Valspar Bonding Primer
- Rubbing Alcohol
- Microfiber rags
- Gloves
- Paper Towels
- Painter’s Tape
- Painter’s Plastic / Plastic Sheeting
How-to Paint Granite Counters to Look Like Marble
Materials
- Rubbing Alcohol
- Microfiber rags
- Gloves
- Paper Towels
- Painter's Tape
- Painter's Plastic / Plastic Sheeting
- Acrylic Latex Caulk
- Polycrylic Satin
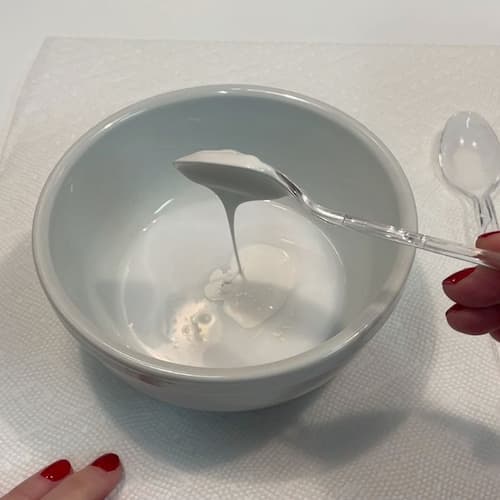
- Clear Mixing Glaze
Tools
- Turkey Feathers
- Sea Sponge
- Nylon Polyester Brush
- Craft Brushes
- Foam Roller with Tray
- 320 grit and 400 grit sanding blocks
- Old cut up t-shirt
- 2 inch foam brush
Instructions
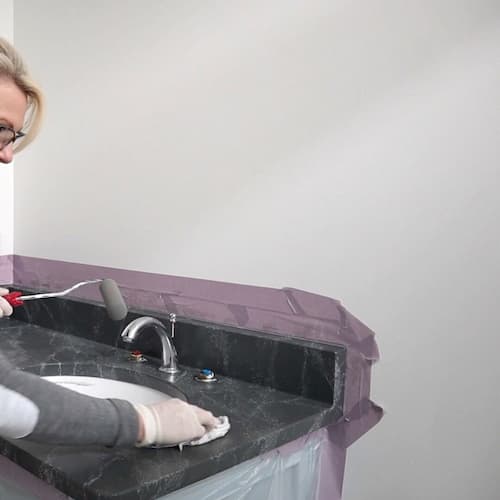
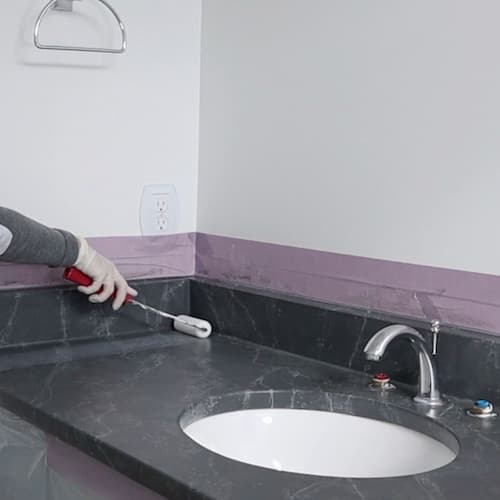
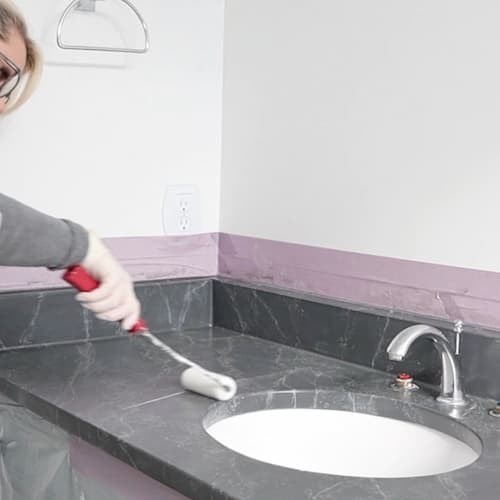
Paint the Granite Counter the Base Color

- .
- Follow the same process as above and apply 2nd coat of bonding primer. DRY OVERNIGHT!
- Follow the same process as above and apply 2nd and 3rd coats of paint. DRYING OVERNIGHT between coats.
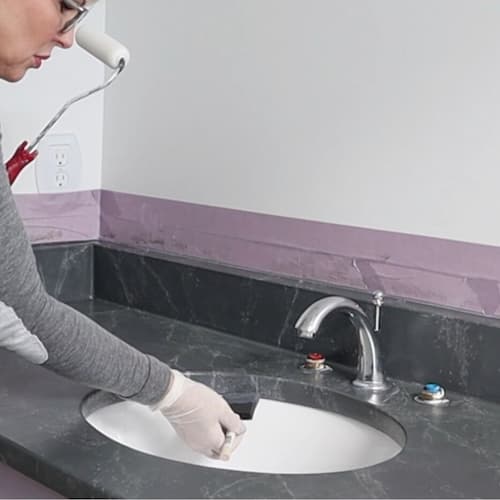
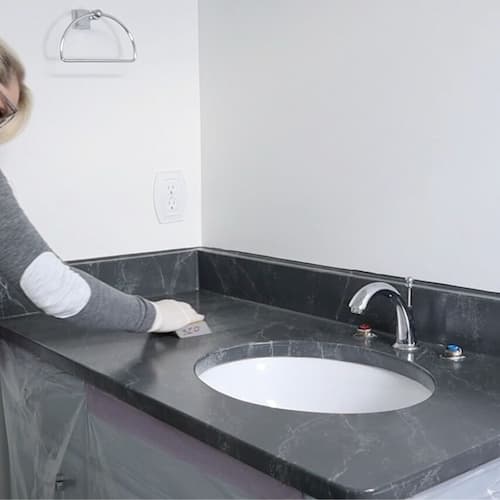
Create the Faux Marble Finish
-

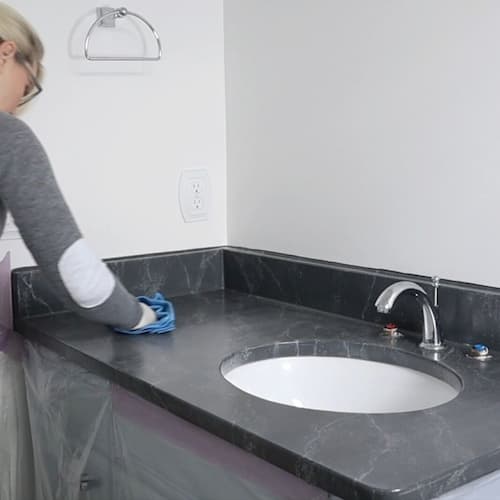
Apply Protective Clear Coat
You will be applying the 1st coat with a foam roller and brush to not disturb the marble faux finish. Coats 2 to 4 you will be following the manufacturers instructions and applying with a nylon polyester brush.


Notes
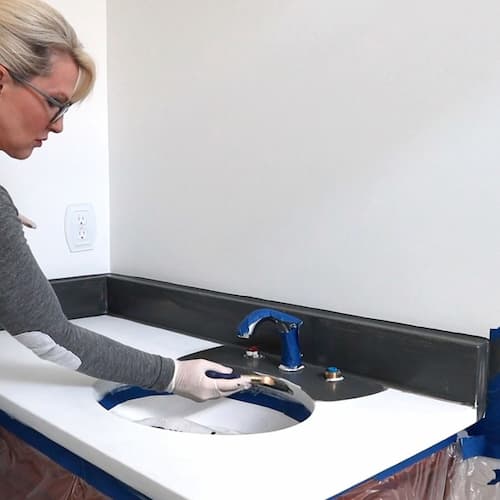
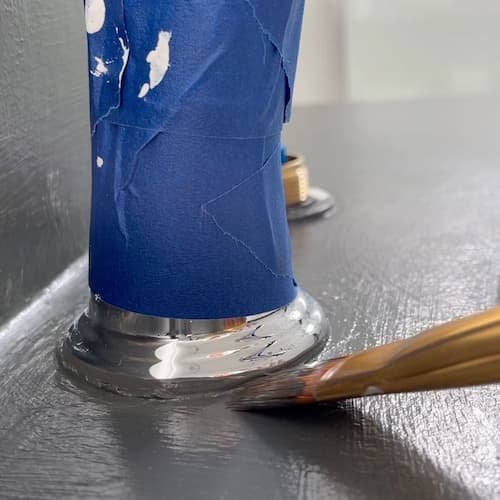
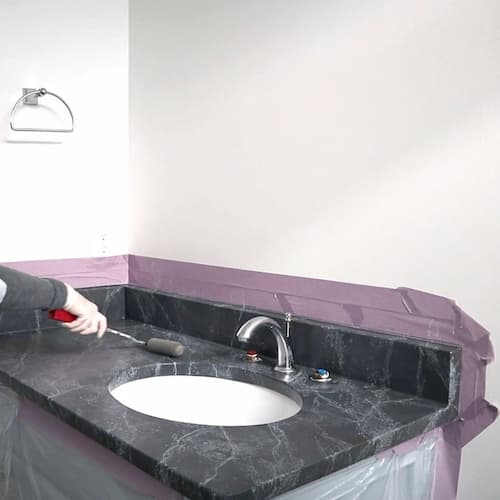
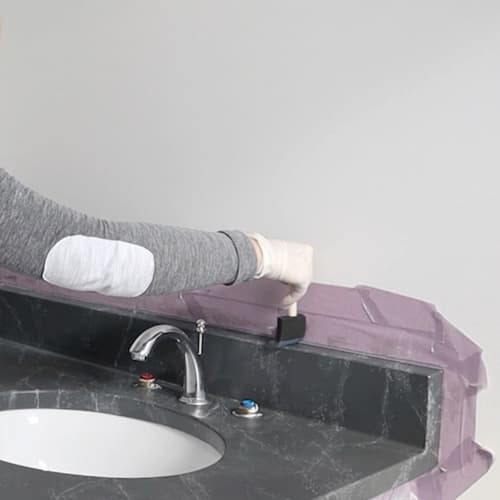
- Removing all plumbing fixtures will make the job easier. I was able to screw off my handles, but wasn't able to remove the faucet.
- If you can't remove the plumbing fixtures paint right up to the edge and clean off after each layer of primer, paint, or polyurethane applied.
- It's REALLY important to get all layers of each product up underneath of the under mount sink. Remove tape between each coat, so you can see if you missed any areas or tape onto the granite.
- Because granite is glossy primer and paint will take longer to dry. That's why you need to let each lay dry overnight.
- BUY A TILE OR MARBLE SAMPLE to work from when creating the marble veining. PRACTICE on cardboard first until you feel comfortable with the technique.
Recommended Products
As an Amazon Associate and member of other affiliate programs, I earn from qualifying purchases.


What do you think? Ready to paint your granite counters now to look like marble?
The actual process of priming, painting, faux finishing, and clear coating goes really fast!
My best advice is to PRACTICE, PRACTICE, PRACTICE the faux marble effect before application. Luckily, there are lots of turkey feathers in the set I recommend to “play with”.
The dry time makes this process take as long as it does…it is the MOST IMPORTANT STEP. If the surface ever feels tacky or sticky, let it keep drying!
You can just do a solid color of paint and skip the faux marble finish, if that’s not your thing.
Just paint and move to the clear coat stage next.
Bathroom Remodeling Advice
Here are more how-to paint posts!


Sign-Up for my Weekly Emails!
Straight to your inbox sharing can’t miss decorating and painting tips for your home.