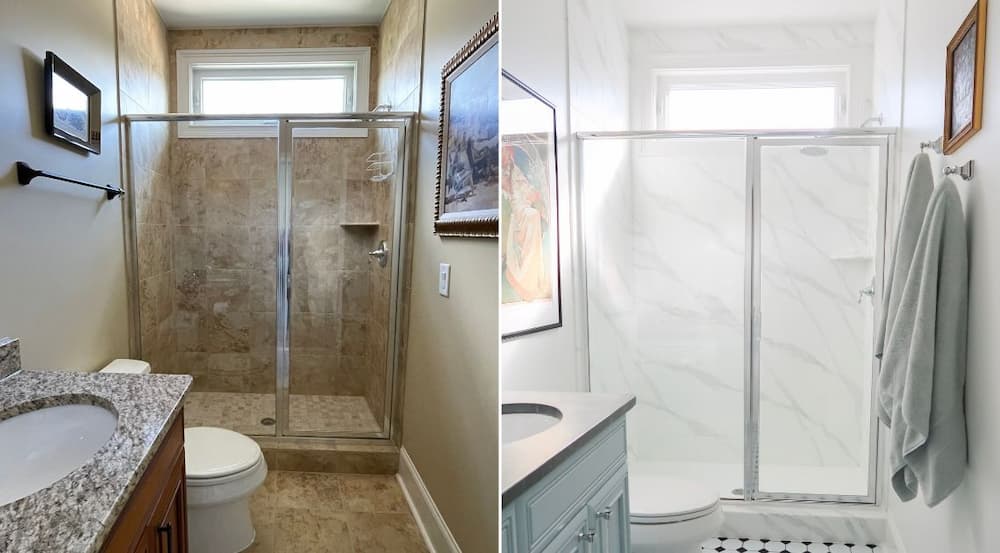
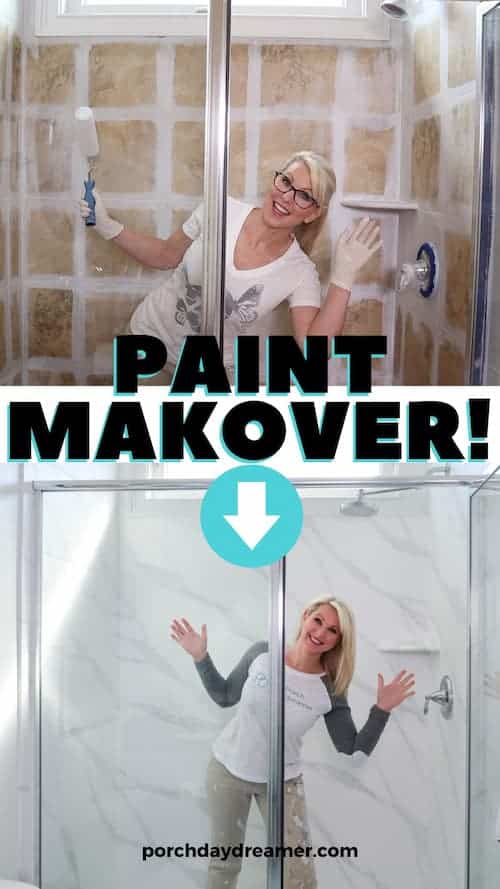
How-to Paint Shower Tile (so it won’t peel)

This is the MOST detailed how-to paint shower tile tutorial you’ll likely find. As a paint industry veteran, I’ll teach you the RIGHT way to paint tile so it won’t peel.
This is a no sand, no epoxy, no clear coat method to painting shower tiles!
Plus I created a YouTube video walking you through the whole shower painting process too
A little about my background. I worked for one of the world’s largest paint manufacturer’s launching new paint technologies with Lowe’s Home Improvement stores.
So yep, I’m a paint expert and part of my job was training the correct way to apply paint products. In addition, I have an ACT (architectural coatings technologist) certification.
Not only do I know how to paint, but the science behind it!
Yes, You Can Paint Shower Tile
This shower tile painting method not only will save you time, but money too!
What is special about the method I use is IMPORTANT! You won’t have to use a nasty tub & tile epoxy kit and you won’t have to use a clear coat.
I PROMISE painting tiles in your shower can be as easy as painting a room.
Another time saver is YOU WON’T HAVE TO SAND the tile first. It’s NOT necessary to get the primer and paint to adhere to the surface.
Painting Shower Tile is MUCH Cheaper than Retiling
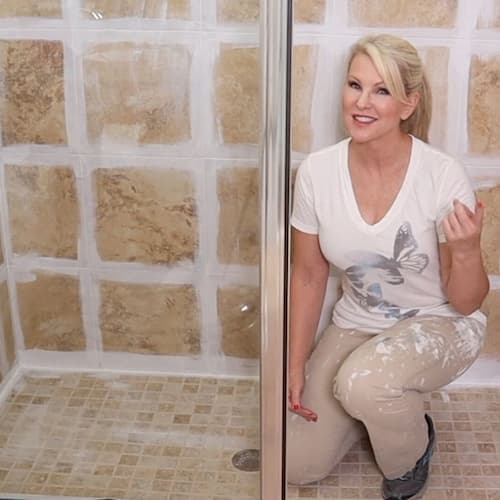
My beige shower tiles have been COMPLETELY transformed by the painted tile.
It literally looks like I spent $1,000s on a new shower tiles, but it’s only paint!
During my primary bathroom remodel I spent over $2,000 on JUST the shower tile plus labor.
How much does it cost to paint bathroom tiles?
- Valspar Bonding Primer = $30
- Specialty Tile Paint = $38
- Caulk = $6
- Painter’s Tape = $6
- Brush, Rollers, Tray Liners = $20
For around $100 you can paint your shower tile, which is a MAJOR savings versus doing a remodel!
Can I use this shower tile paint tutorial for a tub with a tile surround?
Absolutely! It is exactly the same process to paint the tile and much easier in fact because you won’t have to deal with painting the shower tile floor.
If you need to change the color of the tub to match your newly painted tile, you’ll need to use a completely different process and paint.
To paint the tub a new color, please use a Tub Refinishing Kit which is a 2-part epoxy process that will be waterproof once cured.
Will the Painted Shower Tiles Fail and Peel?
My shower tile has been painted, used and cleaned regularly for 2 years. It still looks PERFECT.
What I want you to understand is I am recommending a paint designed to be used outside in the all sorts of weather.
It can withstand extreme temperature changes and LOTS of rain, sleet, snow and sun.
If you use an exterior rated paint in your shower and follow my method for properly preparing the surface and sealing in cracks, the paint can last a LONG TIME!
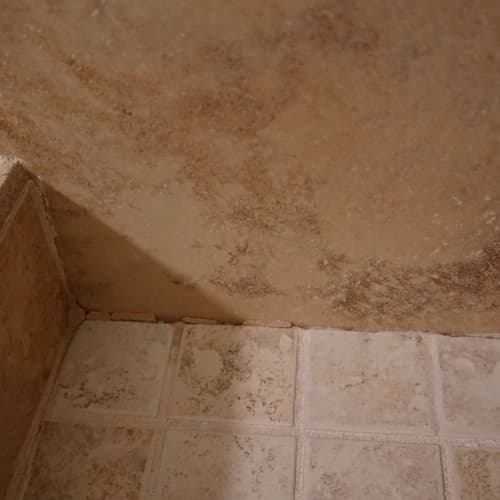
Critical Steps to Preventing Peeling Paint in the Shower
- You MUST repair any failing grout prior to painting the tile.
- You MUST seal and caulk all edges of the shower if you have a glass frame.
- You MUST seal and caulk around the floor and faucet
Do I have to Use an Tub & Tile Epoxy to Paint Shower Tile?
No! Epoxy is hard to use and can’t be tinted to a color you choose. It’s a solvent base so you need to wear a respiratory mask.
The primer and paint I recommend for painting shower tile is low VOC and much safer to use.
Plus regular primer and paint can be applied like wall paint and doesn’t require mixing like epoxy does.
Do I have to use sandpaper on the tile?
Fortunately, my tutorial doesn’t require sanding the tile prior to priming or painting.
The process I use creates a chemical bond, so you don’t have to sand the tile – yay! 2 years later and the painted finish in the shower is still perfect.
What Do You Use to Paint Bathroom Tile (ceramic tile or porcelain tile)?
Many tutorials recommend using a two part epoxy paint system to paint shower tile. I’m not a fan of tub and tile epoxy paint for painting bathroom tile.
It’s has an extreme odor and is a multi-step process that requires mixing components.
Epoxy paint just isn’t user friendly and leaves room for error. Plus if it isn’t water based can really be bad for the environment and your lungs!
I’ve also seen recommendations for using a clear sealer over the top of epoxy.
What’s nice about this tutorial is you only use ONE tile paint for painting shower tiles. NO sealer required!
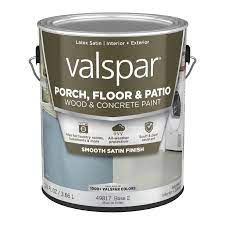
What you will use to paint your shower tile is Valspar Porch and Floor Paint in Satin.
It’s rated for outdoor use and perfect for a waterproof finish on your bathroom tile.
PLUS it can be tinted into 1000’s of colors. What color did I use in my shower?
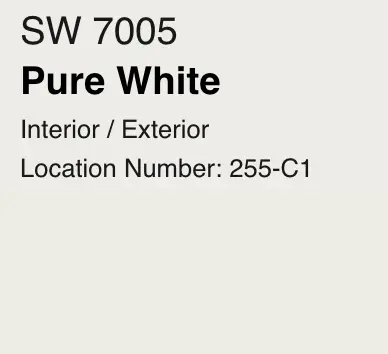
Sherwin Williams Pure White 7005
Biggest Issues Painting a Shower? You Can’t Use it for a Week or Longer!
Let’s start with the fact that this is a process and it will take time. To paint shower tile or bathroom tile itself doesn’t take a long time.
The longest part of this process is DRY time! The tile paint that I am recommending for shower tile must dry at least 12 hours between coats.
You can see how after multiple coats that dry time turns into days. That actual project itself is like painting a wall…you can do it!
Contains hand selected products, with affiliate marketing links where I may earn a small commission if a purchase is made. {full disclosure here}
When You SHOULDN’T Paint Your Shower
Yes, this project isn’t for everyone or for every home. This tutorial can’t be used on FIBERGLASS shower surrounds.
Painting shower tile is SERIOUS and my tutorial will need to be followed EXACTLY to get the best and longest lasting results possible.
So you need to sign up for being detailed and allowing the dry times I provide.
Paint is NEVER PERMANENT. This is a great option to update a bathroom without replacing the tile or remodeling, but it’s a temporary fix while you save up for new tile 🙂
If you are considering this option for a rental property, I would like to steer you away from this option. Gentle use and cleaning is important to prevent peeling later and if you aren’t in control of this the paint can fail quickly.
Do you have a large family and only one shower? Unfortunately, due to the downtime with this project you absolutely need to have a 2nd shower to use.
Pin It for Later!
Painting the Shower Timeline and Plan
BEFORE you start this process, know you will not be able to use your shower for 8 to 10 DAYS! That’s if you keep on a rigid schedule and nothing interrupts you.
If you were doing a tile remodel, you’d be out of your shower for 2 weeks or more so keep that in mind.
The MOST important step in this process is the PREP WORK. It’s critical to note where I tell you to wait until the next day to apply another coat of paint. Apply too soon and the paint will never dry.
DAY 1: Clean the Shower Tile Prior to Painting
- Remove any moldy caulk prior to starting this project and repair any failing grout lines.
- Clean your shower
- Dry OVERNIGHT and run the fan in your bathroom
DAY 2: Apply Bonding Primer and Seal Shower with Caulk
- Apply 1st coat of primer
- Dry 4 hours
- Caulk and seal
- Apply 2nd coat of primer
- Dry overnight
DAY 3: Apply First Coat of Paint to Shower Wall Tile
- Apply 1st coat: paint tile on shower walls
- Let painted tile dry overnight or 12+ hours
DAY 4: Apply Second Coat of Paint to Shower Wall Tile
- Apply 2nd coat: paint tile on shower walls
- Let painted tile dry overnight or 12+ hours
DAY 5 : Apply 3rd Coat of Paint to Shower Wall Tile
- Apply 3rd coat: paint tile on shower walls
- DRY 3 DAYS
If you have a tub, you are DONE! Wait 3 to 7 days before running any water. If you have a tiled shower floor, more to do!
DAY 1: Apply Primer to Shower Floor Tile
- Apply 1st coat of primer to floor
- Dry 4 hours
- Caulk and seal edges
- Apply 2nd coat of primer
- Dry overnight
DAY 2: Apply First Coat Paint to Shower Floor Tile
- Apply 1st coat of paint to floor
- Dry overnight or 12+ hours
DAY 3: Apply Second Coat Paint to Shower Floor Tile
- Apply 2nd coat of paint to floor
- Dry overnight or 12+ hours
DAY 4: Apply 3rd Coat Paint to Shower Floor Tile
- Apply 3rd coat of paint to floor
- DRY 3 DAYS
Curing Process
Even though the paint may feel dry to the touch it isn’t fully cured. You have to wait AT LEAST 3 days before using your shower.
You are DONE! Wait 3 to 7 days before running any water.
Video Tutorial: How-to Paint Shower Tile
How To Paint Shower Tile In 5 Easy Steps
Step 1: clean the Shower Tile
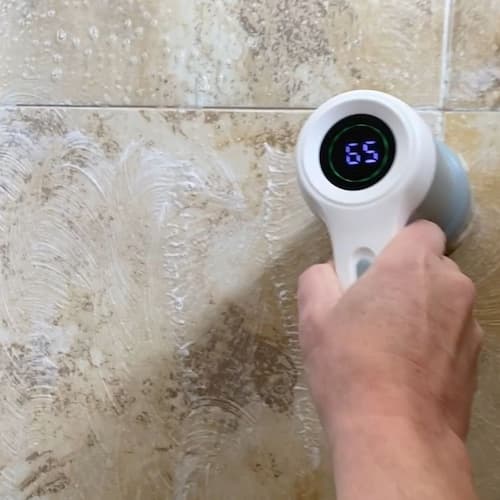
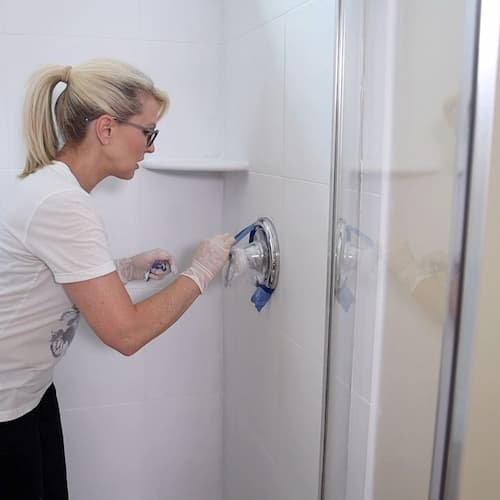
First, you need to clean your shower like you NEVER have before with a special solution.
You MUST remove all mold and moldy caulk prior to starting this process.
It is CRITICAL to use the cleaning solution I provide to remove all soap scum and also to slightly etch the grout lines as well.
Cleaning Supplies:
- Microfiber Rags
- Large Bucket (this one collapses for storage)
- Spray Bottle
- Battery Scrub Brush
- Narrow Step Stool
- Dawn Dish Detergent
- Distilled White Vinegar

Tile Cleaning Solution
- 1 Cup Dawn Dish Detergent (please use this brand it’s the best degreaser)
- 1 Cup Distilled White Vinegar
- Mix together in a spray bottle
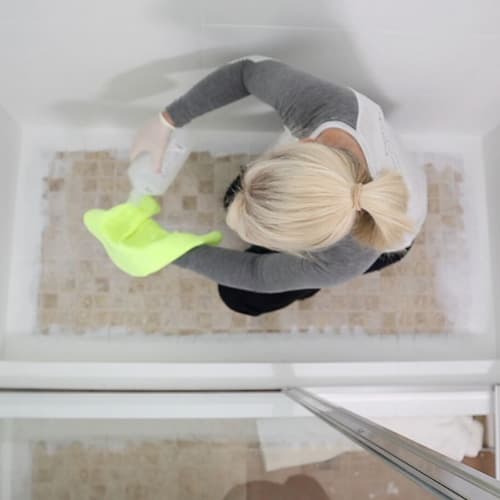
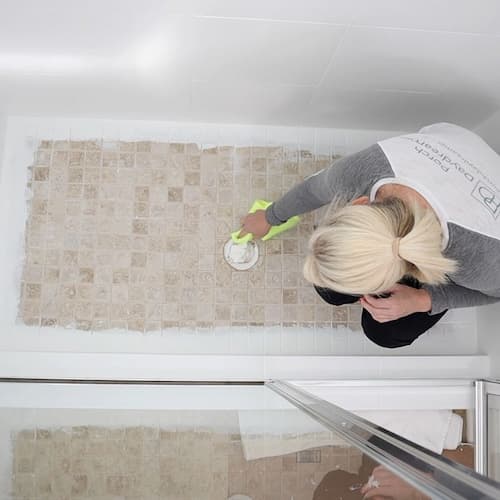
Liberally spray cleaning solution onto tile and use a manual or automatic scrub brush to THOROUGHLY clean off tile.
Work the solution into the grout lines to help etch the grout a bit. This will provide better surface adhesion for the primer.

Fill a bucket with water and rinse clean all cleaning solution using a microfiber rag.
It’s important to get ALL soap off of the tile and make sure the water runs clear.
DRY SHOWER OVERNIGHT. Don’t apply primer until the grout is DRY.
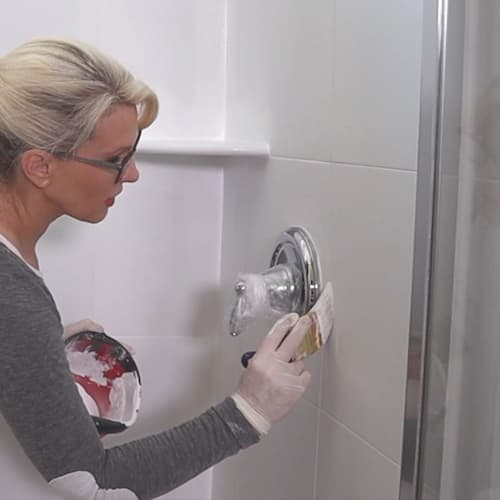
step 2: prepare the shower for painting
Look around your bathroom and shower space to see what areas need to be protected during this paint project.
Use painter’s tape and mask-off any areas you need to protect especially between the edge of a bathtub and tile or around a glass shower frame.
DO NOT TAPE OVER ANY SILICONE CAULK
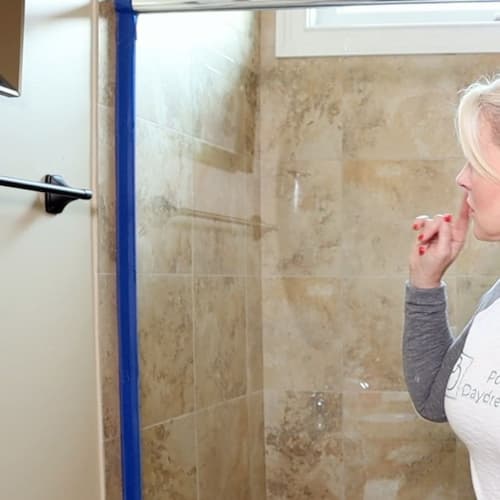
Tape around faucet and cover with plastic. Tape around the shower head and protect it with plastic.
IMPORTANT: Use rubbing alcohol to clean off any grease from your hands on tile while taping.
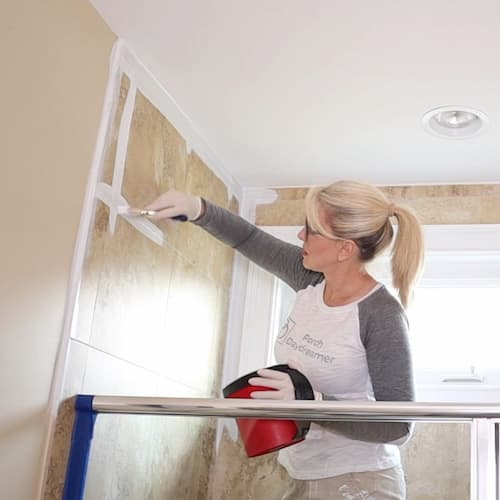
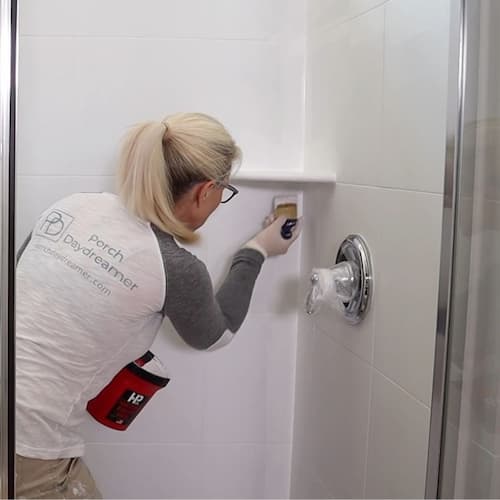
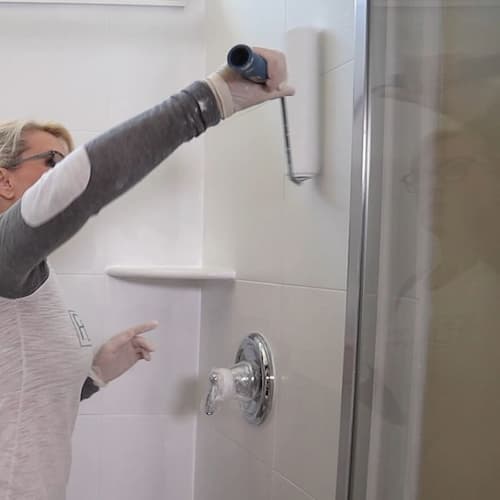
Step 3: Prime the Shower Tile and Grout Lines
I don’t recommend using a foam roller for this project. It won’t push the primer into the grout lines to fully coat them.
Priming Supplies
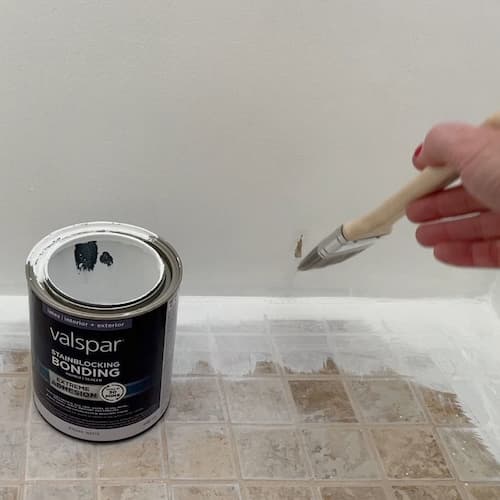
- Valspar Bonding Primer
- Nylon Polyester Brush
- 3/8 inch Nap Roller and Cage
- Handy Paint Pail and Liner
- Paint Tray and Liner
- Drop Cloth
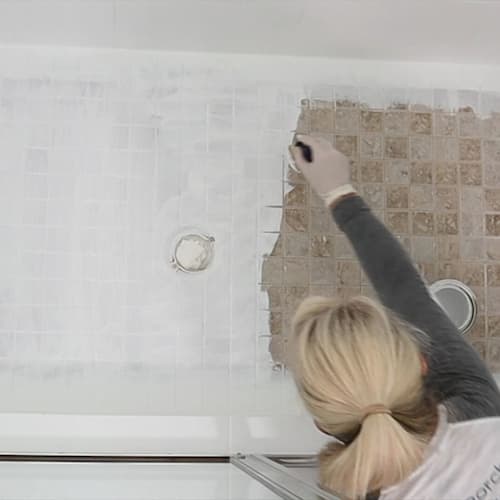
Start with the brush and apply primer in all grout lines first. Work the brush into the grout to ensure even coverage.
Brush all edges and areas that can’t be rolled.
Feather in any heavy areas with your brush, so you don’t have any hard primer edges.
Do not apply primer to a tile floor, but instead edge between the wall and the floor tile.
NOTE: Bonding primer is designed to help the paint stick to the tile. DON’T scratch at the primer to see if it is adhered!
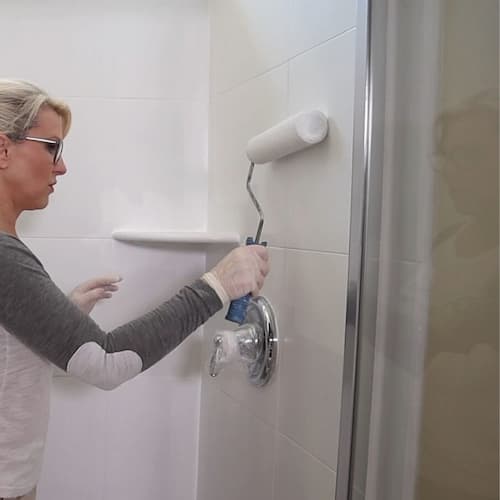
Use a roller and roll on primer immediately following brushing.
Make sure to run the roller both vertically and horizontally to cover the grout lines.
DRY 1st Primer Coat 4 HOURS (pull tape and reapply if you let it dry longer).
Repeat process and apply a 2nd coat of Valspar Bonding Primer.
PULL all tape within 30 minutes of applying the last coat of primer.
DRY final primer coat OVERNIGHT!
Step 4: Caulk and Seal
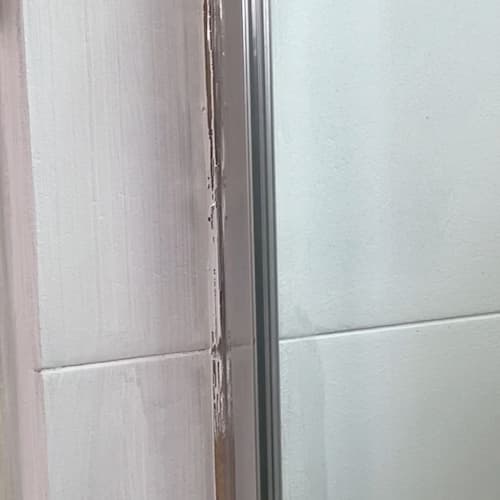
Once primer is fully dry, look to see if it has pulled away from any caulk lines.
IF you see this, it is SILICONE caulk and you MUST cover it with an acrylic latex caulk.
Silicone caulk is not paintable, so any paint will pull away like the primer did.
Caulk Supplies
- Alex Flex Acrylic Latex Caulk
- Caulk Gun
- Gloves
- Paper Towels
You must caulk the following areas:
- Around the faucet
- Around the shower head pipe
- Between the tub and tile or between the tile wall and floor
- Along a glass frame where it was previously caulked
- Over ANY silicone caulk, so it becomes paintable
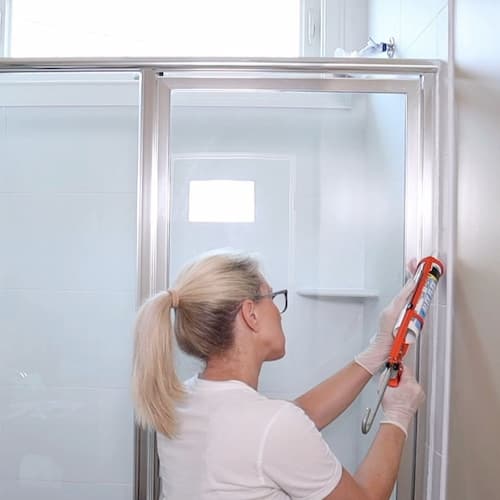
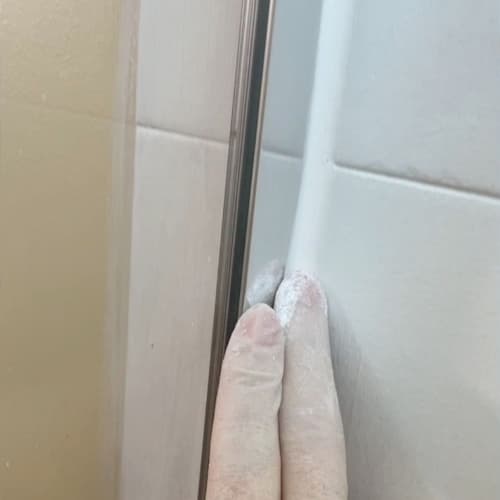
You need to seal in all areas to prevent water from getting behind the primer and paint.
Once finished. Let the caulk dry for 1 hour prior to painting.
Step 5: Painting Shower Tile and Grout Lines
I don’t recommend using a foam roller for this project. It won’t push the primer into the grout lines to fully coat them.
Paint Supplies
- Valspar Porch and Floor Paint in Satin Sheen
- Nylon Polyester Brush
- 3/8 inch Nap Roller and Cage
- Handy Paint Pail and Liner
- Paint Tray and Liner
Painting the shower will feel SO much EASIER! More like painting a room.
You won’t have to brush every grout line like you did with the primer.
My advice DON’T TAPE anything and use a steady hand. The risk of pulling up primer or caulk is high.
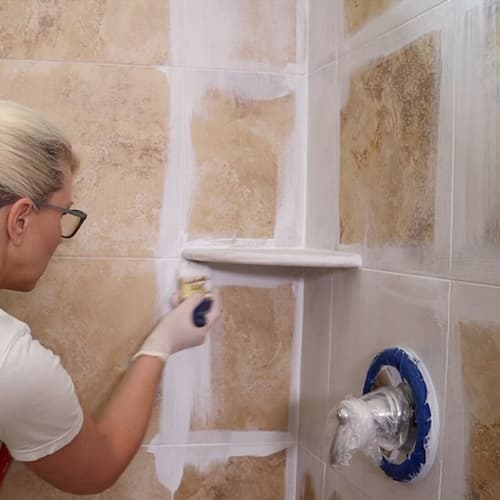
Using a brush, apply the Valspar Porch and Floor paint to all edges that can’t be rolled:
- Around faucet and shower head
- Between tub and tile or tile and shower frame plus floor
- Around any details like a soap tray or shelf
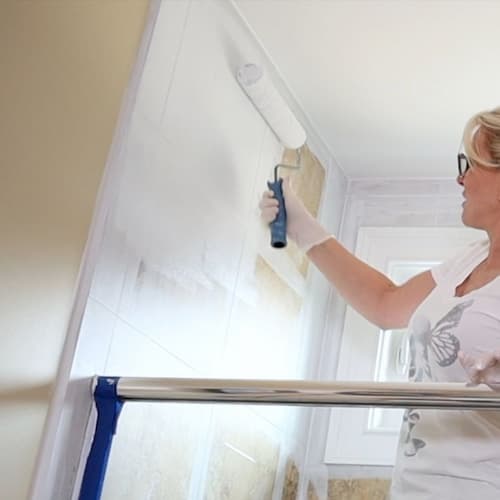
Use a roller and roll on paint immediately following brushing.
Make sure to run the roller both vertically and horizontally to cover the grout lines.
If you did any taping, PULL TAPE within 30 minutes. Don’t allow it to dry.
Turn on the fan in your bathroom to help with removing the moisture in the air to help the paint dry.
YOU WILL BE APPLYING 3 COATS of Porch and Floor Paint
- Apply 1st coat of paint and dry 12 hours or more
- Apply 2nd coat of paint using the same process and dry 12 hours or more
- Apply 3rd coat of paint DRY THE FINAL COAT 3 days before exposing to water!
If you have a tub you are DONE and and skip to how to care and clean your painted shower tile.
If you have a tiled shower floor, move to the next tutorial.
Clean, Prime and Paint Shower Floor Tiles
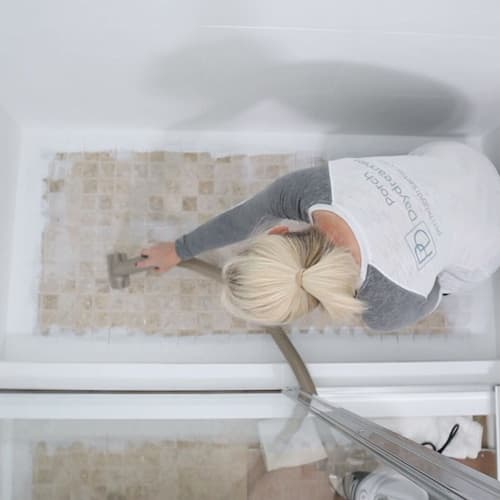
Painting the tile floor is probably the hardest part of this project because you have to work in a small area.
Then you’ll have to be extremely careful with the primer coats not to disturb it in anyway.
Because you’ve been working in the shower to paint the walls you will need to clean the floor again.
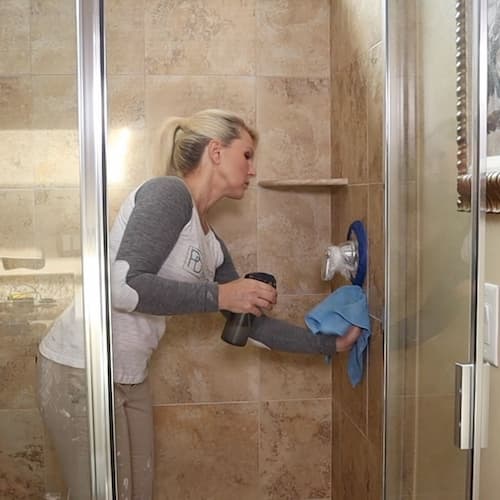
Step 1: Clean the Shower Floor Tile
It is SO important to get the floor clean of all dust, dirt, and debris. Any debris under the primer can create a failure point.
Plus degrease the tile so the primer has the opportunity for maximum adhesion.
Start by vacuuming the tiles prior to cleaning anything.
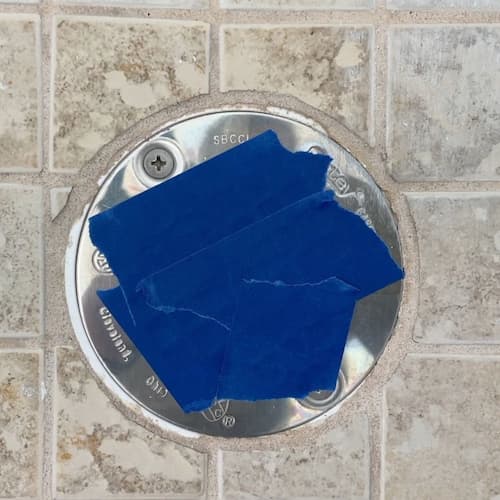
I ended up taping over the drain cover to prevent any paint particles from entering the drain.
Next use a battery operated scrub brush or a regular scrub brush to lift up any weak or loose paint or primer around the edges of the shower basin.
THOROUGHLY VACUUM AGAIN BACKING YOUR WAY OUT OF THE SHOWER.
From this point forward, only wear socks and wipe your feet on a towel before stepping on the tile.
This will prevent grease and debris from getting onto the tile floor.
Use rubbing alcohol and saturate a microfiber rag (a lint free rag is critical to this process.
Thoroughly clean the tile and grout to degrease it as preparation for priming.
Work off any weak spots of primer or paint on the surface of the tile.
Remove the drain cover, fill with a paper towel, and REALLY clean around the edges to remove any dirt and debris plus degrease.
Getting this area clean is important due to how much water exposure the paint will get.
You want to ensure the best adhesion possible.
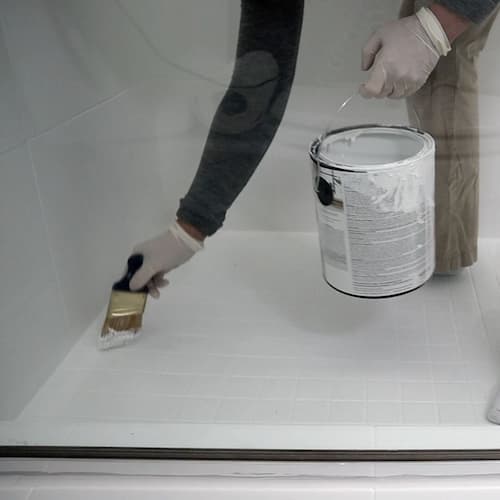
step 3: Prime the Shower floor tile
Make sure to wear socks and wipe your feet on a towel before stepping into the shower.
Take the can of bonding primer into the shower with you and work your way out of the shower.
Use a nylon polyester brush apply a heavy coat of bonding primer and work into grout lines and onto the tile.

Now this is where things get tough! The best application method is to immediately roll on the bonding primer right after brushing the grout lines.
You won’t be able to step on the tile, so you are going to have to lean in and stretch to roll on the bonding primer.
DRY PRIMER 4 HOURS.
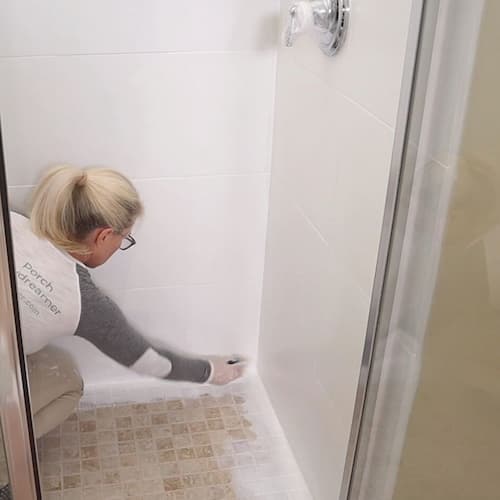
Step 4: Paint the Shower Tile Floor
So you don’t disturb the primed tile floor, you will roll on the Porch and Floor Paint first.
Avoid stepping on the floor if possible. If you do, where socks and wipe your feet on a towel before entering the shower.
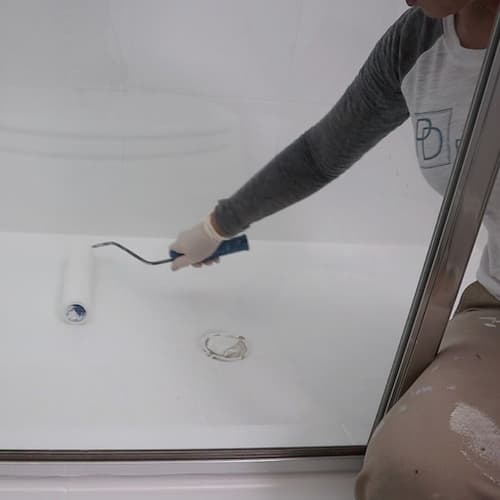
You can see I was leaning to apply the paint and never stepped in the shower.
Applying a layer of paint with a roller and not stepping into the shower will help keep the primer in tact.
DRY OVERNIGHT!
Apply 2nd coat of Porch and Floor Paint starting by applying a heavy coat working it into the grout lines.
Pay special attention to the corners, edges and around the drain.
You won’t be able to step into the shower, so get ready to stretch! Lean and immediately roll on a heavy layer of paint.
Again if you can’t reach, you can let the paint dry 12 hours and then roll on the porch and floor paint.
Focus HEAVILY around the drain to make sure it is thoroughly covered.
If you see any pin holes in the grout once you apply the paint, use your brush or edge of your roller to force paint down in those areas.
You will apply 3 coats with the following dry times:
- 1st coat of paint dry 12 hours or overnight
- 2nd coat of paint dry 12 hours or overnight
- 3rd coat of paint to the shower tile floor. DRY THE FINAL COAT 3 days before exposing to water!
Clean up your supplies because you just completed painting your shower!!
How to Repair Chips or Scratched Paint
I had this issue after only allowing the paint to dry a couple of days. I wasn’t gentle when I put the step stool in the shower to install the new shower head.
You can use this process anytime to have a man made scratch. DEAL with those IMMEDIATELY. If you run your shower and water gets under the painted surface, it will peel eventually.
Here’s how I fixed the scratched paint:
- Lightly sanded the area with 220 grit sanding sponge.
- Removed all sanding dust with a vacuum and damp rag.
- Applied rubbing alcohol with a lint free rag to degrease.
- Applied bonding primer and paint per the FULL tutorial.
When you apply the primer and paint extend out a few inches to fully cover the area. Let it dry and fully cure at least 3 days, before running water.
When You Can Use Your Shower
You MUST wait 3 days before running water in the shower. IDEALLY you should wait 7 days, but I know that may not be an option.
BABY your painted shower tile for the first week. It takes a LONG time for this urethane fortified paint to dry…especially on a glossy surface.
Your painted shower tiles won’t be fully CURED for 30 days!
How to Clean Your Painted Shower Tiles
The porch and floor paint is very durable and will be waterproof. HOWEVER, NEVER SCRUB your painted tiles.
A scrub brush will create little micro wounds in the paint that will start allowing water to penetrate the surface.
By not using a scrub brush to clean, you will extend the life of the painted surface.
You’ll be surprised at how clean the shower will stay now that the grout has been sealed with paint.
Plus it will be much easier to clean in general now that the surface is smoother.
You can use bleach from time to time, but I’d avoid using it on a regular basis and only use it if mold appears.
For regular cleaning, you can use the same spray bottle of dish detergent mixed with 50% water and a microfiber rag to clean.
You’ll be surprised at how well it works to get rid of soap scum.
Sign-Up for my Weekly Emails!
Straight to your inbox sharing can’t miss decorating and painting tips for your home.
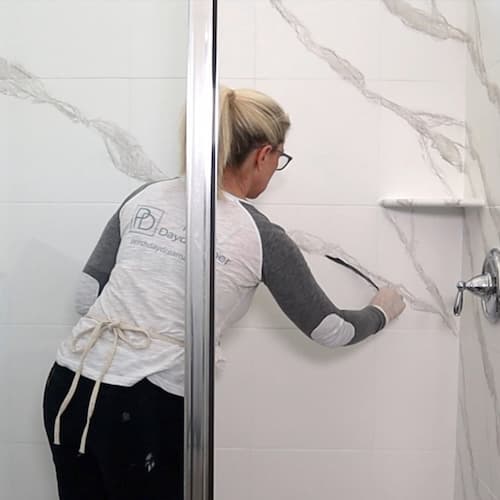
YES! Here’s the tutorial for how to create the marble veining!
Let me know in the comments if you have any questions and I’ll try to help!
Tracey, thank you for the great instructions. We are halfway through.
I didn’t see how to credit you with our paint purchase from Lowe’s but if I can, I will send you the receipt.
Larry
You are sweet and I am so happy they helped you! If you click any link of mine and order online/pick up in-store I get credit with Lowe’s.
Thanks, so much for the tutorial! Our bathroom is in need of some love. We have the vanity out right now due to old home plumbing issues and thought this would be a great time to get the rest done. My question is, can I use a paint sprayer on the walls??
If you feel comfortable with the prep and spraying, a paint sprayer is a great idea!Just test first to make sure you get the right pressure and flow.
Thank you so much for this tutorial! I have one question, you don’t have to seal the tile after painting it?
Glad this helped you! I mention it early in the tutorial and explain why I don’t recommend sealing it. Could you? Yes, but it would make repainting or repairing any damage later much harder. My shower has been painted like this for 3 years and I have NO issues – even around the drain.
It’s hard to tell, do the painted shower walls still look like tile or solid white walls?
Thank you!
Hi, Kathleen. They still look like tiles if you just paint them. The marble faux finish does help to trick the eye into thinking is a solid slab. Hope that helps.
Hi! Is there a reason you did 2 coats of primer on the walls and only one on the floor? Should I do 2 on the floor? Looking at doing white on the walls and charcoal on the floor.
Sorry! Just saw this. I did 2 coats on both the shower walls and floor. Skip the charcoal on the floor. I’ve found the darker colors take forever to dry and keep it all white. Hope that helps!
Hey Tracey. We did this tutorial and it’s been great. Recently my son dropped gum on the shower floor and i tried to get it up with a putty knife and nicked the paint. How would you recommend fixing this nick? Should I start with the initial bond and paint in the hole and then do another paint layer over the whole floor?
I’m so glad this paint tutorial helped you! DARN gum huh? That’s a new one. For reference if this ever happens again, try some baby oil to remove the gum from the painted finish. Yes, you are correct in what to do to repair it. I scrapped the finish with my ladder installing the shower head and had to fix it. I lightly sanded, cleaned the dust, cleaned that area with some rubbing alcohol, applied bonding primer and then 2-3 layers of porch and floor paint around the scratch about 4 inches wide. Everything is still perfect after cleaning and use for 2 years. Good luck!
Hi Tracey- this tutorial
is exactly what I’ve been
looking for instead of epoxy kit. I redid our only full bath last year and have been wanting to paint the beige shower tiles. Finally, am able to do it right before we leave for the holidays so
It can dry! My current concern is the dry time between coats on the Porch paint. Like you mentioned- it’s critical to follow the label. Per the website, it says recoat time is 24 hours, not 12? In the middle and worried I won’t get the three coats in if it is 24 hours between. Thoughts??
Thank you!!
Hmmm, I wonder if they changed that due to consumer complaints or a formula changed. I worked from the back label for the 12 hour recoat time, but this was 2 years ago. If the label says 24 for recoat, then I’d do my best to wait that long. You can speed up the drying by running a hot fan too. If the paint feels hard after 12 to 18 hours and you can’t leave a finger or nail print, it should be ready for the next coat.
I’m putting new fixtures in as well. Should I paint first and then put in fixtures or put new fixtures in and then caulk and paint?
Hi, Nate! The odds you’ll scratch the paint installing the fixtures is HIGH, so to avoid this I’d install them first and start the tutorial. Good luck!
Thanks for this! I’ve researched a lot of methods for painting the shower and am in the middle of this one! Question about caulking – I removed all the previous silicone as some was moldy and then just finished priming. Your next step is to seal with latex acrylic caulk before painting – what is the reason you’d do that after priming but before painting? As opposed to after painting?
Thanks! It was difficult getting Valspar where I live but after I got that sorted – it’s all been going well!
Hi, Laura! I found it was much easier to see where to caulk and if there were gaps/damage/etc after priming. Then we want to seal in everything, so painting OVER the caulk as the final step will help make it more resistant to peeling and water. You can caulk again after you finish painting too! Have fun updating your shower 🙂
Amazing – thanks! It turned out really well, we’re so happy! I’ll check out your link about cleaning it to try and avoid any scratches or peeling and buy us a few years before replacing the tiles!
Yay! So glad it turned out well. Mine still looks great years later!
Would this work with the bonding primer and then Valspar SeasonFlex Satin Ultra as the paint? I’m using a very small amount (schluter trim that my contractor installed in the wrong color) and looking for a quart, and the porch paint you recommend doesn’t come in that size or in plain white, from what I can find online. Thank you!
Hi, Kim! Sorry, you can’t use an exterior paint for the shower. It has to be the Porch and Floor. I had to buy a full gallon to create the marble veins in the shower in this tutorial. When you think about the cost to remodel the shower, the expense is minimal.
Thank you for all the details!!! I have a glass mosaic accent in the shower that I loathe. Can this process be used on glass tile? Also, would it be insane to paint the grout lines to look like new grout lines?
Yes! You can paint the glass mosaic tiles this way too. Thanks for asking. It’s definitely not insane to paint the grout lines! There are grout paint pens specifically for this purpose and they come in multiple colors (see them here). Happy painting!
Can this be done on slate tiles that are in a shower??
Yes, the bonding primer will work to prepare the slate tiles too 🙂
We did your faux marble counter top tutorial on our bathroom vanity and it turned out amazing! We want to do the this shower paint now but I’m wondering if we need to silicone around all fixtures after paint has dried? Or, is just painters caulk sufficient since it will be covered with the outdoor paint?
I’m so GLAD to hear you love your painted counter! In my shower, I didn’t caulk again with silicone because there is silicone caulk under the new acrylic caulk and paint. My shower has been in use and cleaned regularly for close to 2 years and NO issues 🙂 Another reason I wouldn’t add silicone over the top is you can’t easily touch up the paint if needed. Hope that helps!
You mentioned that it still looked good after 10 months. How long ago was that and how long has your paint job lasted? We are about to embark on doing this. A little scary. Every paint store said it could not be done…..
Good news! It’s been 1.5 years, I’ve let my cleaning crew clean it and they have no idea it is painted. Still holding strong and I’ve just added a YouTube video to watch for additional instructions.
This is a great guide and I am probably going to tackle my shower and floor in a bathroom. Question, we are going to get the tub glazed to freshen it up. Would you recommend glazing before or ager the shower tiles gets painted or does it matter. Just curious because of all the new caulking that will take place.
thanks!
Hi, Jay! Great question. I like the idea of glazing first and then painting. That way you can caulk over the newly glazed tub surface before painting. That seems like the logical order. Just make sure to protect the newly glazed tub from the paint 🙂
Thank you so much Queen for your tutorial. I decided to bite the bullet and give it a try. I am loving it so far. I am at the floor stage with the second coat tomorrow. Good bye Travertine!!!
It’s amazing what a color change can do 🙂 Paint is magic. Hope you love it!
If I am replacing a glass tile accent piece around the shower with a different tile. Where should I fit in this step?
Painting would be the last step, so you don’t scrape the painted finish installing tile right?
Wonderful directions. I am saving this for a future project!
Thanks!