How-to Paint Shower Tile to Look Like Marble

Have outdated shower tile, but can’t afford to replace it? I’ll teach you how to paint it to look like marble in a few easy steps!
Searching for how to paint your shower tiles to look like marble? You are in the right place because I’ll teach you everything you need to know!
The best budget saver is to paint your shower tile, instead of replacing it with an expensive remodel.
This is a fool proof paint tutorial that is based in paint technology. I’m the Queen of Painting Everything and have an ACT (Architectural Coating Technologist certification) and worked for one of the world’s largest paint manufacturers. Not only do I know how to paint, but the science behind it!
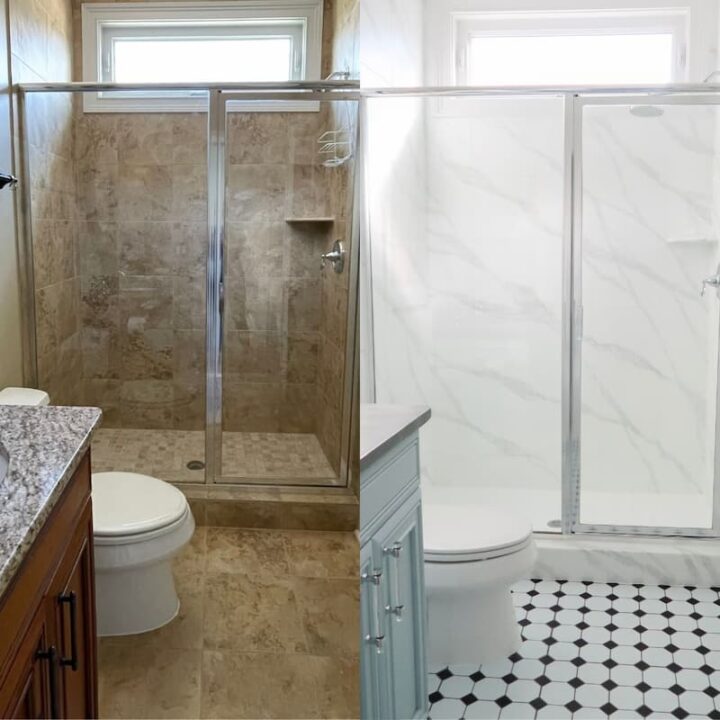
I recently tackled a DIY guest bathroom makeover for $400 and it looks like I spent $1,000s on a remodel!
Table of Contents
Marble Paint Process | Type of Paint | Marble Vein Guide | Paint Supplies | How-to Paint Shower Tile | How-to Paint Marble Veining | Care Instructions | FAQs
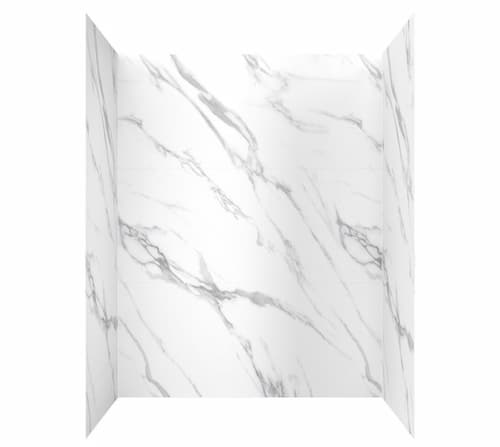
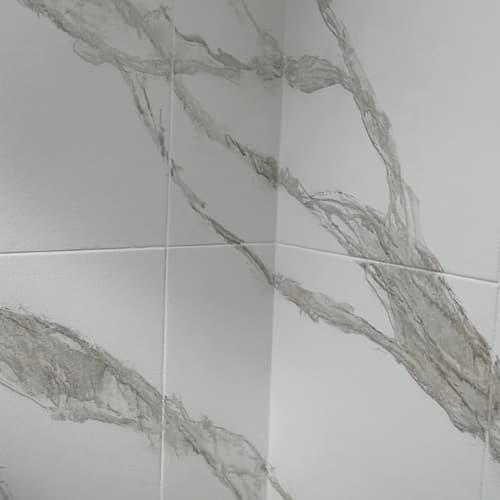
I love the look of marble slab, but that was WAY out of my price range for this small bathroom makeover.
Instead I found an inspiration photo and decided to create the same look by creating a faux marble finish by painting over the shower tiles instead!
The before and after of this painted shower makeover really fools the eye into thinking shower tiles were replaced.

No! It’s all a paint makeover starting with a base color of white and painting a faux marble finish with gray veining.
Luckily for you, the faux marble effect is EASY and with a little practice you can create the same look on shower tile or any tile you choose.
All it takes is two paint colors (white and gray) to create the look of marble on shower tile.
How to Get a faux marble look on tile with paint:
- Clean, Prime, Caulk and Paint Shower Tile White. (follow this tutorial first)
- Draw marble veins onto surface and blend with a brush.
- Create dimension with an over glaze of the white base paint color.
What’s nice about my approach is you don’t have to use a complex 2 part epoxy kit to create the faux marble effect.
Another benefit is the type of paint I use for the marble veining doesn’t require a clear top coat either!
Contains hand selected products, with affiliate marketing links where I may earn a small commission if a purchase is made. {full disclosure here}
What Type of Paint is Used for the Marble Vein?
You’ll be using the same type of paint you use to paint the shower tiles the white base color.
If you didn’t know, I worked for Valspar and consulted with the product experts before ever trying to paint my shower.
I wanted to create the most durable peel proof finish in the shower and make sure the marble veins were water resistance, without needed a top coat.
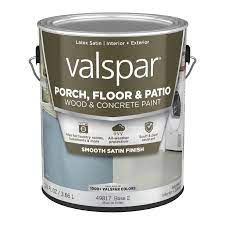
They agreed that Valspar Porch and Floor Paint (in Satin) was the right choice because it is rated for outdoor use and can withstand regular water exposure.
All of the preparation I cover in the How-to Paint Shower Tile tutorial will ensure your painted shower tile is as water tight as possible to help prevent peeling.
What you Need to Know About creating the marble veining
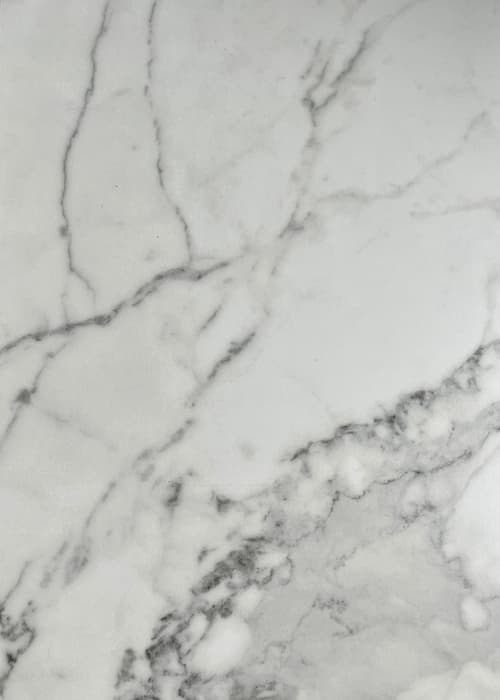
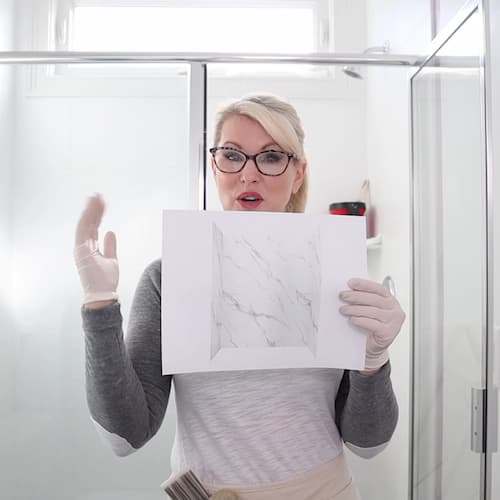
What will be CRITICAL to get the look you desire in the shower is finding an inspiration marble look to copy.
This can be a tile or a large format type slab shower image like I referenced.
Having a reference as a guide as you apply to a large space is really important.
Before you ever apply the veining to your painted shower tile PLEASE PRACTICE your technique.
This will be the key to your success and getting the faux finish looking exactly how you want it!
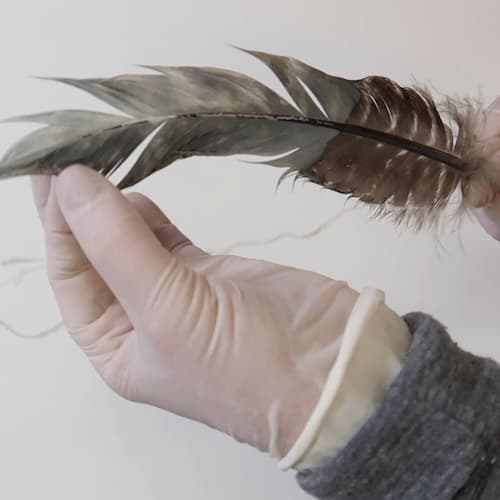
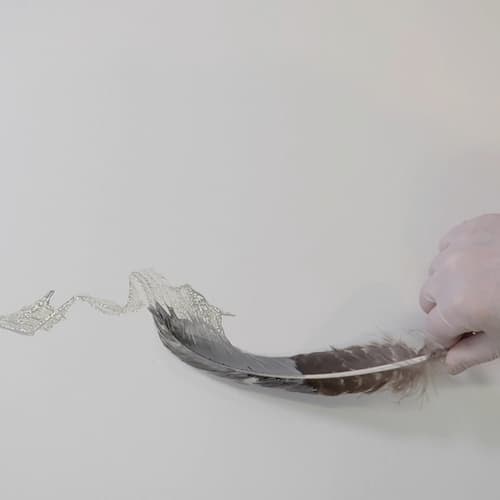
What tool will you use to create the faux marble vein effect?
A TURKEY FEATHER!
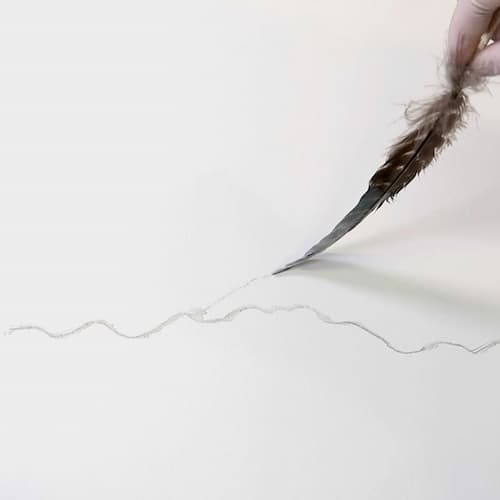
I purchased small drywall boards and applied base coat of paint, so I could practice. It’s worth the time and effort.
You’ll also need some other tools to get the full marble effect.
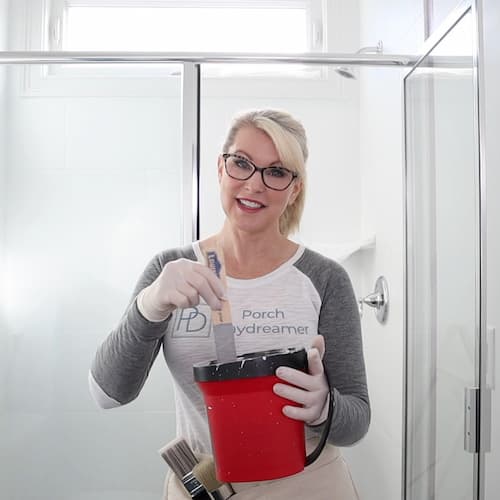
Faux Marble Vein paint Supplies
- Gray Vein – Valspar Porch and Floor Satin in Valspar Stone Mason Gray
- 2. White Wash – Valspar Porch and Floor Satin in Sherwin Williams Pure White (original shower wall color).
- Turkey Feathers
- Round Flat Bristle Brush (chalk paint brush)
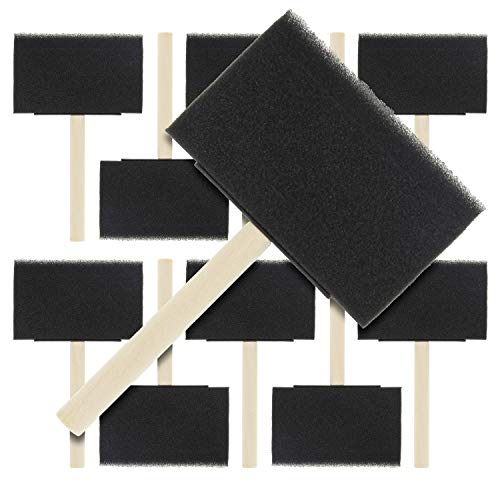
- 4 inch Foam Brushes (3 to 4)
- Handy Paint Pail and Liners
- Stir Sticks
- Tie on apron
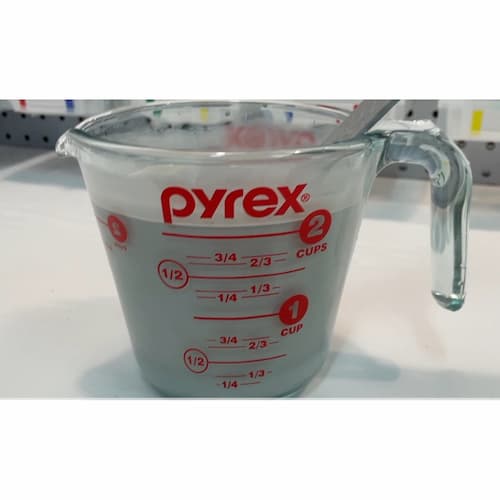
- Glass Measuring Cup (2 cup size)
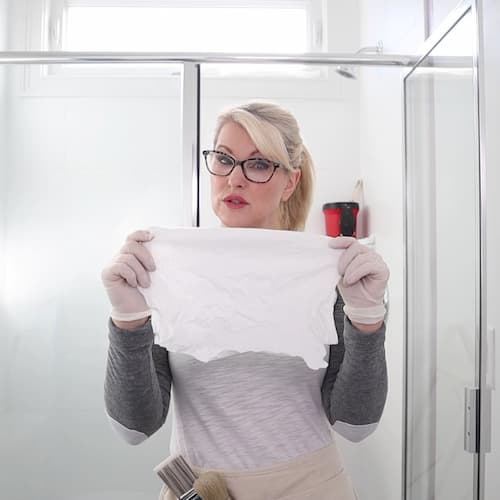
- Cut up white T-Shirt or Lint Free Rags
- Painter’s Tape
- Plastic Drop Cloth
How to Paint Shower Tile to Look Like Marble
For reference, this tutorial assumes you’ve followed my previous tutorial on how to paint shower tile.
You will have cleaned, primed, caulked and painted the shower.
YOU MUST DRY the base color Porch and Floor PAINT 7 DAYS, BEFORE APPLYING THE MARBLE VEIN EFFECT.
How-to Paint Shower Tile to Look Like Marble
How to apply layers of paint to create a faux marble effect on shower tile.
Materials
- Valspar Porch and Floor Paint - Valspar Stone Mason Gray Satin Sheen
- Valspar Porch and Floor Paint - Sherwin Williams Pure White Satin Sheen
- Gloves
Tools
- Turkey Feathers
- Round Flat Bristle Brushes
- Wide Foam Brush
- Lint Free Rags or Cut Up T-Shirt
- Handy Paint Pail and Liners
Instructions
BASE COLOR (tutorial here) MUST DRY FOR 7 DAYS PRIOR TO APPLYING MARBLE VEINING 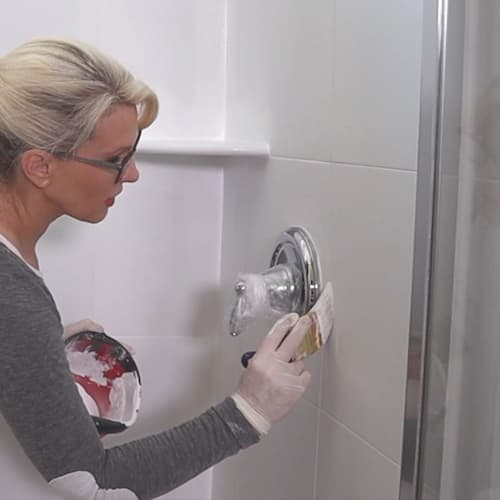
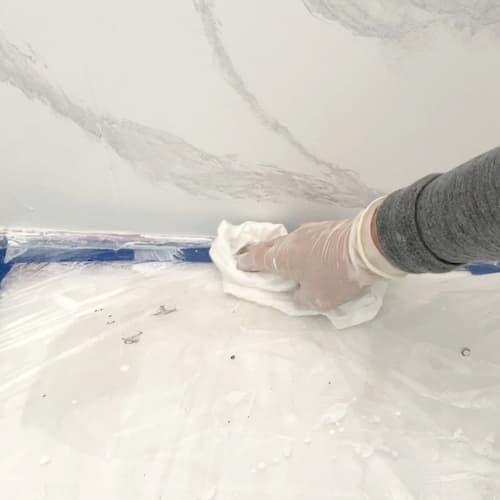
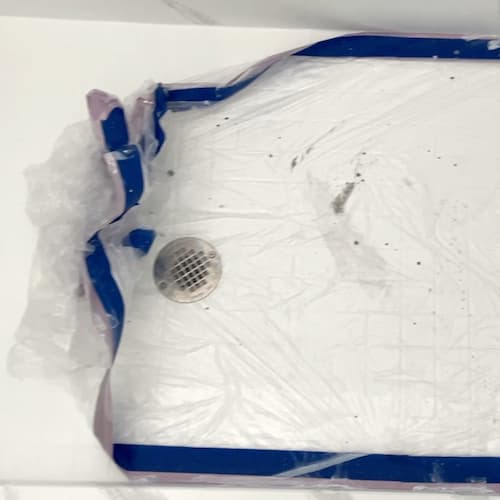
- Protect the shower floor or tub by covering with plastic and edging with painter's tape. Any glaze you get on the fixtures can easily be wiped clean.

- Create the marble vein glaze. Combine 1 1/2 cups of water with 1/2 cup of Valspar Porch and Floor Paint in Stone Mason Gray. Add paint to water. Stir thoroughly to mix. Pour into a pail and continously stir throughout the project to keep glaze mixture blended
- Assemble all tools turkey feather, lint free rags, brushes. I found having all tools in an apron sped up the process. An additional tool you may need is a damp sea sponge for blending (I ended up not using it)
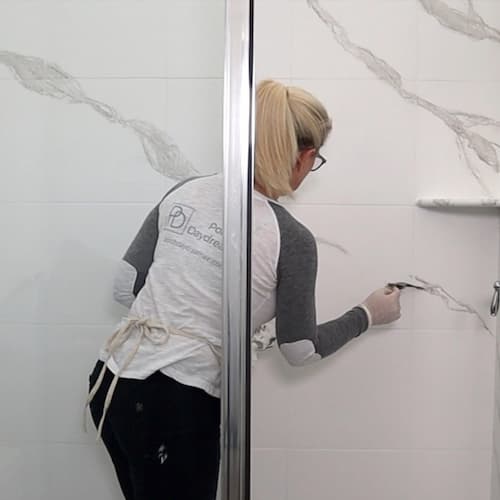
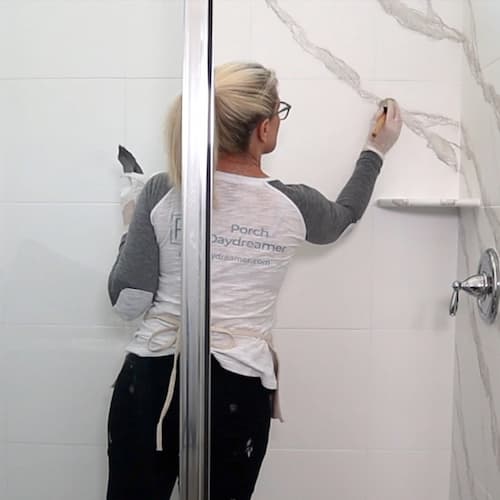
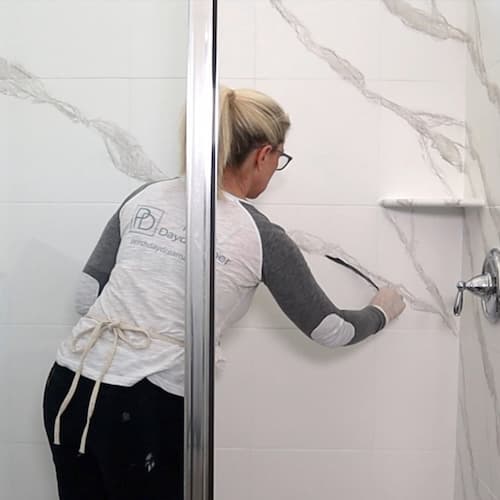
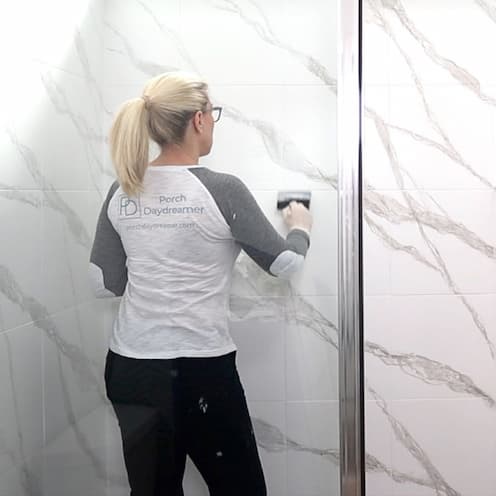
- Use your reference marble vein as a guide while painting. If you are doing a full marble slab look, work at a 45 degree angle off set from the corners. The same rule applies for individual tiles.
- WATCH THE VIDEO for more guidance. Start by dipping the turkey feather into the gray glaze mixture, blot it on the lint free rag, and break it up to create texture and a tip at the end.
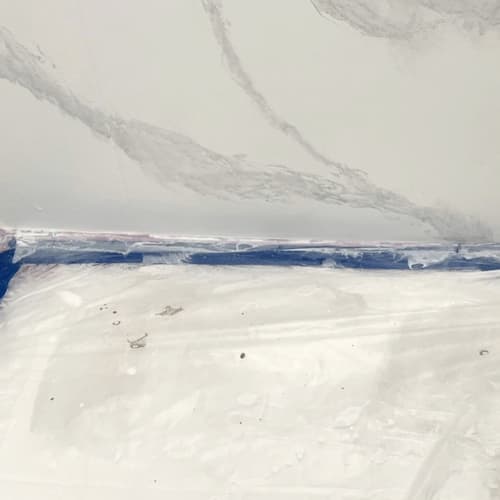
- Draw on small lines of the marble vein to start the pattern. Use your wrist to guide the turkey feather.
- For larger areas, drag the turkey feather across to fill in the space between smaller veins.
- Work on one vein at a time and in small sections while the glaze is still wet, pounce in the glaze using the round brush.
- Once you have blended in an area or if you need to connect veining section, use the edge or side of the turkey feather to add more dimension. Use your reference for guidance

- Your veins will look severe initially prior to the next layer of glaze. Make sure to look for natural areas to connect veins like they would occur in nature. LET GLAZE DRY OVERNIGHT
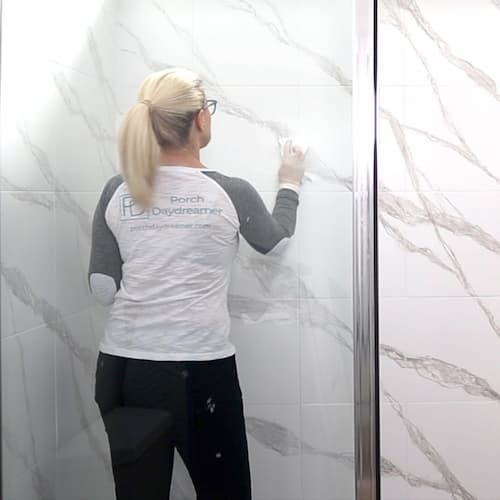
- Once the first glaze of marble veins is dry, mix the final glaze using the ORIGINAL white paint you used to paint the shower. Start with 3 cups of water and add in 1 cup of white paint. MIX thoroughly the consistency should be runny and look like thin milk.
- Dip your foam brush into the glaze mixture and blot off on a rag if needed. Apply in sections working top to bottom over the veining to set them back and create depth of color.

- Let the glaze sit a minute or so and blot off excess with a lint free rag.
- REPEAT THE OVERGLAZE process as many times as needed until you are happy with how light or dark the veins look. I applied 2 coats of glaze total.
- A tip for cleaning up, make sure to blot and drips of glaze off of the plastic prior to removing. Pull the tape and roll the plastic toward the center to avoid transfering glaze onto the walls.


Notes
- Make sure to PRACTICE on a sample board prior to applying the veining in the shower.
- Don't wiggle the feather to create lines, but instead use your wrist to guide the feather.
- For the white paint over glaze, start out with a thin mixture. As you get applying and think it isn't setting the marble vein back enough you can add more paint.
- You can apply as many coats of the white over glaze as needed to get the look you desire.
- If you can dry 7 days prior to running water, that's even better!
Recommended Products
As an Amazon Associate and member of other affiliate programs, I earn from qualifying purchases.


Do I Need a Clear Coat Protector
Fortunately no! Using my paint technology expertise I combined the paint in a way that would dry and retain it’s water resistant qualities.
My shower has been painted like this for months and cleaned WITHOUT ISSUE!
Not applying a clear coat gives you the opportunity to paint over the shower again, if you see any failing areas.
You can sand them smooth and follow my tutorial to repair any issues! The one area that may peel is around the drain, so fix it fast if you begin to see issues.
When You Can Use Your Shower
You MUST wait 3 days before running water in the shower. IDEALLY you should wait 7 days, but I know that may not be an option.
BABY your painted shower tile for the first week. It takes a LONG time for this urethane fortified paint to dry…especially on a glossy surface.
Your painted shower tiles won’t be fully CURED for 30 days!
How to Clean Your Painted Shower Tiles
The porch and floor paint is very durable and will be waterproof. HOWEVER, NEVER SCRUB your painted tiles.
A scrub brush will create little micro wounds in the paint that will start allowing water to penetrate the surface.
By not using a scrub brush to clean, you will extend the life of the painted surface.
You’ll be surprised at how clean the shower will stay now that the grout has been sealed with paint.
Plus it will be much easier to clean in general now that the surface is smoother.
You can use bleach from time to time, but I’d avoid using it on a regular basis and only use it if mold appears.
For regular cleaning, you can use a spray bottle of dish detergent mixed with 50% water and a microfiber rag to clean.
You’ll be surprised at how well it works to get rid of soap scum.
Sign-Up for my Weekly Emails!
Straight to your inbox sharing can’t miss decorating and painting tips for your home.
Let me know in the comments if you have any questions and I’ll try to help!
Paint Tile FAQs
Answering the most common questions around paint ceramic tiles!
Can I use this tutorial to paint my bathroom floor tiles?
Yes, BUT I don’t love recommending painting floor tile in general and instead recommend peel and stick floor tiles (some of my favs).
Any little stone you get on the bottom of your shoe or when you drop a hairdryer on the painted tile floor can create we weak spot or crack in the paint.
Eventually that will allow moisture or water to get under the paint and primer and begin to peel it.
IF this is just a short term fix until you are ready to replace the tile, then go for it!
You can follow the same process as I used for painting the shower floor tile. Don’t walk on it for 3 days AT LEAST!
What type of paint should I use to paint my tub to match the painted shower tiles?
The type of process and paint you would use is completely different to paint a tub.
You’ll need to use a 2-part epoxy system that will completely seal the surface and make it waterproof.
I recommend using a Tub & Tile refinishing kit. They come in gloss or satin finish. It comes in a standard bright white, so the color will be different, but that shouldn’t be an issue.
This project will be a lot more involved than painting shower tile. The preparation is more aggressive and the smell is SEVERE.
You would need to invest in a respirator mask as well to protect your lungs.
Quick question 🙂 would the paint used for painting your shower, hold up for a tub? The tub isn’t used all that often.
Hi,Stephanie! I just added some information to this tutorial so thank you for the question. I’d recommend an epoxy based tub and tile refinishing kit, which is waterproof.