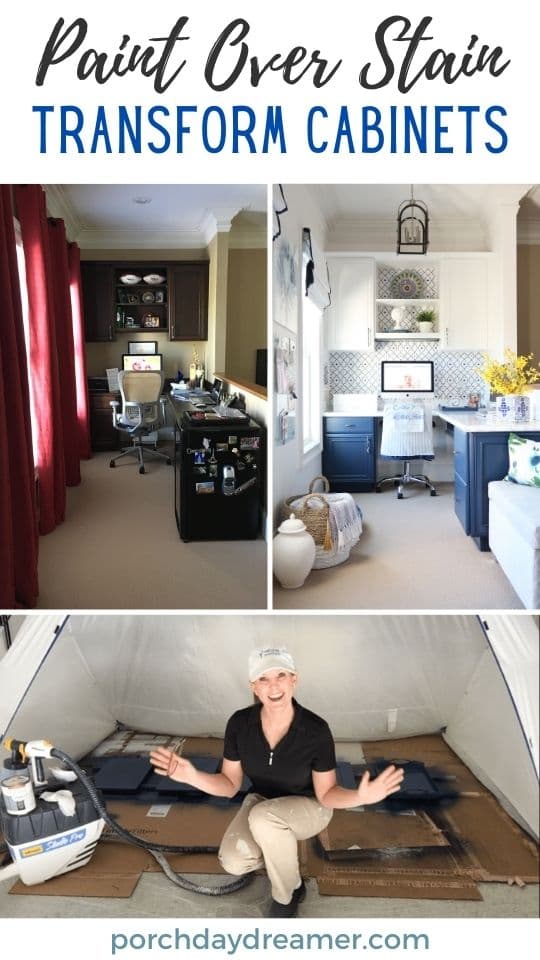
How-to Paint Cabinets and Get a Smooth Finish
Here are step-by-step instructions on how to paint cabinets and get a smooth finish! Plus the best most durable paint to use and how to avoid sanding altogether.
The truth is what you are really looking for is how to make the painting project easier, faster, and get a smooth finish that looks like a professional did it!
Why should you trust my advice? I worked for Valspar Paint for over 5 years and learned how to apply all sorts of coatings from professionals.
I got to practice for free, without messing up anything in my own house 🙂
Our team trained the Lowe’s Home Improvement paint staff, so I got first hand experience of problems people experience in real life and how to avoid painting mistakes.
Plus, I’ve painted all of my home’s cabinets and gotten beautiful smooth professional results.
I’m sharing all my best tips and tricks anyone can follow.
Let’s talk specifically about painting cabinets and why it’s such a good skill to perfect:
- Hiring a professional painter is EXPENSIVE
- Paint is the cheapest and easiest way to redecorate
- Cabinet color is really important during reselling a house – especially the kitchen and bathrooms
- Painting doesn’t require a lot of skill just the right tools!
Can I paint my cabinets if they are in bad shape or chipped?
Yes! However, you are going to have to put some additional work into preparing the surface prior to painting.
This is the rule about painting chipped cabinets: If the surface is failing and you paint over it the newly painted surface, it will fail too.
You MUST sand smooth peeling or chipped areas on the cabinet (especially around knobs and pulls), prior to painting.
My favorite battery operated sander is ideal for this task or simply using sand paper.
Just make sure to clean off all of the sanding dust prior to starting the project.
Cabinet Painting Tools
Now it’s time to get serious and let me teach you exactly what you need to purchase to create a smooth paint finish on a cabinet.
It’s going to require some investment on your part, but several of these items you can re-use over an over again.
Wooster Brush Company worked directly with Valspar to develop compatible brushes, so I am a huge fan of their products!
Novice Painter : If you really don’t have much experience, start with painting a powder room cabinet to ease into painting cabinets.
DON’T start with the kitchen or a large bathroom please.
Post contains hand selected products, with some affiliate marketing links {full disclosure here}
Cabinet Painting Supplies
- Painter’s Plastic
- Just buy the box and you can create any size drop cloth you need, you can cover furniture and even adjacent walls with this stuff!
- Frog Tape
- I’ve experimented with a lot of painter’s tape and this by far leaves the cleanest line and pulls off without damaging anything.
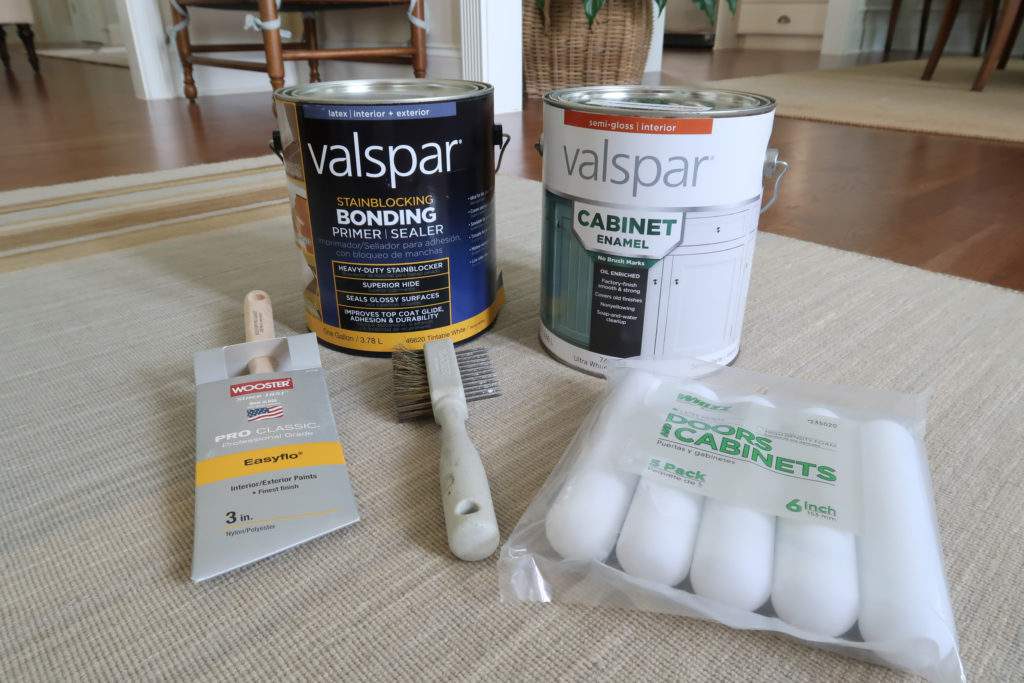
- Wooster Pro Classic Brush
- You need a high quality brush to get a smooth finish, when you hand paint the base of the cabinets. Spend the money!
- Brush Cleaner
- If you spend the money on a good brush, you must clean it after every use!
- Foam Roller Multi-Pack
- A foam roller is a foam roller, so you can find the cheapest version.
- Valspar Bonding Primer from Lowe’s
- This sticks to every type of surface, even tile and polyurethane plus blocks stains. Why do you care about this? NO SANDING!
- Valspar Cabinet Enamel from Lowe’s
- A new paint technology that is soap and water clean-up, but dries to a hard finish like an oil paint. It flows and levels to fade brush marks, so even the novice painter will get a smooth finish.
- Plus NO NEED for polyurethane! Use this paint on furniture too for a smooth finish.
- 4 Pieces of long and narrow trim pieces of wood. Usually in the trim aisle at Lowe’s.
READ: Valspar Cabinet & Furniture Enamel: What You Need to Know
IMPORTANT: Foam rollers are critical to a smooth finish. Don’t use a regular roller!
READ: Are You Using the WRONG Paint Roller Cover?
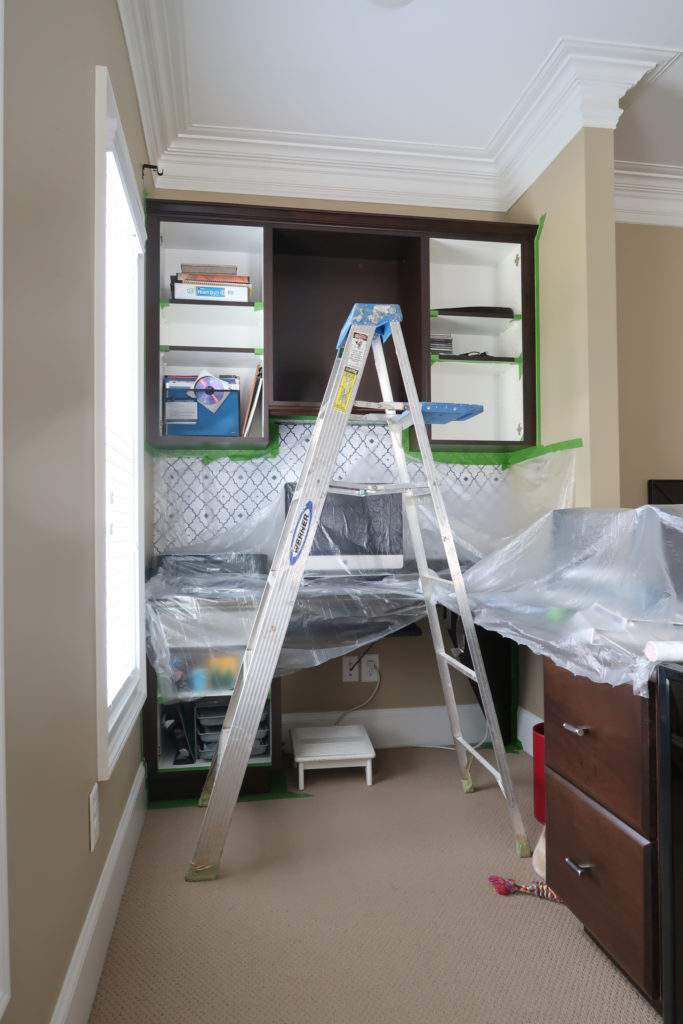
When painting cabinets, preparation is everything:
- Remove the drawers and doors from the base cabinets.
- Remove the cabinet hardware. Store each drawer and door in separate labeled small snack bags.
- Clean the cabinet surface and dust.
- Apply tape to adjacent surfaces you are not painting. Make sure you aren’t taping on the cabinets!
- Lay drop cloths to protect surfaces.
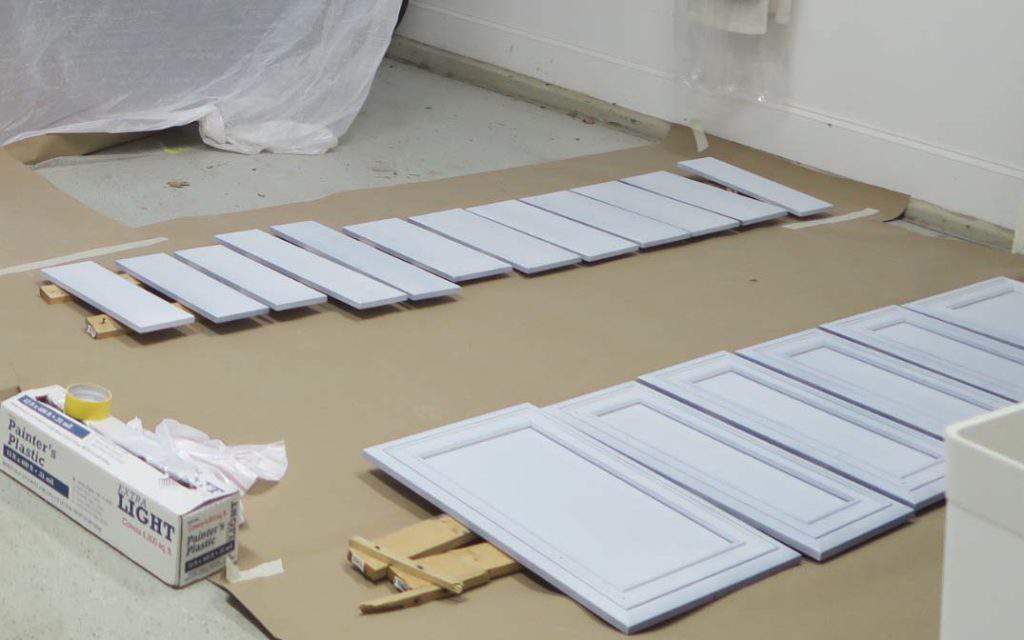
- Place trim wood in an area that is safe and protected from dogs, cats, dust, and kids so your cabinet drawers and doors can dry in peace.
- Your drawers and doors will be painted while they are on the trim boards.
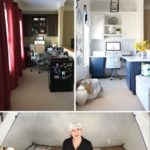
Here is a picture of what my office looked like as I was prepping for painting.
I haven’t covered the floor yet, but notice I taped the carpet, so paint couldn’t seep and ruin it. It worked perfectly!
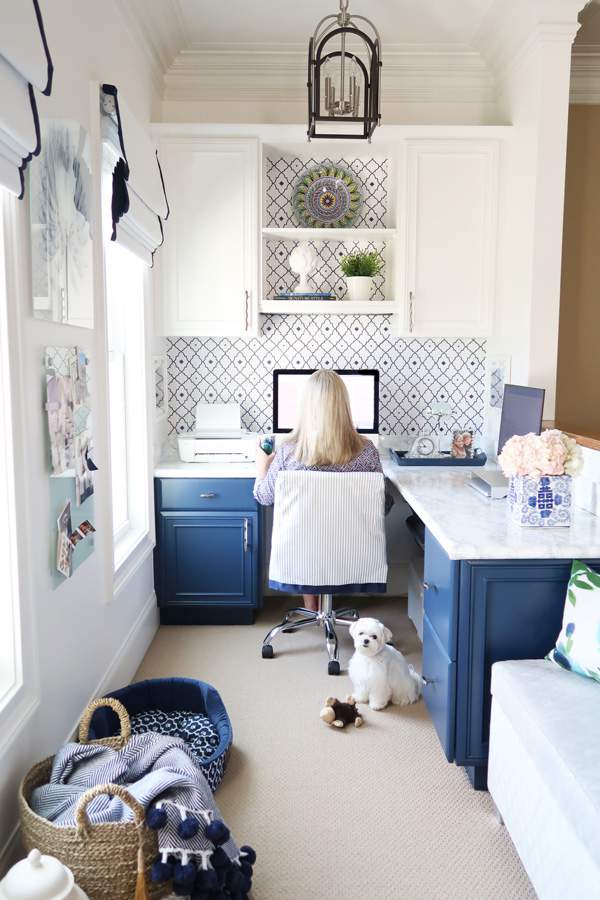
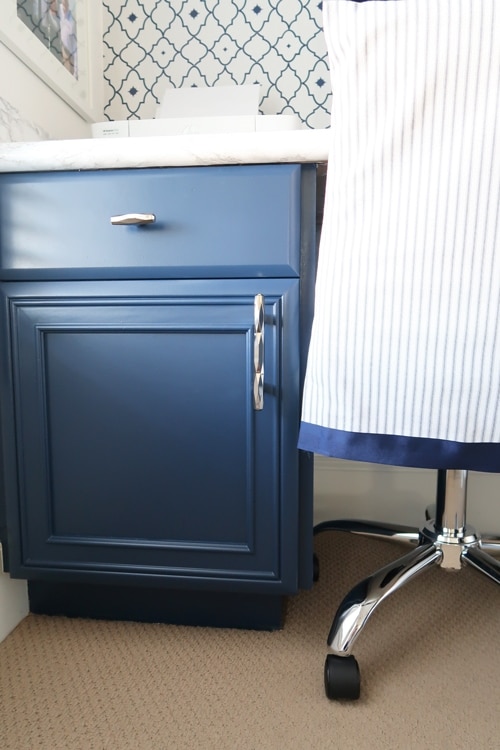
Here is the after and you can see I transformed dark espresso cabinets with white and navy paint!
Are you getting excited about what you can do in your home?
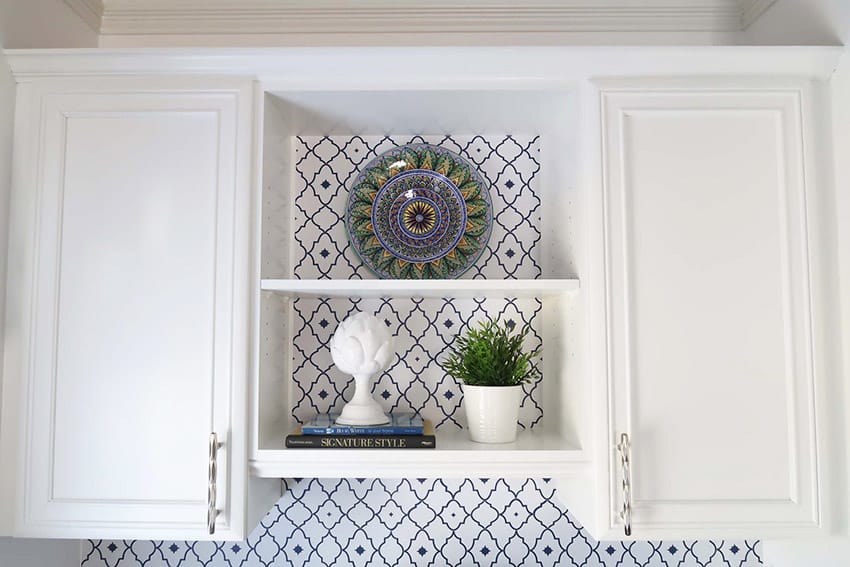
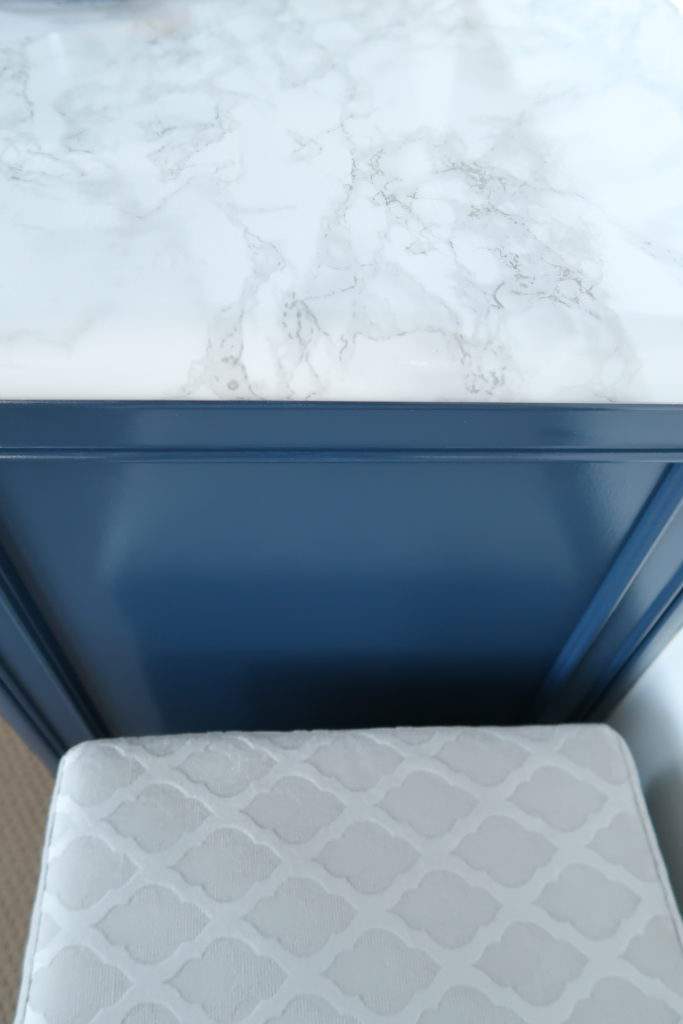
Wall and Upper Cabinet Color: Valspar 7002-16, Swiss Coffee
Lower Cabinet Color: Valspar 4010-4, Indigo Streamer
Shop the Space

If you are looking for cabinet paint colors:
- Classic Kitchen Cabinet Paint Colors
- 20 Cabinet Paint Color Combos for the Kitchen
- Best White and Neutral Paint Colors: Walls, Cabinets and Trim
- 2021 Kitchen Cabinet Paint Color Trends
Painting Cabinets Step-by-Step
Get your painting clothes on, some comfy shoes, put on some good music, and let’s get started.
Here is another post that may be helpful too: NO-SAND Method to Painting Kitchen Cabinets
Step 1: Bonding Primer
- While on the trim boards, using the foam roller prime only one side of drawers and doors.
- Make sure to coat the edges and corners thoroughly because they take the most abuse.
- Bonding primer is NOT meant to cover and some of the surface will show through. What you are doing is “roughing up” the surface so the paint adheres.
- Try to limit brush marks by painting with the grain of the wood.
- Next, using the same brush and foam roller prime ALL base cabinet surfaces.
- DRY OVERNIGHT! Yes, annoying but you want really good results remember!
Here’s what my garage looked like, while my master bathroom cabinets dried. It was spring, so the temperature was mild, no rain, and no humidity. Dry inside if you have the space for maximum temperature control.
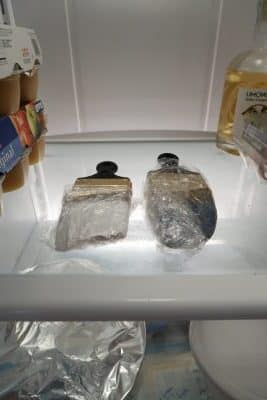
Step 2: Cleaning and Drying Brushes
This is the process you use each time you stop painting for the day:
- Clean your brush thoroughly, set it out to dry, and throw away your first roller (you bought the multi-pack, right?).
- As another option, the brushes CAN be kept overnight without cleaning in the refrigerator. Wrap tightly in clear plastic wrap.
- My preference is to clean, so I don’t have to worry about dried paint on the brush ending up in my smooth surface!
Step 3: Bonding Primer Again
- Flip over your now dried drawers and doors and gently place them primed side down on the trim boards. DON’T scratch off the bonding primer, if you do touch up!
- Apply with your brush and foam roller a coat of bonding primer to the other side of your drawers and doors.
- Next, using the same brush and foam roller you should only need to touch up areas you missed with primer on the base cabinets.
- DRY OVERNIGHT! Yes, annoying but you want really good results remember!
IMPORTANT: DON’T Shake the cabinet enamel to mix it up. Use a stir stick. Shaking will create bubbles in the paint that will ruin the smooth surface.
Step 4: Apply 1st Coat Cabinet Enamel / Color
- Try to limit brush marks by painting with the grain of the wood.
- While on the trim boards, using the foam roller and brush paint only one side of drawers and doors.
- Next, using the same brush and foam roller apply a coat of Cabinet Enamel to the base cabinets.
- DRY OVERNIGHT and clean your brush. Toss the foam roller.
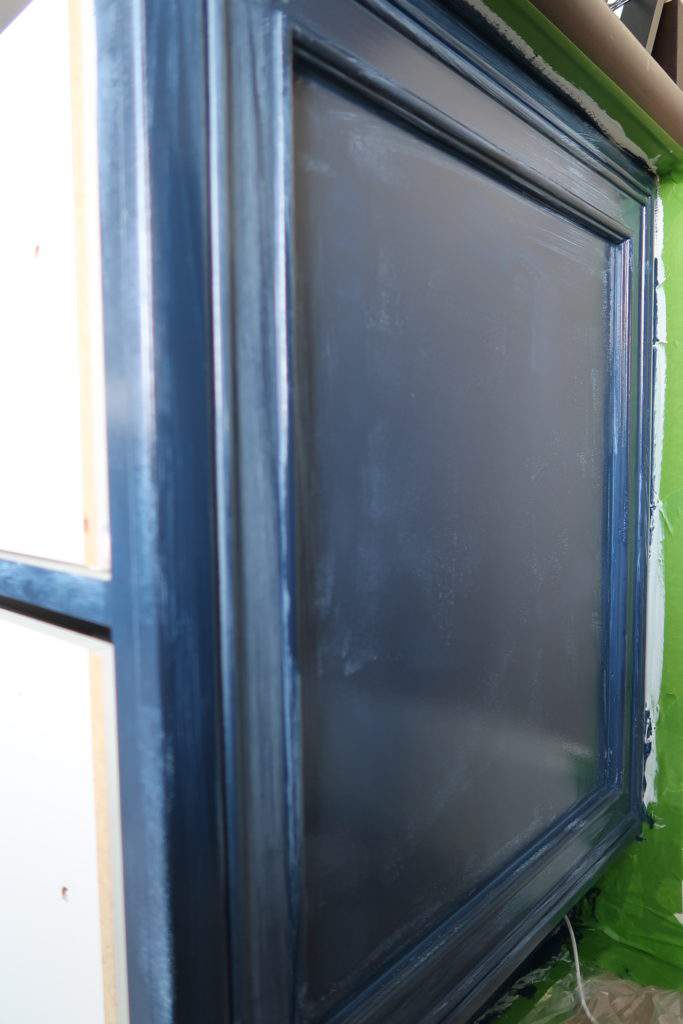
Warning; If you are using a dark color, the first coat will look awful. Don’t over apply and don’t panic. Here is what a hand applied 1st coat looked like when I was painting cabinets navy blue.
Step 5: Apply 2nd Coat of Cabinet Enamel / Color
- Flip over your now dried drawers and doors and gently place them painted side down on the trim boards. DON’T scratch off the paint, if you do touch up!
- While on the trim boards, using the foam roller and brush paint the other side of drawers and doors.
- Next, using the same brush and foam roller apply 2nd coat of Cabinet Enamel to the base cabinets.
- DRY OVERNIGHT and clean your brush. Toss the foam roller.
- You are DONE painting! Celebrate.
Step 6: Reassemble the Cabinet Drawers and Doors
- Re-attach doors and drawers to base cabinets.
- Attach cabinet knobs and pulls.
Warning: If one of your drawer fronts doesn’t seem to match the screw holes, try it on another drawer. I had this issue and my drawer wouldn’t close properly, so pay attention as you go.
I’ve got a NEW POST showing you hand painting and spraying cabinets in a video tutorial!
Finished Results
This is how smooth and beautiful that second coat of paint will appear after it has dried. Ahhh, it’s a miracle!
Experienced Cabinet Painters or a Large Project
Now it’s time to get serious.
All right my “I am ready to tackle a kitchen cabinet painting job” friends. It’s time to step-up and buy yourself an airless paint sprayer!
Additional Painting Tools
Spray Shelter

An airless paint sprayer is a GAME CHANGER.
I’ll link a project where I let you know why I love mine so much and even paint a HUGE carved armoire INSIDE my bedroom with one: CLICK HERE.
#1 Reason you want an airless paint sprayer for a large project like a kitchen or bathroom!
- Drying SPEED and FEWER coats. Enough said?
- When It’s Time to Buy a Paint Sprayer
To see my sprayer in action painting cabinets, watch this! It’s amazing.
The base cabinets were painted by hand and the cabinet door and drawer were painted with the airless sprayer.
It was SO much faster to spray on paint, the coats of paint are thinner, and dry faster!
Pin It for Later!
Painting Cabinets with a Smooth Finish is Possible for Anyone
Now you see that truly anyone, with the right tools, a little know-how, and some confidence can achieve a beautiful smooth paint finish on their cabinets.
If you’d like to see some of my other painting projects around my home, CLICK HERE.
Looking to update the cabinet hardware?
Every time I update the paint I update the cabinet hardware too! I teach you how to choose, layout and install cabinet hardware HERE.
Good luck, YOU CAN DO IT!
Please consider following me on Pinterest and Instagram for daily inspiration.
Until next time…
Porch Daydreamer
Tracey
Hi there! Great tutorial! What sheen did you use for the navy blue colour above? What sheen would you recommend for a black and white two toned kitchen?
Thank you in advance!
Here is a great sheen guide and project guide for you. I recommend semi-gloss for cabinets.
https://porchdaydreamer.com/best-cabinet-paint-kitchens-bathrooms/
https://porchdaydreamer.com/best-paint-sheen-by-project/
HI! I am so excited to do this! Did you paint the insides of the doors as well?
I did! Sorry for the late reply.
I sanded my cabinets down to raw wood due to poorly prepped 2nd color by previous owner. Do you recommend using the bonding primer in the case of raw wood or should I use regular primer?
I like using a stain blocking primer, which Valspar Bonding Primer is, to prevent any tannin bleed and to prep the surface prior to painting.
Wonderful tutorial, but I have one question. I’ve read a lot online and they all say to sand after the primer coat, but you don’t do that.
Should I lightly sand the primer coat or not?
Thanks
If you have rough or uneven areas, you can sand. I was priming over a smooth surface and applied a smooth coat of primer. There have been times when my paint sprayer has left some “globs” of primer that I have sanded down. Painting has a lot of variables…so if you need to sand the primer to get it smooth do it!
Great article! I’m getting ready to tackle a kitchen painting project at one of my rental properties. The cabinets are oak. Have you had success painting oak cabinets with the primer and Valspar cabinet paint you recommend, without the grain showing through very much? Would like it to be as smooth as possible. I’ve read a lot of articles about people using fillers on oak before priming, but would like to skip this step if you have had success with your approach!! Thank you!!!
Hi, Shannon! If it is a rental, I’d just prime and paint without filling the grain. If it’s important to you to eliminate them then you can fill, but likely the color will be the best update of all 🙂 I haven’t personally tackled this project, so I can’t offer much more than my opinion on this one.
Love your tutorial! Do you use a Deglosser at all before the bonding primer on oak cabinets? Or just the chemical cleaner. I just wiped down with a TSP substitute and wondering if I need to Deglosser before using the Valspar bonding primer. Thank you!!
Hey, Renee! No, I never have used a de-glosser on cabinets. Just get them free of grease and dirt them prime 🙂
Hi. I have just started a kitchen cabinet paint project. Using the Valspar Bonding Primer and the cabinet and furniture paint. Had challenges with the paint running and dripping. Some areas I think I may have over applied because the paint looked a little gunky. Left it to dry overnight. Do you think it will level of should I expect to sand before my 2nd coat? Enjoying your website. Thanks for your help.
This can happen to anyone…even the professionals and me 🙂 Yes, you can sand/prime and I walk through this issue in this post: https://porchdaydreamer.com/hand-painting-or-spraying-cabinets-what-is-better/
Hello! My husband and I just finished painting our kitchen cabinets using your tutorial! Thanks so much for the easy-to-follow instructions!
We want to paint the walls tomorrow. Would it be okay to use painters tape on the cabinets before they cure fully? Just to clarify, they will have plenty of time to dry, but they won’t have the days to cure. Thanks!
I’m SO glad you found the tutorial helpful! I’d wait a week before taping to paint the walls to be safe OR free hand paint the edges. I never tape anymore and just wipe off the paint with a damp paper towel if I mess up. The finish of the Cabinet Enamel is wipeable, so if you want to hurry up that is your best bet. Patience is a virtue 🙂
Hi there!
I am new to all of this, and decided to tackle “the boys” bathroom to get me started. I noticed that the primer on the doors is streaky (brush marks), and I’m afraid it will show when I paint over it. I think I must have put it on too thick (?). Do you recommend sanding? Also, as I need to use a brush on many parts of the cabinets (they’re small), how do you avoid brush marks?
Hey, Tara! Definitely sand the primer smooth with a 220 grit sandpaper and clean off ALL of the dust. I just painted my nightstands and had to use a brush in some areas and didn’t have any brush marks. The main goal is to apply thin layers with a nylon/poly brush. It’s better to have 3 thin layers and prevent brush marks than 2 heavy layers. The paint levels out in a week.
Tracey, thank you for your easy to follow guide. I have a problem that I need advice on how to fix. Painting cabinet doors white that were originally stained and varnished. Sanded all the varnish off to bare wood. Used Valspar bonding primer primer/stain blocker, 2 coats, sanding between each coat. Applied the Vaslpar Cabinet Enamel semi-gloss and and it has an orange peel texture. It has been 12 hours and still has this look. Applied this with a Valspar brush. What should I do to get rid of that texture before applying another coat?
Hey, Sandy! I don’t ever remember having and “orange peel” look after painting with Valspar Cabinet Enamel applying with a brush/foam roller. I just recently used it on my nightstands and had to brush on as much as roll and never saw texture. They dried to a smooth finish. It sounds like you did everything right? Did you roll on any of the surfaces? If you used a regular nap roller and not a foam roller that can create texture. You can lightly sand the paint to see if that smooths out the texture, clean and then apply the 2nd coat.
I used a regular nap roller and a brush while applying the prime coat, but used a brush only when I applied the first coat of enamel. The primer did not look like orange peel. I’m going to wait until morning to see if it levels out. If no change I will try to lightly sand, clean and apply a second coat. I read to try ‘wet sanding’ with a fine grit sandpaper. Would that be a better way to sand or not? Thank you Tracey
Definitely wait until the paint is fully dry to sand 🙂
Thank you so much for sharing! When I clicked the paint that you purchased, is it right that you used a semi gloss finished? I’m planning to paint my baby boy nursery dresser. I’ve originally bought a chalk paint but I was never really a fan of the finish and waxing it after.
Yes, semi-gloss is the best finish especially for a nursery dresser. That way you can wipe it clean easily.
Hello. I used the Valspar Enamel to refinish my daughters bed and I loved. Now I am going to tackle the 15ft of oak cabinets I have in my hallway. Two questions. 1. There is some rough/damaged spots on the counter and I need to sand that. Should I just roughly sand in order for the primer to work properly?
2. When you use a sprayer, do you dilute the paint? It tends to be a thicker paint and I was wondering if it clogs the paint sprayer? Thanks so much!
Hi, Ashley! Yes, definitely sand any rough areas smooth and make sure to remove all of the sanding dust before priming. No, I’ve never thinned the paint nor do I recommend it 🙂
What wonderful tutorial! I want to paint my dark wood kitchen cabinets. What do I use to clean them before priming?
If they are in the kitchen, you want to remove the grease. I like Krud Kutter Pre-Paint Cleaner and a micro-fiber cloth to remove the dust and lint. Good luck and thank you!
Here is my affiliate link for the cleaner: https://amzn.to/2zpbCbr
Hi there! So much great info! Thanks for all the details. If I wanted to add a dark glaze over the valspar cabinet enamel would I need an additional topcoat? If so, what do you recommend? Thank you!
Hey, Katie! I recently did this using Valspar Cabinet Enamel on my nightstands and didn’t do an extra top coat. Haven’t had any issues! Here’s that post: https://porchdaydreamer.com/french-blue-paint-nightstand-makeover/
hi! I am currently painting my kitchen cabinets following your tutorial. I previously did another kitchen years back that turned out terrible so I’ve researched a lot to make sure I get it right this time. When I went to Lowe’s the employee told me to get Zinsser 123 instead of the Valspar primer. He said they preferred it and it worked better.. so I did. I’m wondering after you paint the primer how easy is it to scratch the primer off? Do you do a scratch test, would it come off with your nail or should it be very well adhered? I did the top cabinets white and the bottom green. I have painted the frames and just started the door. The white top frames seem to be holding up after 3 weeks but I bumped the green gently and it scraped off a huge chunk right down to the wood and the paint feels soft and maybe even a little tacky. I’m not sure why the green and white are acting differently.. I have sprayed the primer on the doors but I can scrape it easily with my nail so I’m afraid to continue and end up with a bigger problem, not sure if I need to sand down and start over. Talking 25 painted doors already.. I know I should have tested first. Beating myself up a bit. thanks!!
Oh darn! I’m sorry you are having trouble. Never have I heard good things about the Zinsser primer and I would’ve told you to steer clear of it. Since I don’t use that primer, I can’t really explain what is happening. All I know is with the Valspar bonding primer and every different type of color I’ve painted even a dark blue it’s adhered and I’ve had no chipping issues. I sprayed the Valspar bonding primer on my nightstands and physically moved those. I did not see any scratches before I ever painted. If the primer is scratching, it’s not adhered to the surface.
I had a similar issue. I painted a couple of cabinets dark blue and they looked great and I mistakenly placed them close to each other to dry and they peeled a bit on the side. The rest of the cabinet is great just the edge where they touched each other.. how do I fix that? Sand that area, prime, paint, seal? Thank you!
Your solution is correct!
I need to paint over cabinets that have already been painted. Is there anything I should do differently from your directions here?
Thank You!
Hey, Trisha!
If you are going over another coat of paint this tutorial is probably better: https://porchdaydreamer.com/hand-painting-or-spraying-cabinets-what-is-better/
Help! I am also trying to paint kitchen cabinets that were previously painted but not prepped first. I tried to remove all the paint but that didn’t work out. That was a few years ago because I just gave up. So you can imagine what my kitchen looks like. I am afraid that even with the primer all the chipped paint lines will show through. Any advice?
Hi, Brytany! Yes…the chipped paint lines will definitely show through. My advice is to buy an electric sander and sand them to the bare wood first. Then, clean ALL of the dust off, one coat of primer, and two to three coats of Valspar Cabinet Enamel. Hope that helps!
Hi! I am using these exact products (paint brush and foam roller, same primer and paint), but I am getting a TERRIBLE orange peel- like texture. I know it’s not technically orange peel since I’m not using a sprayer, but it looks like it. I think it’s from the foam roller? But I have tried multiple ways to get the texture to go away and it still is there. Do you have any tips? Or explanation why it’s happening? Too much paint, too little? I’m so confused as to why this is happening.
Hey, Piper! Are you seeing it right after you roll it or is it drying that way? If it is right when you are applying, the paint will level out an dry smooth. I haven’t had this issue before (10 projects), so my only guess is you are applying to heavily? Once the first coat is dry you can lightly sand the primer or the cabinet enamel (220 grit) to smooth it out a bit. Just make sure to wipe it clean of dust, before applying more paint.
Great tips, thanks! However, your color download does not work. The blue you used is exactly what I am looking for. Can you share the color name? Thank you!
Kelley, can you please tell me where you tried to sign up for the download so I can check it. The main page sign up is working without issue. The paint color you are asking about is above the photo where I am sitting in the office chair and my dog is looking at the camera
Great instructions. I am doing my kitchen cabinets and taking the time to test, retest and re-retest again. After trying various methods, I feel that using a foam brush (no bristles) and a foam roller appears to work best as any brush with bristles is ultimately going to show. With that said, the foam still creates a little bit of streaking as well as that leathery texture look when you roll a foam roller. Am I wrong in thinking that I am simply not going to get any better UNLESS I use a paint sprayer? I am surprised that any overlap of primer (thickness) tends to show on the front so I am super careful now to apply very evenly and consistently. Still, I don’t think you can do an A+ job (especially on the flat cabinet fronts in a kitchen with spot lights) unless a paint sprayer is used?
Hey, Dee! I love how you’ve analyzed this like I have! Spraying is the BEST way to get a smooth finish and I wrote a newer post on this https://porchdaydreamer.com/hand-painting-or-spraying-cabinets-what-is-better/. However, I’ve been pretty amazed that even with a foam roller in time as the product fully cures (a week or so) the Valspar Cabinet Enamel levels out to hide much of what you are talking about. Regular latex paint won’t do this. Plus spraying is SO much faster and uses less paint 🙂
I primed and painted my cabinets as instructed, but after two weeks decided to change the white color to a softer white. Will I have to prime again or can I just apply 2 coats of the new white paint color?
Absolutely, you can just apply the paint in the new color without priming again. That’s exactly what I did to my bathroom cabinets in this post: https://porchdaydreamer.com/hand-painting-or-spraying-cabinets-what-is-better/
Hello! I just started priming and painting! So far so good. I’m worried about the paint scratching off the cabinets once I’m done. Do you seal the cabinets with a clear coat? Have you had any issues with scratches (kitchen cabinet)? Thanks!
Hey, Lindsay! No you don’t have to top coat the paint will cure in about week to a very hard finish. In my bathroom, where my makeup is, I did experience a little scratching but it was more from my beauty products softening the finish. The nice thing is since you aren’t top coating, if you experience a scratch you can lightly sand and reapply the paint. Good luck!
Hi and thank you for all this information. So so helpful.
My project and question is for painting over maple cabinets with poly coating….for sure no sanding???😉
Thanks, Kelly
Hey, Kelly! You can always “rough them up” and use a 220 grit sand paper if it makes you feel better 🙂 Just make sure to remove all traces of dust. Have you read this post? https://porchdaydreamer.com/dont-sand-before-painting/
All of the projects I didn’t sand before painting over poly and haven’t had an issue. On my bathroom cabinets, after about 3 years, there is some wear on the top of my makeup drawer. I’m getting ready to re-paint those next!
Does the bonding primer need to be thinned when sprayed through the studio pro or studio plus?
No, I never did thin it. I did strain the primer the first time I used the sprayer. After that, I used the primer without straining.
Hi- what paint color are the navy cabinets? Thanks!
Emily, Thanks for asking. Lower Cabinet Color: Valspar 4010-4, Indigo Streamer
Thanks!
I am using your blog post to paint my kitchen cabinets this week. Wish me luck! I’m so excited!
Good luck! I just rewatched my YouTube tutorial because I’ll be painting some soon 🙂 Wish me luck too!
Hi again! We are starting today! Now I am wondering if it’s supposed to be 2 coats of primer? It sounds like you did one coat on one slide then flipped and did one coat on the other. Can you confirm one or two coats of primer? Thank you!!
You read it correctly! One coat on each side. You may find you have to touch up the first side because it’s sitting on the wood when you are painting the other side. Make sure to start with the back side of the cabinet door and flip over to do the outward facing side 🙂
I think one more question ☺️ Unfortunately there are some small globs and bits of dust or whatever, dried in the paint. Could i lightly sand those parts in between coats of the cabinet paint, or might that ruin it? Thanks so much
Just shot you a reply back to your email 😁
I just started painting the cabinet in our half bath, but I am trying a General Finishes acrylic paint (over bonding primer) touted lots of places as an easy paint for cabinets. We’ll see!
I’m confused by your explanation of painting the second coat–when I read it, it seems like you say to paint one side of the panels one day and the other side the next day, but that only adds up to ONE coat (other than on the base). I’m I wrong?
Also, how do you get the panels off of the drawers? I’ve been painting the sides of the drawers, which I guess was a waste of paint and work!
Thanks so much–your home is GORGEOUS.
Hey, Caroline! Yes, I can see why I left you a little confused. I sprayed my drawers/doors, so I could re-coat the 2nd coat in one day with about a 4 hour dry time. When hand painting it’s 8 hours, so the 2nd coat would go on the 2nd day or LATE in the day. So if you got the first coat on by 8am, you could re-coat before diner and dry overnight.
I’d batch things, so I always had a set to “flip” over and paint like in a rotation or would paint the doors and then move to the frames. That is the true benefit of a sprayer because you can do two coats in a day easily! Then for my drawers, there were screws that attached the drawer front. I took off the knob/hardware and then took off the two screws. Hope that helps! Good luck 🙂
Glad you like my home!Thank you!
I’ve been wanting to paint my some cabinets for a long time now but was always afraid of brush marks. This post has given me the confidence to do it! Thank you! One question about painting oak. I’m assuming I’ll need to use a grain filler. Would that step be done after cleaning and before the bonding primer? And did you use a special cleaner like Krud Kutter?
Oh I’ve never used a grain filler, but nice to know that exists! Yes the order will be as you suggest. All I did is wipe down the cabinets with a damp Norwex cloth. No chemicals.
So glad I found this post! There’s a ton of info out there and it’s hard to know who to trust but you seem to know what you’re talking about!
I’m looking at two projects right now, and was considering the Valspar Cabinet Enamel for both. I was going to warm up with a couple of matching bathroom vanities and then tackle a kitchen. I did a kitchen in my previous home and was thrilled with the results, but this was a number of years ago and I don’t recall that the cabinet enamel was an option.
My question is in regards to glazing. I’m considering a cream color for the kitchen and would like to do a very light bronze glaze – just in the crevices to soften the color a little. I’m concerned that the glossy finish of the enamel will not be super conducive to the glaze? Have you had any experience with this? I glazed my last cabinets and then did a poly finish but one of the things I like about the enamel is that I wouldn’t have to do a finish coat, particularly since the color is so light and I’d risk yellowing.
Thanks in advance for any tips regarding glazing over cabinet enamel! Thrilled to have found you!
Leah, that is SO nice to hear and I am so happy to help. Your instincts are correct on glazing and I recently did glaze over the table in my “Man Cave” makeover and created a faux driftwood finish (haven’t written that post yet!). The base coat was the same cabinet enamel color I used on my bedroom furniture Light Raffia. Gotta love leftover paint!
Since the surface is more “slick” I had to play with it to get the right blend of paint and translucent glaze – I did a custom color. My advice is to practice on the backside of a drawer before you reattach it to see how it will go. If you are using a pre-made glaze, it will have a longer working time so you can move it and wipe it. Since you only want a slight tint, I think it will work out well after some practice 🙂
Good luck and email a picture of your project once completed!
I am going to do two bathrooms, so this is perfect timing. Thanks so much. I am definitely a beginner at painting cabinets.
Marty, so nice to hear this was helpful! Good luck and be patient with yourself and the dry time. That’s the part that I have trouble with – the wait! Trust me it’s worth it. Happy painting ?