Plan and Prepare for a Bathroom Remodel

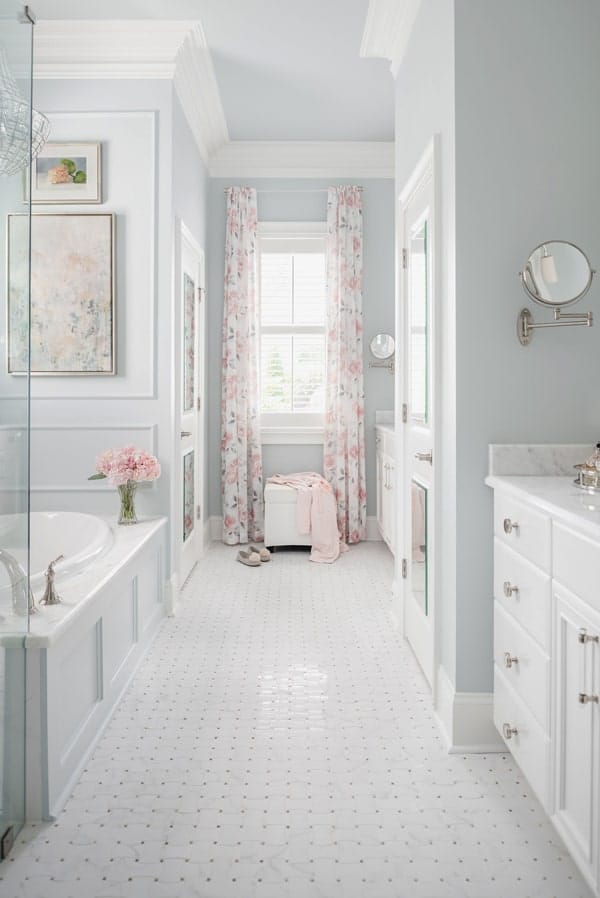
After living through my own bathroom remodel, I thought I’d reflect on what worked and what I wished I’d known ahead of time. Sharing my best tips on how-to you can be better prepared for a bathroom remodel.
Knowing how to prepare for a bathroom remodel is truly one of the most important steps in the process.
Having a plan AHEAD of time is the key to a successful remodel, keeping on budget, and making sure you get your dream bathroom.
In this guide, I’m sharing my best tips for what to do before you ever get a quote and how to prepare for demolition day. Plus some emotional support for when things don’t go as planned.
Create a Bathroom Remodel Plan
Having a plan for the bathroom remodel before you ever get a quote from a contractor is REALLY IMPORTANT.
Why? You want to get the most accurate quote you can, before you hire anyone.
Having a specific bathroom remodel plan will help you budget properly, buy the right materials, and save time in the process.
Walk through your bathroom and THINK THROUGH everything you want done in the space…small or large.

BEFORE you get a quote, it is important to have the vanity, shower, and tub plan prepared.
Plus the general structural, electrical and plumbing requirements.
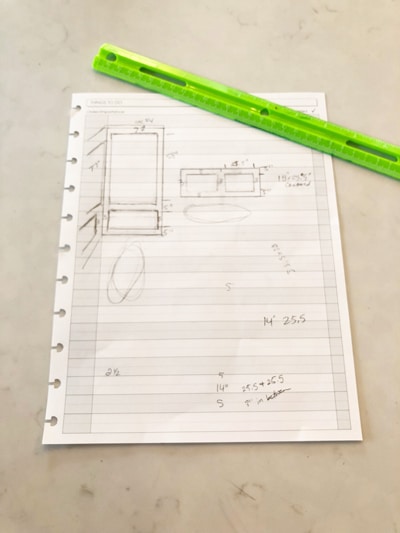
Use Pinterest pictures and sketches with your contractor during the quote process to help communicate your expectations.
As they say a picture is worth a thousand words!
decide before the bathroom remodel quote process:
- Are there any required structural changes to the space? Like moving or adding walls.
- Determine if you or your contractor is doing the demo.
- Will the vanities be staying or replaced?
- Are you installing new counters or a tub deck?
- Specify if any light fixtures are being moved or modified.
- Are there any additional lighting or electrical outlets you would like to add?
- Will you be replacing or reusing the tub and toilets?
- A general plan of the tile for the walls and showers. Think through floor and curb transitions that may be needed.
- For the shower, are there going to be niches that need to be created?
- What kind of a shower surround do you require? Is the contractor or are you sourcing the glass?
- What is happening with the vanity mirrors?
- What will need to be painted? Typically walls, trim, doors and possibly cabinets need a new coat of paint.
- Do you plan to add new trim or moulding?
- Who is installing the bathroom hardware like towel bars and curtain rods?
This is a general list to get you thinking and help your contractor develop the best and most comprehensive quote possible.
Having a plan will help you get multiple quotes based on the same information for comparison.
Plus, once you get started it will help to prevent any unnecessary surprises. Changes equal time and money during the bathroom remodel.
Pin It for Later!

Liking Your Contractor Goes a Long Way
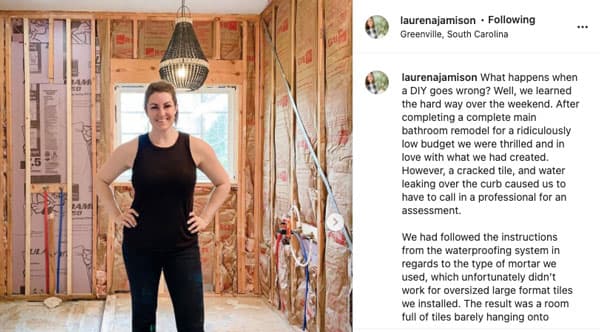
I’d highly recommend saving most of your remodel to the professionals and avoid a major disaster!
One of my blogger buddies and her husband DIY’d their bathroom remodel and literally had to rip up the whole thing after a major mistake.
That’s an EXPENSIVE mistake, so they ended up hiring a a contractor.
Finding a contractor who you trust, like, and is neat is key! Research, get references, and read reviews.
The crew that worked in my home from Finishing Touches Construction (local to Charlotte, NC) was incredible in keeping the mess in the bathroom and out of the rest of my home.
Know you will wake up with these people coming to your home for an entire day for 6 weeks! LIKE ARRIVING REALLY EARLY AND ON WEEKENDS!
Here were my people: Leo and Blanca.
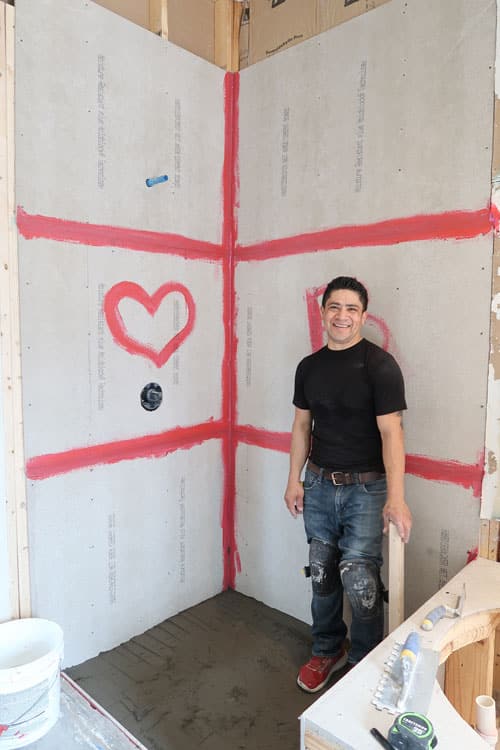
I was greeted with a smile every morning, which made having to welcome people into my home Monday through Friday for weeks actually pleasant.
In addition to meeting the owner of the company, meet the crew as well because that’s primarily who you will see on a daily basis.
Bathroom Remodel Timeline
So you get a feel of how a bathroom remodel unfolds, I thought I would share a general timeline of each phase.
What I MUST tell you is that things will go wrong and there WILL be delays. Living without a bathroom for 8 or more weeks, when you thought it would only be 4 to 6, can be maddening!
My advice is to add 2 to 3 weeks from whatever the contractor quotes you to account for when sh!t goes wrong, because it will.
The wrong parts get ordered, products don’t arrive on time, other jobs take priority over yours…the list goes on 🙂
1. Initial Planning Phase (2-4 Weeks)
- Define Your Vision: Start by collecting inspiration from luxury hotels, magazines, and Pinterest to solidify the design style you want.
- Set Your Budget: Determine how much you are willing to spend and allocate funds for each aspect of the remodel, such as fixtures, tiles, and labor.
- Hire Professionals: Research and hire a qualified contractor, designer, or both if needed. Get at least two quotes to compare costs and services.
2. Design and Product Selection (2-6 Weeks)
- Layout and Measurements: Work with your designer or contractor to finalize the layout. Make sure to take accurate measurements to avoid costly mistakes.
- Choose Materials and Fixtures: Select all the materials, including tiles, countertops, vanity, fixtures, lighting, and any custom features. Order these items EARLY to avoid delays.
- Approve Final Design: Ensure the design meets your expectations and get a detailed plan from your contractor, including timelines and costs.
3. Pre-Construction Phase (1-2 Weeks)
- Clear the Space: Remove all personal items from the bathroom. Set everything up in an alternate bathroom.
- Product Delivery: Ensure that all ordered materials and fixtures arrive and are inspected for damage BEFORE the contractor start.
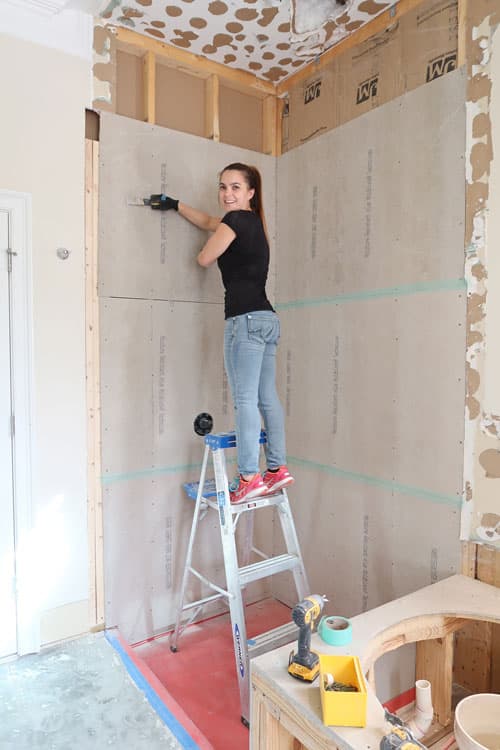
4. Demolition and Structural Work (1-2 Weeks)
- Demolition: Your contractor will remove old fixtures, tiles, and drywall as needed. I detailed how to prep below.
- Rough-In Work: If plumbing, electrical, or structural changes are needed, they will be done during this phase.
5. Installation (3-6 Weeks)
- Plumbing and Electrical: New fixtures, including the bathtub, shower, sink, and toilet, will be installed along with any necessary electrical work like lighting and outlets.
- Tile Installation: Shower wall tiles will be installed first and the floor tile follows.
- Vanity and Cabinetry: The vanity should be painted at this stage or a new one installed. New counters and/or bathtub deck are installed.
- Drywall Repair: New drywall will be installed or repaired at this stage and prepped for painting.
6. Finishing Touches (1-2 Weeks)
- Paint: All walls, doors, and trim are painted. (here’s a sheen guide)
- Install Accessories: Towel bars, hooks, and new light fixtures.
- Final Inspection: Conduct a walkthrough with your contractor. Address any minor touch-ups or adjustments as needed.
Prepare for Bathroom Remodel Demolition
The hardest part of a bathroom remodel is two-fold: demolition and the wait for completion!
Patience is definitely a virtue when it comes to remodeling.
We will cover the remodeling process steps to take before demotion day plus what it really looks like.
Step 1: Move Out of Your Primary Bathroom
First, if you’re remodeling your primary bathroom (master bathroom) you will lose ALL ACCESS.

It’s annoying I know, but you must relocate everything out of your bathroom to an alternate bathroom for almost the entire duration of the remodel. You will get used to it – I promise.
The first week was the hardest and for me because my clothes were downstairs and the bathroom I was using was upstairs.
I climbed a lot of floors and burned some extra calories for the duration LOL!
You will learn to develop a new routine in a few days.
What to remove from the bathroom before they start demolition:
- Pull everything out of your cabinets and linen closet you use regularly.
- Take everything off of the vanity counters because that will be covered in plastic.
- Remove all items from the shower and tub surround.
- Take towels and robes off of hooks.
- Pull out all artwork and decorative items.
- If you have fabric window treatments, take them down.
Seriously, everything will be covered in plastic, so take it all out of the bathroom or stick it in the linen closet or cabinets before they cover things in plastic.
Step 2: Prepare Walkways and HVAC System
Demotion is a dirty and dusty process.
You almost won’t believe what your bathroom will go through to be reborn!
They have to break the tile to remove it and grind down the mortar.
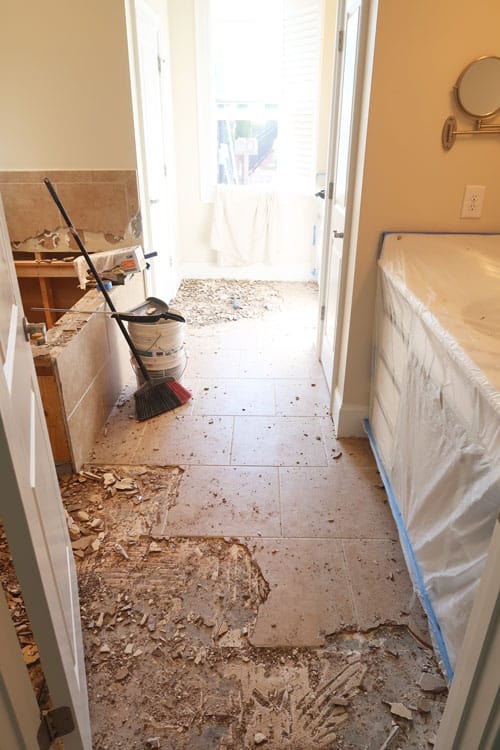
It’s a noisy and messy process with the debris having to be removed…preferably through the window and not through your home.
It basically will look like a war zone for days, so you don’t want anything in the bathroom that could get dirty or damaged.
Insist that your contractor lays down drop clothes on all walkways they use every day during demolition and they cover the door opening to your bathroom in plastic.
This will control a lot of the dust, but also TURN OFF YOUR HVAC during the times they are breaking and removing the tile.
You want to make sure the dust and dirt doesn’t get sucked up into the vent and sprayed throughout your home.
Also, it will save you a few bucks on heating and cooling since your windows and doors will be opened much of the time.
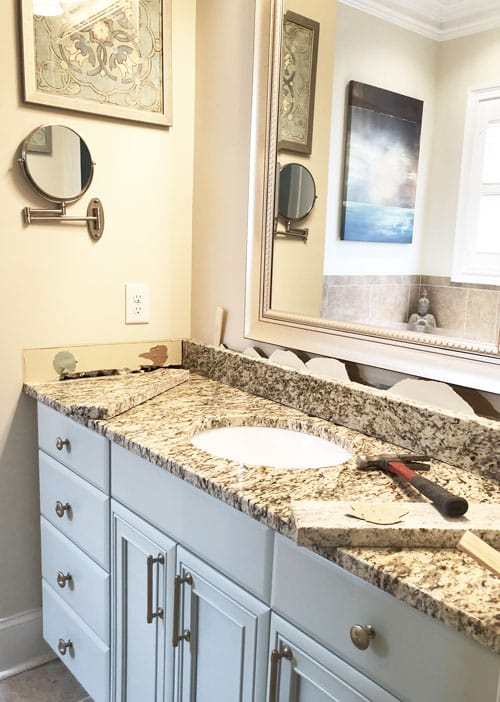
If you are removing and replacing the counters, that is another process with a different granite / marble contractor.
Know that the walls will likely get damaged and don’t be surprised by this.
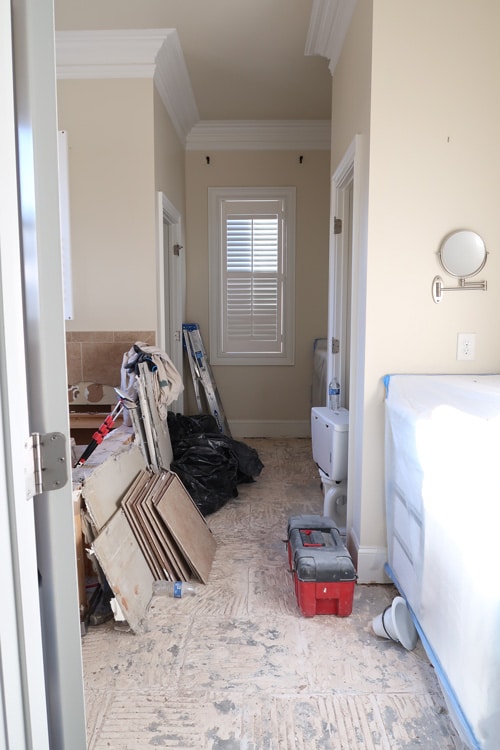
Step 3: Create space for your contractor and new bathroom materials
I’d say this was something I didn’t anticipate since this was my first major remodel.
There are a TON of supplies and materials that will be part of the bathroom remodel.
You need a place to store the tile, tub, lighting plus plumbing fixtures, and paint.
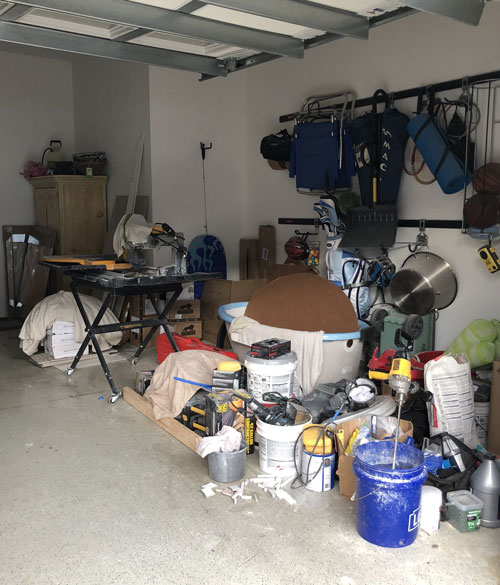
Yes, that is the new bathtub in the garage! Another thing to try and accommodate, if you have the space for it, is your contractor’s tools and supplies.
They need to store large tools, compounds, mortar, tile cutters, your toilet (if you aren’t replacing it), mixing buckets, moulding, fasteners, etc.
I didn’t think about this, but luckily had the space in my garage to house everything.
It made it more convenient for my contractor so they could get to work each day, without having to pack up each evening.
Here is a quick review to keep handy!
before bathroom demolition BEGINS:
- Remove all items from the room – the dust is beyond awful (for days!)
- Turn off your HVAC system on demo days. Windows are open so you don’t want to pay for heating/cooling. You also don’t want the debris sucked into your system
- Prepare a staging area to use for their tools and materials. My garage was that area.
- Insist, if they don’t mask off the area, that they do so and cover the floor. My team did this everyday on their own.
- Make sure they have an access to remove the demolition debris. Luckily, my bathroom was on ground level and went out the window.
- Have them run fans pulling the dust outside too. Even with all of the precautions your home will be dusty for a couple of weeks!
- Ensure any items remaining in the room are protected (like my vanities and marble counters).
So you don’t miss anything, review this the night before the contractor arrives 🙂
Bathroom Remodel 101
My hope is you now feel like you are well prepared to even THINK about starting a bathroom remodel.
- Follow my ENTIRE bathroom remodel process by clicking here.
- Primary Bathroom Remodel Costs: Luxury Hotel Makeover
- Design Tips to Make a Small Bathroom Look Bigger
- How-to Start a Room Makeover
Have fun in the makeover and remodel process…it is SO worth it!
Sign-Up for my Weekly Emails!
Straight to your inbox sharing can’t miss decorating and painting tips for your home.
Please consider signing up for my weekly email newsletter and following me on Pinterest and Instagram for daily inspiration.
Until next time…
PORCH DAYDREAMER
Tracey