NO-SAND Method: Painting Kitchen Cabinets

This no-sand kitchen cabinet painting tutorial is for ANY type of cabinets that were previously stained, coated with polyurethane/clear sealer OR painted.
Have you been staring at your wood or stained kitchen cabinets and thinking you have to sand off the finish?
Or maybe your are wondering if refinishing kitchen cabinets without stripping is even possible?
Or are you wondering how to paint kitchen cabinets in general?
Guess what? You don’t have to sand before painting!
With the right preparation and paint products you can get a professional finish that will be durable and smooth. Over a long weekend you can complete this project.
Painting kitchen cabinets will be the most affordable project you can DIY to completely transform the look of your kitchen.
If you’ve looked into the cost to sand and repainting kitchen cabinets, this is a MUCH more affordable option!

Tags: painting old kitchen cabinets, best way to repaint kitchen cabinets, acrylic paint on cabinets, grit sandpaper for cabinets, ideas for painting old kitchen cabinets, milk paint cabinets no sanding, best no prep cabinet paint, deglossing cabinets, how to paint cupboards without sanding
Cabinet Painting Expertise
Why should you trust me? Well, I am the QUEEN of Painting everything including painting cabinets!
Part of my career was with Valspar the paint company training the Lowe’s Home Improvement paint desk staff.
Not only have I’ve learned the technology behind paint and application, but also talked to countless consumers in the store answering their general paint questions.
So I know most of your cabinet painting concerns and heard about all of the bad things that can happen if you don’t follow the directions!
I’m going to share my easy tips for cabinet painting.
It all comes down to choosing the right paint, but more importantly preparing the surface properly.
Even a beginner can follow this process!
If you are a more adventurous DIYer you can spray the paint giving you a really smooth finish that looks like you hired a professional.
Table of Contents
- Cabinet Paint Color Ideas
- Best Paint for Kitchen Cabinets
- Should You Hand Apply or Spray?
- Covering Cabinet Wood Grain
- Cost of Painting vs Replacing Cabinets
- Can you paint over chipped or peeling cabinets?
- Can you paint kitchen cabinets without removing doors?
- Paint Supply List
- How-to Paint Kitchen Cabinets
Pin It for Later!
cabinet coating kings reviews, refinish cabinets without sanding, best sanders for kitchen cabinets, stain cabinets without sanding, random, orbital sander, orbital sander, orbital sanders, electric sander
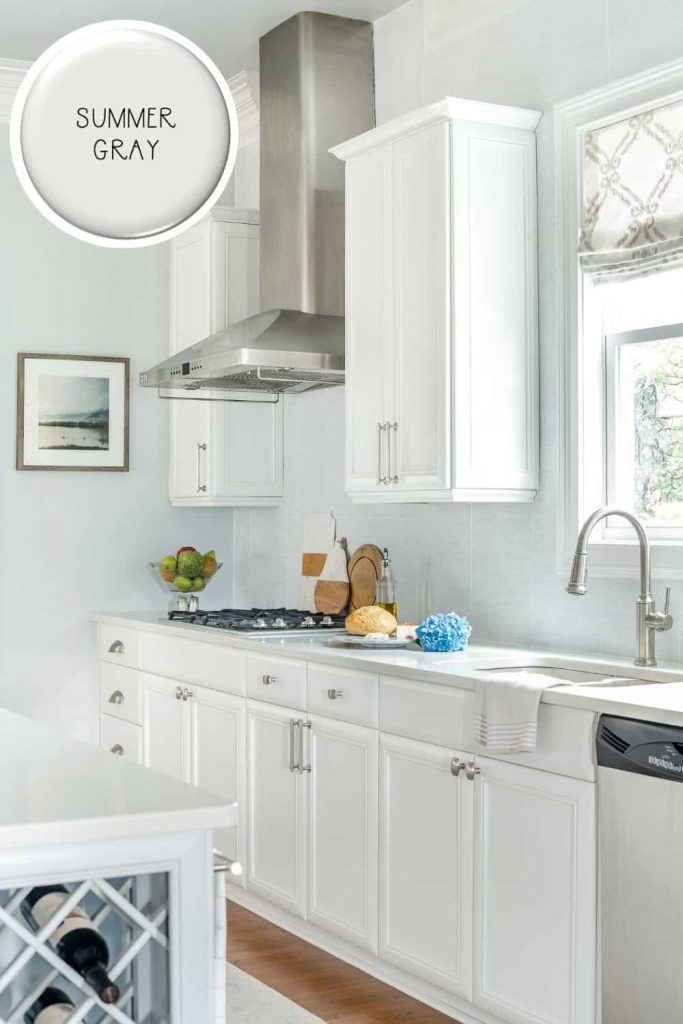
Finding Kitchen Cabinet Paint Colors
Maybe you still need to find that perfect color for your kitchen cabinets? Of course I am here to help!
Plus I’ve written all about this year’s cabinet paint color trends, that will be around the next 5 years.
Or if you are more traditional or want to mix paint colors when you paint your kitchen cabinets, check out these following posts:
Best Paint for Kitchen Cabinets
Oil or Latex?
The paint I am recommending for cabinets is a hybrid alkyd oil enamel and not a basic latex paint.
Latex paint is great for a wall, but not when you need a hard durable finish that will last.
I never recommend full oil based paint for the DIYer due to the high VOC content and difficult clean up.
Plus oil based paint will yellow over time and completely change your paint color!
You can read all about what I recommend for painted kitchen cabinets here:
Should I use a one-step paint like chalk paint?
My firm answer on this is NO! It’s a myth that you can apply one-step paint to cabinets without any prep work.
You can read about what can happen with one step chalk paint, if you don’t prime stained wood first before painting: Why You Must Prime Before Chalk Paint and also My Solution to Stop Chalk Paint Bleed Through
The paint I use and recommend should be applied after proper cleaning and priming.
What’s great about it is that a hybrid-oil enamel doesn’t require a top coat!
Chalk paint and most one-step paint will require a clear top coat to protect it adding DAYS to painting your kitchen cabinets plus lots of extra work.
Can I paint my cabinets if they are in bad shape or chipped?
Yes! However, you are going to have to put some additional work into preparing the surface prior to painting.
This is the rule about painting chipped cabinets: If the surface is failing and you paint over it the newly painted surface, it will fail too.
You MUST sand smooth peeling or chipped areas on the cabinet (especially around knobs and pulls), prior to painting.
My favorite battery operated sander is ideal for this task or simply using sand paper.
Just make sure to clean off all of the sanding dust prior to starting the project.
Hand Apply or Spray Kitchen Cabinet Paint?
Luckily, I have an ENTIRE post that will help you decide if you should hand apply or spray paint your kitchen cabinets.
Of course a paint sprayer and spray tents are an investment that come with a learning curve.
So for this tutorial, we will be using the hand application method using high quality brushes, rollers, primer and paint.
Should You Cover the Wood Grain on the Cabinets?
Many people ask me about painting kitchen cabinets with wood grain like oak.
My personal opinion is that it isn’t worth the effort to cover the wood grain and I recommend two coats of primer with an enamel paint instead.
This will soften the look of the grain on your kitchen cabinets, without all of the effort to fill in the grain.
If you REALLY want to do this, here is a link to a video tutorial filling in the wood grain using Aqua Coat.
The Cost of Painting Kitchen Cabinets
You may be wondering whether it’s better to paint your existing cabinets or replace them entirely.
There are pros and cons to both options, and the best choice for you will ultimately depend on your budget and personal preferences.
Replacing cabinets can be expensive ranging $5,000 to $15,000 depending on the size of your kitchen and the quality of cabinets you choose.
It’s usually the best way to achieve a truly drastic transformation.
Painting, on the other hand, is much more affordable and can still give your kitchen a fresh new look.
If you’re happy with your current layout and just want to change up the style, painting is probably the way to go.
The cost of painting kitchen cabinets will depend on the size of your kitchen, the number of cabinets, and the type of paint you use.
On average, you can expect to spend between $200 and $600 on painting supplies.
If you hire a professional painter, the cost will be higher ranging from $1,000 to $5,000.
Contains hand selected products, with affiliate marketing links where I may earn a small commission if a purchase is made. {full disclosure here}
Can You Paint Kitchen Cabinets without Removing Doors?
Since this is a DIY repainting kitchen cabinets tutorial, you likely will do what you want to do during painting 🙂
However, it is BETTER to remove the cabinet doors and drawer fronts (if you can) prior to painting.
Why should you remove cabinet doors and drawer fronts prior to painting?
- It will make painting the base frame of the cabinet much easier.
- You will get a more professional smooth finish by laying the cabinet doors flat to paint (hand painting or spraying).
- Painting all sides of the cabinet door will be easier.
- You will avoid drips down the face of the cabinet door while painting.
How-to Paint Kitchen Cabinets
Before you get started with your kitchen cabinet painting project, there are a few things you need to do in order to prepare.
Make sure you have all the supplies you need, before you ever get started.
It will help you be more organized and get the job done faster.
The type of paint I am recommending to paint kitchen cabinets is a hybrid alkyd enamel (enamel paint).
You can read all about Valspar Cabinet & Furniture Enamel and why I recommend it here.
Supplies for Painting Kitchen Cabinets
- Power Drill
- Philips and Flat Head Screw Driver
- Painter’s Plastic
- Degreaser / De-glosser
- Gloves
- Painter’s Tape
- Drop Cloths
- High Quality Brush
- Foam Roller and Handle
- Small trim boards (for drying)
- Long plastic table
- Microfiber clothes
- 220 grit sanding block
- Paint tray and liners
- Valspar Bonding Primer
- Valspar Cabinet & Furniture Enamel
Once you have everything ready, you can begin painting and transform your kitchen in no time!
You’ll need to start a production line setting up a “paint station”.
I find placing the drawers and cabinet doors on a long table on trim boards makes the job easier.
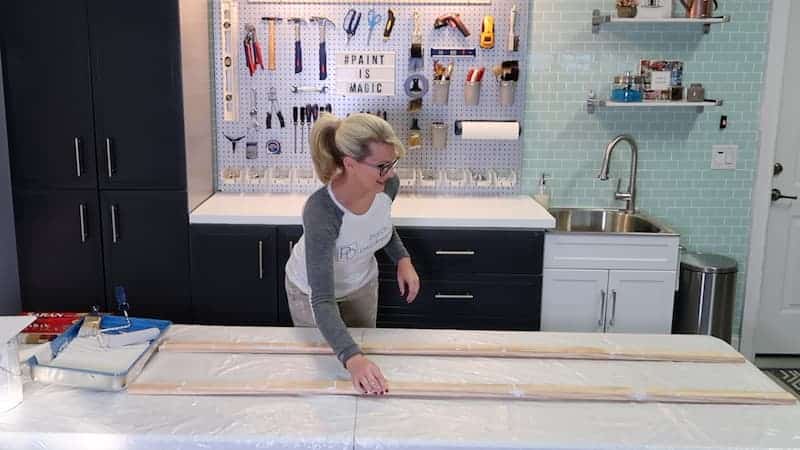
What’s most important to find a place to painting cabinets that is free of dust and debris.
Between coats of primer and paint, you will need to flip over the pieces to paint the other side and why the trim boards are necessary.
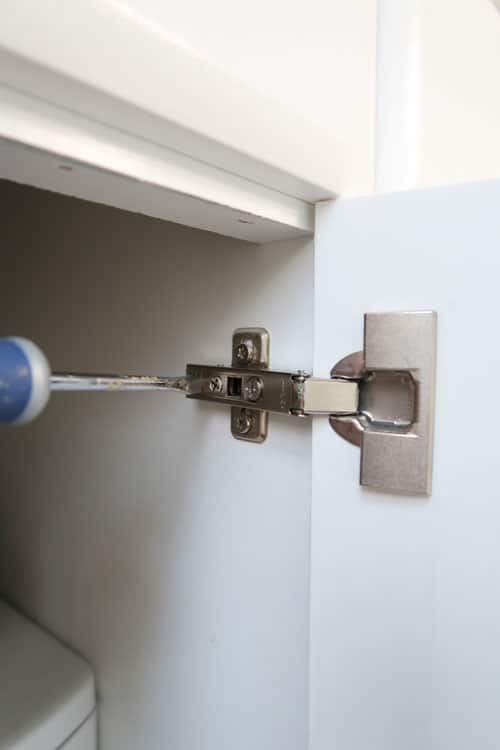
Step 1: Remove all the cabinet doors, drawers and hardware and label them
First, remove all of the cabinet doors, drawers and hardware.
Label them so you know where they go when it’s time to put everything back together.
You can label the cabinet doors inside the hinge cut-out and on the back of the drawer faces.
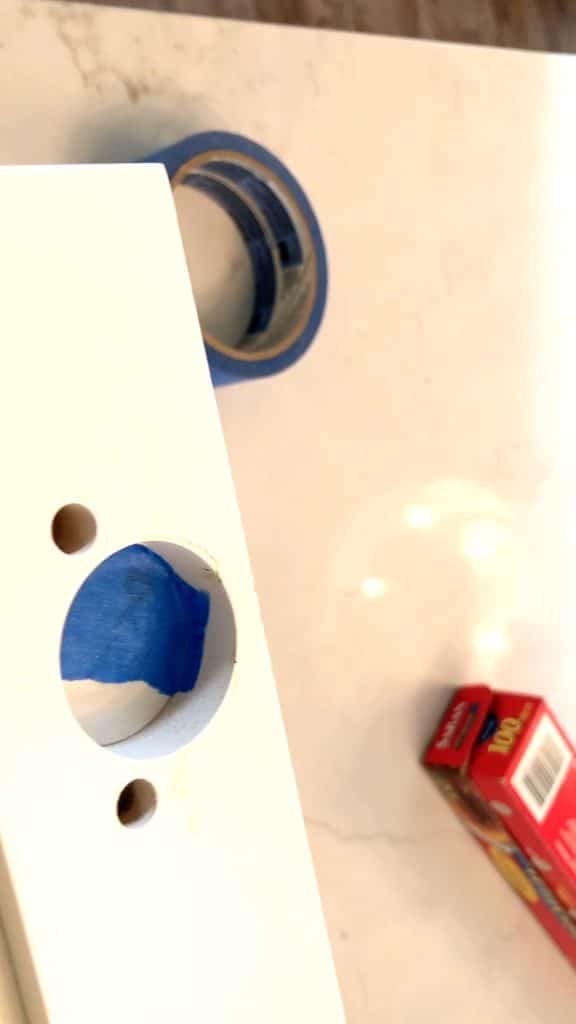
Make sure to cover the marks on the drawer backs with painter’s tape so you can paint over the top and reveal the label later.
Not taking the time to label will make reassembling the drawers and doors much harder because the screw and hinges won’t line up.
Step 2: If there are any light scratches or chips, smooth them out with light sanding
OK, I know I said no sanding but your are NOT sanding off the finish.
This is a LIGHT sand with 220 grit sand paper to smooth any rough edges or chipped areas.
Painting over a failing finish is a poor foundation and will continue to chip even with new paint on top.
So start by sanding smooth those small areas FIRST!
If you have a serious chip, use a wood filer per the manufacturer’s instructions and sand smooth.
Make sure to remove ALL sanding dust with a damp microfiber cloth or tack cloth.
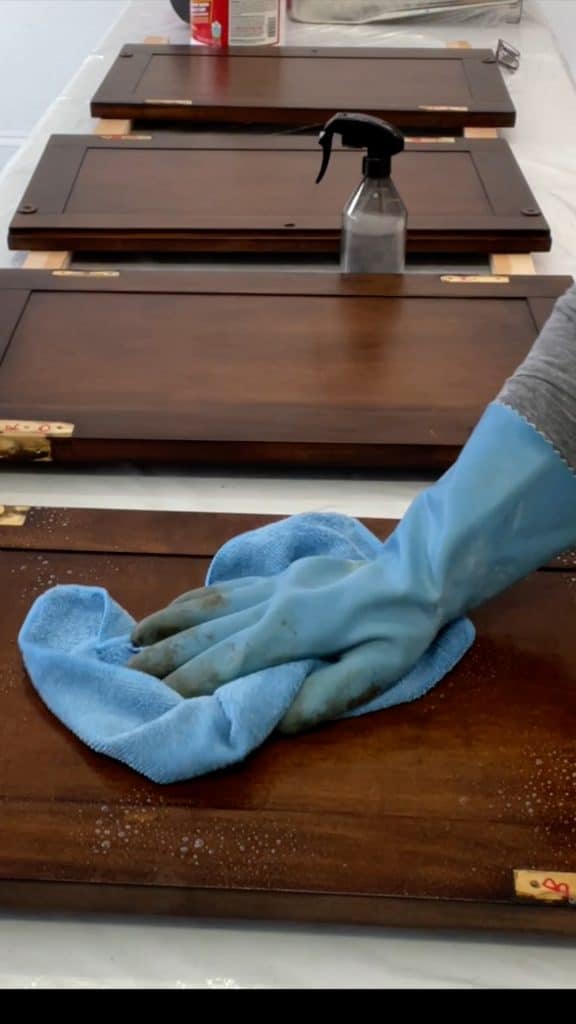
Step 3: Thoroughly wipe down the cabinets with a degreaser
Kitchens are dirty places and greasy grime builds up on the cabinets from your hands and from cooking.
The MOST important step before painting your kitchen cabinets drawers and doors is to wipe down the cabinets with degreaser before applying the primer.
This helps to remove any dirt, grease or grime that may be on the surface of the cabinets and allows the primer to better adhere to the surface.
You can buy a pre-made degreaser or make your own.
Homemade Kitchen Cabinet Degreaser
- Bucket of hot water
- A few squirts of a degreasing dish detergent like Dawn
Plus, it’s just satisfying to see all that grime come off on the rag!
Make sure to get into all the nooks and crannies it you have doors and drawers with raised moulding.
Let the surfaces dry thoroughly.
Step 4: De-Gloss the kitchen cabinets
If you have stained and clear coated cabinets or a shiny paint finish like a semi-gloss, this is the pro-step you shouldn’t skip when painting cabinets.
This is an extra step for extra adhesion because it softness the glossy finish, so it has more tack for the primer to stick.
Follow the instructions, but typically you only need to wait 10 minutes before applying the primer.
To protect my skin and nail polish, I use chemical resistant gloves.
It helps to pour the de-glosser into a spray bottle, apply and wipe with a micro-fiber cloth.
Step 5: Apply a bonding primer to the cabinets doors and drawers with a brush and foam roller
Before you start painting your kitchen cabinets, it’s important to apply a bonding primer.
This will help the paint to adhere better and create a more durable finish.
If you don’t know about bonding primers or the difference between types of primers you can read about them here.
ALWAYS PRIME and PAINT the BACK of the CABINET DRAWER or DOOR FIRST.
Here is a quick video on how to apply primers, click to unmute:
Make sure to prime all of the drawers and doors at the same time.
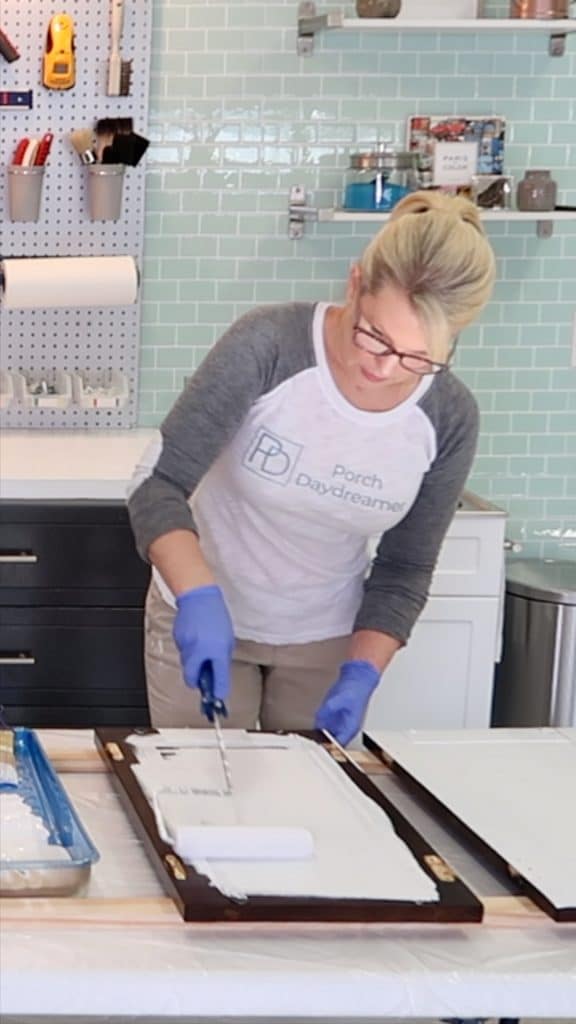
First, use the brush to apply the primer to the corners and edges of the cabinets.
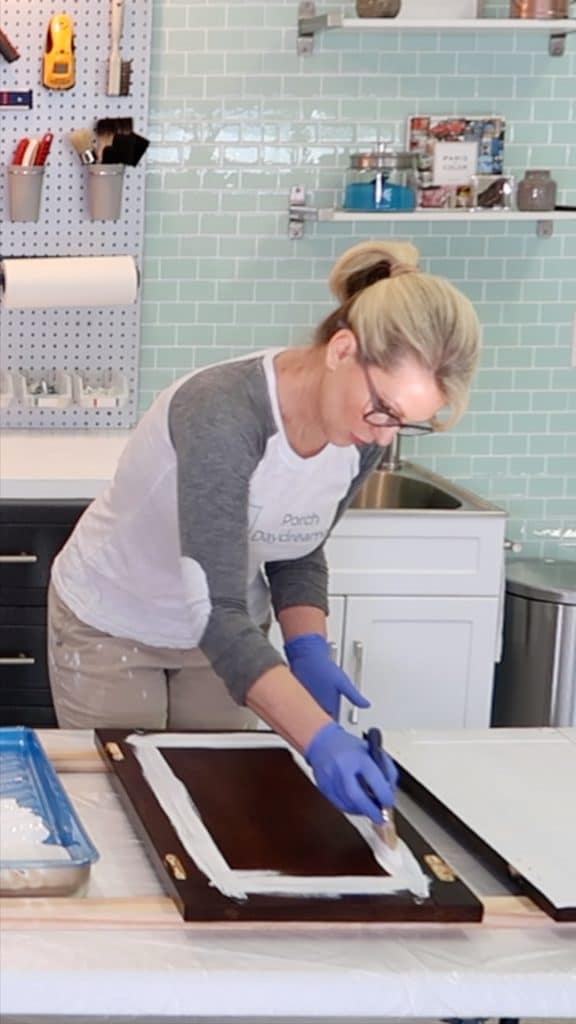
Then, use the foam roller to evenly prime the rest of the surfaces.
Apply in the same direction as the panels.
To make sure you are creating a smooth surface for the paint to adhere to, be sure to strike off in one direction by rolling the roller over the primer top to bottom with a light touch while it is STILL WET.
Once you’ve finished applying the primer, let it dry according to the manufacturer’s instructions.
Typically you will only need one coat of primer, but if you are trying to hide some of the wood grain you can apply a second coat of primer to mask it a little more.
Let the primer DRY 2 HOURS, before flipping.
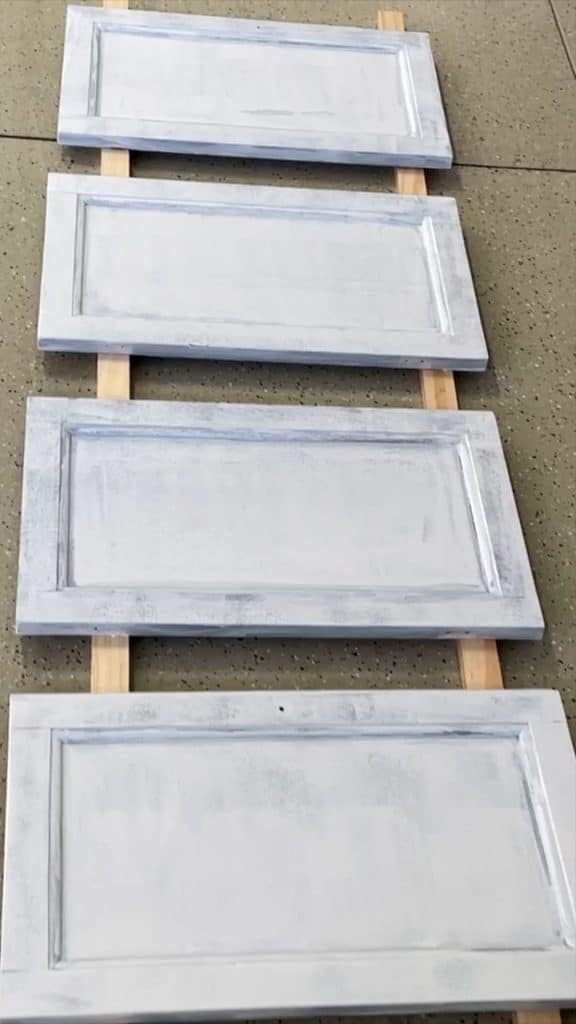
Flip over the doors and drawer fronts and prime the other side using the same method.
Step 6: Apply bonding primer to the cabinet frames
Depending on the type of kitchen cabinets you have it’s likely that some of the frame will be exposed.
You will need to prime the outside frames of the cabinets using the same method as described in step 4 for the kitchen cabinet drawers and doors.
Step 6: Paint the primed cabinets with Valspar Cabinet & Furniture Enamel
I’m recommending this paint because I KNOW it is durable and doesn’t require a polyurethane top coat.
Because this is a hybrid paint alkyd oil enamel it’s going to feel thinner than a regular latex paint that you are accustom to using.
That means you HAVE TO STAY ON TOP OF DRIPS.
Don’t overload your brush – it’s better to apply THIN coats than over apply.
ALWAYS PAINT THE BACK OF THE CABINET DRAWER OR DOOR FIRST.
Using a brush to apply the paint to the corners and edges of the cabinets.
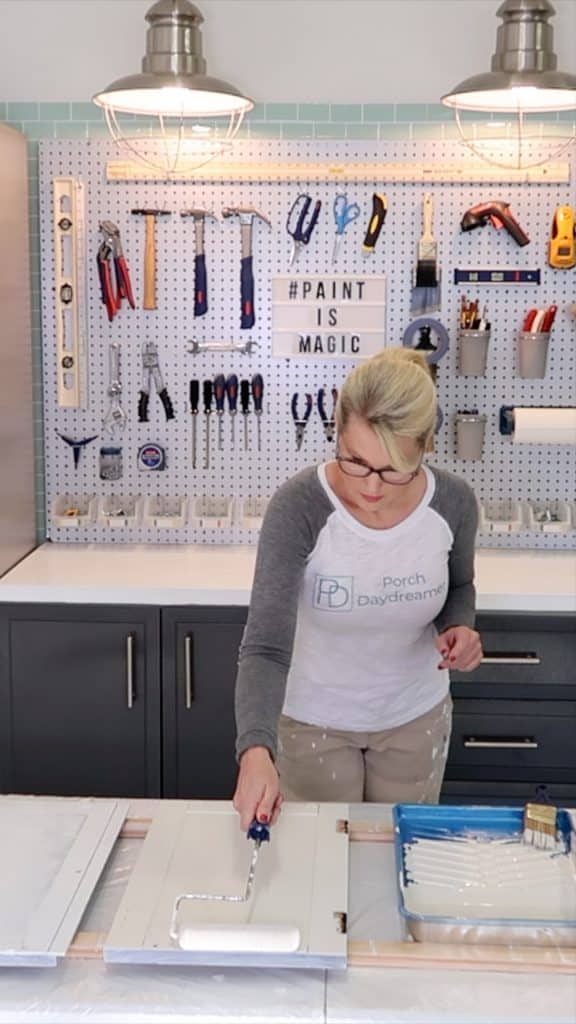
Then, use a foam roller to evenly paint the rest of the surfaces.
To make sure the paint will dry with the smoothest finish possible, be sure to strike off in one direction by rolling the roller over the newly painted surface top to bottom with a light touch while it is STILL WET.
Apply paint to the first side and come back after 5 minutes to touch up any drips.
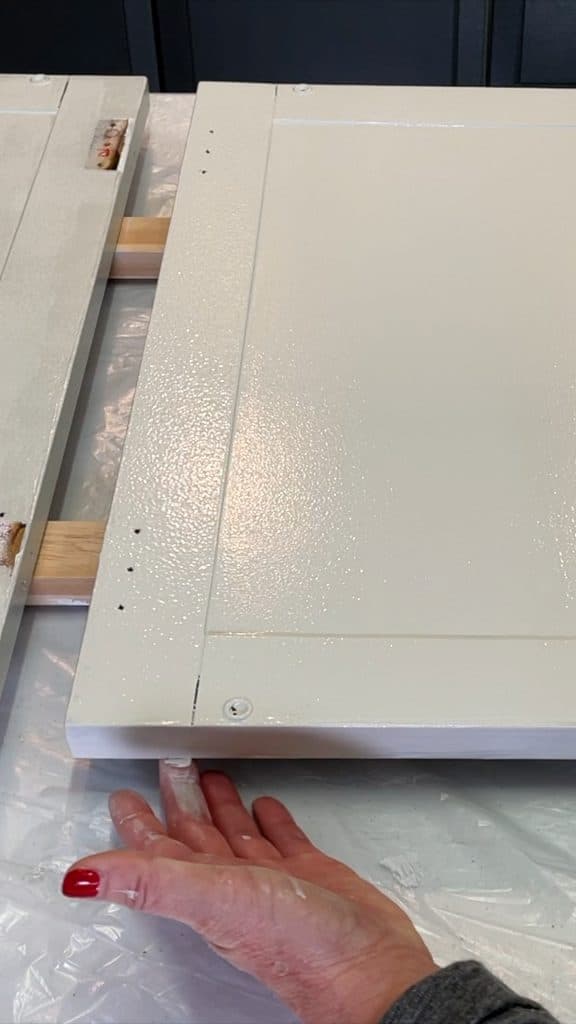
LET DRY OVERNIGHT OR 8 HOURS. You must do this BETWEEN all COATS OF PAINT.
If not, you will have blocking where the paint sticks to itself, never fully dries and is forever tacky!
Flip over to the front side of the cabinet faces and follow the same instructions as painting the back side of the cabinet drawers and doors.
Apply a 2nd or 3rd coat of paint following the SAME INSTRUCTIONS.
Step 7: While the drawers and doors are drying, paint the cabinet frames
If you have a lot of energy and not a lot of time, moving back and forth painting one side of the drawers and doors and then moving to painting the frames (while the paint dries between coats) is the fastest way to complete the job.
Apply the first coat of paint to the cabinet frames per the instructions above with a brush and roller.
Come back after 5 minutes to touch up any drips.
LET DRY OVERNIGHT OR 8 HOURS. You must do this BETWEEN all COATS OF PAINT.
If not, you will have blocking where the paint sticks to itself, never fully dries, and is forever tacky!
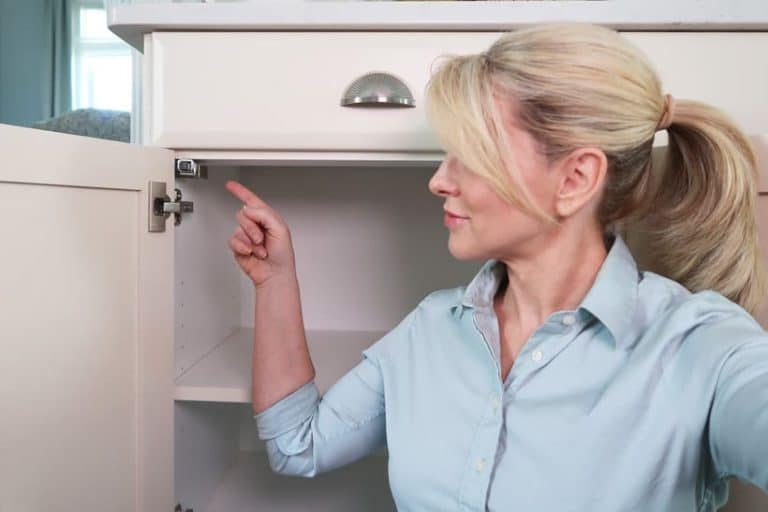
Step 8: Reattach the doors and drawers to the frames and attach the knobs and pulls
It’s IMPORTANT your paint is completely dry, before reattaching the cabinets to the frames.
I like to wait a minimum 48 hours and recommend you do as well. You can still use your cabinets without the faces 🙂
Make sure to follow your labels to reattach the cabinet doors and drawers.
Place them in their original cabinet door frame or drawer and be VERY careful not to chip the surface with your drill or screw drive.
IT TAKES 7 DAYS FOR THE PAINT TO CURE TO THE FULL HARDNESS, so be gentle!
Don’t fix any issues until after the 7 days. If you chip or scrape the paint, lightly sand with 220 grit sand paper and touch-up with the primer and paint like you did for the overall project.
Make sure to strike off the paint again to ensure the finish will dry smooth!
Step 9: Clean-Up the Supplies
It’s funny, so many people complain about how messy it is to paint anything.
Reframe that and when it is time to clean up, it’s time to celebrate because you are DONE!
Step 10: Step back and enjoy your painted kitchen cabinets!
Seriously, I know how physically demanding it is to paint cabinets.
But now you are an expert and can apply what you learned to all of your future painting projects 🙂
Painting Over Stained Furniture?
Check out this helpful post: Yes! Paint Over Stained Wood without Sanding
More ways to update your kitchen!


Please consider following me on Pinterest and Instagram for daily inspiration.
Until next time…
Porch Daydreamer
Tracey