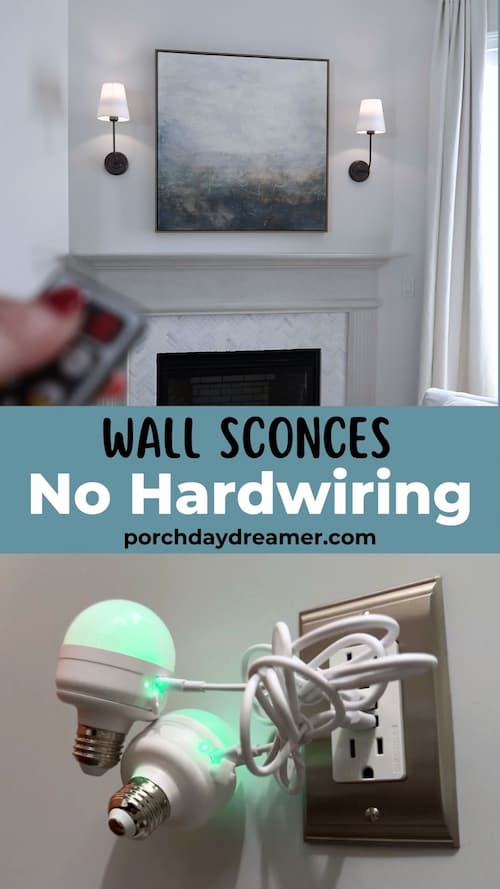
ANYWHERE Wall Sconces: No Wiring or Drilling (renter friendly)

This renter friendly hack will make it possible to hang a wall sconce anywhere NO wiring OR drilling required!
Not only is this hack to hang wall sconces temporary and budget friendly.
It’s great for those who don’t want to drill into their walls (drywall or plaster) or deal with electrical wiring.
You can quickly and easily hang hang wall sconces, then use a remote to turn them on an off or even put them on a timer!
Yes, you can be a couch potato and still operate your wall sconces!
This is a fast and easy DIY project that you can do in an hour. No glue or special tools required for installation.
Plus when you move you can pull down the wall sconces and take them with you or hardwire them later once you know you love where they are hung.
Contains hand selected products, with affiliate marketing links where I may earn a small commission if a purchase is made. {full disclosure here}
Pin It for Later!
No-Drilling Wall Sconce Hanging Method
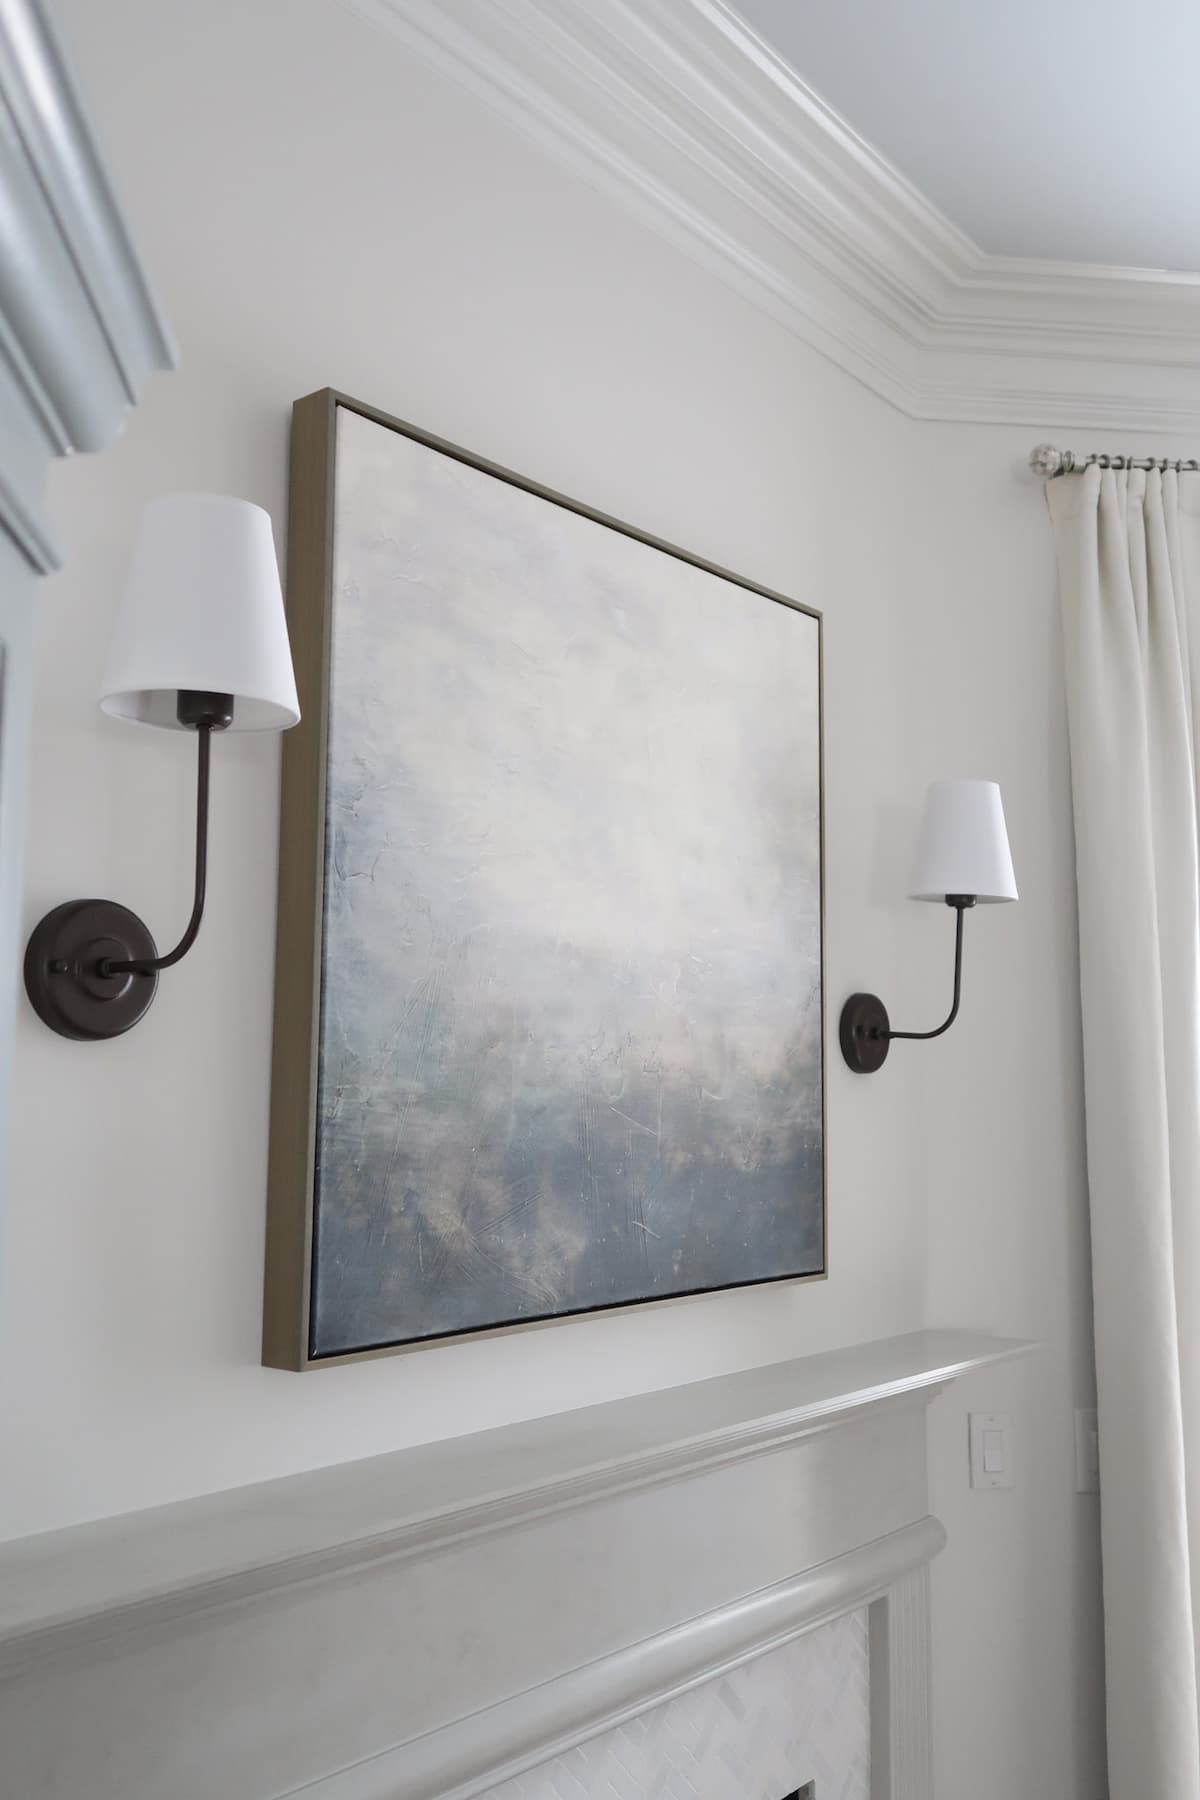
Sounds like a miracle right? Well, necessity is the mother of invention and at my house I was determined to hang wall sconces above my fireplace.
But in the back of my mind I wanted these wall sconces to be temporary. I had so many worries about drilling into the wall!
The questions I was asking myself about hanging wall sconces:
- What if I didn’t like them after they were hung?
- If I drill into the wall, what if I get the placement wrong?
- Maybe I’ll want a new style in a couple of years and will have holes to repair – eek!
So after thinking through all of my options for hanging the wall sconces, I decided to use a favorite trick!
In my bathroom, I have a FULL length mirror hung on the back of the door. This door is opened and closed all of the time.
The mirror was pretty heavy and even with steam plus lots of use, the mirror has been hung on that door for 10 years!
Plus during my bathroom remodel I had to remove the mirror to paint the door and it popped right back up with the adhesive I used.
What is this miracle product? I bet you guessed it! Yes, good ole Command picture hanging strips.

These are the hook and loop kind that stick together. Easy!
Maybe it’s overkill to get the 16 lbs version, but they were the perfect length and I KNEW they would hold any wall sconce I chose.
After lots of experience hanging hardwired wall sconces, what I was very aware of was making sure the lights ended up level.
When you use the mounting plate and drill it into the wall, it’s really easy to twist the plate to get the screws level.
So it was important that this hanging option provided the SAME flexibility and the wall plate could be repositioned without damaging the wall.
These worked perfectly and yes, I did have to reposition the one light a couple of times because the drill holes were off on the fixture (cheap lighting I bought online – you get what you pay for).
I can confidently tell you that this method works and HOLDs! My wall sconces have been up for a month NO issues.
What kind of light do you use for a no wire sconce?
Not only was finding temporary hanging solution important, so was making sure the wall sconces lit up the artwork above the fireplace and dark corner of my family room.
After ordering and returning a few battery light options for my wall sconces, I created a NEW puck light trick (magic light trick). It improves the overall lighting output and is pretty too!
Some of those “emergency” rechargeable battery light bulbs were harsh, big and ugly. Not a good combo for anything y’all.
Glad I found a better solution for us!
What’s important about battery operated lights for no wire wall sconces:
- The lighting needed to be warm and not a harsh cold LED bright light.
- Lighting needed to be battery operated or rechargeable.
- The bulb or puck light needed to fit on a standard socket size.
- I needed an option that emitted as much light as a hardwired bulb (this was a tough one).
- Being able to turn the lights on and off with a remote was critical.
- Dimmable with a timer was a plus!
Yes, I think through things thoroughly before I tackle any DIY project.
Believe it or not finding lighting that fit the space at the socket and within the wall sconce shade proved to be the most difficult.
What light bulbs do you use in a no wire wall sconce?
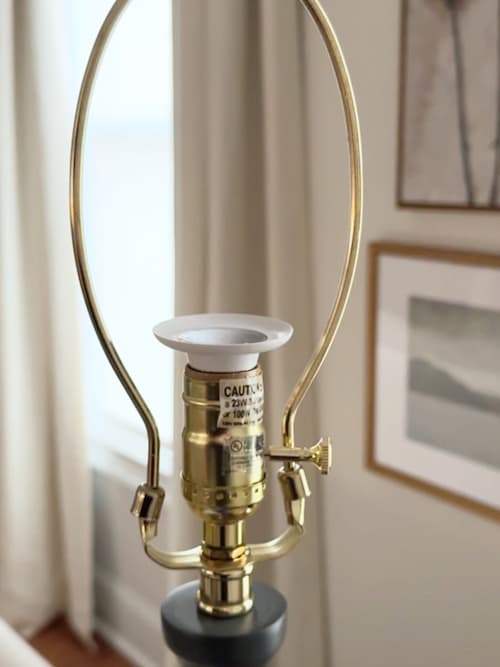
When I tell you I am obsessed with these rechargeable LED light bulbs I am!
They literally are the perfect option on every level for not only a wall sconce, but for any lamp where you don’t have a plug near by.
I’m call these the ANYWHERE light bulb. These small rechargeable, battery operated LED light bulbs PERFECT.
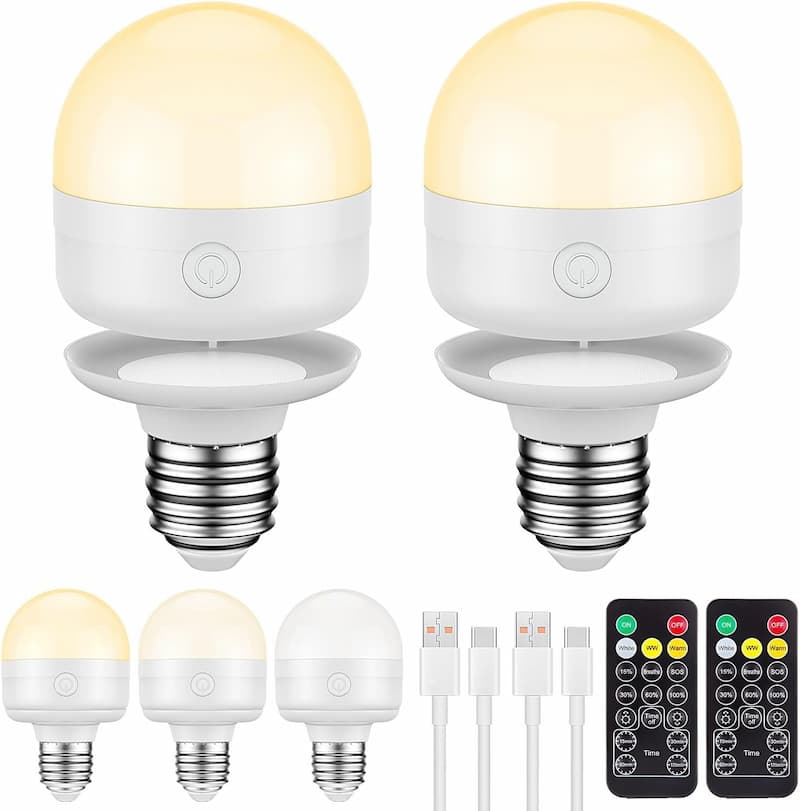
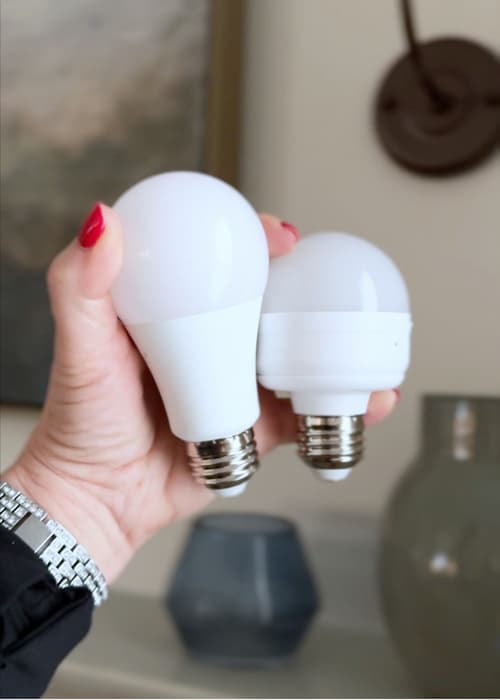
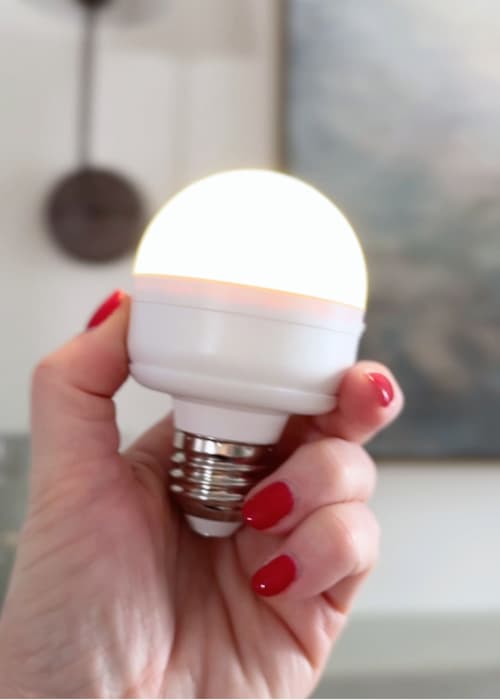
- The bulb screws into a standard sized light socket (there is a candle size bulb too).
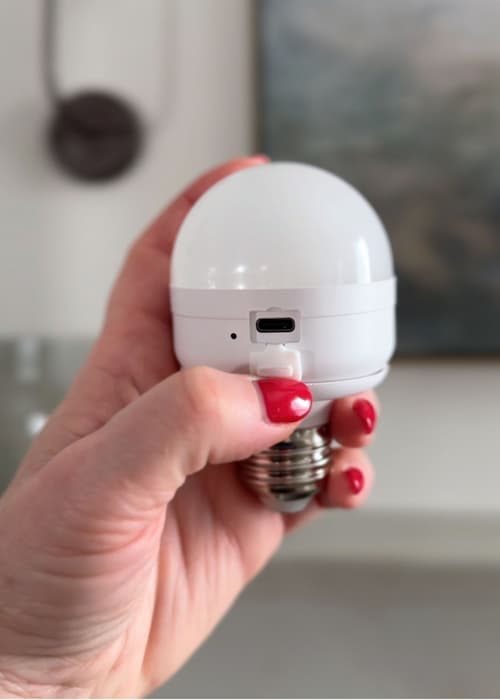
- It attaches to a magnetic base, easily remove for charging.
- Recharging is via USB C and the charge is long lasting.
- You can modify the color Cool, Warm, or Neutral and fully dimmable.
- Runs off a remote with a timer.
- Use with an upright socket or a hanging socket like a chandelier (the magnet is strong enough).
- The light is as bright as a 75W bulb (my opinion).
See them in action on my YouTube channel:
Wall Sconce Location Ideas
There are SO many places you can use this little no drilling and no wiring installation method for wall scones.
There are really affordable wall sconces these days that will fit any budget and decor.
- Hallway
- Bathroom / Powder Room
- Flanking furniture
- Above a fireplace
- On either side of a mirror
- Stairwell
- Anywhere you have a dark corner!
Remember because these will be removable you can take them with you when you move!

shop wall sconces

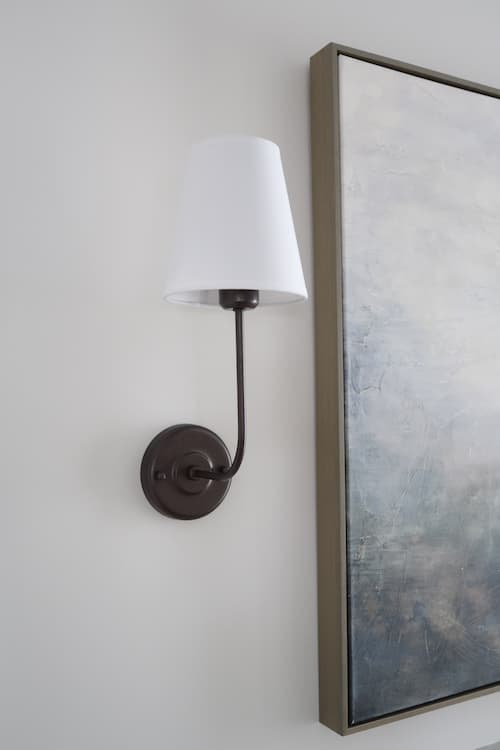
How-to Hang a Wall Sconce without Drilling
Seriously, this only took me an hour to tackle hanging two wall sconces. MAJOR heads up is this tutorial is for a wall sconce with shade!
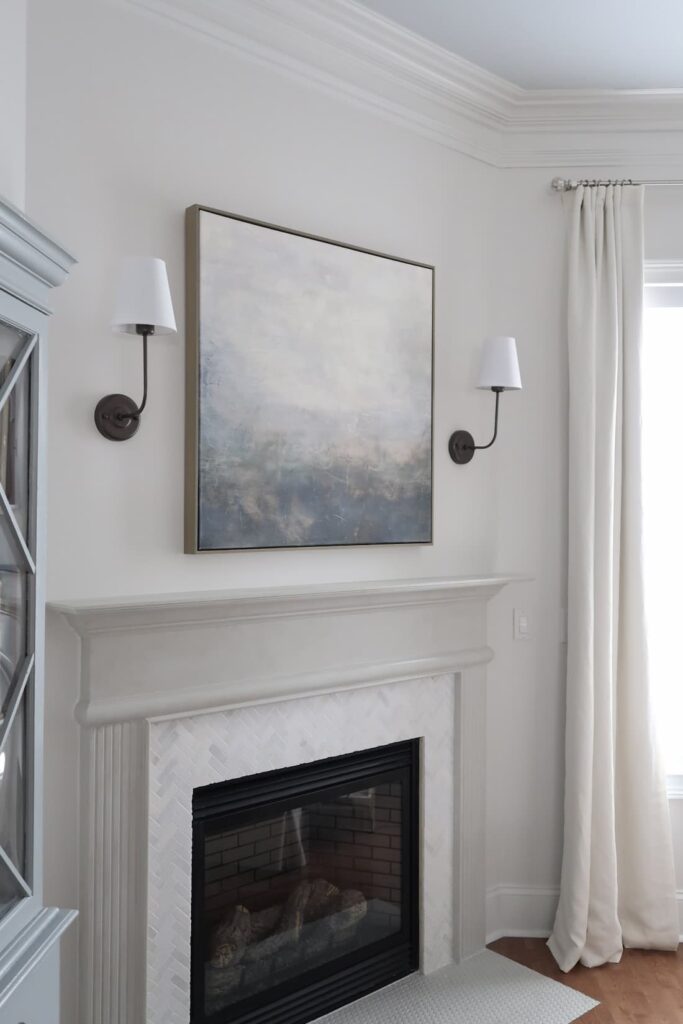
The hardest part was deciding on the height and width away from the artwork.
A major challenge I faced was due to the drill holes not being level on one of the wall sconces. My hope is you don’t face this challenge!
What you’ll need to install no-drill No-wire wall sconces:
- Rechargeable LED Light Bulbs
- 16 lb rated Command Adhesive Strips
- Mounting Putty
- AAA batteries
- Tape Measure
- Painter’s Tape
- Pencil
- Wrapping paper
- Scissors
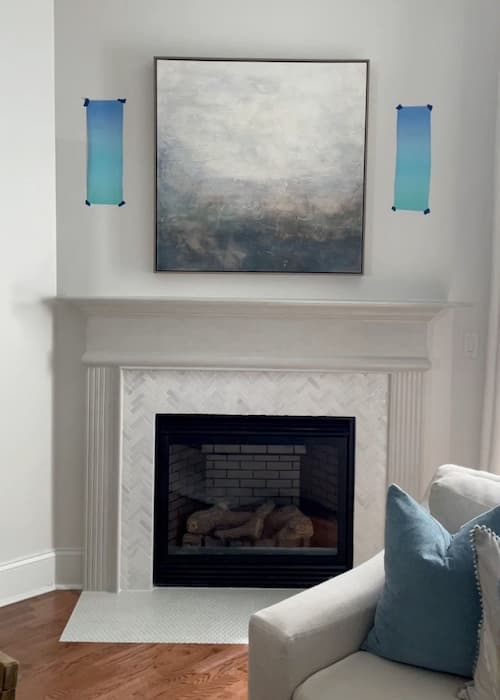
Determine wall sconce placement prior to hanging
- Take note of the sconce width and height.
- Mark measurements on wrapping paper and cut to size.
- Hang on wall where desired with painter’s tape.
- Adjust until you are happy with the placement.
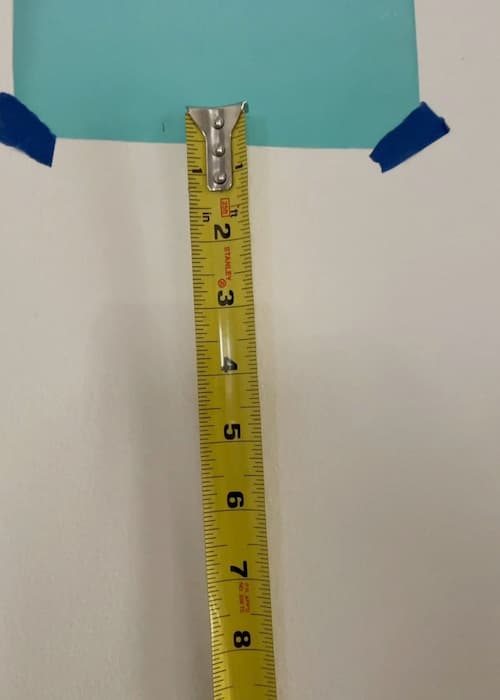
Step 2: Mark the center and bottom of sconce location
- The wall plate will sit about 1/4 inch up from the actual wall sconce itself.
- With a pencil, mark the base location of the sconce just under the wrapping paper.
- Then mark the center under the wrapping paper, so you have a place to align the mounting wall plate.
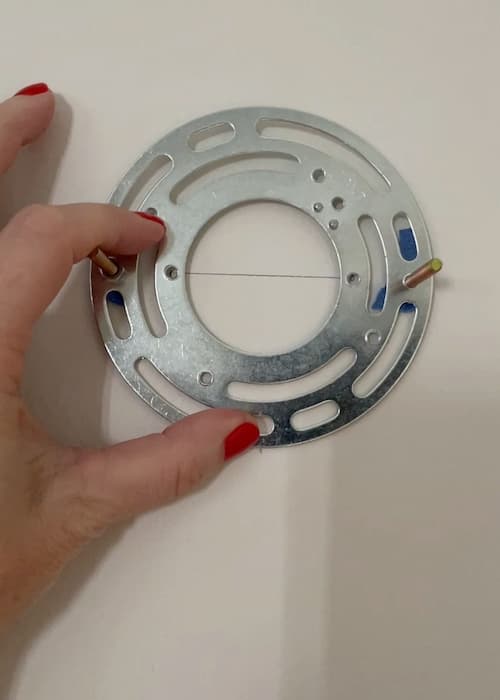
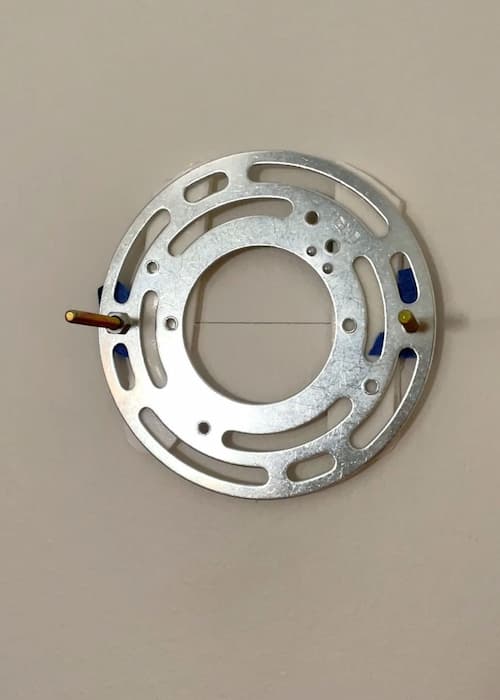
step 3: level mounting plate and level
- It is important that the two mounting screws for the wall plate are level.
- Hold the mounting plate up, level and mark placement with a pencil as a guide.
- To protect the wall, you can apply painter’s tape over the screw heads.
How-to Hang the Wall Sconce
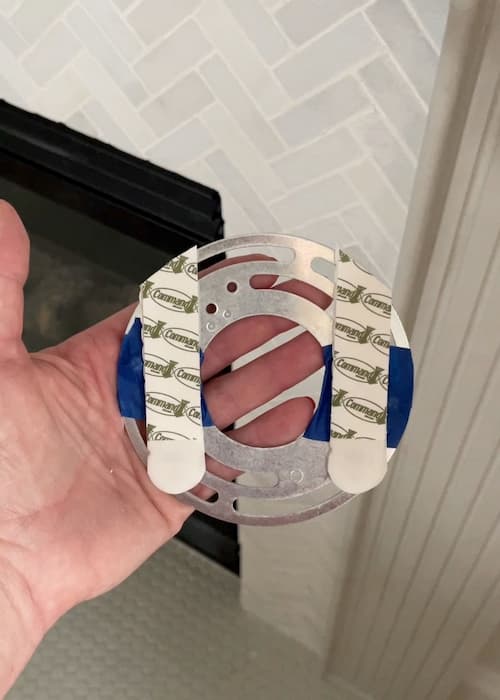
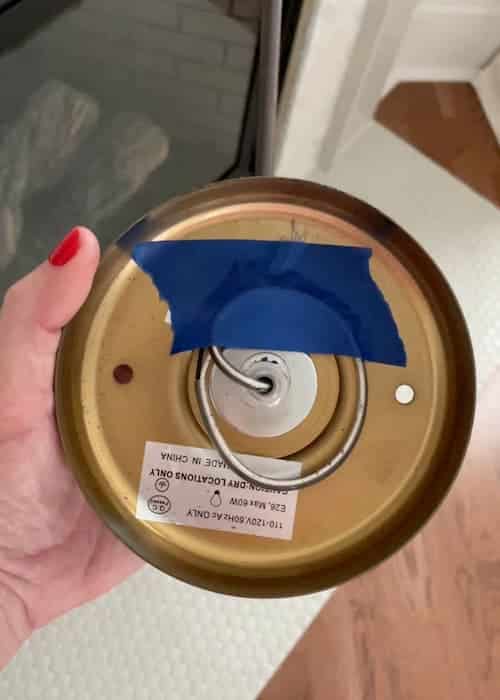
Step 1: Attaching the adhesive to the mounting plate
- Press two of the hook and loop adhesive strips together. You’ll need two sets for one wall sconce.
- You will be attaching the Command strips to the BACK SIDE of the wall plate. Keep the mounting screws in for later!
- Remove adhesive back on ONE side and attach to wall plate.
- Make sure the pull tab is at the bottom and within the mounting wall plate.
- With scissors, trim tops of Command strips to align with the mounting plate.
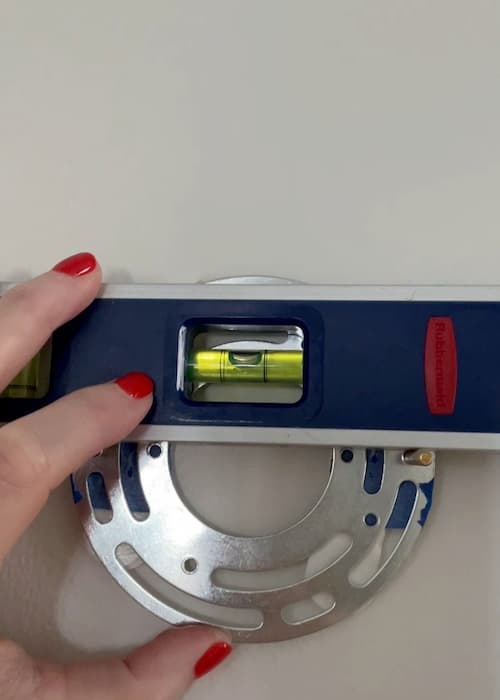
Step 2: Attach mounting plate to wall
- Peel back the protective strips to expose the adhesive.
- Align the mounting plate with your level line.
- Gently hold the plate up and make sure it is level.
- Once level, with firm pressure push the mounting plate to the wall.
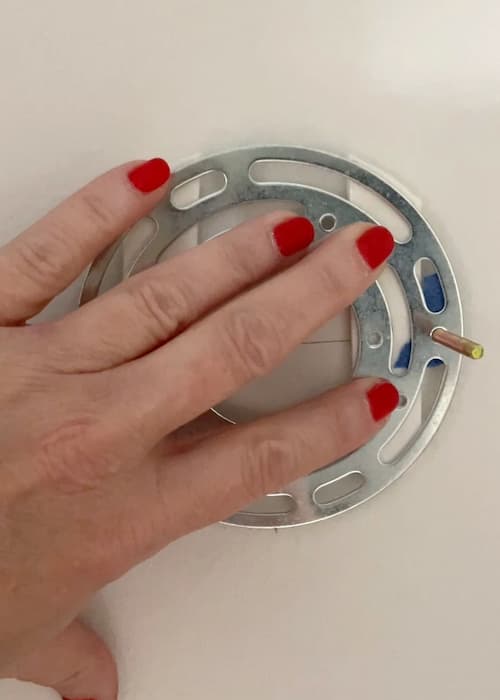
Step 3: Allow adhesive to adhere to the wall
- Set a timer and let the mounting plate adhere to the wall for 5 minutes!
- While waiting, use painter’s tape to secure wires.
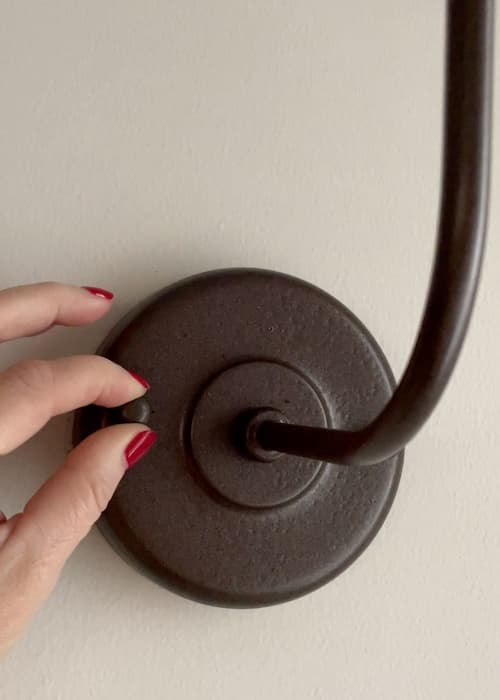
Step 4: Attach wall sconce to mounting plate
- Using the supplied screws, attach the wall sconce to the mounting plate.
- Double check to make sure it is level.
- If not, gently pull down to release the mount plate from the strip adhered to the wall.
- Turn slightly until level and reattach wall sconce.
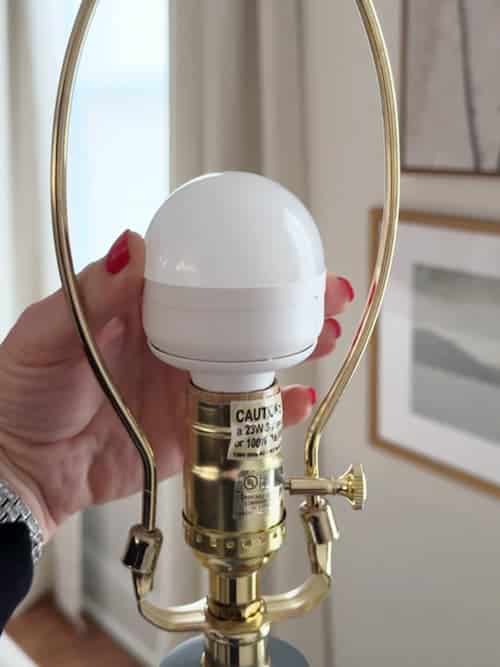
Install Wall Sconce Rechargeable Light Bulbs
This is the EASY part! You’ll be surprised at how bright these bulbs look even though they aren’t hardwired.
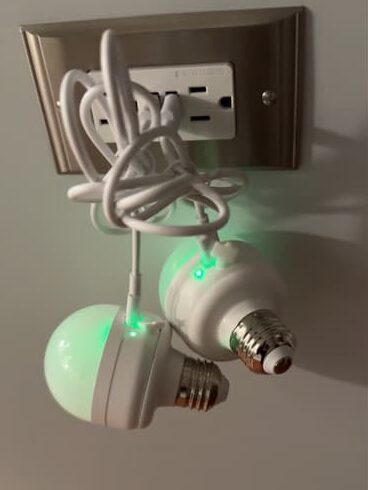
Step 1: Install Wall Sconce light bulb
- Fully charge the bulb until the light turns green.
- Screw magnetic base into light fixture.
- Attach bulb to magnetic base.
Step 2: Attach shade to wall sconce
- NOTE: Depending on the type of wall sconce you have, you may need to attach the shade before the bulb.
- Make sure shade is level and if needed, use mounting putty to balance.

- Play with the color and dimmer to get the perfect light.
- Each time you turn on the light, it remembers the last setting!
Step back and admire your hard work! I LOVE the way my new wall sconces look.
It’s nice to know I can change them anytime I want, without having to fill any drill holes or mess with any wiring.
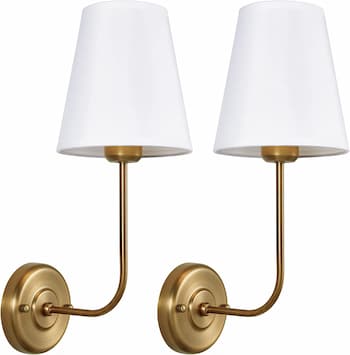
You may be interested in these wall sconces, but I have to confess I ordered gold (they were inexpensive for a pair) and ended up spray painting them!
Let me know in the comments if you are going to try this easy DIY project in your home!
Tags: non hardwired wall sconces, how to install sconces without electricity, non hardwired sconces, non hardwired wall sconce, wall lamps with cords, best wall sconces, accent lighting, ambient lighting, white fabric shade, interior designer, hard wired sconces, how to decorate wall sconces, bed frame, bed frame mounted headboard, traditional headboard
Want more renter friendly or easy home decor updates?
- Peel and Stick Tile: How-to Install on a Wall
- Peel and Stick Wallpaper: Beautiful and No Commitment!
- Easy Stick On Tiles Update Your Fireplace!
- Yes! You Can Spray Paint Just About ANYTHING
- How-to Convert Old Under Cabinet Lights to LED
Sign-Up for my Weekly Emails!
Straight to your inbox sharing can’t miss decorating and painting tips for your home.
Please follow me on Instagram where I share daily decorating and painting tips.
Until next time…
Porch Daydreamer
Tracey
Love this idea! My mom doesn’t have a light over her kitchen sink, and it can be pretty dark. I’d love to do this for her, especially for doing dishes, and it looks so pretty too! Thanks for all the great tips, and clear instructions!
Yay! I’m glad it helps.
Love this idea and will try it soon. My husband did not want to drill more holes in the wall and this is my answered prayer for wall sconces. Thank you!
Great! Glad to hear it.