Peel and Stick Tile: How-to Install on a Wall

YES! Apply peel and stick tile to a wall (drywall). Peel and stick tile is an affordable and easy DIY for a beginner. You can use this same tutorial to cover over drywall in a kitchen and create a tile backsplash!
Here’s your guide on how to cut and apply peel and stick tile to a wall. Seriously, a LARGE WALL!
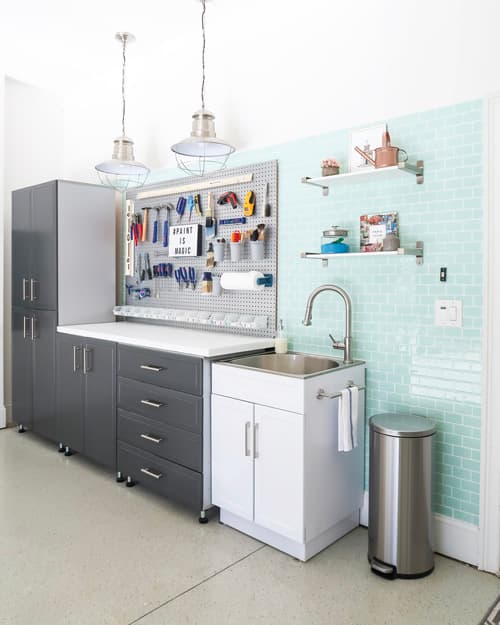
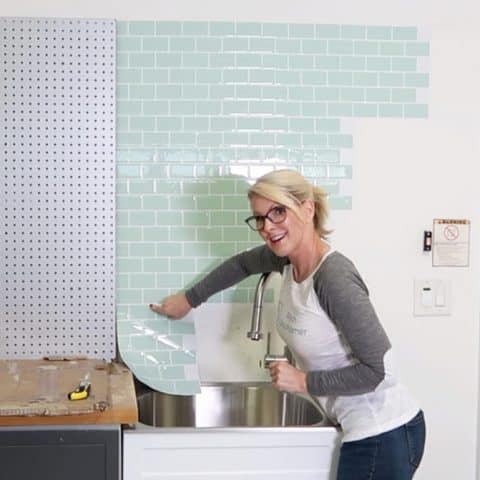
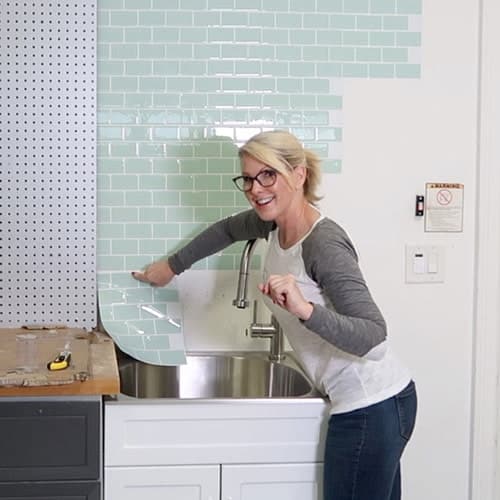
I installed peel and stick tile to almost the entire back wall of my garage. Cool right? For not a lot of money, I completely transformed the wall, added a pop of color and texture, plus now it is water resistant.
No grout to worry about…just cut the tile, stick and enjoy. NEW: YouTube Peel and Stick Tile Tutorial.
Benefits of Peel and Stick Tile
When I started doing research on peel and stick tile, I was surprised at how many options were available.
Plus how easy it is to install, without needing any special tools, adhesive or grout.
That’s a nice change versus installing ceramic tile, which takes a lot more skill!
What to love about Peel and Stick Tile
- Lightweight and easy to handle
- Easy to measure and cut with simple tools
- Adhesive is pre-applied and strong for a wide variety of surface applications
- Resistant to water, heat, moisture, and humidity
- Lots of design options for use in a bathroom, kitchen, laundry room, craft space, and even a garage!
I’m sure you want to see how they look, before I jump into how to apply the tiles.
My garage is my home base for all of my home improvement projects, so I’m in here a LOT.
Plus much of my blog is dedicating to painting things, so I was in search of a cleanable surface for behind the utility sink.
walls to consider for peel and stick tile:
- Kitchen backsplash
- Bathroom
- Laundry room
- Powder room
- Office
- Craft room
- Garage
Contains hand selected products, with affiliate marketing links where I may earn a small commission if a purchase is made. {full disclosure here}
Shop the Garage
shop the garage


This is where I wash out paint supplies and I’ve made a mess of the wall as the water and paint splatter.
Now these pretty tiles can be wiped clean with a paper towel!
I’ve been living with the Peel and Stick Subway Tiles for 5 months and tackled several paint projects.
Trust me they have been splashed with glaze, paint, soap, dirt and wiped off clean each time.
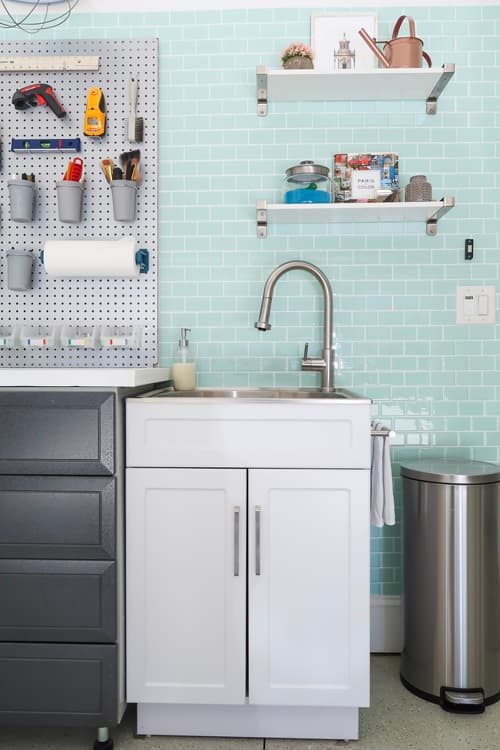
If these were real tile with grout, I doubt I would be able to say this.
The tiles still look amazing and driving into the garage seeing this gorgeous pop of color just makes me happy!
They have weathered temperature changes too without issue.
What a huge trade up to my garage now that I have a wall of tile. It was SO worth the expense and effort.
Pin It for Later!
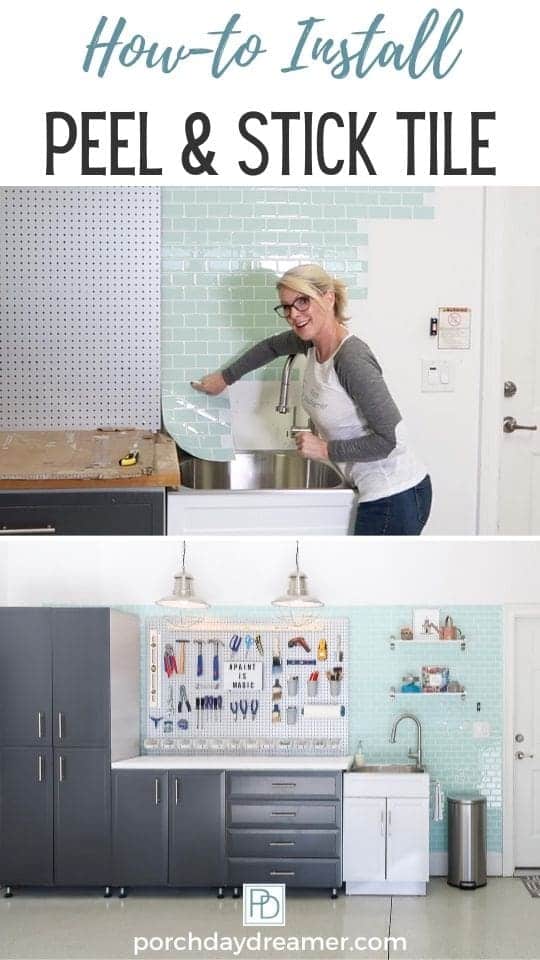
How-to Install Peel and Stick Tile
This tutorial will help you understand how to apply the peel and stick tile to drywall.
However, the adhesive is so strong it could be applied over a wide variety of surfaces.
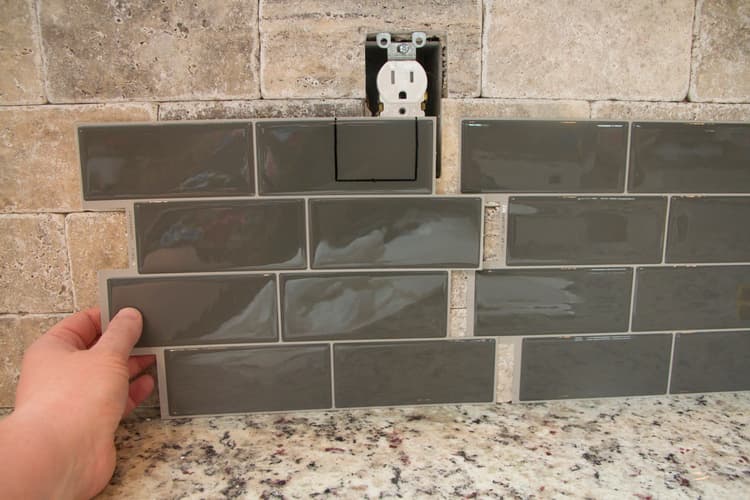
You may be wondering…can you apply peel and stick tile over existing ceramic tile?
Yes, especially over a smooth tile BUT you may need to fill in any grout lines wider than 1/16″ of an inch.
Here is a great tutorial applying over an existing backsplash:
It’s important to start with a smooth flat surface that is free of grease, so test one to two tiles first to make sure they adhere and lay flat.
Just like in any paint project…preparing the surface is key to your success!
IMPORTANT BEFORE APPLYING: The peel and stick tile I used specifies the wall AND tile are both at 70F prior to installing.
Shop Peel and Stick Tile
Install Peel and Stick Tile on a Wall
Tips and tricks on how to install peel and stick tile directly to drywall. How to cut and apply for the best results.
Materials
- Peel and Stick Tile
- Krud Kutter Cleaner
- Microfiber Cloth
- Thick Cardboard for Cutting
Tools
- Metal Straight Edge
- Utility Knife
- Yard Stick with Level
- Scissors
- Mechanical Pencil
- Tape Measure
Instructions
- So the tile adhesive will adhere, lightly sand wall, degrease, and clean with a microfiber cloth.
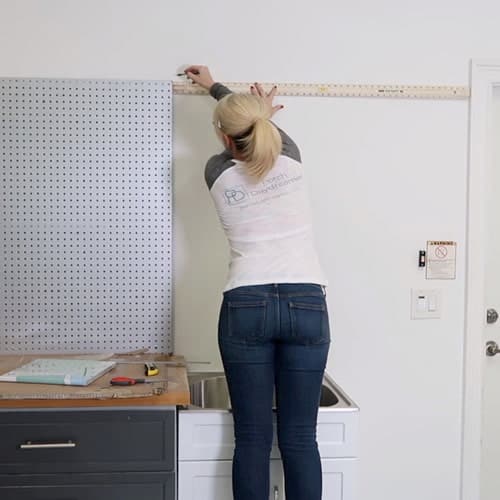
- Using a yard stick with a level, create a level line as a guide for your first row of tile. THIS IS THE MOST IMPORTANT STEP.

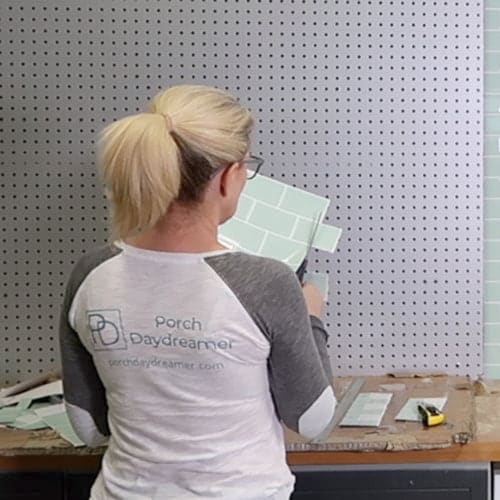
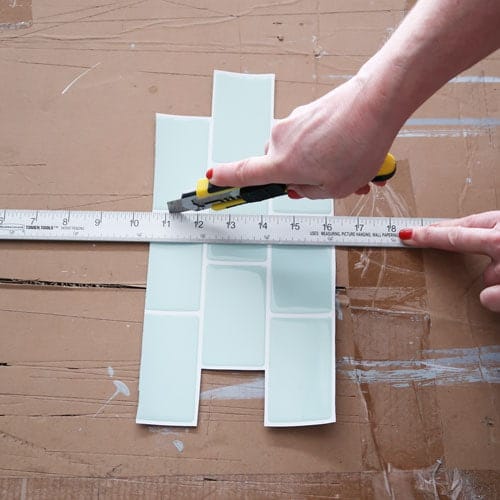
- Determine placement of first tile. If needed, carefully cut off pieces with a straight edge and utility knife or scissors if you can follow the grout lines.
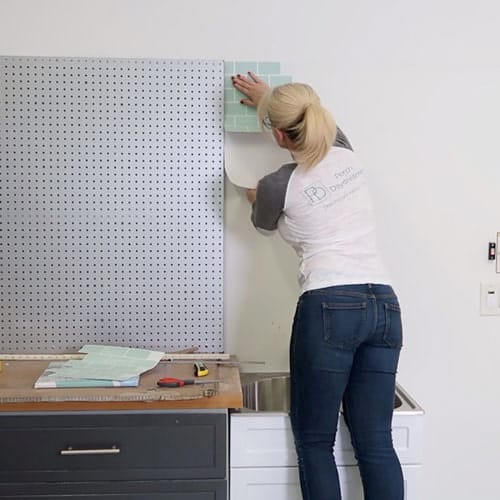
- Remove the adhesive backing from just the top couple of inches of the peel and stick tile. Place along level line to start and ensure it is straight vertically and horizontally. Gently peel back adhesive and smooth tile to wall.
- Move across and down the wall. Apply tile with the pattern of the grout lines.
- Make sure to test and match the grout or tile pattern prior to cutting.
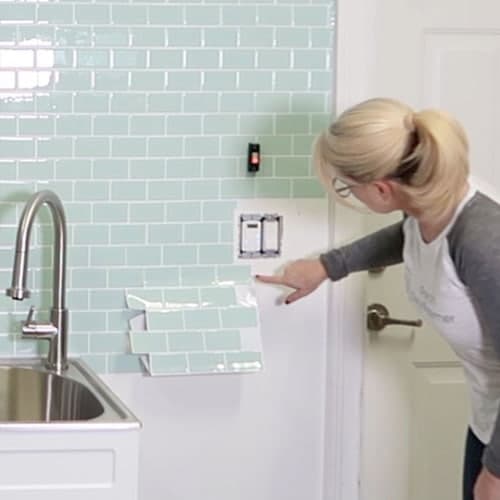
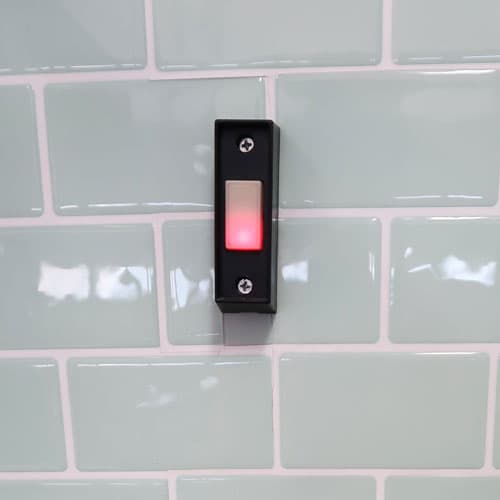
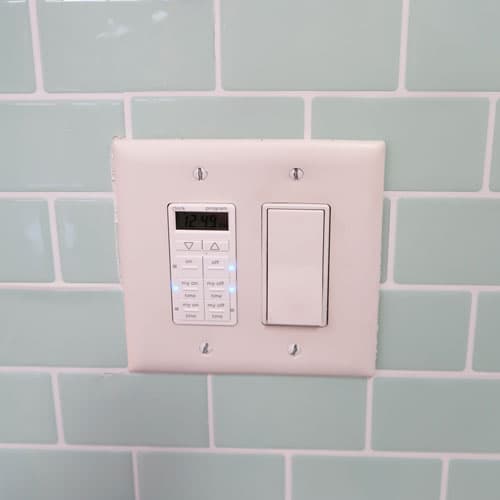
- When working around light switches, remove the plate or cover. Measure and cut tile to work around the area.
- You may need to cut small pieces of tile to fit as needed.
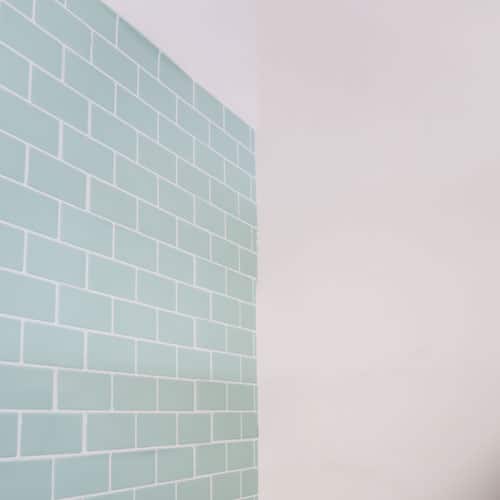
- Work your way to door jams and corners, finishing with a straight edge. Walls are not perfect, so it may look like the tile is "wavy".
- Clean up and enjoy!


Notes
- Make sure to measure your wall before purchasing tile. Buy 10% extra for mistakes...you will make them!
- A tape measure is best when measuring into a corner or up against moulding because you can flex it to a 90 degree angle for a true measurement.
- Mark where to cut on the actual piece of peel and stick tile. Make a mark of the measurement at the top and bottom, so you cut a straight line placing the metal straight edge for a clean cut.
- SAVE all cut outs and extra pieces, so you can use them around edges and switch plates. I used my extra scraps over and around the pegboard.
I hope you enjoyed this tutorial and are thinking about adding peel and stick tile to a wall in your house!
Read Next: Girl Meets Garage Makeover
other peel and stick options for around your home:
- Peel and Stick Wallpaper: Beautiful and No Commitment!
- Easy to Install Faux Contact Paper Marble Counters
Check out: Ultimate Guide to Updating an Outdated Kitchen
Please consider following me on Pinterest and Instagram for daily inspiration.
Until next time…
PORCH DAYDREAMER
Tracey