Easy Stick On Tiles Update Your Fireplace!
Are you looking for a quick and inexpensive update for your fireplace surround that you can DIY? Why not try stick on tiles that are easy to apply and heat resistant plus look like stone?
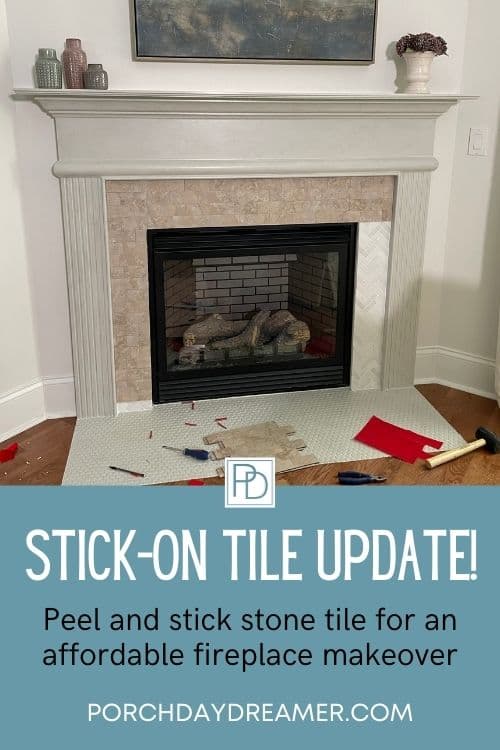
On a tight budget and desperately wanting a quick and easy fix for updating my fireplace surround, I landed on PVC peel and stick tile.
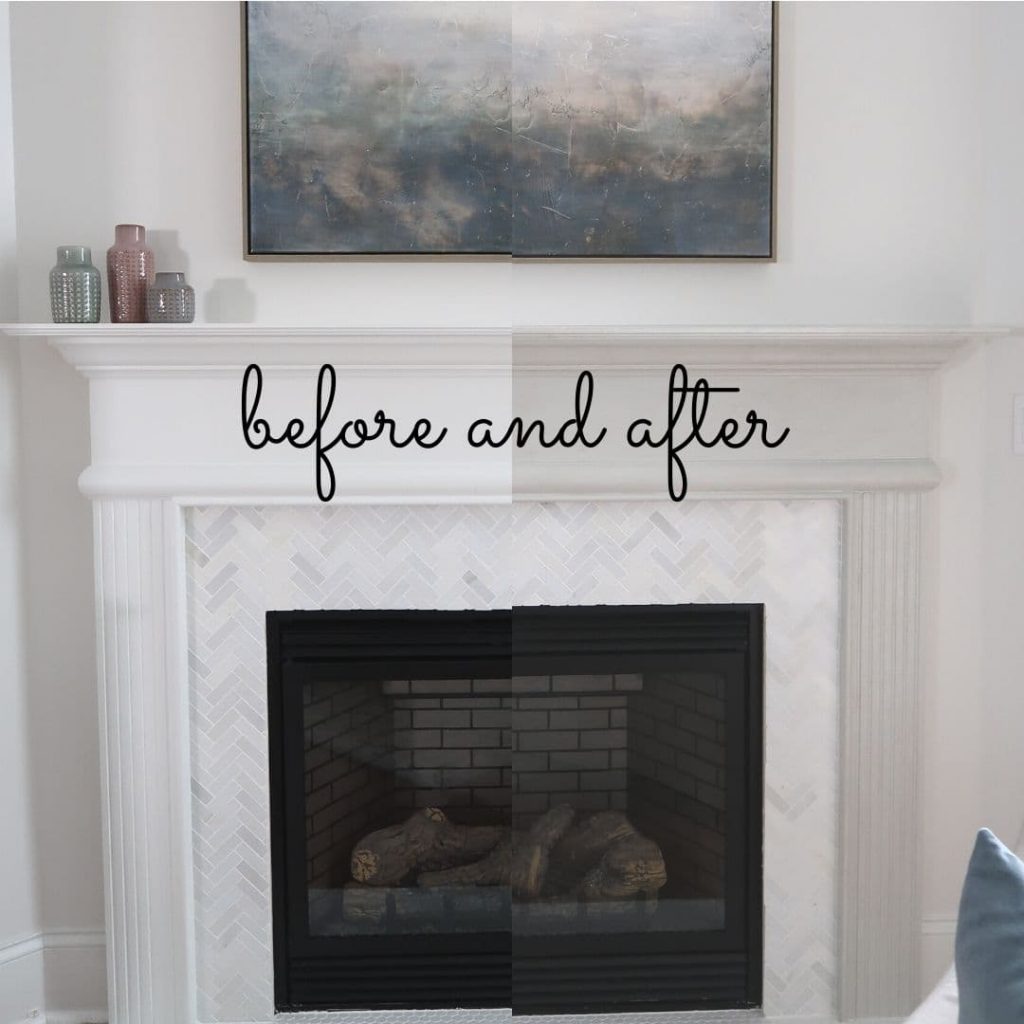
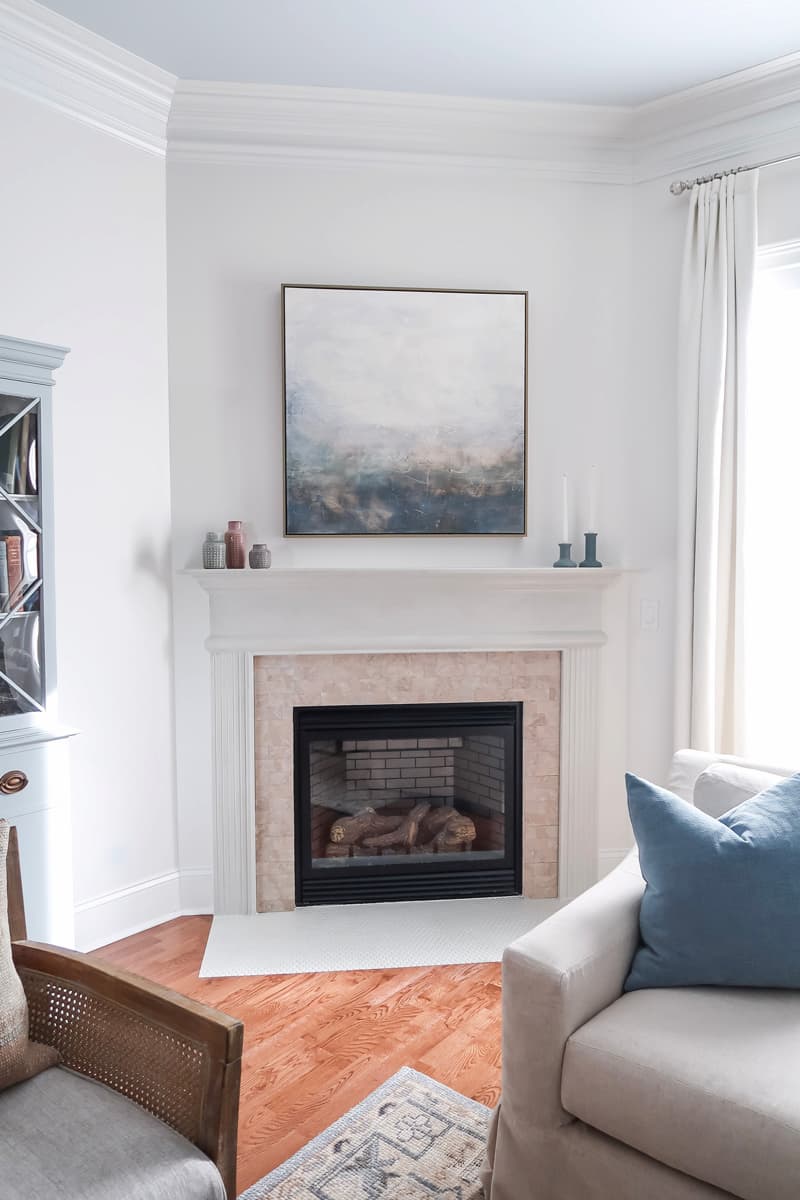
I’m SO impressed with how my fireplace makeover turned out I just HAD to share it with you!
Here is a step by step tutorial on how to apply peel and stick or “stick on tiles” to your fireplace surround.
Pin it for Later!
Contains hand selected products, with affiliate marketing links where I may earn a small commission if a purchase is made. {full disclosure here}
Peel and Stick Tile
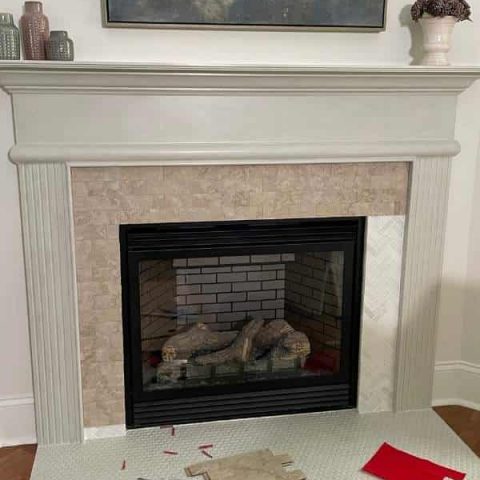
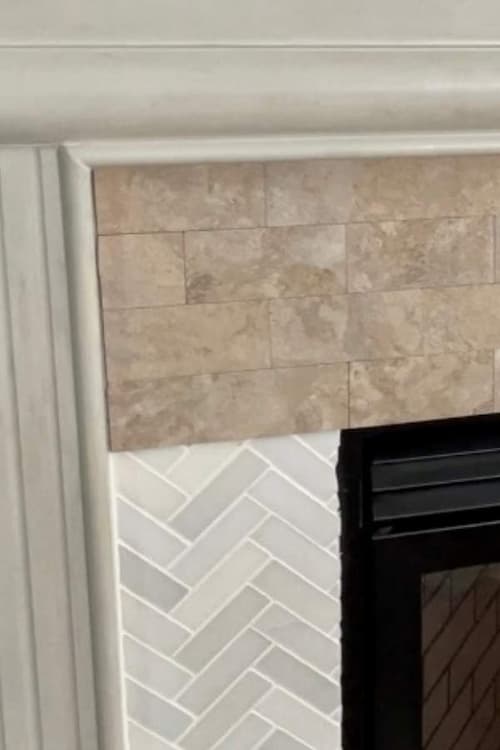
After updating my fireplace mantel to look like cast stone with a painted faux finish, I decided that the white marble tiles needed an update too.
Cast Stone Fireplace Paint Tutorial
Are you like me and don’t want to mess with traditional tile installation that involves mastic, wet saws, measuring and mortar?
Stick on tiles will be your best friend!
I leave the ceramic tile installation to the professionals. Check out this fireplace update: How-To Tile Over a Marble Fireplace Surround
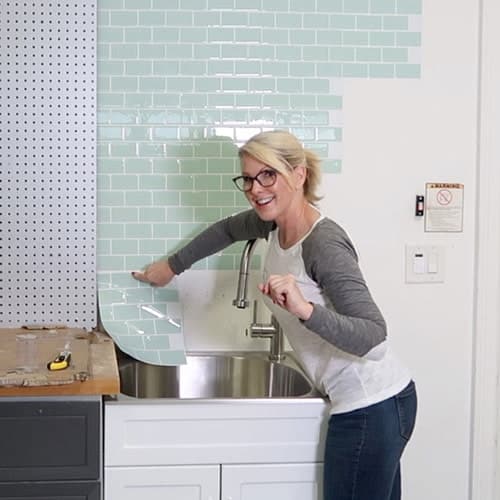
In my home I’ve used stick on tiles to make over an entire wall and loved the look!
They are incredibly easy to cut and apply.
Check out my garage wall makeover with peel and stick tile tutorial.
The tiles I used in the garage were perfect for that application, but my requirements were different for the fireplace surround.
In the garage, the main goal was water resistance and a pretty color.
So I found peel and stick tiles that looked like a glass tile.
For a fireplace surround you can imagine the needs are much different.
A major concern was heat resistance, along with having a natural stone look and feel.
I found a GREAT peel and stick tile for a fireplace surround.
They are PVC, have a heavy duty adhesive and yes are heat resistant. PERFECT!


If you are looking for a stone look backsplash tile, these peel and stick tiles are your answer!
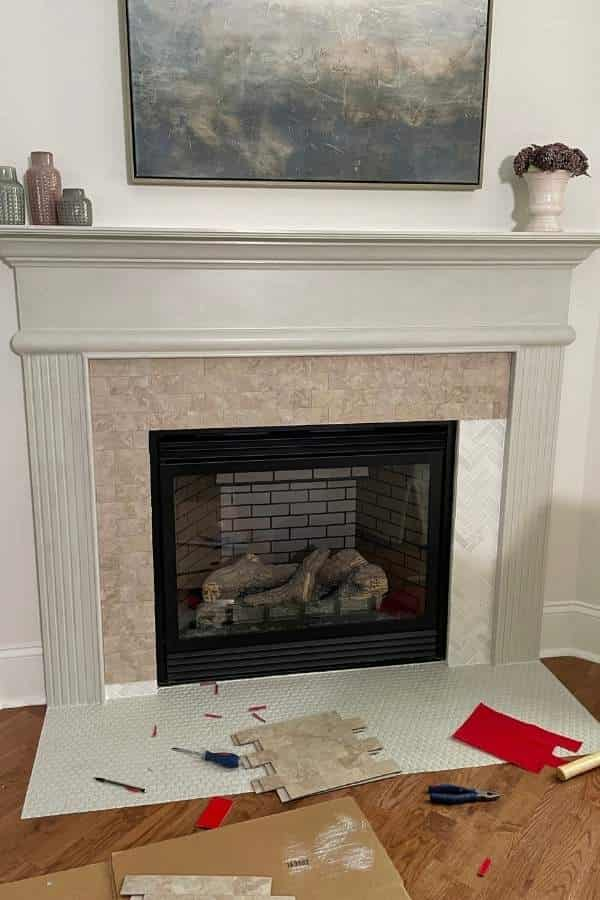
In about an hour, you can create a new look for your fireplace surround with stick on stone tile.
Porch Daydreamer
How-to Apply Stick On Tiles
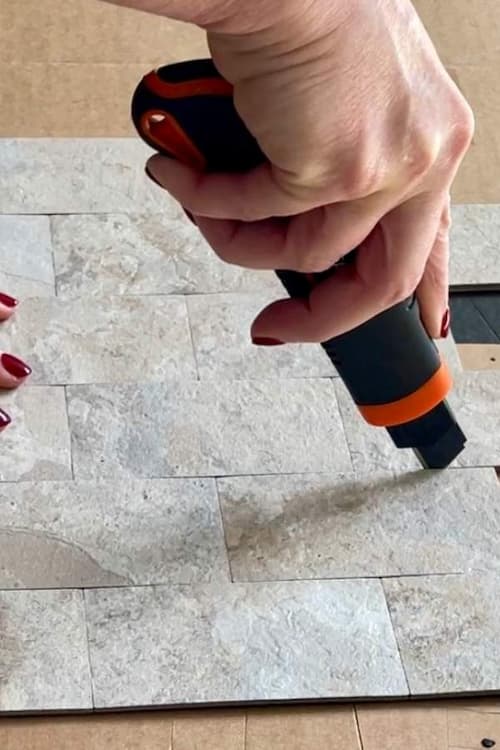
When I first opened the box, I was immediately impressed by the high quality of the PVC tiles.
They have lots of texture and dimension and look like REAL stone.
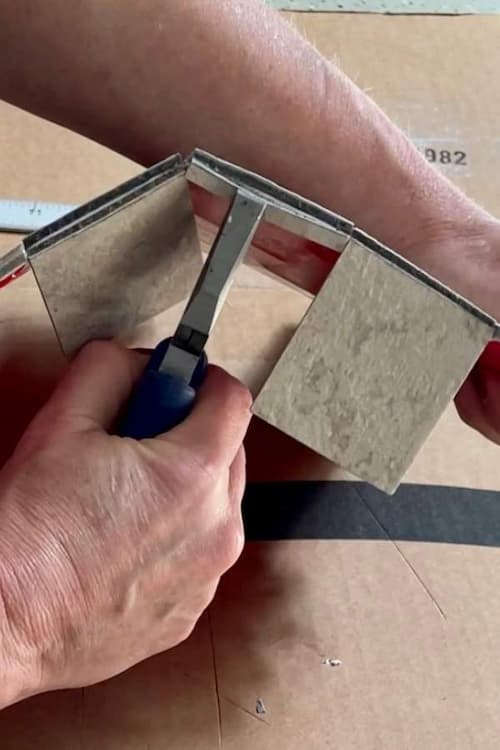
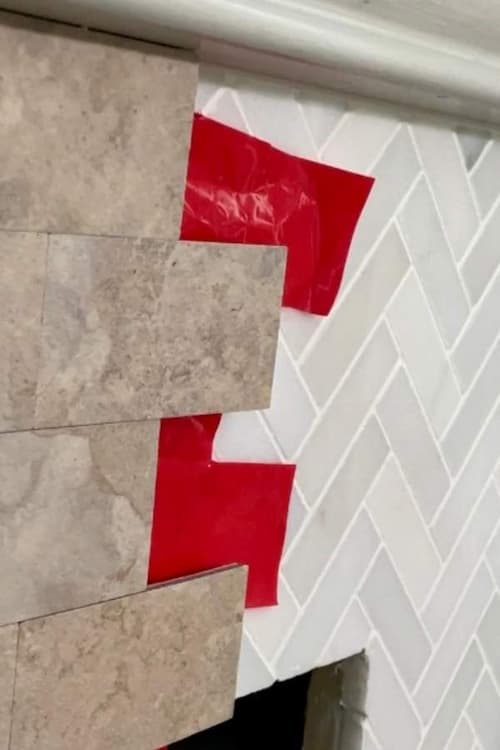
What initially concerned me was how thick the material was and if I physically could cut them myself.
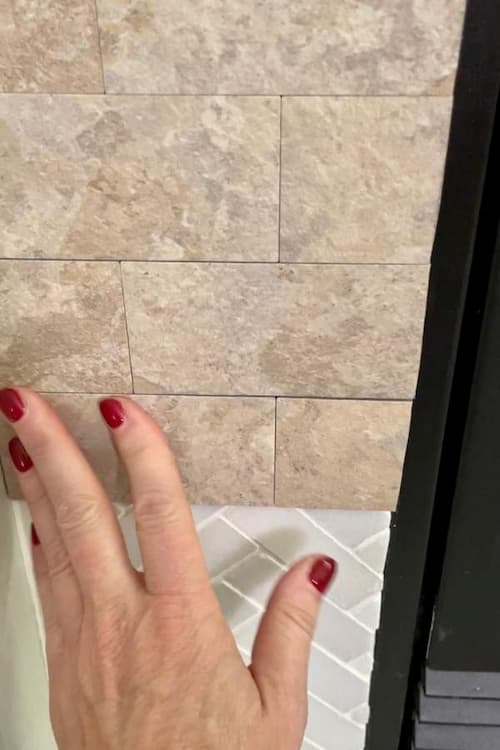
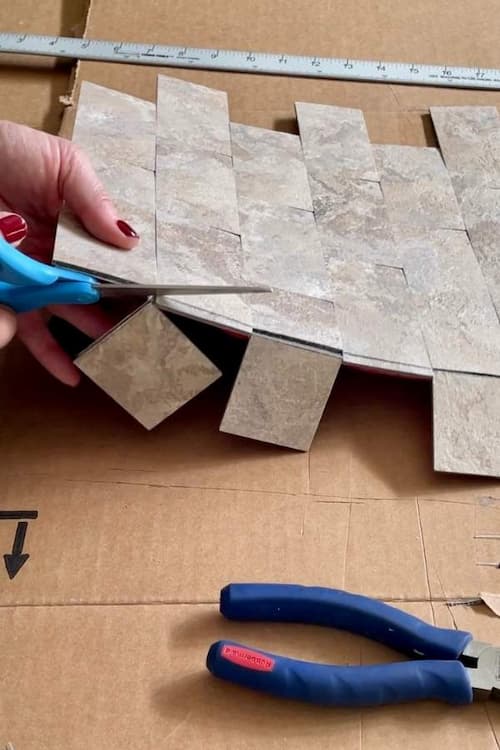
The other surprise was that each tile was individual, with space in between like real stone.
The tile was flexible and each piece could be applied on its own.
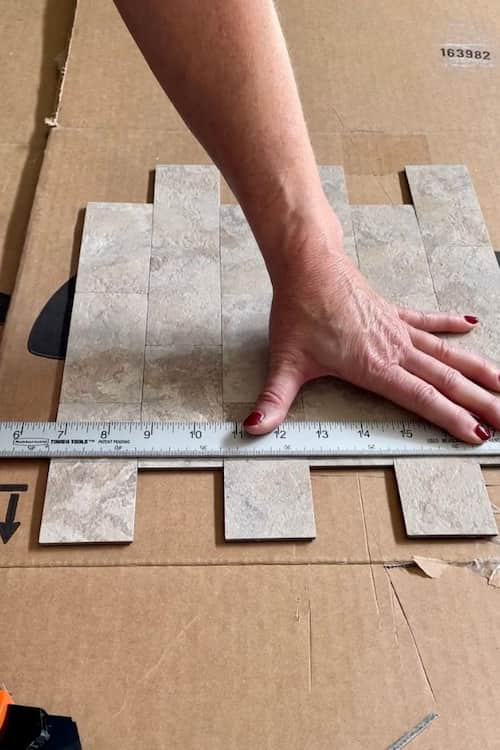
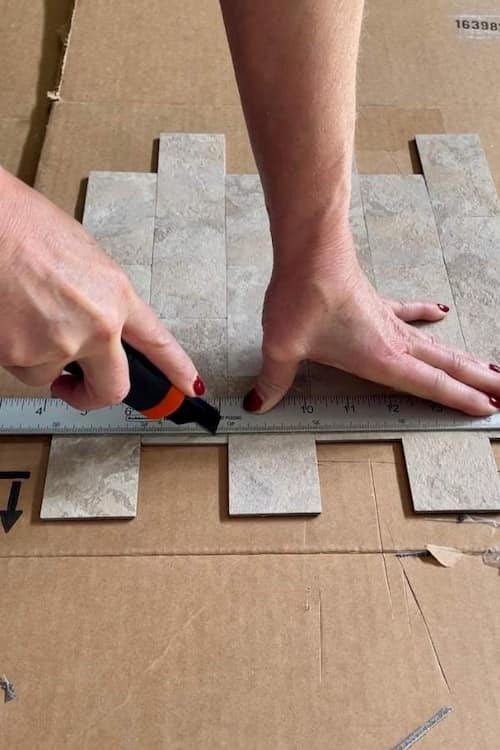
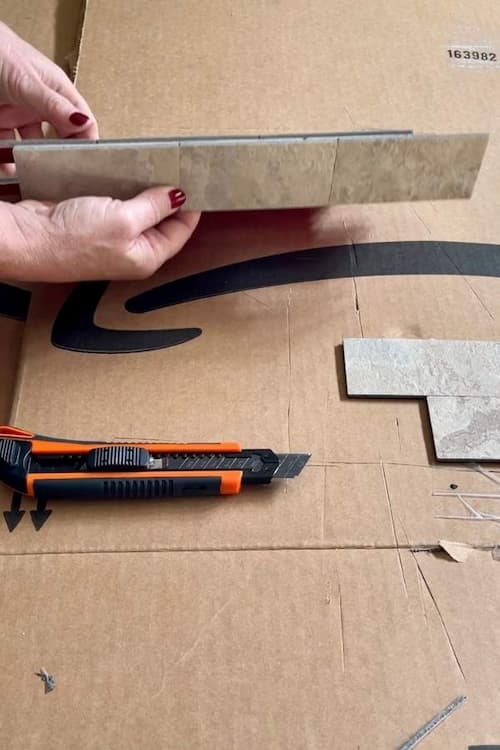
Once I started to cut the tile to size, I was relieved to find out that all I had to do is score the tile using a utility knife.
The scored areas snapped off quickly…all I had to do is cut the adhesive with scissors.
Easy right? I’ll teach you exactly how to install them!
In just over an hour, you can update the look of your fireplace with new tile.

How-to Apply Stick On Fireplace Tiles
How-to apply stick on or peel and stick tile over existing tile to makeover a fireplace surround.
Materials
- Peel and Stick Tile
- Cardboard
Tools
- Metal Straight Edge
- Utility Knife
- Scissors
- Flat Nose Pliers
- Pencil
- Level
Instructions

-
-


Notes
- If you have the space, I found it easiest to work in front of the fireplace to cut as I went.
- It is critical to make sure your first tile is straight as a guide for the remaining tiles.
- A helpful tip is to use a level to make sure your cuts and tiles are straight.
- Until you are happy with the tile placement, don't push down on the tile to adhere it.
- The tile can be removed shortly after you place it. I wasn't happy with one of my cuts and was able to pry off the recently applied tile with a flat head screw driver and remove the adhesive.
- This is a semi-permanent application. If you wanted to update the tile, it can be removed but you will have to work to get off the adhesive.
Recommended Products
As an Amazon Associate and member of other affiliate programs, I earn from qualifying purchases.


Now that you see how easy of a DIY project this is let me know in the comments if you plan to tackle updating your fireplace.
Check out: Ultimate Guide to Updating an Outdated Kitchen
Please sign up for my weekly email newsletter, so you never miss a post or new project idea!
There is a little pop-up in this post or follow me on Facebook or Instagram where I let you know new posts are live!
Until next time…
PORCH DAYDREAMER
Tracey
Hello, can these be used over faux brick?
[email protected]
Sorry, no. Only over a smooth surface.
I have been looking for a tile like this to use as a backsplash in my kitchen, but am worried this will pull off the drywall later on if I decide to change it out. Is this a pretty permanent product?
Yes, I would say to get off the adhesive it will damage the dry wall. If you were to tile with ceramic tile, you would damage the drywall trying to remove it as well!