Easily Update Picture Frames with Spray Paint!

Have you ever thought about spray painting your picture frames? It’s so easy and fast to spray paint metal and wood frames.
Are you looking for an affordable update for your picture frames?
Seriously, it is the fastest and easiest way to entirely change the look and feel of your artwork in a room.
Without priming, you can repaint just about any picture frame. I was able to paint 16 wood and metal frames for under $40!
Follow this easy tutorial and video. In minutes you can update your picture frames to a whole new look.
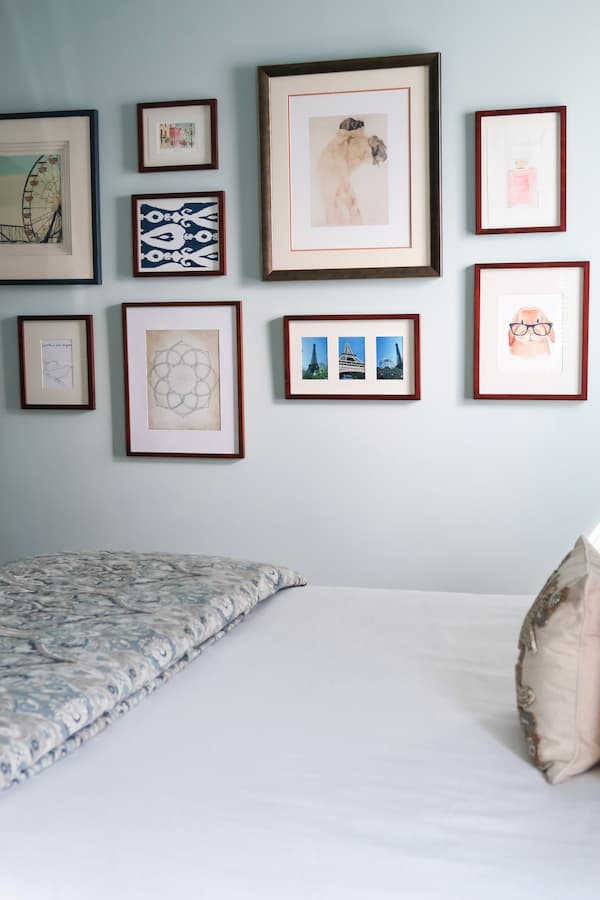
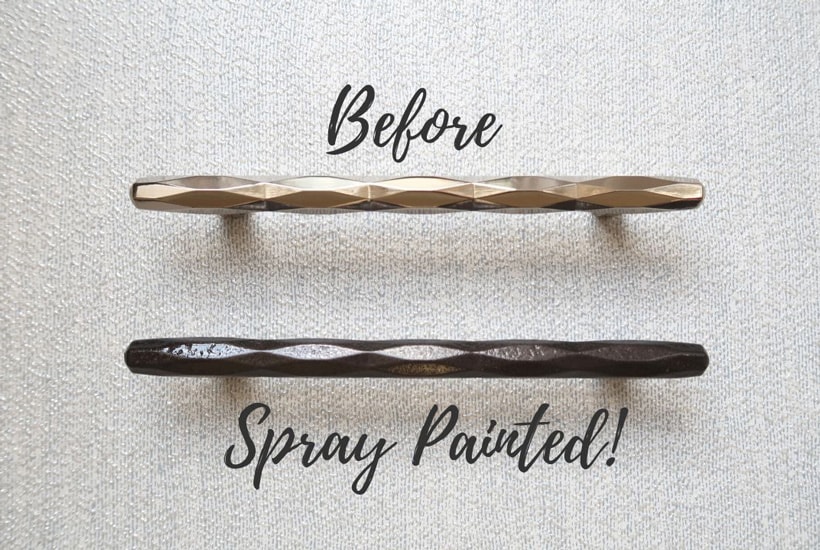
What My Frames Looked Like Before
The update to my picture frames started with my bedroom makeover a few months ago.
In trying to lighten up the overall look of my bedroom, I used paint to change the entire look of the room!
Paint truly is magic and is the most inexpensive update to any room.
This gallery wall is one of my favorite projects, but I could see that spray painting the picture frames would not only make the artwork look better but brighten the entire space.
Originally, I looked at replacing the frames with new gold one but after adding up that expense it was going to be hundreds of dollars!
That was definitely not in my makeover budget!
Spray paint is such and affordable way to change anything and I’ve had lots of success with it in the past.
It was time to find the “right” gold spray paint to work with the room.
Frames Spray Painted Gold
The frames I wanted to spray paint were both metal and wood – stained and painted.
I was hopeful that spray paint was going to cover all of the materials. Guess what?
The best part was I didn’t even prime first just got to spraying after thoroughly cleaning the frames first.
The lighter champagne finish works beautifully with the pale blue walls and also helps to create a cohesive look with the artwork as well.
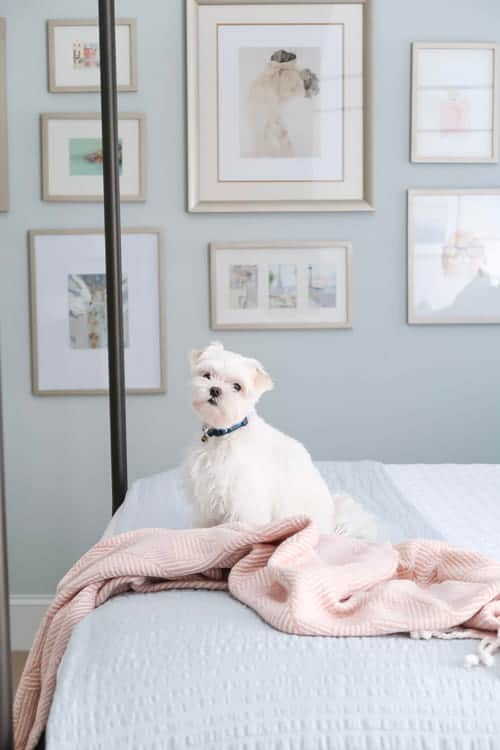
I love how the new frames complement the rest of my bedroom decor as you walk into the room.
This really is my favorite wall in the house…beautiful and filled with personal artwork that makes me happy each morning I open my eyes!
Not only did I spray paint the frames in my own bedroom, but also in the guest bedroom.
I needed a wide variety of frame sizes in both natural, gold and black so I spray painted some of them a new color.
It was a mix of wood and metal frames, YES you can spray any type of frame.
Contains hand selected products, with affiliate marketing links where I may earn a small commission if a purchase is made. {full disclosure here}
Pin It for Later!

How-To Spray Paint Picture Frames (wood or metal)
Here is my go to list for spray painting just about anything! In total I used 6 cans of spray paint for reference, so around $36 for all of those frames.
I included the scraper because it really is a handy tool around the house and is great for scraping any overspray on the glass.
Supplies for Spray Painting Frames
- Rustoleum Spray Grip
- Rustoleum Champagne Mist or color of your choice!
- Frog Tape
- Paint scraper
- Paper cutter or scissors
- Tape measure
- Cardboard
Plus I know we all shop on Amazon and have leftover cardboard, so that part is easy!
If you don’t have a prime membership, trust me it’s worth it.
Free shipping, free original TV series, and music make it worth it to me!
HERE IS A 30 DAY FREE AMAZON PRIME TRIAL!
Using Krylon or Rust-Oleum Spray Paint is a MUST!
The reason I am recommending Krylon or Rust-Oleum spray paint for this project is because it dries to the touch in a half hour, which is perfect for a project like this.
Plus both have lots of metallic color options to complement a wide variety of home decor styles.
You’ll see in the video me spraying the Rust-Oleum spray paint and can see the beautiful gold sparkles! It looks really high end.
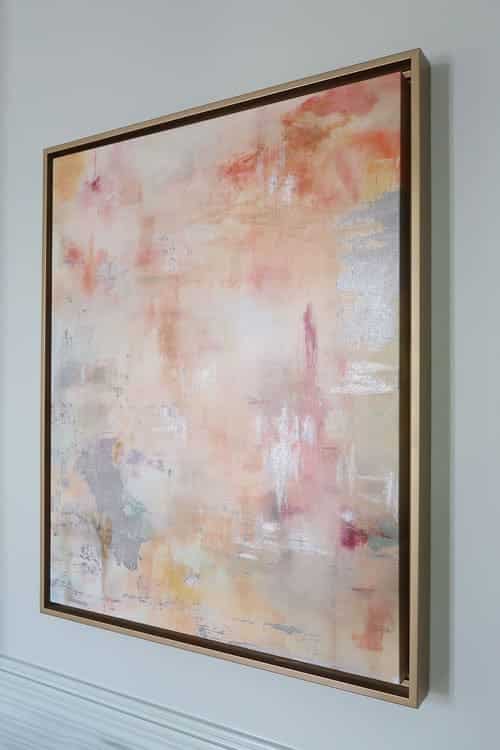
Here is the update to the frame in Rust-Oleum spray paint in Satin Bronze and you would never know this wasn’t the original finish.
It looks SO much better in the new color versus the brassy old gold finish.
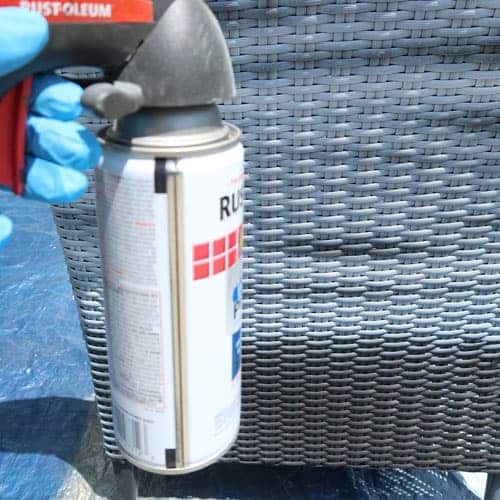
To make spray paint projects even easier, I have a great tool that I love to recommend.
If you’ve never owned a “spray paint trigger”, it is SO much easier on your finger if the can has a regular spray tip.
You grip the trigger and it depresses the trigger, instead of having to use the tip of your finger.
During large projects it’s really important, so your finger won’t go numb and you get a more even spray pattern.
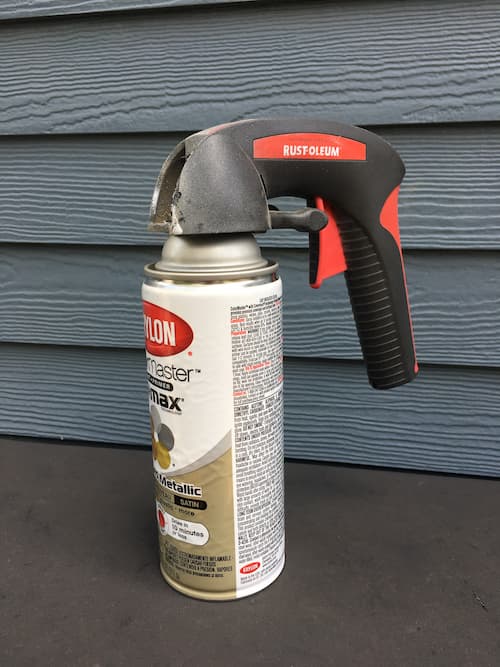
A great investment that can be used over and over again – you can see mine is well loved 🙂
Step-By Step Spray Paint Instructions
How-to Spray Paint LIKE A PRO
Teaching you how to apply spray paint the right way to avoid over application, drips, bubbles and peeling!
Materials
- Can of Spray Paint
- Cardboard or Tarp
- Painter's Plastic
Tools
- Rust-Oleum Comfort Grip Attachment
Instructions
Step 1
- Find an outdoor area to spray paint preferably in the shade if possible.

Cover the ground with a tarp or cardboard and any areas that you are concerned may be hit with overspray with painter's plastic or a drop cloth. - Make sure to anchor each corner of a tarp or plastic, so it doesn't blow back onto the object(s) you are spray painting.
Step 2
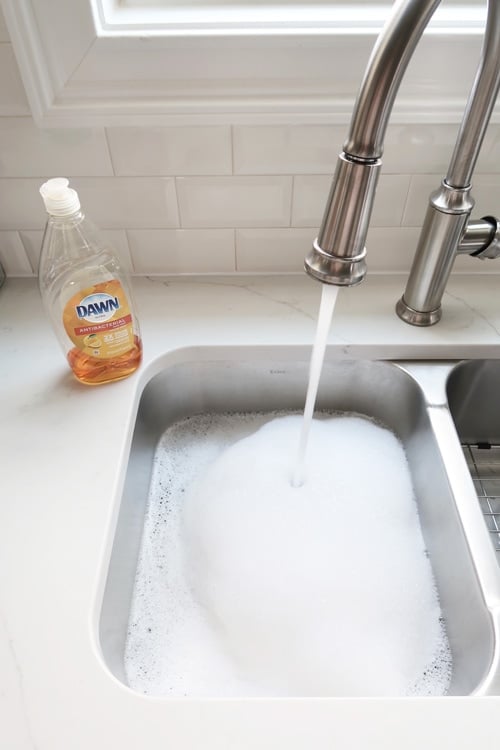
- Always make sure to CLEAN the surface of everything you are painting to remove dirt, dust, grease or debris.

- Hot and warm soapy water using a degreasing dish soap works well to clean or if it is and outdoor piece you can brush off and hose off. Just let everything dry thoroughly.
Step 4
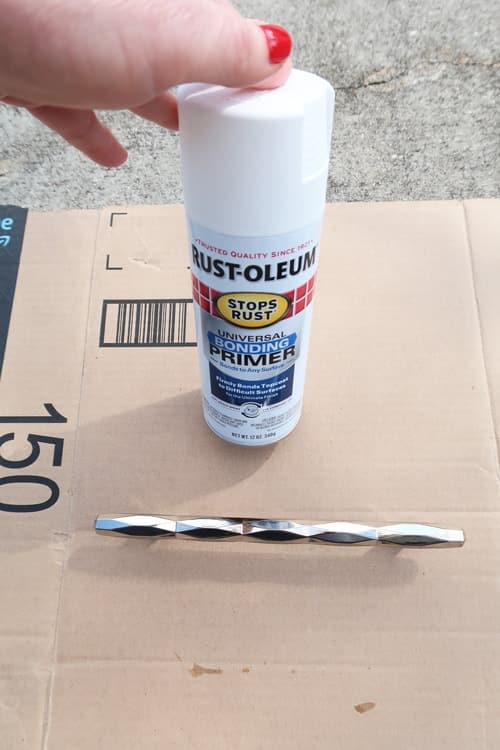
- For tough to paint surfaces, I usually recommend a spray bonding primer. That will ensure the best adhesion.
Step 5
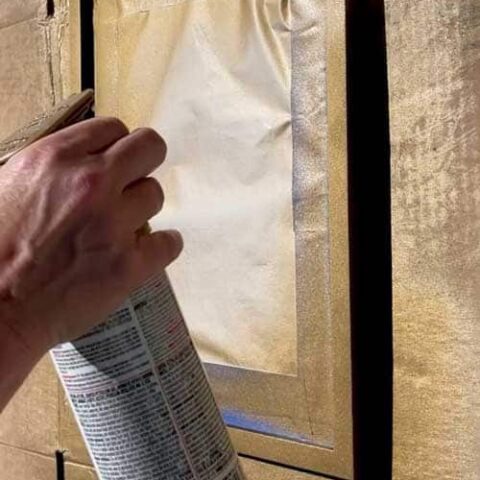
- Using either the Universal Rust-Oleum can of spray paint or the Comfort Grip attachment test the spray on a piece of cardboard. Make sure it is spraying properly. ALWAYS start the spray just before the object, so you don't create a spot or over apply in one area.
Step 6
- Watch my video to see the press and release method of spraying. The keys are to keep your can around 10 inches away from the surface and keep the spray moving and overlapping.
- As you finish a section end, you release the trigger and then press it again moving in the opposite direction.
- That will ensure you don't over apply or create drips.
Step 7
- READ the can to make sure you allow the proper amount of time between coats of spray paint. Each manufacturer is different.
- Allow the spray paint to dry thoroughly, before use.
Notes
- IF you end up over applying because you get too close the the surface, you typically can allow the spray paint to dry about 30 minutes and sand the area smooth.
- Make sure to always remove all sanding dust prior to painting! I like to use a damp paper towel for this process. Allow the area to dry before applying more spray paint.
Recommended Products
As an Amazon Associate and member of other affiliate programs, I earn from qualifying purchases.


Tips for Better Spray Paint Results!
- When taping it’s better to get spray paint on the glass vs. missing some of the frame. You can easily scrape off the paint from the glass versus touching up the paint on the frame.
- Invest in a spray gun, so you don’t get a tired finger and get EVEN coverage. It applies even pressure to the nozzle for a smoother finish.
- When using a spray gun, make sure the nozzle is centered before you spray. If you don’t, the paint will go into the side of the gun and drip on your project. Yes, I’ve had this happen and it’s not fun!
- Please make sure the cardboard extends about 2 feet beyond the frames. Spray paint floats and you don’t want to get any on the adjacent ground.
- Bend down and make sure the sides are as evenly coated as the face of the frame.
- Don’t worry if you miss any spots. Days later I took down some of the frames and applied one more coat.
- When spraying a large number of frames, spray paint up to 3 of the smaller frames and 2 of the larger frames at a time to make the project easier and go more quickly.
Other Spray Paint Projects to Explore
How amazing is spray paint that it can transform anything!
I’m a spray paint fan and have some other ideas for you:
- Yes! You Can Spray Paint Cabinet Hardware
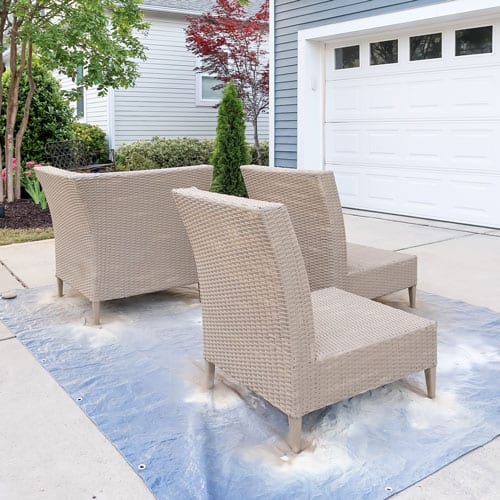
- How-to Paint Outdoor Resin Wicker Furniture!
- Spray Paint Curtain Rods for a Whole New Look
Have you never heard of bonding primer?
It’s a paint game changing product and I go into detail in this post: When Bonding Primer is a Must Before Painting
See how I use bonding primer to teach you how to paint IKEA Laminate Furniture: Paint IKEA Furniture: Easy hack for a peel proof finish!
Good luck on your next project and know any color you choose will work well and look beautiful!
Please consider signing up for my weekly email newsletter where I share lots of home design, DIY, and painting tips.
If you want to learn how to transform other items in your home with paint, click here to see all of my paint projects.
Please consider following me on Pinterest and Instagram for daily inspiration.
Until next time…
Porch Daydreamer
Tracey
Hi Tracey,
I’m an interior designer and love painting/spray painting to give new life to perfectly good items. I’ve been sharing your blog with clients to jump start them on projects I know they can do themselves with your instructions! It’s wonderful!
One of the other huge advantages to spray painting the frames versus replacing is the time saved from finding replacement frames. I can see clients eyes glaze over now as they think about this task:)!
Spray painting comes with huge instant gratification too!
Thank you for your tips!
Thank you, Kelly! I appreciate your positive feedback and sharing my blog with others 🙂
Tracey, Would this method work for painting kitchen cabinet hardware ? Also what is the exterior color of your house, house trim and door?
Thank you for such great inspiration.
Thanks for reminding me to link the cabinet hardware tutorial in this post! I just added it to the bottom with a picture 🙂 All of my paint colors can be found in my home tours and here is the link that includes my exterior: https://porchdaydreamer.com/best-blue-paint-colors-home-tour/
Hi I was wondering if you could tell me where you found the Krylon spray paint? I’m having trouble finding that color online (even Amazon)! Thank you, I’m excited for this project!
Thank you for letting me know that it’s hard to find! Here is a great substitute that will give you the same look from Rustoleum: https://amzn.to/3lUoY3F
So excited to get started on painting several pictures frames with the beautiful spray color you recommended. I just ordered it online @ $13 per can but I do not need 6 cans, so very worth it. I was honestly about to donate some of these pictures as most have black frames or dark brown and not in line with my new house/lighter coastal décor. The Champagne Nouveau in Satin will create a whole new look to the artwork. I already own the spray gun which is an essential for spray painting. Thanks for the guidance. I would love to do my garage like yours but I need to work up to that and clean it out first. Your projects are so inspiring.
Patricia! So excited to hear you can repurpose your frames. Better to upcycle and save…that’s what motivated me!
Super helpful! I really appreciate all the tips and love the color choice. Will be updating my black frames for a softer look as well!
Thanks, Adora! I’ve had mine painted for several years now and love the lighter look.
Hi, I love your ideas. Question: why don’t you need to use a primer on the picture frames? Will the Rustoleum spray paint work on the frames, too? Thank you!
Hi! Because they are not going to be used/handled the spray paint sticks and holds. I’ve never had any issue with mine and it’s been years plus I’ve changed out the artwork. I’m sure Rustoleum will work too. If you are worried about the wear, then start with a bonding primer first…can’t go wrong with that!
Thanks for tip on the spray gun!
Help please: I painted a bunch of wood frames (profess. framed) 2 days ago. Ranged from shiny (flat) frame, to simple ‘lines’, to ‘bumpy’ & more ornate in style. Used Krylon black satin finish. After 2 coats still had some bare spots so applied a 3rd coat this morning. 3 hrs later I was surprised the paint has bubbled in some areas on almost all of the frames. My question is: any suggestions on how I can fix this? It’s noticeable. I’m afraid to do a 4th coat in case it just gets worse (plus I will need to sand off the bubbled areas first). This is my 1st paint project. Also, I have some little spots where the tape peeled off the paint inside the frame so need to touch up that – what product do you reco for this? Thanks so much
Hey, Sharon! Sorry to hear you had some trouble. It’s odd the 3rd coat bubbled…usually that is from spraying too close or too heavily and creating air pockets. Since the first coats weren’t an issue, my best guess is that you should be able to sand the rough areas, clean off the dust, and LIGHTLY coat those again a couple of times. Use the same process drying between each coat until it’s covered. For the areas where, the tape pulled off I just re-tapped and sprayed those sections again. Hope this helps!
ok, I’ll ‘go back in’ & give this a try! Thanks so much – I really appreciate your help!
Hi Tracy! Just signed up for your newsletter. Not sure you’ll see this question since it’s an older post but here goes. I would love to know the wall paint color the pictures are hung on. Thank you!
Hi, Heather! You can actually download all of my paint colors on my home page or in the side bar by signing up for my email. It’s called Feeling Blue, by Valspar.
Do you think this would also work on plastic frames? I’m looking for a way to update some larger inexpensive frames.
For plastic, I would buy spray primer and do that first before the color. Good luck!
Thank you!
Can you also tell me how you put the whole frame back together,( I have some frames that are missing the backing?
Love your idea, thanks
Glad you like this idea! The frames are all solid and most of the backs were held down by metal tabs. So I just had to remove and replace the glass and the backing. Not sure if that answers your question?