Create a Gallery Wall Like Designers Do!
Have you struggled with how to start the process of setting up a gallery wall? I have an EASY process that creates a unique layout that will look like an interior designer did it!
Does it seem too complicated to create a gallery wall? Which sizes to mix or how to layout the gallery wall so it’s unique and even?
I have an easy formula that I’ve used over and over to create complex gallery walls.
It is the perfect process to use to fill a LARGE wall with pictures too.
What’s nice is the starting point is easy too! Find a piece of artwork – just one and build around it!
You will be surprised how easy it is to create a gallery wall that looks like a designer did it.
Why Gallery Walls are a Great Option

When a gallery wall is a good idea
- Inexpensively fills a large wall
- Creates visual interest in a room
- Great option for displaying family photos
- Artfully display personal photography
- Display not only framed items, but objects too
If you don’t have an interior design degree, but want your gallery wall to look like they do in magazines I have the secret to success.
There is one basic rule that works every time!
Contains hand selected products, with affiliate marketing links where I may earn a small commission if a purchase is made. {full disclosure here}
The Secret to a Designer Gallery Wall: Create Horizontal Lines
Do you want to know the main rule/secret to how I layout my gallery walls?
It sounds complicated, but is really very simple:
“Layout your picture or artwork frames on horizontal lines that anchor the objects”
Porch Daydreamer
Tracey, what does that mean? I’ll show you with my gallery wall!
Want to know how to makeover your picture frames with spray paint? Easily Update Picture Frames with Spray Paint!
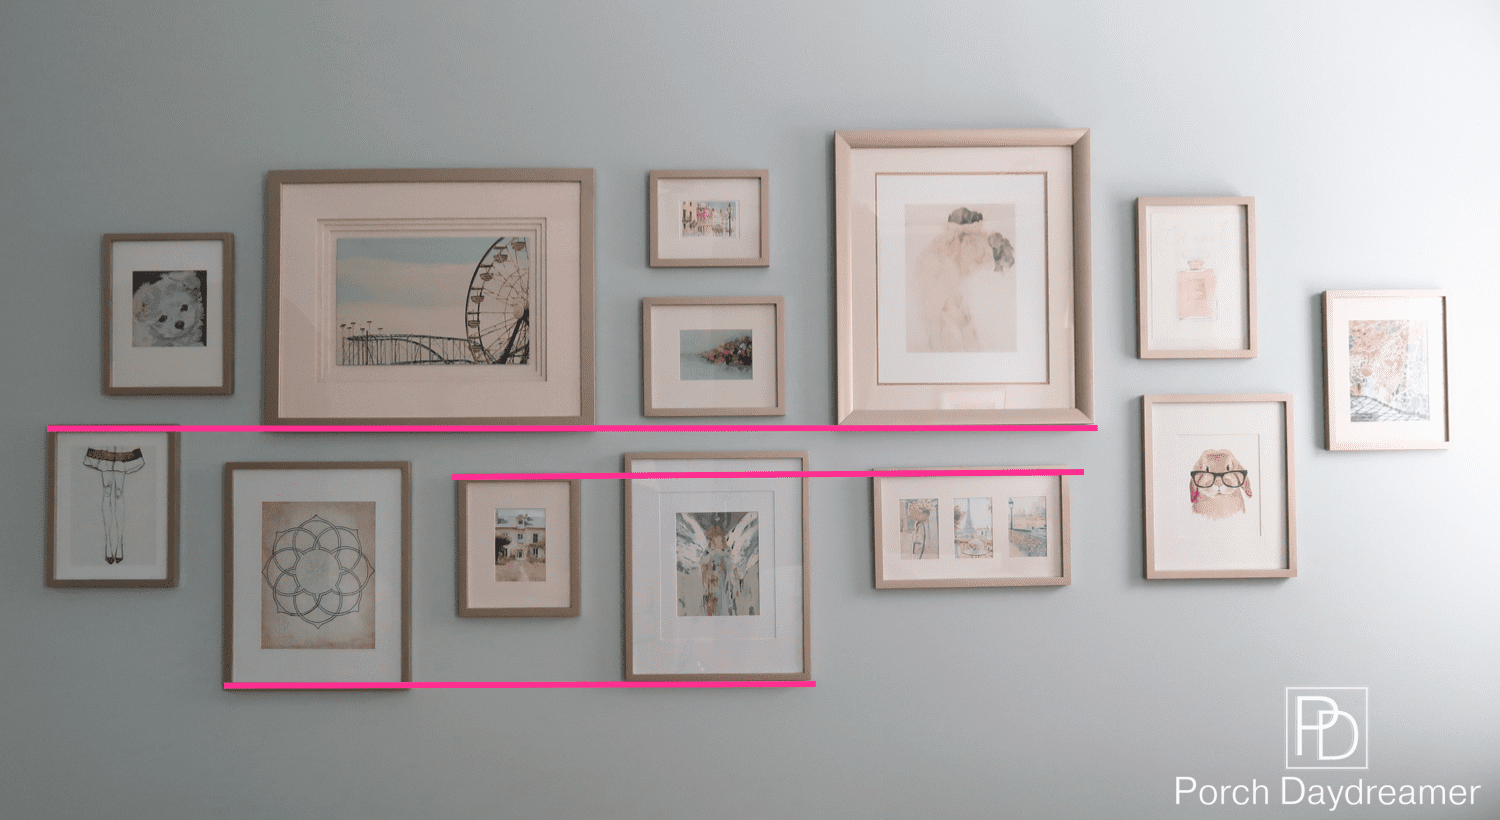
See what I mean? As you layout your items, place several at the same height using either the bottom or top of the frame.
It provides an anchor for the art and the eye.
Even though this group and gallery wall of artwork is a mix of different shapes and sizes, there is a substantial foundation to it.
Another important element is ALWAYS and I mean ALWAYS use and uneven number of objects, frames, or artwork to create your gallery wall.
My gallery wall has the lucky number 13! Think in 5, 7, 9, 11 depending on the size of the space you are trying to fill.
If you don’t have an uneven number, then plan to add one object later and leave space for it at one of the ends.
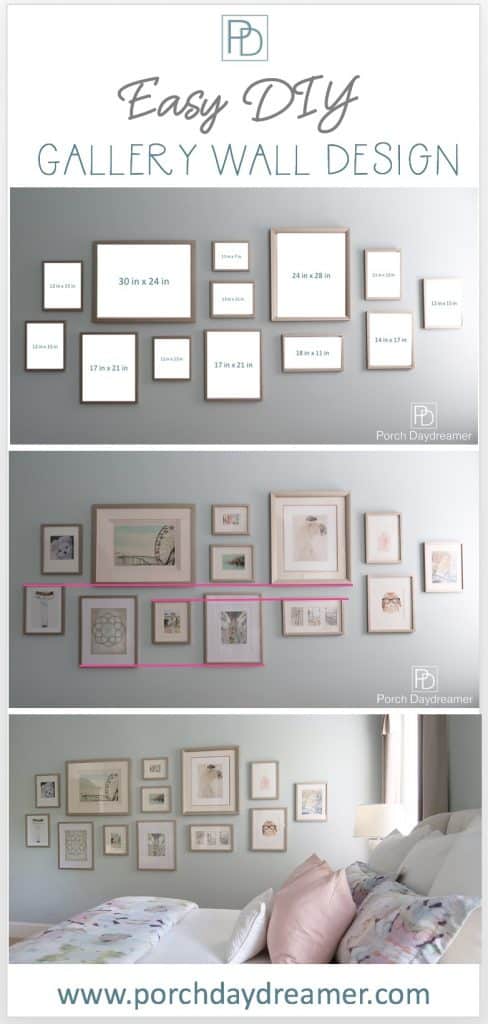
Pin It for Later
How-To Create and Hang a Gallery Wall
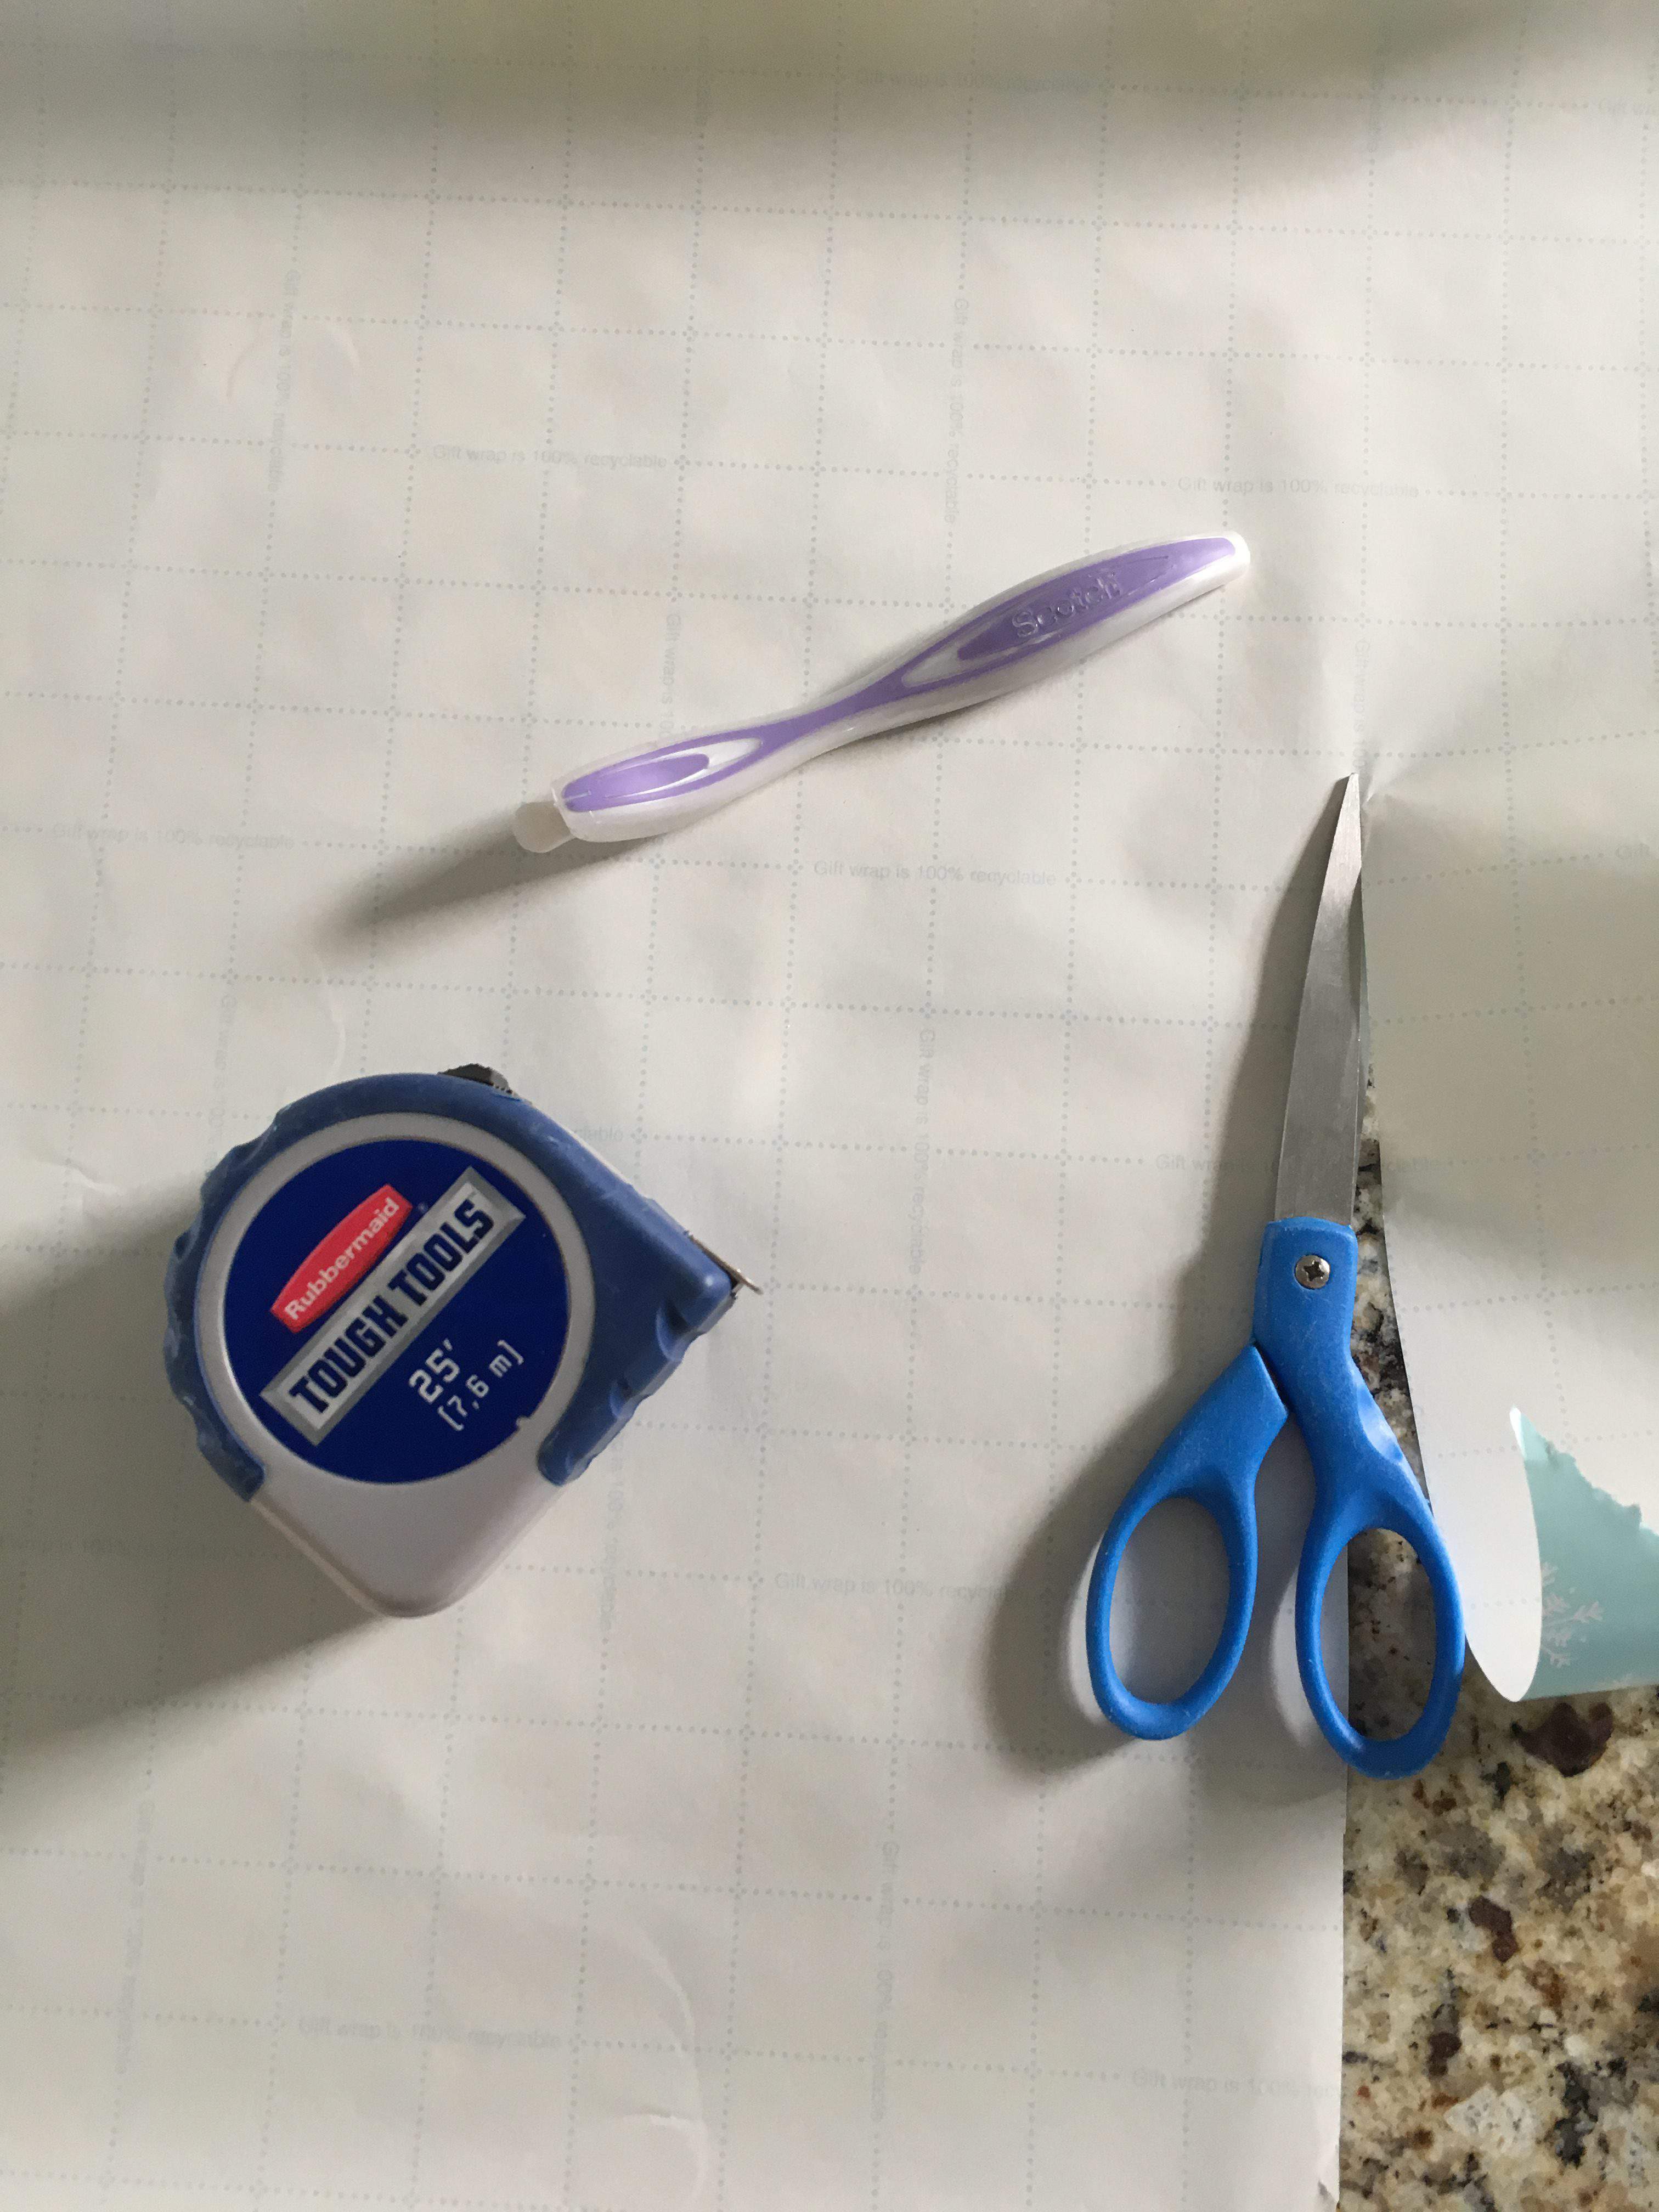
gallery wall supplies
- Pencil
- Hammer
- Wrapping or craft paper
- Scissors
- Tape Measure
- Small Level and Yardstick Level
- Painter’s Tape
- Picture Hanging Kit
The picture below was the beginning of this gallery wall a few years ago and you can see my first instinct was to create a blocked symmetrical look.
Instead after several layouts I ended up with an asymmetrical layout that I think visually looks more interesting.
Plus I’ve been able to add artwork as the years have progressed, which would have been much harder to do in a blocked design.
Step 1: Create the gallery wall pattern on the floor
Layout all of your art or objects on the floor to determine the best design that works for you.
This really is the hardest and most time consuming part because the options are infinite!
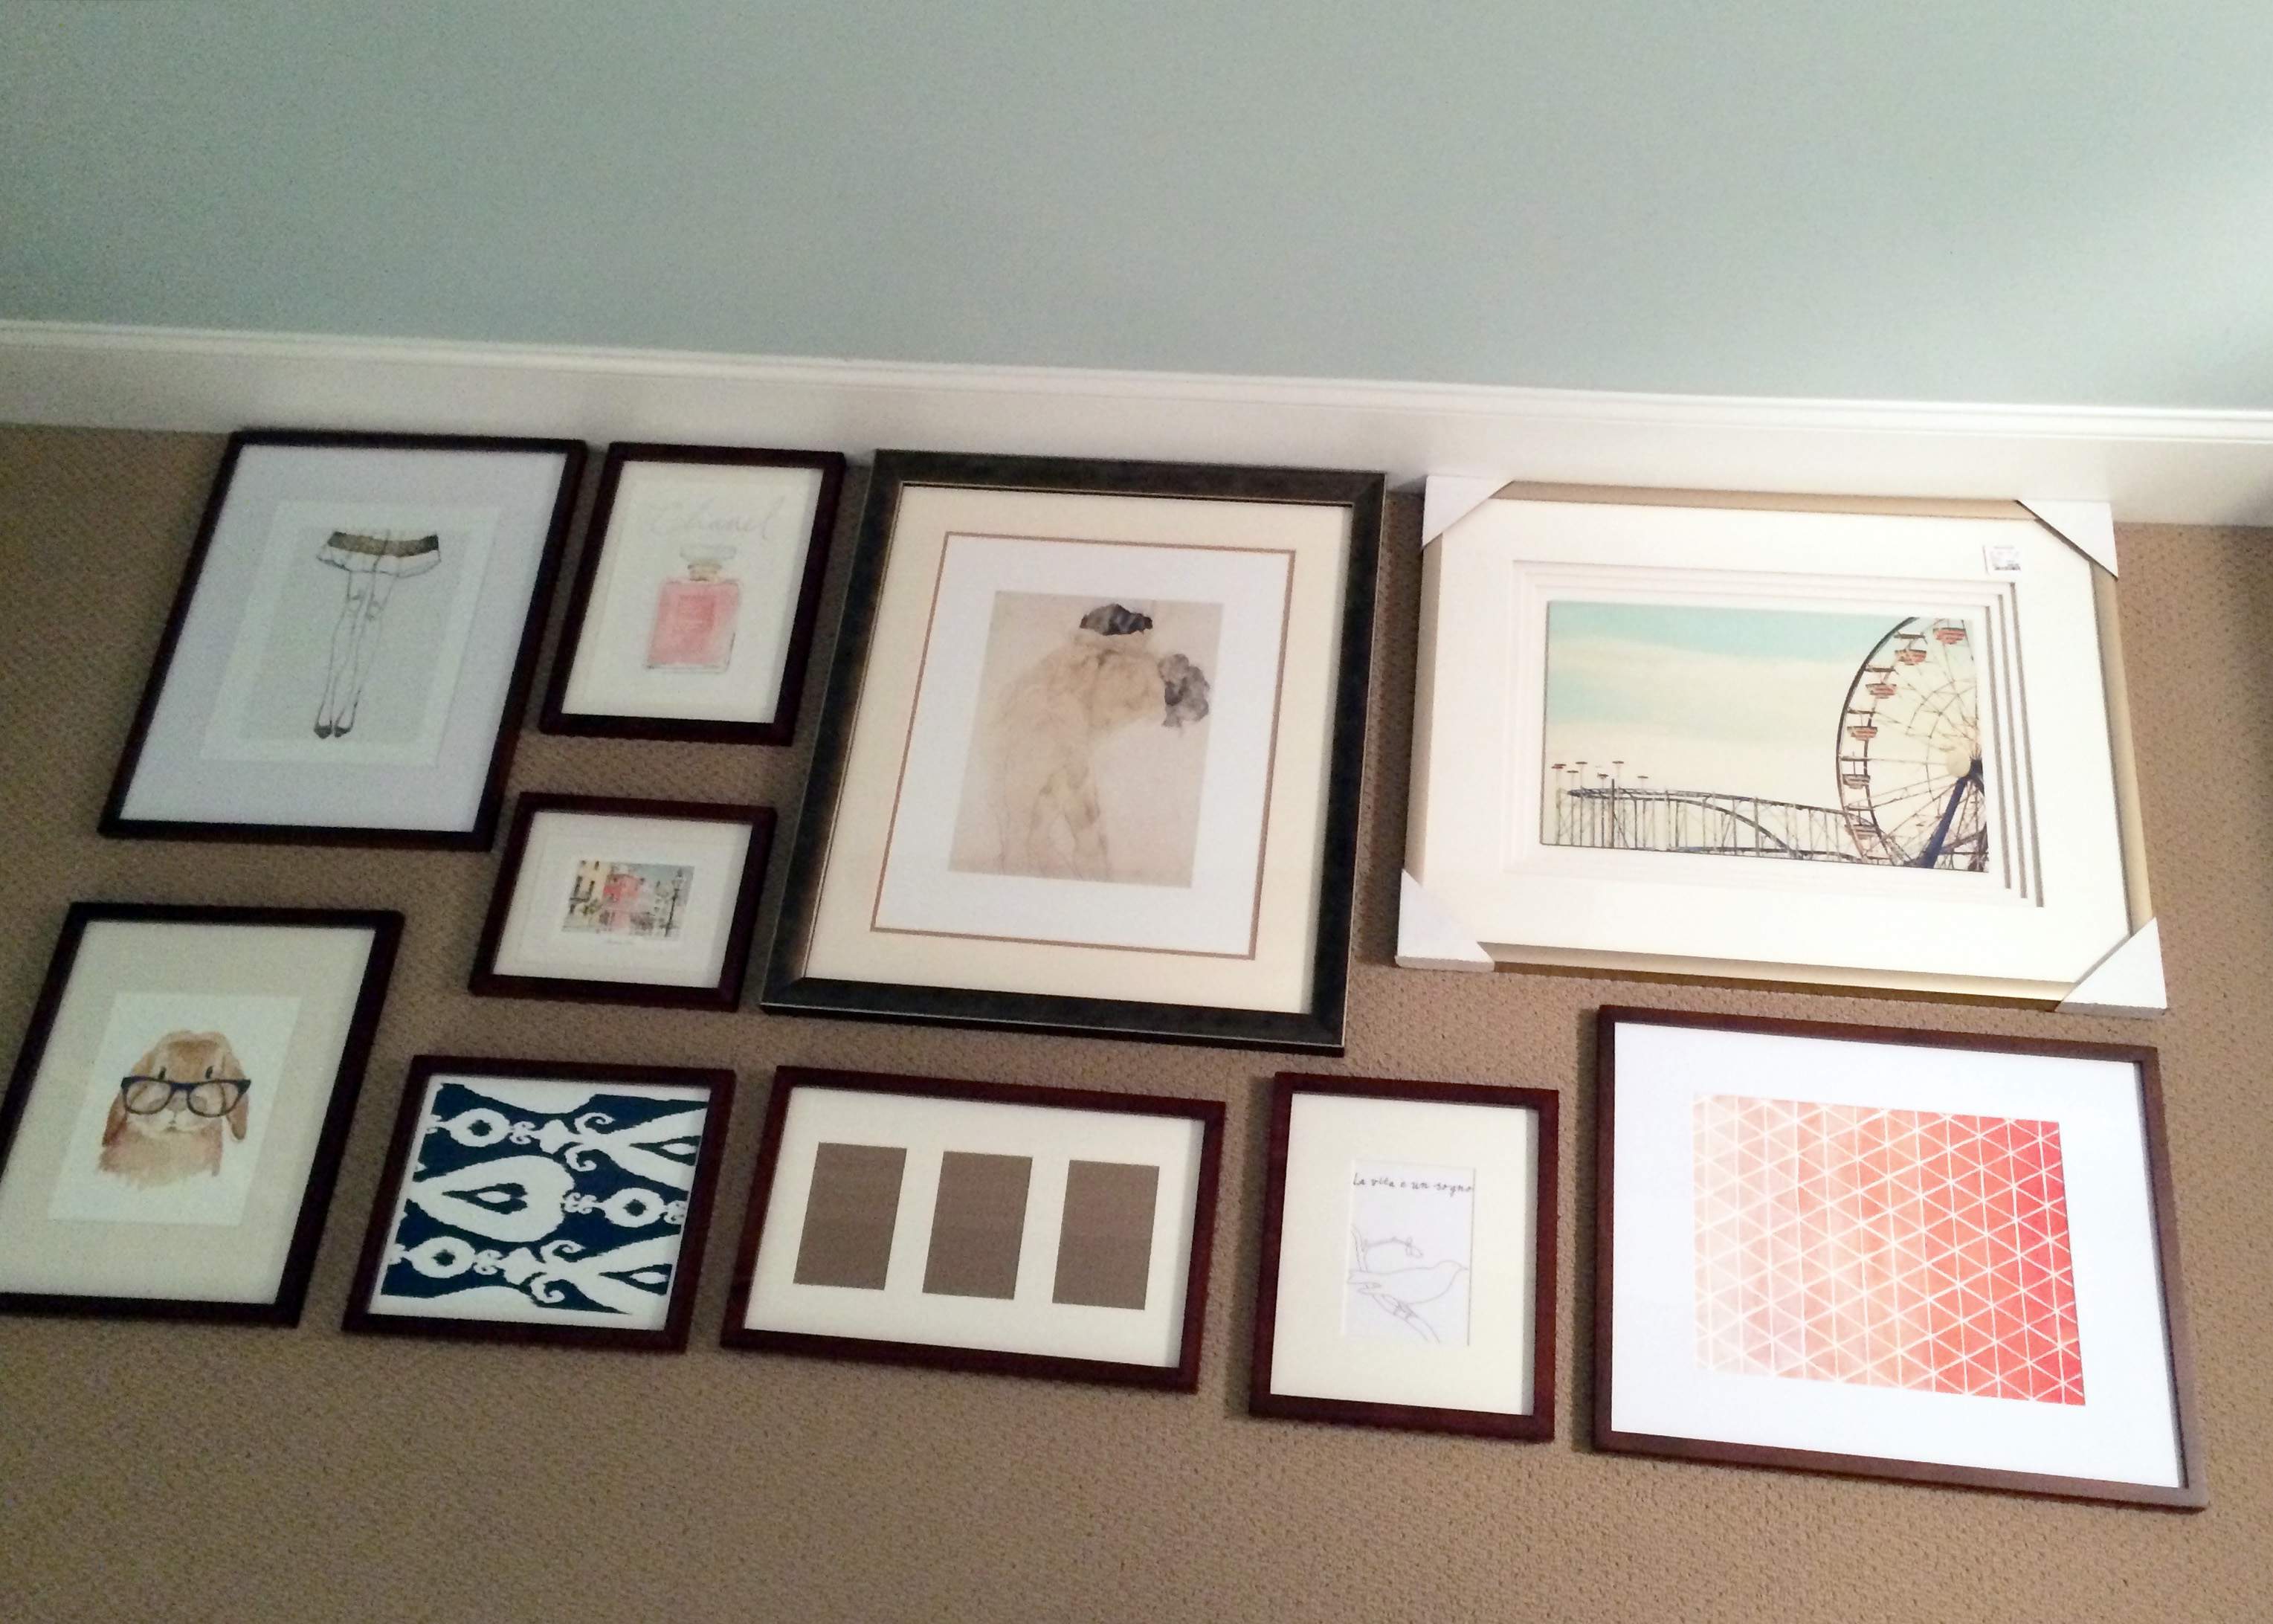
ALWAYS consider an asymmetrical layout for more visual interest versus favoring a squared-off block of artwork.
An asymmetrical design will create space to add new artwork later.
Step 2: trace the frames onto craft or wrapping paper
Trace each frame on either craft paper or wrapping paper with gridlines.
Using wrapping paper with gridlines on the back makes everything easier from tracing, cutting, locating where to nail the picture hangers.
Cut out all of the traced pieces of artwork.
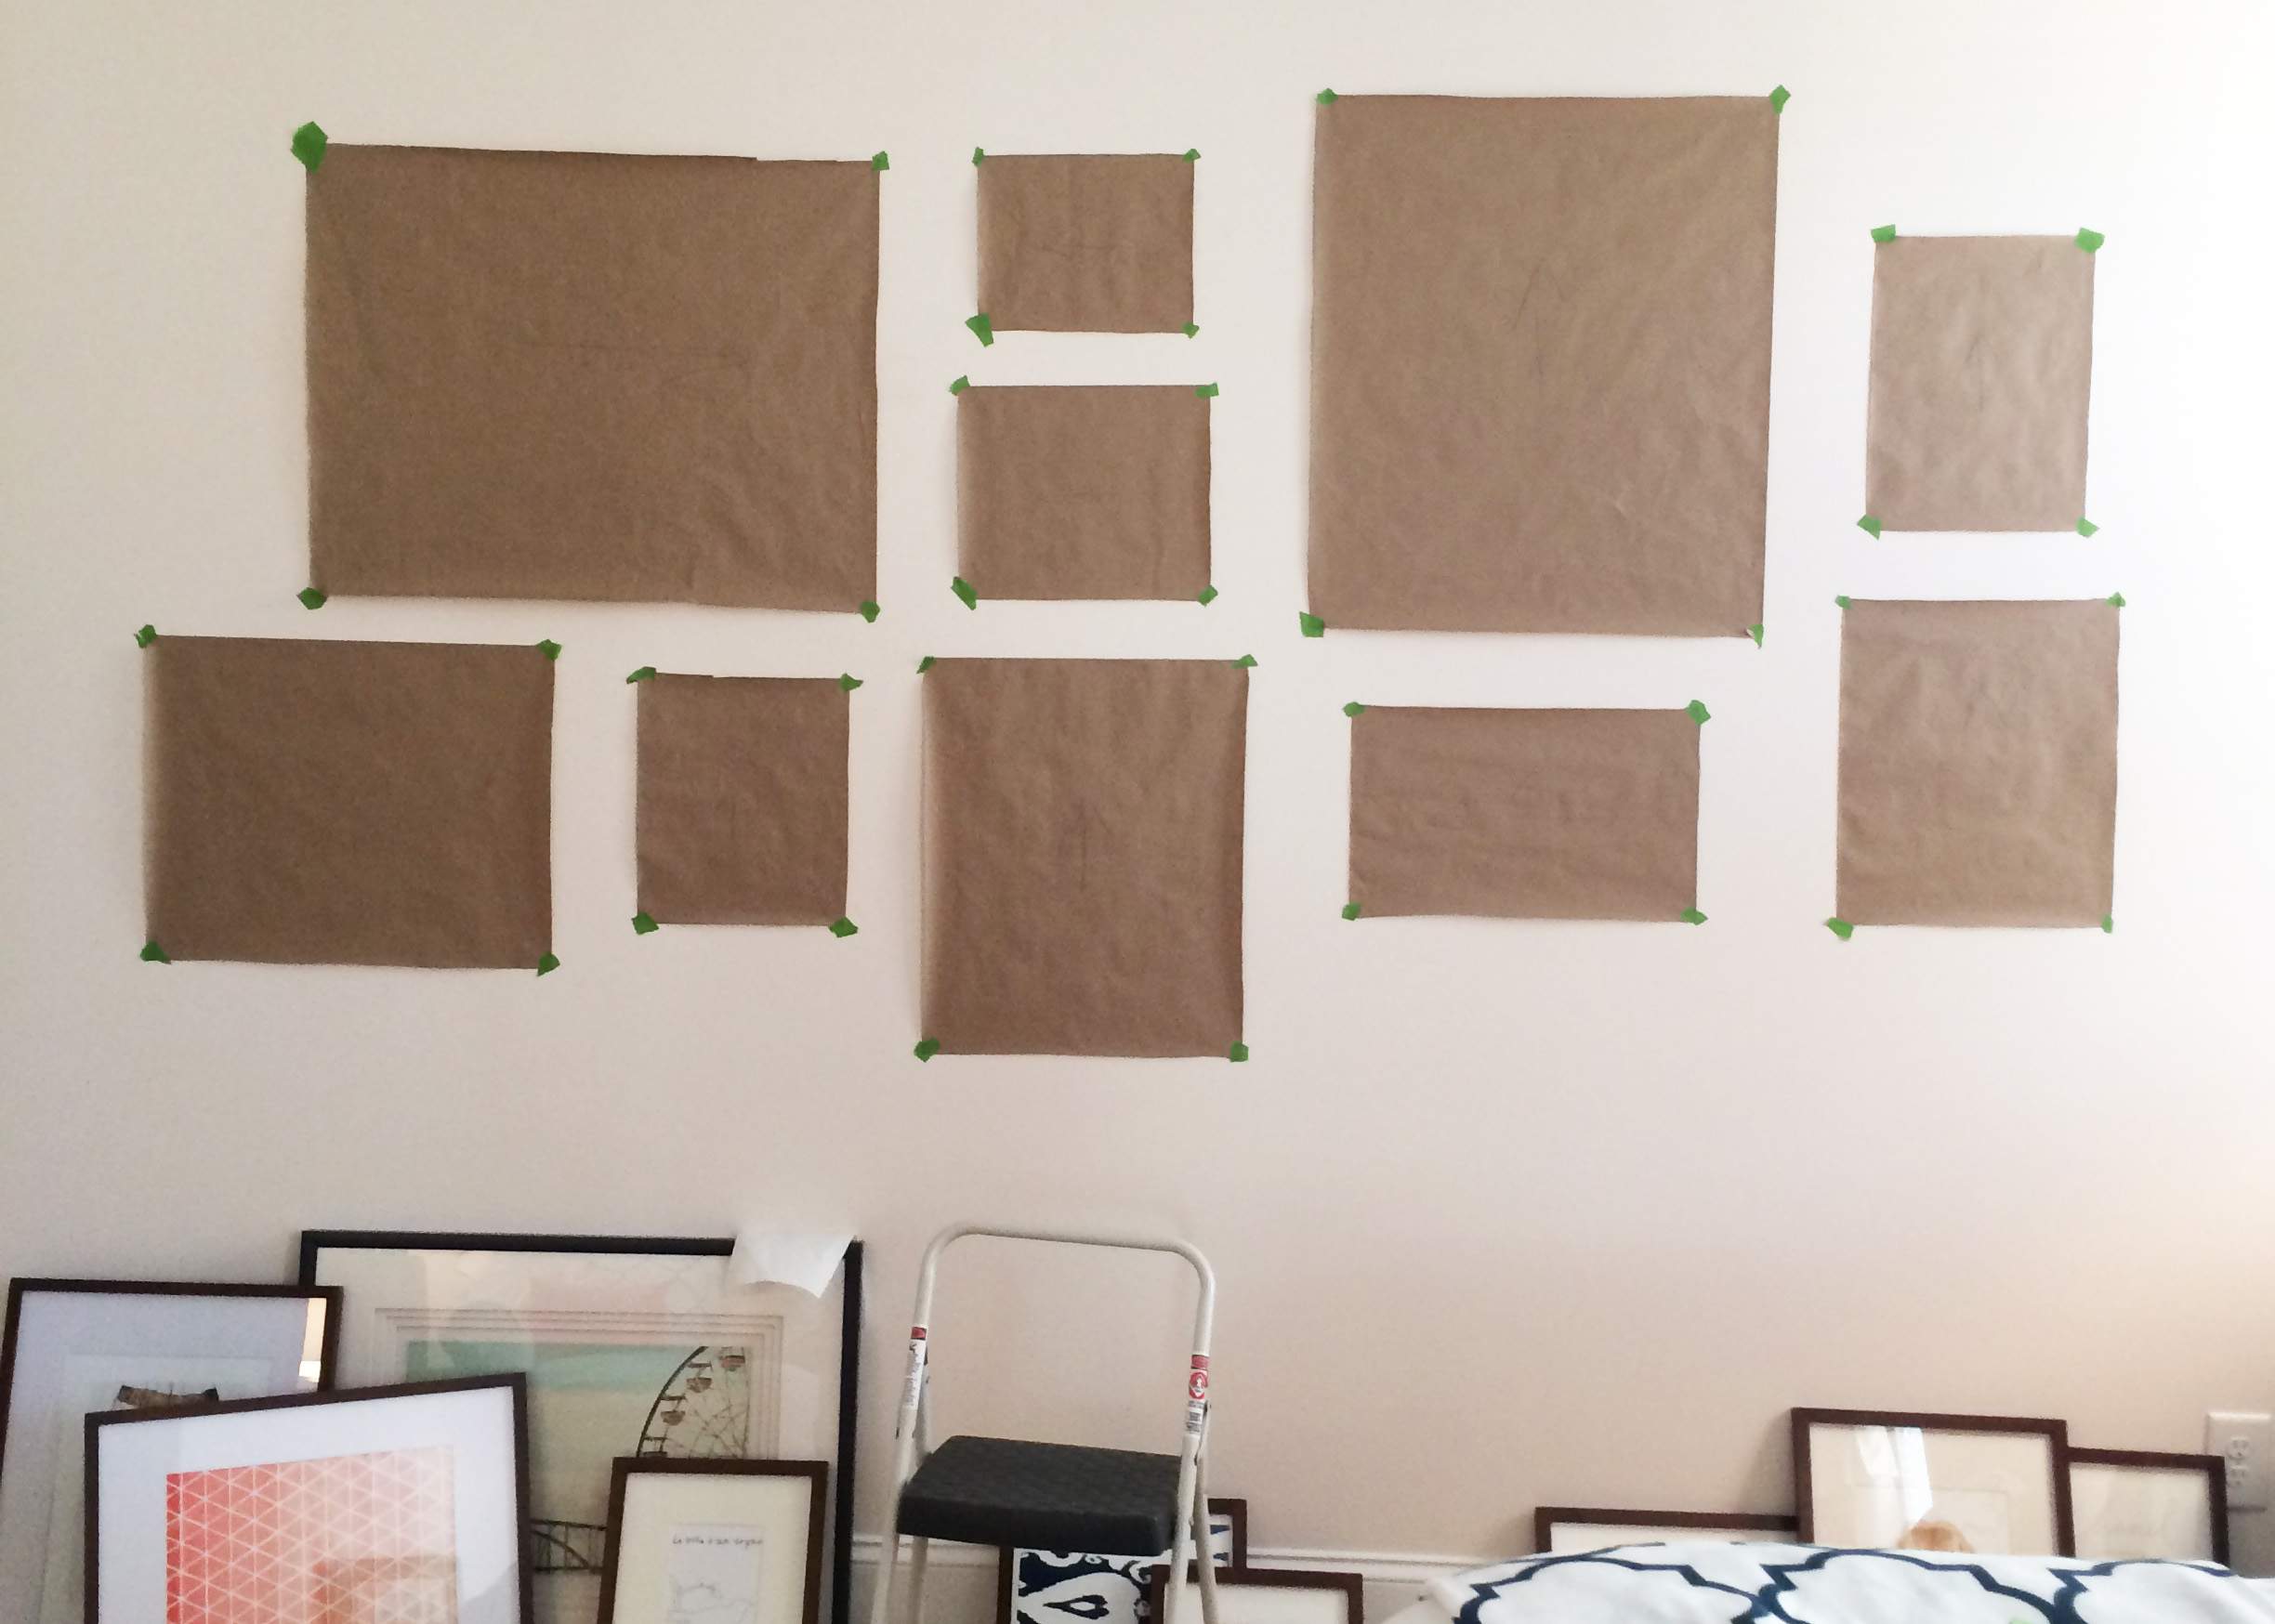
Step 3: Layout the paper cut outs on the wall.
Use painter’s tape and mount the paper cutouts to the wall.
That way you can move the paper around easily without damaging the wall.
Play with the design until you get it to “just about” where you want it. It doesn’t have to be perfect at this point.
The beginning of this gallery wall started much smaller and with craft paper – I sure wish I would have thought to use the wrapping paper!
You aren’t finished yet 🙂 Don’t be nailing holes in the wall…keep reading.
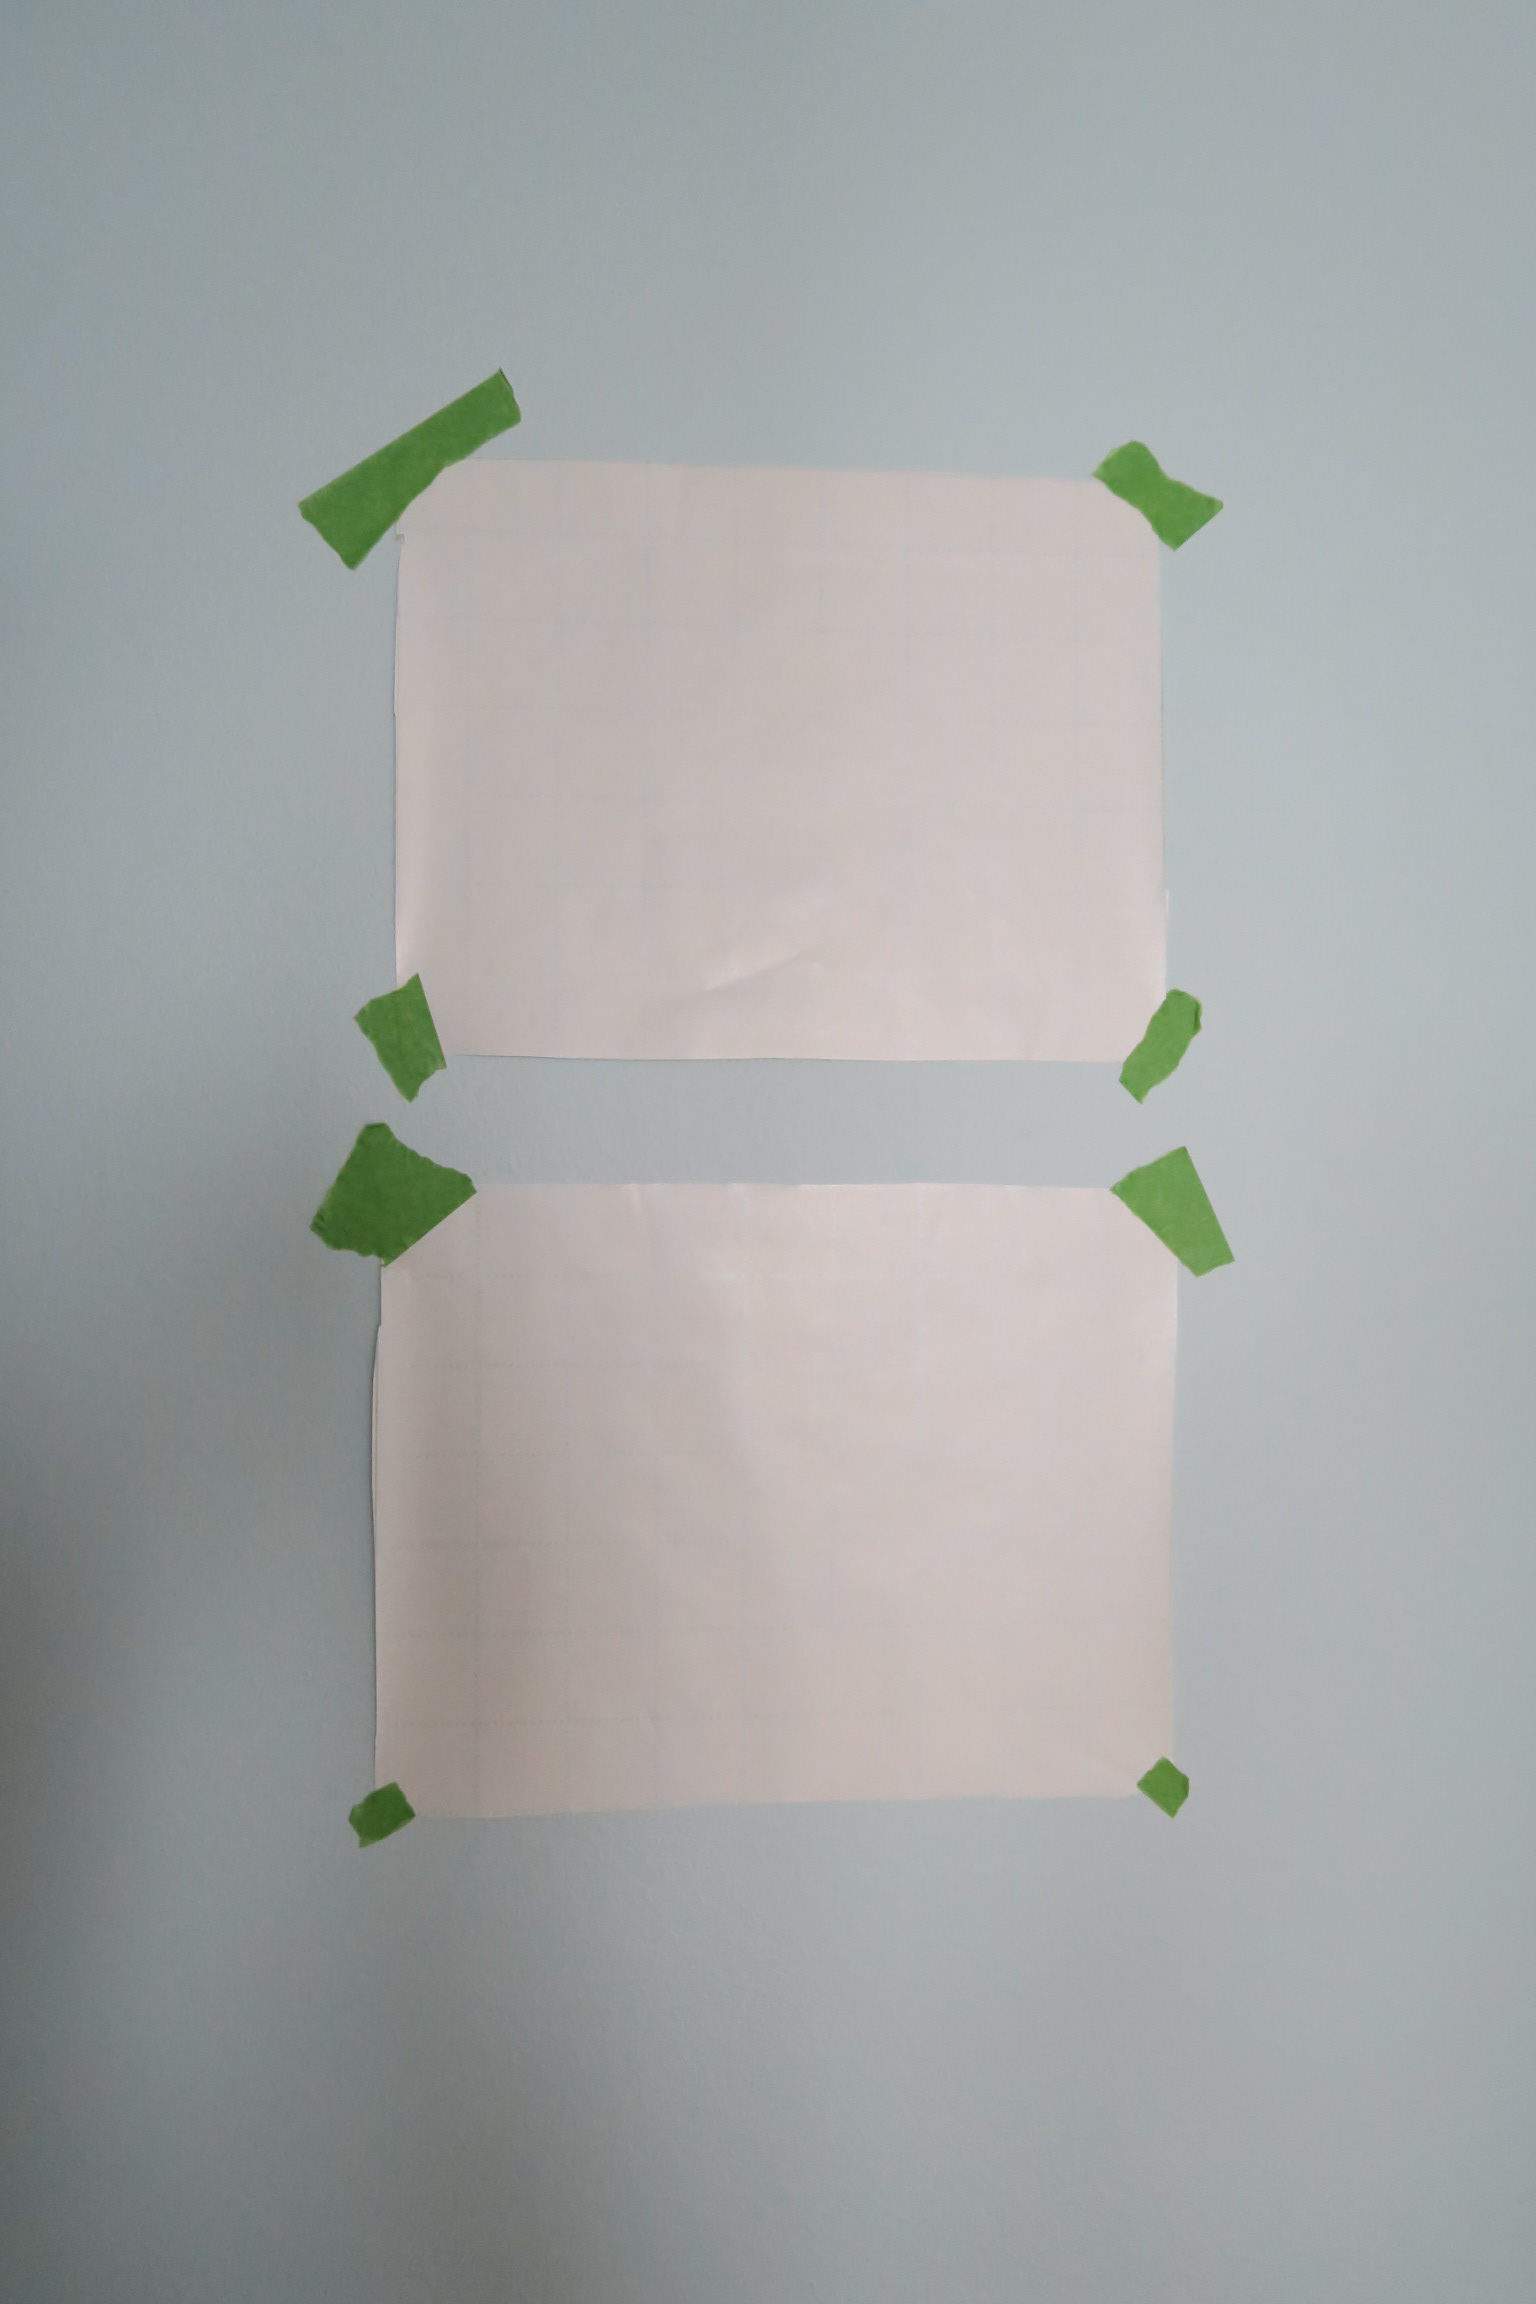
Step 4: create consistent distance between frames
Using a tape measure, measure between each item and make sure the spacing is similar.
Making sure it is visually appealing to you is more important that the measurement, BUT they should ALL be the same distance apart.
Most items in my gallery wall pieces are about 3 to 4 inches apart vertically and horizontally, but it’s a VERY large wall.
A rule of thumb for spacing a smaller gallery wall is to place them 1.5 to 2 inches apart or between frames.
Keep adjusting each item to get the spacing just where you want it.
At the same time you make sure the spacing and distances are correct, check to make sure each piece is LEVEL!
Step 5: Measure picture hanging placement
Have a picture hanging kit handy with a wide variety of sizes of picture hangers to make this job easier.
Then measure the back of the picture where the hanger is or pull up on the hanging wire to measure.
I typically will use the measurement from the top of the frame.
You need the center point and the distance down from the top of the frame.
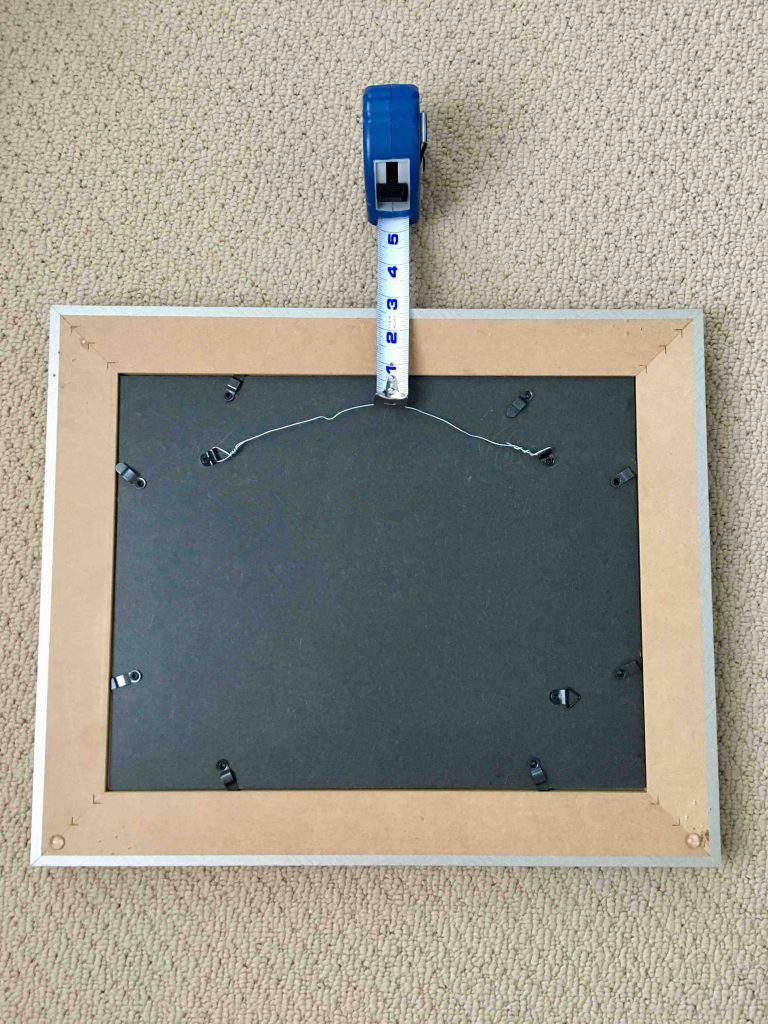
Measure in from one end and down from the top. Take those same measurements, map it out on the paper, and mark the spot with a pencil.
Nail the hanger right through the paper. Hang up the artwork to test if it looks good.
Make any adjustments and rip down the paper. Nice, right?

Gallery Wall complete
Step back and admire your work. Be proud of your accomplishment!
You just created a gallery wall that looks like you hired a designer to do it!
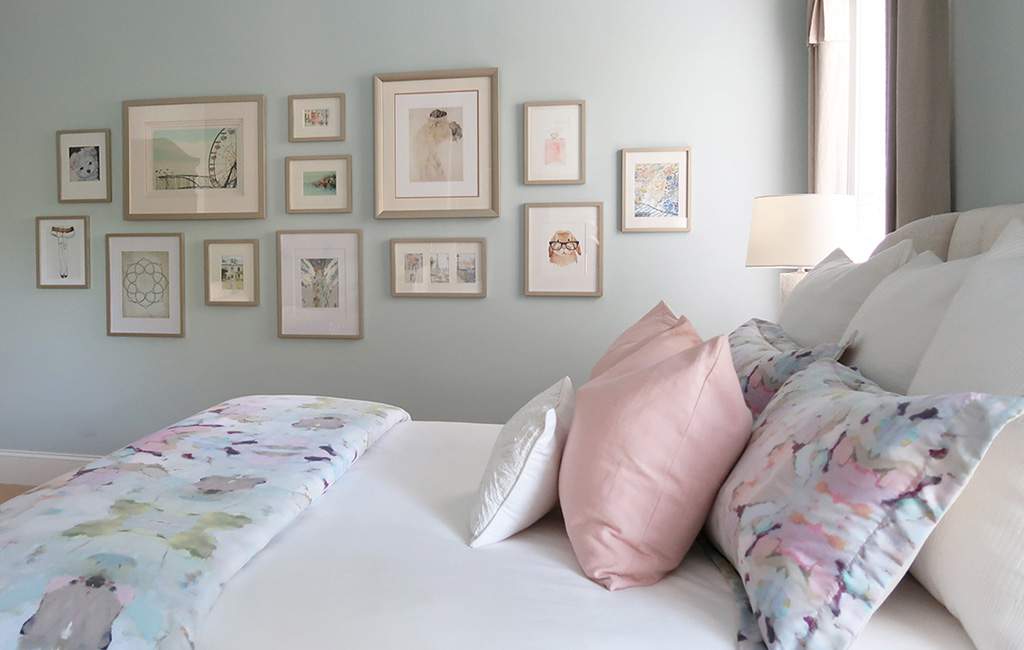
The gallery wall in my bedroom makes me smile. I’ve filled it with images that are personal to me or inspire me plus added some of my own “artful” photography as well.
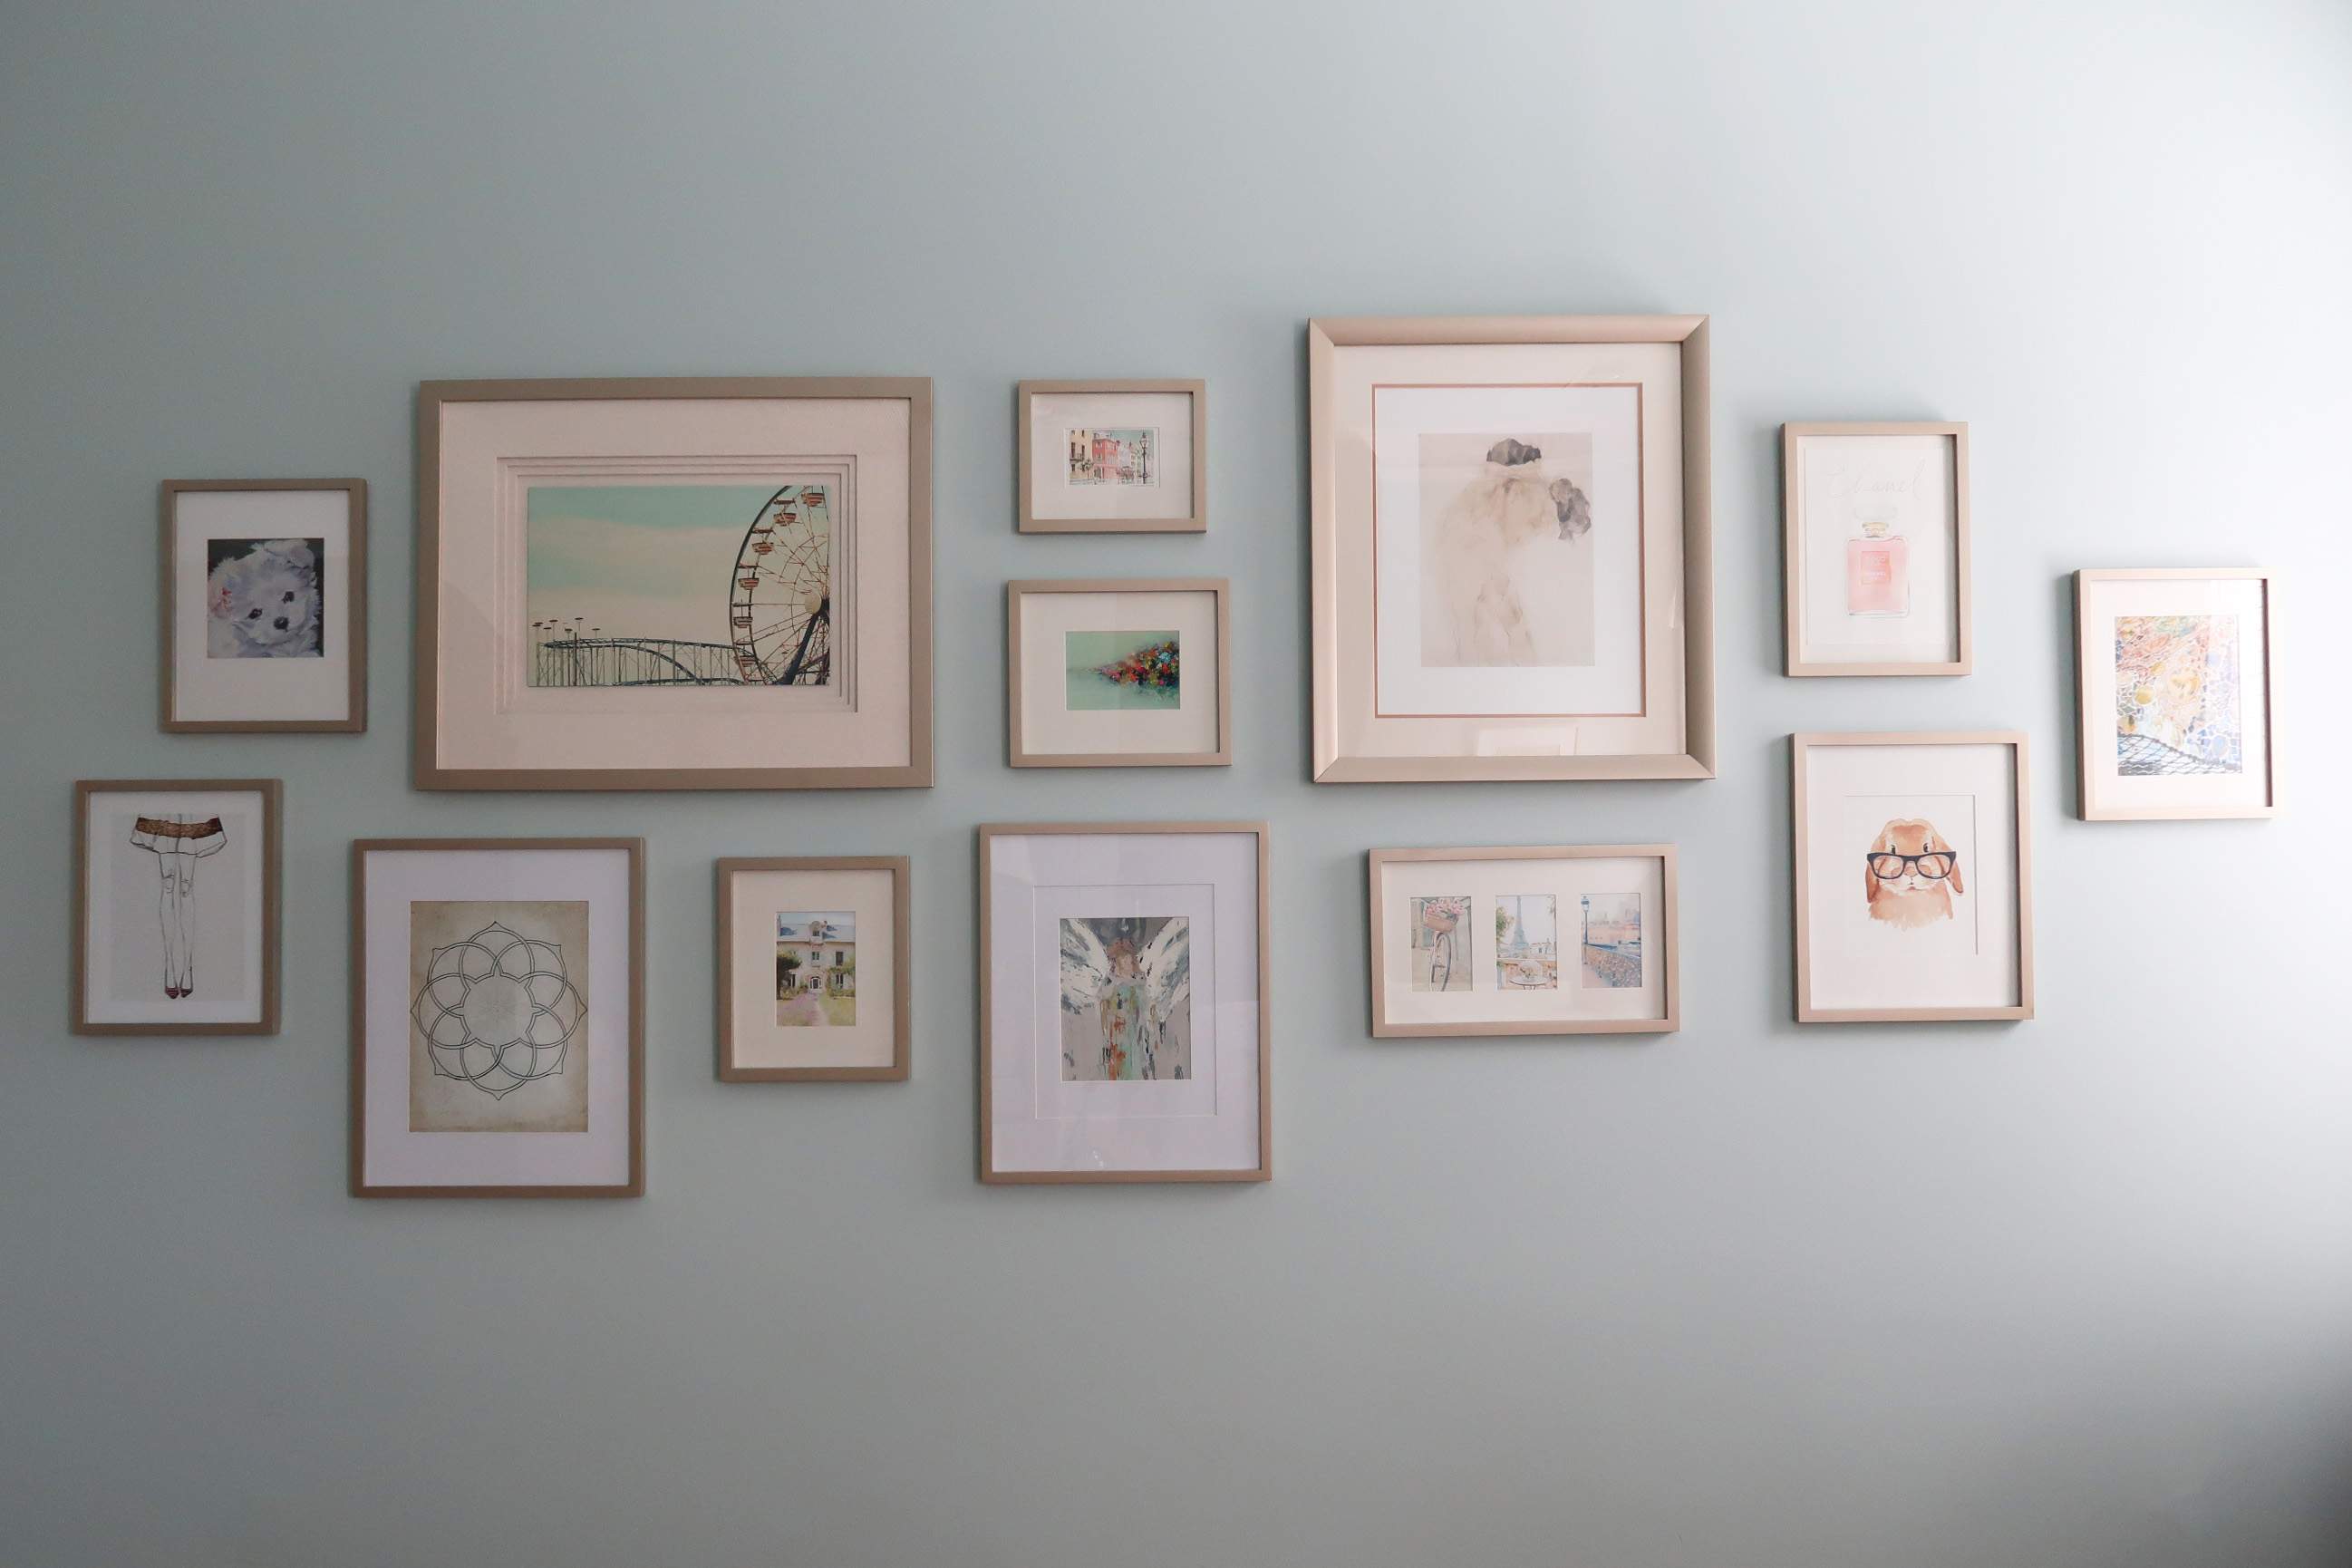
It includes images of my favorite travel destinations, goals and even a lovely painting of my dog Mick as a puppy.
Overtime I change it for my mood or life events. Two of my favorite places to find inexpensive art are Etsy and Minted.
You can support a new artist along the way! As you travel pick up post cards or take photography that can be framed.
My Gallery Wall Frame Sizes
So you have perspective, I thought it would be fun to show you the exact frame sizes and measurements of my gallery wall.
Then if you want to re-create the same look or portions of the wall you will know ahead of time exactly what to purchase.

Or if you like you can purchase pre-made frame kits to get you started!
Don’t forget mats! Mats are really what highlights the artwork itself and also creates a cohesive visual look.
Most of the frames have them included, so not to worry!
Click the links to shop by size:
3 ea. 12 in x 16 in | 2 ea. 17 in x 21 in | 3 ea. 11 in x 13 in | 1 ea. 12 in x 16 in | 1 ea. 18 in x 11 in | 1 ea. 11 in x 8 in | 1 ea. 30 in x 24 in
These are the nominal outside frame sizes to my actual inside frame sizes in the chart above.
Remember some were custom framed, so these are close!!!
Helpful Tutorials on Hanging Stuff
Happy hanging!
Please consider following me on Pinterest and Instagram for daily inspiration.
Until next time…
Porch Daydreamer
Tracey
Hello, what are the overall dimensions of this gallery wall? Trying to decide if it could fit over my larger buffet. Thanks!
Hi, Mel! It’s a 14ft wall space and my ceilings are 10ft with a deep moulding. It’s a LARGE gallery wall for sure.
Hi Tracey! I love this so much and am planning to do the same gallery wall in my bedroom. I wanted to mention that none of the Amazon links for the frames seem to be working. I keep getting an error message. Thanks!
Thanks for letting me know! It’s an old post, so I’ll work on getting the links updated.
Thank you so much for the great tips on how to create a gallery wall. We moved into our house recently and I am having trouble trying to decide which pictures to hang and how to hang them. I might have missed it, but how high off the ground should a group of pictures or even just one, be hung? Thanks for your great tips!
Hey there! I’m SO THANKFUL for your breakdown of this process! Could you tell me how wide the entire gallery is?
May I ask where you got the frames that were originally the espresso color? They look a bit like PB frames.
Thank you much.
Hey, Christina! Yes, there area few from PB and others I bought at Hobby Lobby or Frame it Easy. Hope that helps – didn’t want to spend the PB money to build the whole wall!
Hi Tracey,
I love your gallery wall Thank you so much for the detailed instructions. I have been looking at so many gallery photo/art walls online but the difference with yours is that design edge. Just like you mentioned, it looks like a designer created it!!! Can I ask you how tall your wall is from floor to ceiling and what height from the ceiling is the picture that is closest to the ceiling if that makes sense?
Thank you!!
Julie
Julie,
Hi! I’m so glad that you found my instructions helpful! My ceilings are 10 ft. tall and the crown moulding is about a foot deep. When I measure the “couple” piece of art from the top of the frame to the bottom of the crown moulding it is 28.5 inches.
Hope that’s what you need 🙂
Tracey
I looooove this! So helpful to know that the top and bottoms of frames should be level with one another. I’m really diggin your wall color! Can you tell me what color it is?
Thank you and glad this was helpful! This wall color is so soothing. I’ve had it 7 years and redecorated 3 times around it. The blue acts like a neutral: LOWE’S/ Valspar Feeling Blue CI 13.