Spray Paint Curtain Rods for a Whole New Look
Spray painting curtain and drapery rods is an easy and affordable update. Plus it’s a lot easier and faster than replacing the rods!
Spray painting curtain rods during room makeovers is one of my favorite budget saving tricks. I’ve sprayed both metal and wood rods and rings, for a whole new look!
Here I share with you the best gold spray paint color that works with most home decor. It’s time to makeover your drapery rods with spray paint!
Spray Paint Step by Step Guide
Spray painting rods and rings is so easy, BUT you have to be a bit methodical about it to avoid drips and over spraying. My number one tip for spraying ANYTHING:
#1 TIP: Hold the spray paint can 8 to 10 inches from what you are spraying
Not spraying too close to the rods or rings will ensure you apply thin coats and avoid the spray paint color running and dripping.
Best General Spray Paint Tips
Here are general tips that will help anytime you spray paint anything! How do I know they work? I’ve made every mistake in the book and learned how to get a smooth finish every time 🙂
- Spray paint outside, but pull items inside to dry to avoid dirt, dust, and bugs from landing on your pretty finish.
- Use a drop cloth that has 2 foot radius to protect the area from over spray.
- Choose a fast dry spray paint. I’ve found Krylon and Rustoleum to be the best on the market.
- Apply 2 thin coats and allow the manufacturer’s recommended dry time between those two coats.
- Raise your items up on the lip of a box or use trim pieces, so you can coat all edges and get them off the ground where the spray paint may puddle.
- For drapery rod finials, poke them into cardboard or in between trim boards so you can spray all surfaces while they are upright.
- Don’t forget to spray the screws/hardware the same color!
- Use a spray gun for the most consistent finish.
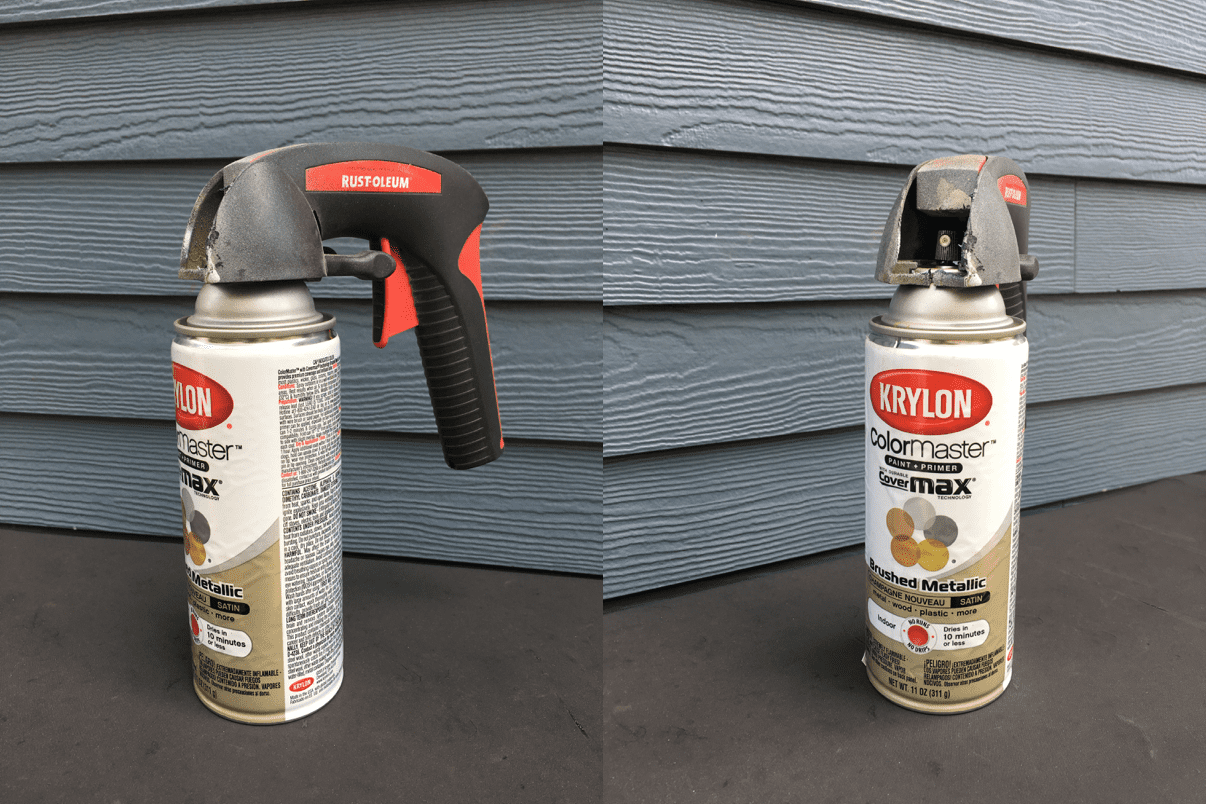
You can see my spray gun is well loved, after many spray paint projects!
Pin It for Later!
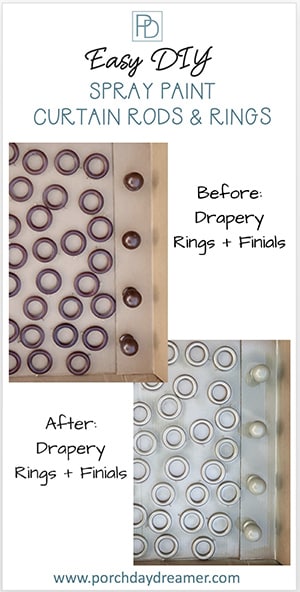
How-to Spray Paint Curtain Rods and Rings
Seeing the before and after of spray painting your curtain rods is going to get you hooked on this inexpensive and easy DIY project.
For this tutorial, I’ll use my recent master bedroom update as an example. I spray painted wood brackets, rods, and rings in serious need of an update to go with the rest of the makeover.
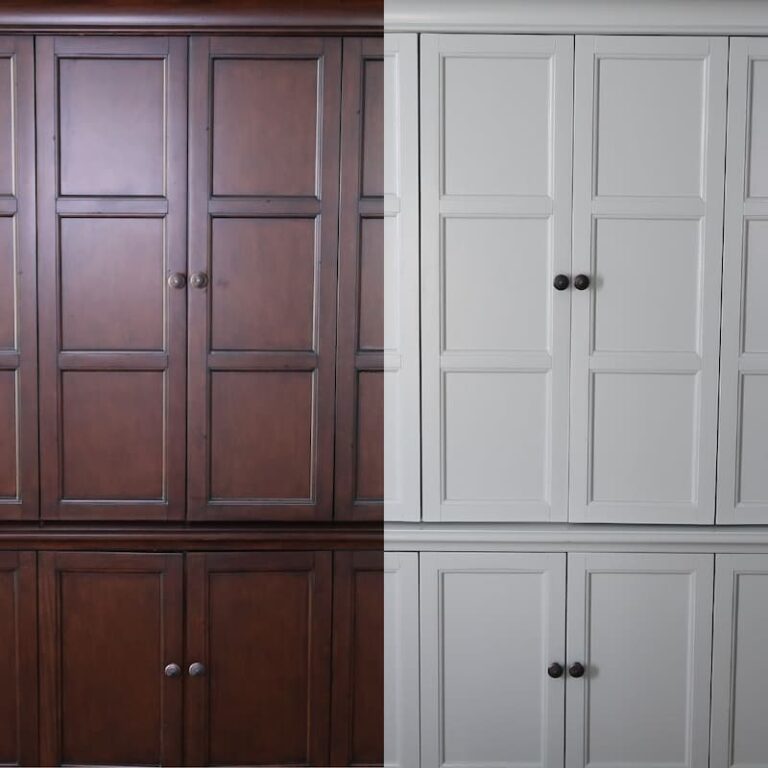
Earlier this year, I painted all of the bedroom furniture to a light bright off-white from a mahogany stain and the rods were the same stain.

After updating ALL of my picture frames with gold spray paint CLICK HERE FOR TUTORIAL, I knew that this Krylon Champagne Nouveau ![]() was going to be a perfect color for the curtain rods and rings.
was going to be a perfect color for the curtain rods and rings.
Supplies
- Drop cloth or tarp
- Cardboard boxes or trim boards
- 2 ea. Cans of spray paint
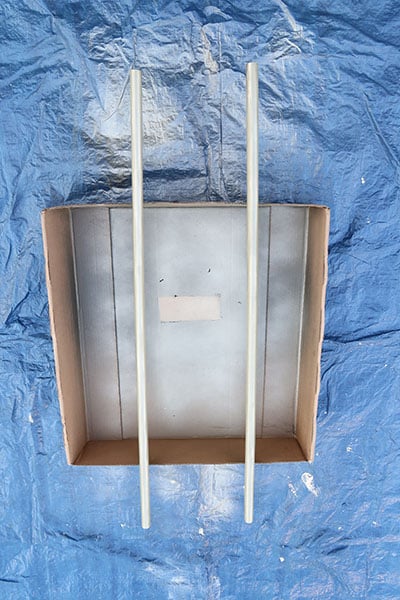
Step 1: Set Up for spraying drapery rods
Place a tarp down first and then place trim boards or cardboard boxes on top. You want to protect the area against over spray.
Here I’ve used a large box that has a deep cover, so it raises the rods up off of the ground.
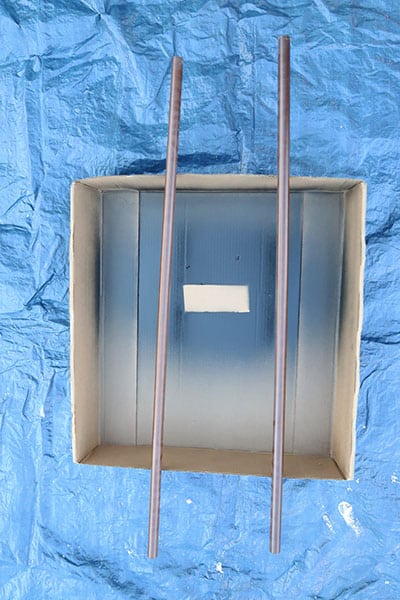
Step 2: Spray paint the drapery rods
FIRST, spray the rods. I like to start with the rods when the can is full to get the best coverage. Spray ONE thin coat at a distance of about 8 inches.
Start spraying before the end of the rod and work from one end to another. You start the spray before the rod to avoid spraying too much in one area.
Pull into garage or covered area to dry for 4 hours or overnight (with Krylon and Rustoleum).
Turn over rods to expose side that hasn’t been sprayed with paint.
REPEAT process to apply 2nd coat and let dry overnight, before hanging.
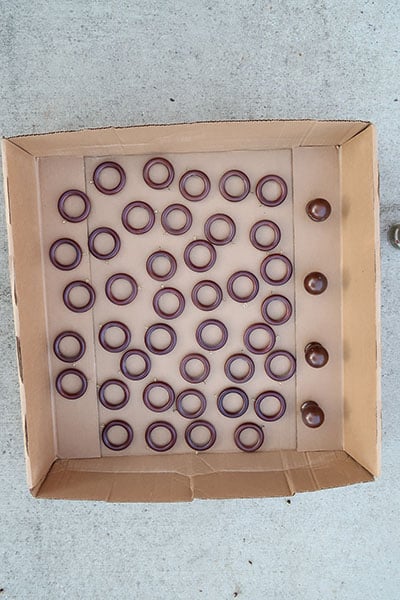
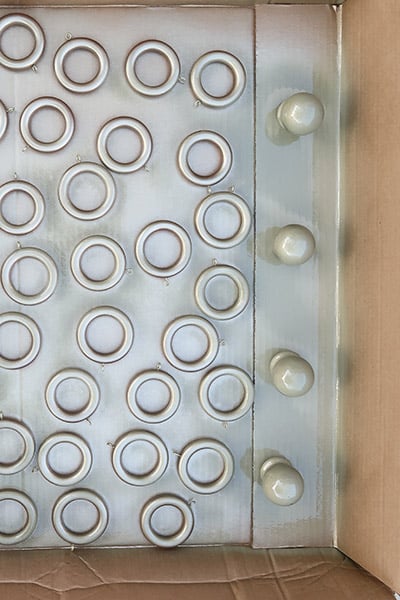
Step 3: spray paint drapery rings
Lay rings flat on a cardboard surface. Spray rings in a circular motion to coat entire surface.
Pull into garage or covered area to dry for 4 hours or overnight (with Krylon and Rustoleum).
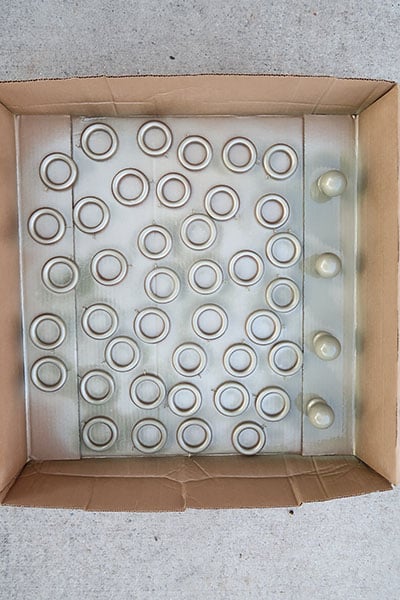
Turn over rings to expose side that hasn’t been sprayed with paint. REPEAT process to apply 2nd coat and let dry overnight, before hanging.
Step 4: spray paint rod finials
Poke screws of finials into cardboard or between two trim boards.
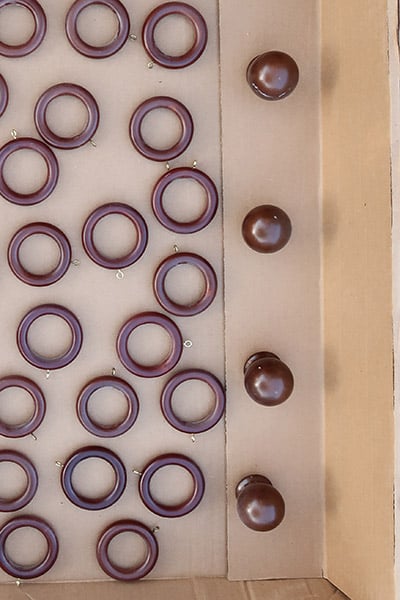
Spray finials in a circular motion to coat entire surface. Bend over to make you are getting the bottom of the finial.
Pull into garage or covered area to dry for 4 hours or overnight (with Krylon and Rustoleum).
REPEAT process to apply 2nd coat and let dry overnight, before hanging.
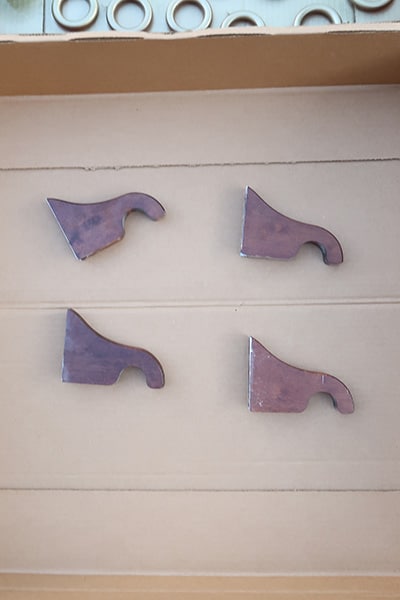
Step 5: spray paint drapery rod wall brackets
Lay brackets flat on a cardboard surface. Spray brackets by starting spray before end of bracket and spraying back and forth end to end.
Pull into garage or covered area to dry for 4 hours or overnight (with Krylon and Rustoleum).
Turn over bracket to expose side that hasn’t been sprayed with paint.
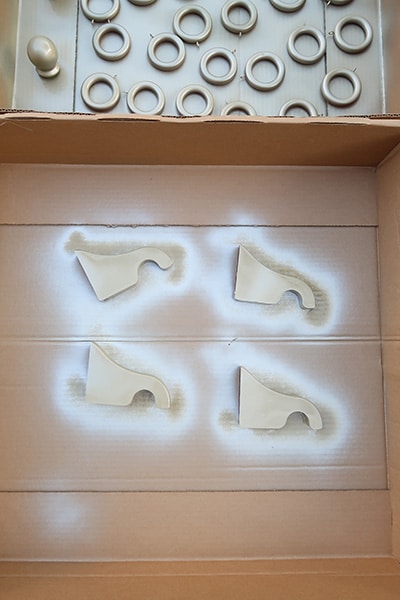
REPEAT process to apply 2nd coat and let dry overnight, before hanging.
How-To Correct Spray Paint Drips
Ok, no matter how careful you are sometimes you get a little too close and the paint runs and drips ESPECIALLY on the rods. Don’t worry there are a couple of options.
- If the drips are minor, turn that side of the rod or finial to the wall so it’s hidden. Easy right?
- The drips are major and obvious. Sand down with 220 grit sand paper, wipe dust, and apply two new thin coats of spray paint to that area.
See not so bad! Luckily it’s paint and can be fixed with a little sand paper and reapplying the spray paint.
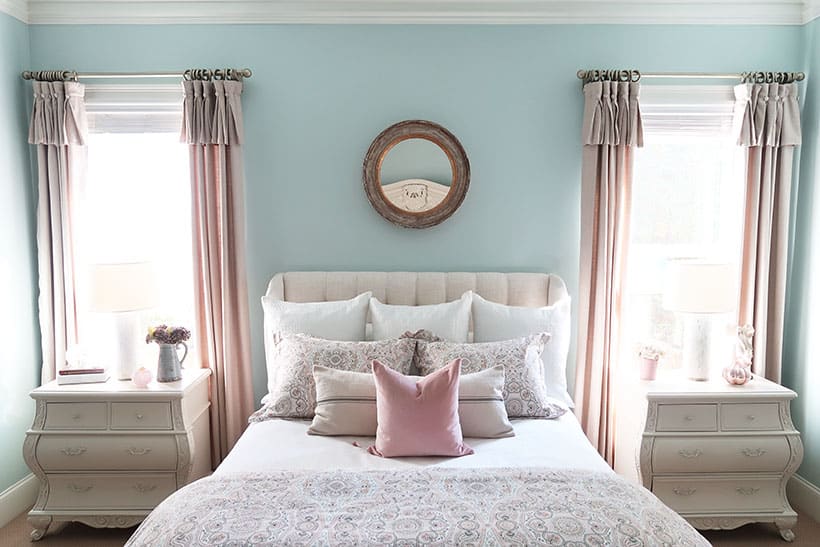
Before and After Spray Painted Curtain Rods
Now you can see the nice change a little gold spray paint created in my bedroom!
It brightened the room and created a more cohesive look with all of the other elements in the room.

Here is the after…
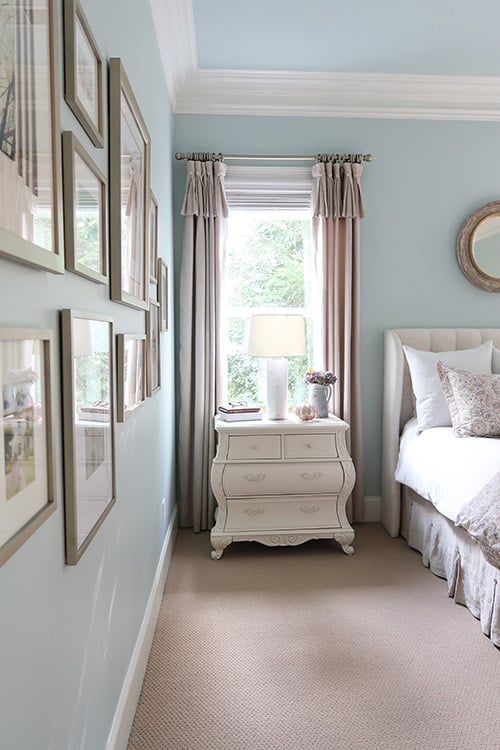
What a big impact spray paint can have, when you have a small budget! Hopefully, I’ve inspired you to update your curtain rods for a whole new look.
Trust me, it is SO much easier than buying and installing new ones 😉
How amazing is spray paint that it can transform anything!
I’m a spray paint fan and have some other ideas for you:
- Transform Outdoor Resin Wicker with Spray Paint!
- Easily Update Picture Frames with Spray Paint!
- Spray Paint Curtain Rods for a Whole New Look
Here are more how-to paint posts!


Have you never heard of bonding primer?
It’s a paint game changing product and I go into detail in this post: When Bonding Primer is a Must Before Painting
Please consider following me on Pinterest and Instagram for daily inspiration.
Until next time…
Porch Daydreamer
Tracey
what color did you paint the nightstands please?!
Valspar Light Raffia
Thank you for your tutorial very helpful. Wanted to know how it holds up when you move the drapery back-and-forth does it ship off overtime? Is there any sealant that needs to be applied to keep it from chipping or rubbing off?
Hi, Lizzie! Every so often I would close my drapes in the bedroom and never had any issues. The good thing about paint is if you do have some chipping it’s easy to sand and reapply the paint. The silver painted rods in my son’s man cave still look great and have been painted for 3 years.