Yes! You Can Refinish Painted Cabinets (here’s how)

Your kitchen cabinets look worn or outdated. Here’s your easy guide on how to paint previously painted cabinets and get a smooth finish.
If you are new here, I’m Tracey aka Porch Daydreamer and the QUEEN of Painting Everything! It’s my belief that paint is the best and most affordable way to update your home.
Even as a beginner, you can DIY a professional paint finish on your cabinets. I’ll teach you what I’ve learned during my career in the paint industry and share my expert experience painting cabinets in my home.
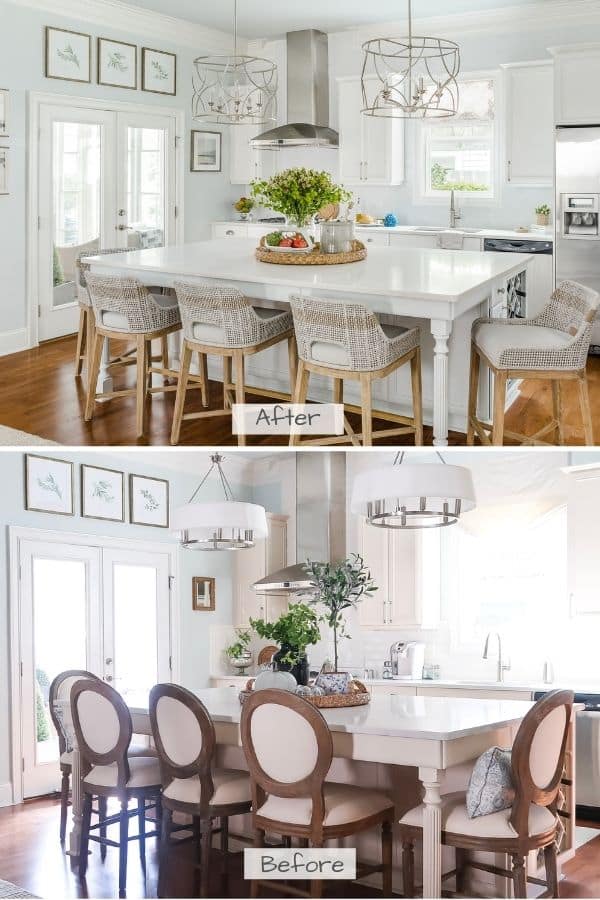
It’s EASY to update your old kitchen cabinets without replacing them. Repainting and refinishing your cabinets is TOTALLY worth it!
This post is a paid collaboration with Lowe’s Home Improvement. All content and opinions are my own 🙂
What you’ll learn
- Understand the basics of cabinet painting.
- Learn the right surface prep techniques for a durable finish.
- My favorite cabinet primer and cabinet paint that lasts for years without a top coat.
- Discover the best cabinet painting methods to achieve a professional smooth finish.
- Decide if a topcoat is needed and how you likely can skip it with the right type of paint.
Contains hand selected products, with affiliate marketing links where I may earn a small commission if a purchase is made. {full disclosure here}

I recently completed a home office makeover. My cabinets were scratched (thanks to my dog Mick) and the navy blue color looked dated.
I’ll teach you how I refinished my own cabinets and repainted them a brand new color Tradewind from HGTV Home by Sherwin Williams.
Understanding Cabinet Painting Basics
When repainting over previously painted cabinets, the key to getting the best results is knowing what type of paint you are painting over.
Typically, your cabinets were painted using one of three types of paints:
- Oil based paint
- Acrylic latex paint (water based)
- Hybrid alkyd-oil enamel paint (my favorite)
Determining whether you’re painting over oil-based paint is crucial, as water-based (latex) paints won’t adhere well to oil-based paint without proper preparation.
Rubbing Alcohol Test to determine paint type
Materials Needed: Rubbing alcohol (or acetone), a clean cloth or cotton ball.
- Dip the cloth or cotton ball in rubbing alcohol and rub it on a small, inconspicuous area of the painted surface.
- If the paint comes off onto the cloth, it’s likely latex (water-based) paint. If the paint doesn’t come off, it’s probably oil-based.
Basic Steps to Repainting Cabinets
- Prepping the cabinets and area prior to painting
- Cleaning the previously painted surface
- Lightly sand smooth scratched areas
- Applying 2 to 3 coats of high quality cabinet rated paint

When I worked for Valspar the paint company, my customer was Lowe’s. My team and I trained the paint department staff on new paint product launches. So I REALLY know the products inside and out!
Lowe’s to this day is my GO TO source for all paint supplies and to find beautiful paint colors. They have the best quality primers and paints at the lowest prices.
Essential Tools for Cabinet Painting
- High-quality nylon/polyester brush
- Foam paint rollers
- Painter’s tape
- 220 Grit Sanding Sponge
- Pre-Paint Cleaner
- Wood Repair Putty
- Detail Sander
- Project Stands (for drying)
- Paint Sprayer and Spray Shelter (optional)
- Drop Cloth and Cardboard

I’m a BIG fan of shopping online for pick-up at Lowe’s! It saves so much time. It makes the project run more smoothly, if you have everything ready to go BEFORE you start painting your cabinets.
Also, prepare your workspace by covering surfaces against overspray. Work in a well ventilated area during the painting process. I spray in my garage with the door slightly open.
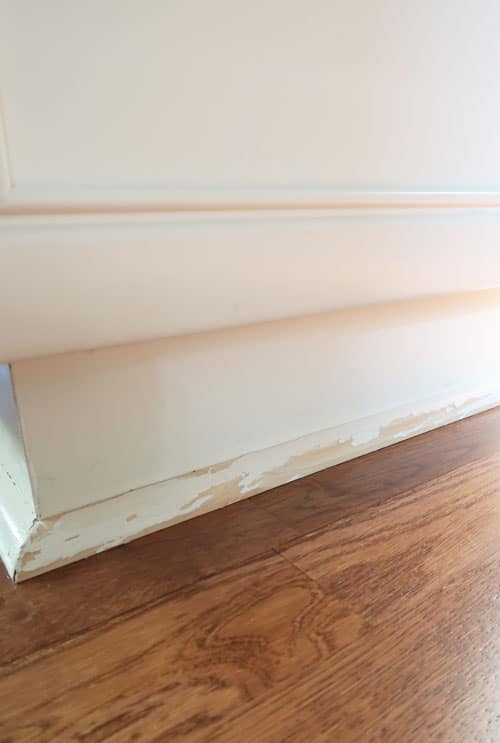
Is stripping or sanding off the old paint color necessary before repainting?
No! If the previously painted finish on the cabinets is in good condition and isn’t flaking or peeling, you can lightly sand with 220 grit sandpaper, vacuum off the sanding dust, and clean with a pre-paint cleaner.
If it’s not in good condition, you’ll need to sand the areas smooth and then prime with the primer I recommend below.
Do you have to prime cabinets prior to repainting?
No! Most of the time, if you prepare the cabinets by lightly sanding and cleaning, you won’t have to prime them.
There is ONE acceptation. If you are repainting over an oil based paint with a water based paint you MUST prime! It’s also helpful (but not necessary) if you are applying over a gloss finish.
I recommend Valspar Bonding Primer (Lowe’s exclusive) to prepare the painted surface. It will ensure the best adhesion of water based paint to the old oil based paint.

Can I spray paint kitchen cabinets or should I hand apply?
I’m going to share my PERSONAL preference, which is SPRAY doors and drawers and hand apply paint to the base cabinets.
This is the BEST way to get a smooth factory finish. If you are new to spraying, I have a FULL tutorial on how-to spray cabinets for beginners.
You CAN spray the base cabinets (cabinet boxes), but MUST protect all areas from over spray.


Safety Equipment
If you’re going apply paint with a sprayer, safety comes first! Make sure you have the right protective gear, such as:
- Respirator mask
- Safety Glasses
- Disposable Gloves
- Paint Clothes and Shoes
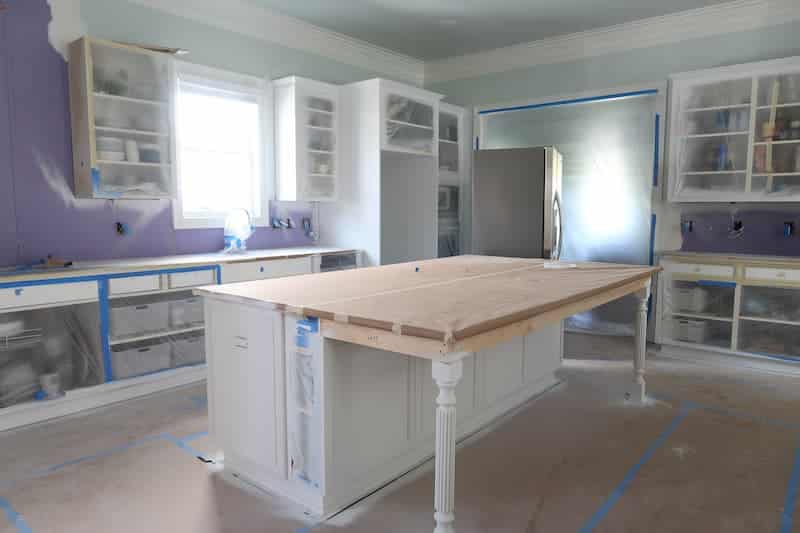
Preparing Your Space and Protect Surrounding Areas
Creating a Temporary Kitchen Setup
Painting cabinets can get messy, so setting up a temporary kitchen is a good idea. You can use another room or area for cooking and eating. This keeps your main kitchen area clean while you work on the cabinets.
Covering Floors and Countertops
Use protective sheeting or drop cloths to cover your floors and countertops. This step saves time and effort when cleaning up.
Proper Ventilation Setup
Open windows, use exhaust fans, and set up temporary fans for better air flow. Turn off HVAC when spraying (read about spraying inside your home).
Do you have to remove the cabinet doors and drawers prior to painting them?
Yes! You need to remove the doors and drawer fronts prior to painting to get the best results.
It’s the only way you can properly paint the cabinet boxes behind the doors and drawers.
Plus it’s much easier to paint cabinet doors and drawer fronts on a flat surface. This is how you get a smooth finish and avoid drips.


Tips on Removing Cabinet Doors and Hardware
To remove the cabinet doors and hardware efficiently, follow these steps:
- First, note the cabinet door’s position and how it’s facing. This will help when you put it back later.
- Then, take out the cabinet hinges by unscrewing them or with a quick release. Make sure to keep all parts and screws organized and labeled for easy reassembly.
- Label the door and drawer position inside the hinge and on the back of the drawer front. Cover with painter’s tape.
- Next, remove any cabinet knobs, pulls, or other hardware.
- If your cabinets have adjustable shelves or other interior parts, remove them too.
What’s the best paint for repainting cabinets?
A water-based enamel is the BEST option when refinishing your cabinets. Enamels dry to a hard finish making them ideal for repainting kitchen and bathroom cabinets.
- #1 cabinet paint I recommend Valspar Cabinet & Furniture Enamel
- It doesn’t require a top coat and dries to a hard finish.
- Unlimited color options
I’ve used this paint on 20 projects around my home because it is DURABLE and CLEANABLE.
Here’s help on know which paint is right for your project: Best Paint by Project Type: Easy Guide
What sheen should you use for Cabinets?
Ideally Satin or Semi-gloss for durability and cleanability. I’ve found that the Satin Sheen in Valspar Cabinet & Furniture Enamel is the not too shiny, but is easy to wipe clean.
Refinishing Kitchen Cabinets: Tips and Tricks
Preparation is the MOST important step when painting cabinets. It’s vital for the paint to adhere and and be durable.
It’s important to DEGREASE the surface. You’d be surprised how much grease is deposited from your hands and from cooking.
- Remove all cabinet doors and drawer fronts and store old hardware in labeled zip lock bags.
- Sand lightly with 220 grit sandpaper to smooth out any scratches.
- Fill in damaged areas with Kwikwood wood filler and sand smooth.
- Vacuum up sanding dust. Wipe all painted surfaces using a rag and degreaser or tsp.
- If applying over a gloss finish or over oil with a water-based paint, apply 1 coat of bonding primer.
- Choose paint with a satin or semi-gloss sheen for the best durability.
- For the smoothest finish when hand applying use high quality brushes and foam roller.
- Paint in thin, even layers, letting each dry 4 or more hours before the next coat.
- For a perfect finish, use a HVLP paint sprayer.
- Wait 24 to 48 hours before reattaching doors and drawers and hardware.
By following these steps, your cabinets will look like they were painted by a pro.
Professional Painting Techniques for Smooth Finish
Brush vs. Roller vs. Spray Application
There are three ways to paint cabinets: brush, roller, or sprayer. Each has its own benefits and drawbacks.
Brushes give you control in tight spots. Rollers cover a wide area quickly, but may show roller marks. Sprayers give a smooth finish but need more setup and cleaning.
Achieving Professional-Grade Results
For a smooth finish, prep and technique matter, no matter the method. Clean, degrease, and sand the cabinets well before painting.
Use thin coats and let each dry fully. Choose the right paint for cabinets to ensure a smooth finish.
Common Painting Mistakes to Avoid
- Painting on high humidity days, which delays drying time.
- Applying paint too thickly, which can lead to drips, runs, and an uneven finish
- Skipping the sanding and cleaning steps, resulting in poor paint adhesion
- Using the wrong type of paint or primer for refinishing your cabinets.
- Not following the RECOAT time between coats.
- Rushing the process and not allowing proper drying and curing time.
- Neglecting to properly mask and protect surrounding areas.
By using these techniques and avoiding common mistakes, you can get a smooth, flawless finish when painting cabinets a new color.
Proper Drying and Curing Process
Patience is key when repainting your cabinets. The drying and curing process is vital for a lasting finish. After painting, give your cabinets time to dry and cure before using them again.
The drying time varies based on paint type, environment, and coats. Usually, paint takes 24-48 hours to dry. But curing, where paint hardens, can take days to weeks.
To cure your cabinets right, follow these steps:
- Let painted cabinets dry for 24-48 hours before touching or reassembling.
- Don’t put heavy objects or press on painted surfaces for 7-10 days.
- Wait 2-4 weeks before using cabinets for their purpose to ensure paint cures fully.
- Keep your workspace well-ventilated to speed up drying and curing.
Do I need to apply a topcoat after painting my cabinets?
No, not necessarily. If you use a high-quality enamel paint on your cabinets, you can avoid a top coat.
If you’d like to apply a protective topcoat, I recommend a water-based polyurethane like Minwax Polycrylic in a satin finish.
SHOP ALL OF MY FAVORITE PAINT SUPPLIES
Sign-Up for my Weekly Emails!
Straight to your inbox sharing can’t miss decorating and painting tips for your home.
Let me know if you have any questions about painting cabinets in the comments and I’ll answer them. Have fun repainting your cabinets.