
Beautiful Board and Batten: How-to Plan a Wall Pattern
With this easy guide, you can create a board pattern that will make your walls unique and trade up the look of your room too!
Looking to add some character to your walls on a budget? Board and batten is the perfect solution!
This tutorial will show you how to measure and plan your board and batten trim pattern for any room.
Board and batten is an affordable timeless way to update any room in your home – follow these simple instructions and plan your next room makeover.
Pin It for Later!
What is Board and Batten?
Board and batten is near and dear to my heart! It is a classic wall treatment and helps give a room a ton of character.
Board and batten is attached as trim to drywall to create a pattern that is usually all painted the same color.
You can add board and batten as just and] accent wall or to file the entire wall top to bottom.
I’ve actually used board and batten in two room makeovers (so far!).
Trimming the walls made each room look completely different from when they were just drywall.
Board and batten is created by pairing “boards” placed horizontally on the wall with strips of wood, called “batten,” running between them vertically.
The wider the board both horizontally and vertically, the more prominent the pattern will be.
Using a thicker material will be what determines the visual depth of the pattern on the wall.
You can be creative with a board and batten pattern by creating different angles or using different width boards.
Typically, board and batten walls are created in straight 90 degree angles and why many DIY the installation.
Straight cuts are the easiest cuts to make for sure!
What is the difference between board and batten and wainscoting?
Wainscoting is a similar wall treatment but the boards cover the lower third of a wall.
Wainscoting is typically used hallways and dining rooms.
It consists of a chair rail, which is a horizontal board that sits about 32 inches from the floor, and panels or boards below it in a square pattern.
Here is a picture of wainscoting in my dining room and up my stairs to show you what it looks like in most homes.

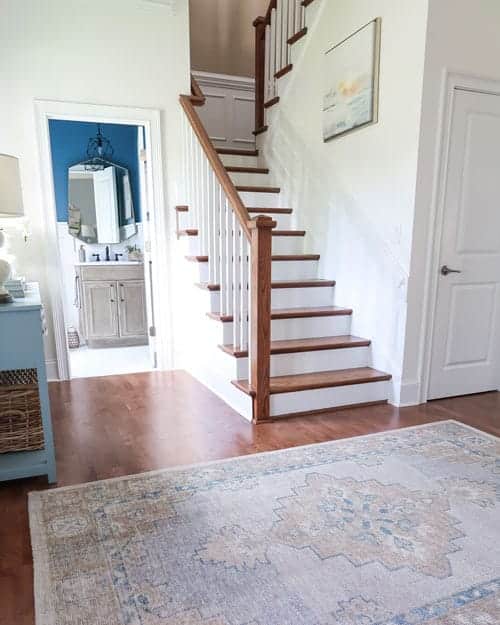
I’m a huge fan of adding up stairs that get a ton of traffic for protection and plus it is easier to clean.
Yes, you can add board and batten instead of wainscoting in any scenario.
Why Choose Board and Batten over Wainscoting?
First, it’s a fairly easy DIY project that most people can do themselves with some help.
Or you can affordably hire it out to a professional who has all the tools and expertise (that’s what I did!).
The horizontal boards and vertical battens are much easier to map out and cut than seaming angled frames with trim for wainscoting.
Lastly, it’s a timeless look that can be used in any room from formal to casual settings.
- It’s an affordable way to add some character to your walls.
- The pattern is timeless and can be used in any room of your home.
- Board and batten is a quick and easy way to give your walls a makeover.
- It can be used in any room of a house.
rooms to adding board and batten:
- Family Room
- Dining Room
- Master Bedroom (primary bedroom)
- Guest Bedroom
- Bathrooms
- Hallways
- Laundry and Mud Rooms
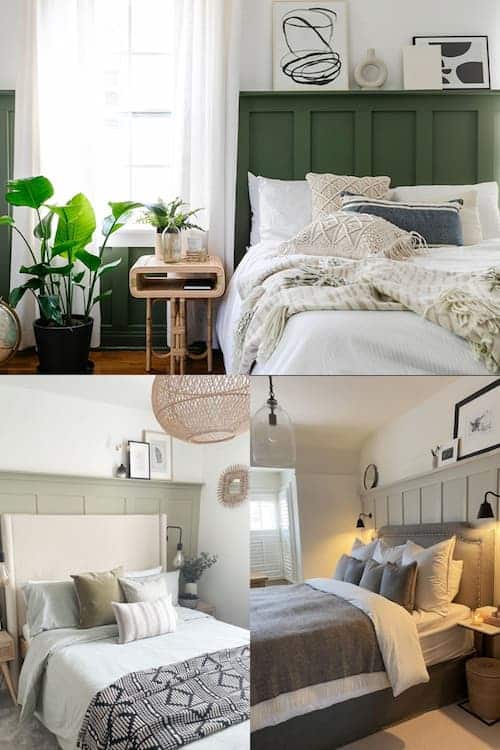
Want to see board and batten walls in action at my house? I absolutely love how they both turned out!
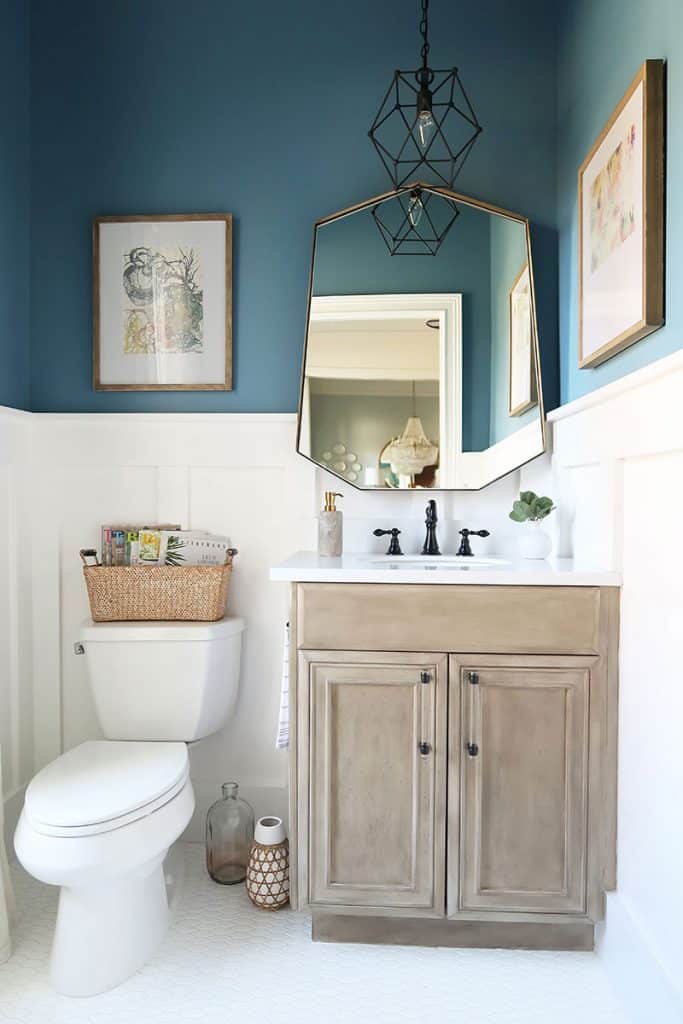
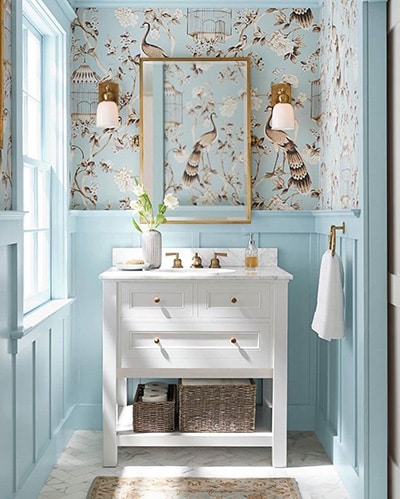
To make my small powder room look bigger and hide the toilet by painting it white, I added a traditional board and batten pattern around the room
Click Here for the Powder Room Before and After
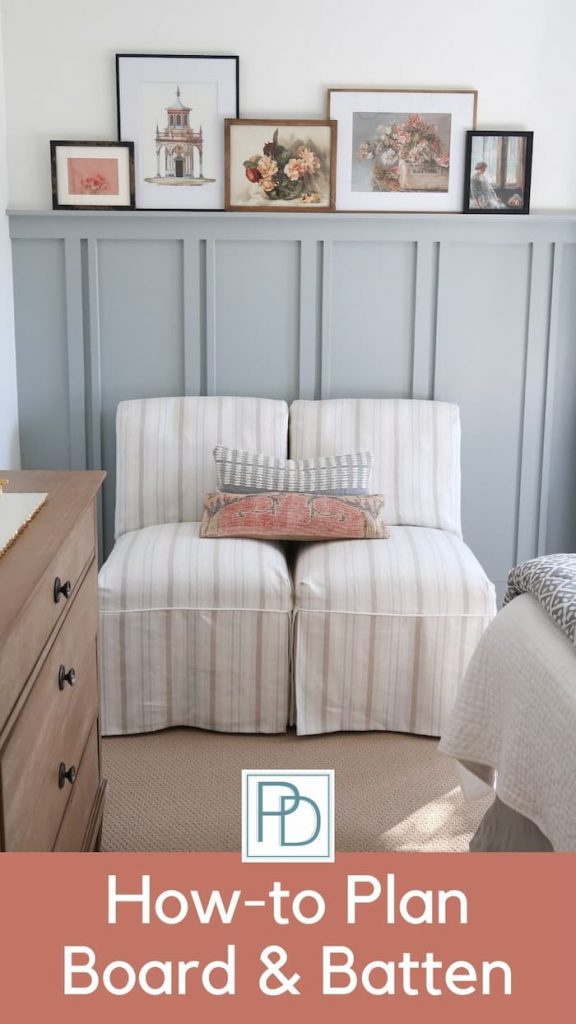
Then in my guest bedroom cottagecore makeover, I created a unique board and batten accent on multiple walls.
Click here for the Guest Bedroom Before and After
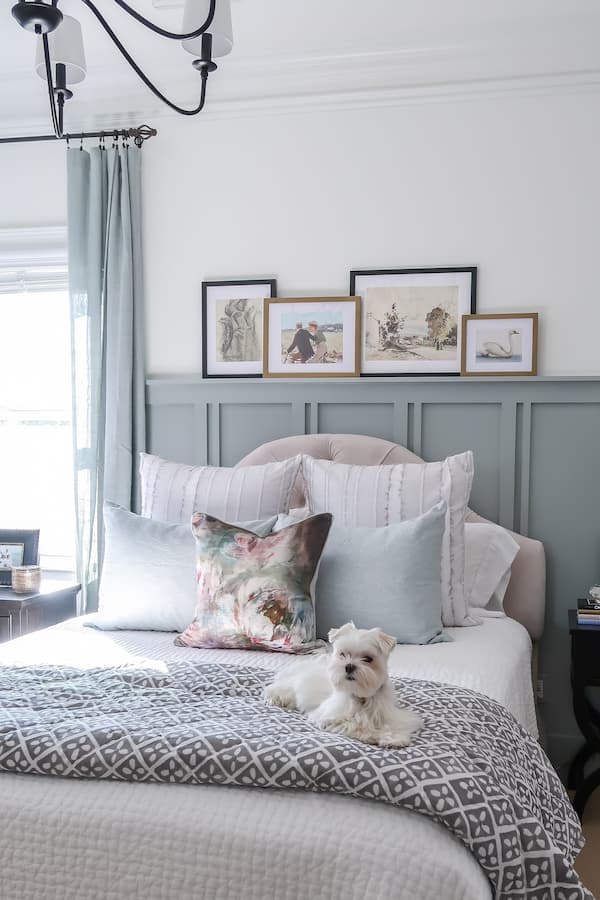
The board and batten in this room was unique pairing different boards together as not only a beautiful pattern, but also added function with an artwork shelf ledge.
Cool right? Now I am sure you want to know how I planned out the pattern!
How to Measure and Create a Board and Batten Pattern
Now that you know what board and batten is, it’s time to plan your project pattern.
We will cover the simple steps on how to measure and determine the board sizes.
Plus help you choose the best material for board and batten too.
What kind of wood is used for board and batten?
For both of my projects to save money, I chose pre-primed MDF boards (medium fiber density) and my contractor cut them to size plus installed them.
It’s the most cost effective way to trim out the room because you can use wider boards and cut them to size for the board and batten wall – both the vertical boards and horizontal boards.
Being able to cut mdf boards to any size you need provides the benefit of total creativity for your board and batten wall.
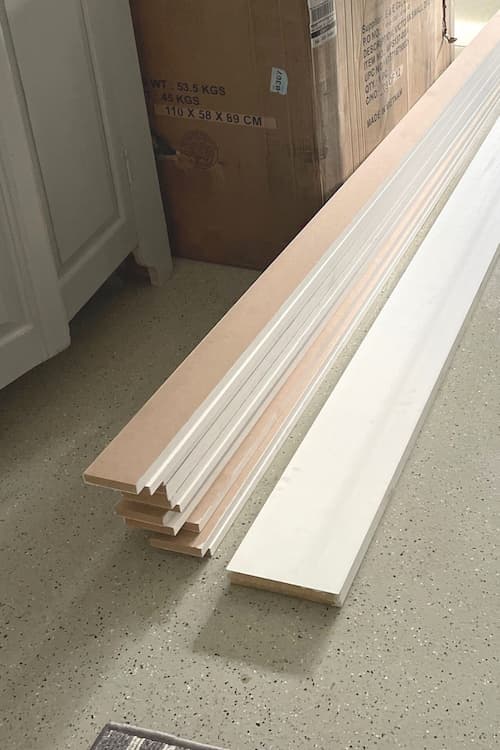
My plan was to paint the board and batten, so having them primed made that job much easier.
In my project we used 3 inch wide boards in 4 locations by cutting them to size. It makes ordering supplies a lot less complicated!
Another option is real wood trim especially if you plan to stain the wood versus paint.
Higher end species of woods that are stained can be beautiful, but will increase the total cost.
Or consider pine boards which are more affordable, can be cut to size, painted or stained for a more rustic look.
How thick should board and batten be?
When we are talking about thickness of the material, we are talking about is the projection of the boards from the wall.
The projection of the board is what gives the board and batten pattern visual depth.
When you decide what type of wood or material to use, it is important to look at the common depths available.
For my projects I worked with the current baseboard depth in my home, which was 1/2 inch.
You can go a thick as 3/4 inch to as thin as 1/4 inch.
Before you commit what to buy and install, my suggestion is to bring home small samples of boards to test.
Step 1 – Determine which walls will get board and batten trim
Decide which walls you want to trim with the board and batten.
You can just do one wall as an accent or all of the walls!
This is completely up to you and the room you are trimming.
Of course the more walls you apply board and batten to, the more you will have to materials and labor if you hire out versus DIY the project.
For the powder room since it is a small room, I added board and batten to all of the walls.

For the guest bedroom, I only added board and batten to two walls as an accent.
Or you can choose to add the trim to only one wall as an accent.
This is particularly nice for the back wall of a bedroom or dining room, to make the room look larger.
Step 2 – Determine the height of the horizontal board / top board
Decide if you want the board and batten from floor to ceiling or just a portion of the way up the wall.
There are NO hard and fast rules of how tall the board and batten wall has to be!
A board and batten project can be as unique as your mind can create.
Let’s use my home as a baseline for measuring and as an easy to understand example.
My ceilings are 9ft upstairs and 10ft tall downstairs with 10 inch deep crown moulding at the ceiling.
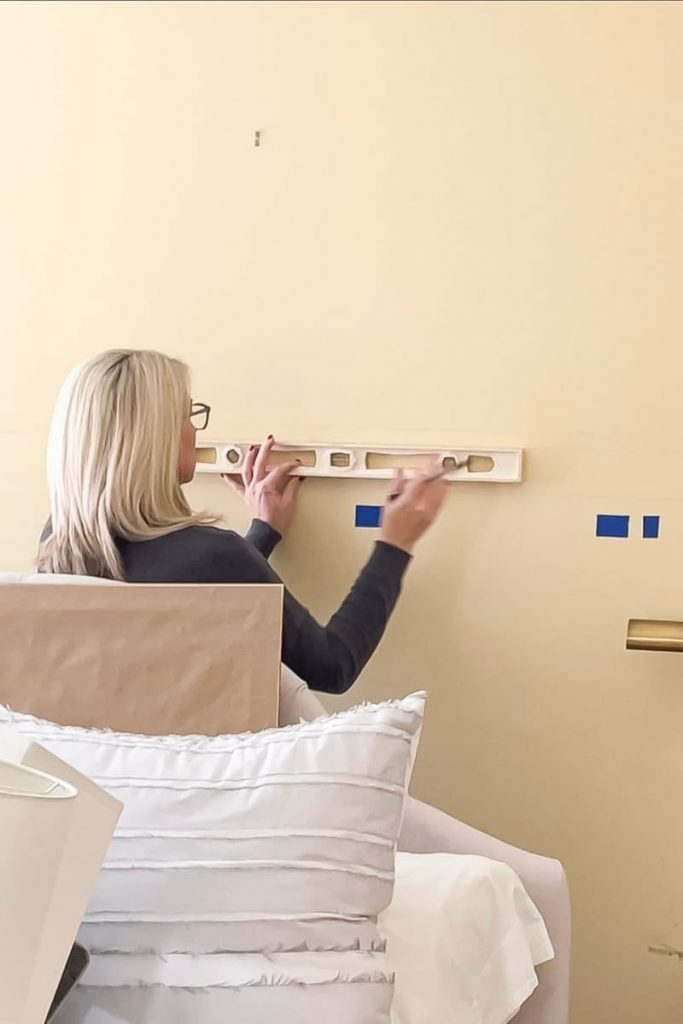
Tip: Actually DRAW the board height onto the wall using a level to see how it will look.
For both the bathroom and bedroom, I used 53 and 53.5 inches respectively for the horizontal board height. This was just over half way up the wall.
You can see that I didn’t use a straight calculation for the top board, but instead went with what I liked visually.
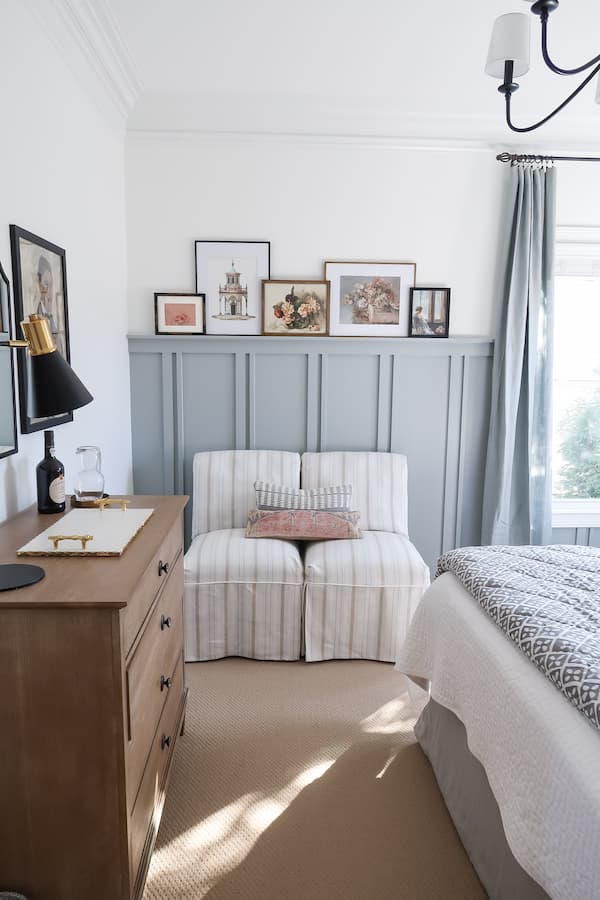
The total drywall space is 98 inches, so the height of the picture shelf ledge is 55% of the total open space.
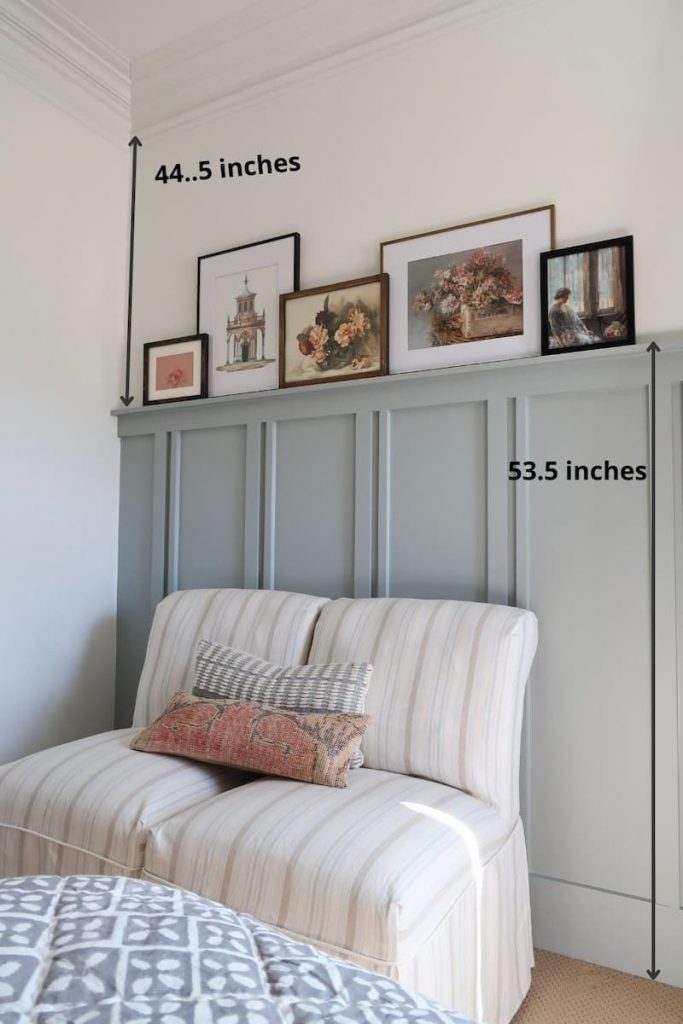
In the bedroom, the top horizontal board also acted as a shelf ledge and why the overall height was greater.
What can I say…I like visually what I like and was consistent designing the board and batten wall.
As you are mapping out the height don’t forget to take into account the existing baseboard height, so you measure from the floor up.
Most of the time you will replace the existing baseboards with baseboard trim in the same style as the horizontal board at the top.
For the width of the top board, a good rule of thumb is the top board width is HALF of the baseboard height.
This will give the frame of the pattern visual balance.
If you have baseboards that are not as wide as mine, please pay close attention to this.
Want to create a picture shelf ledge?
Factor that into the total height of the pattern.
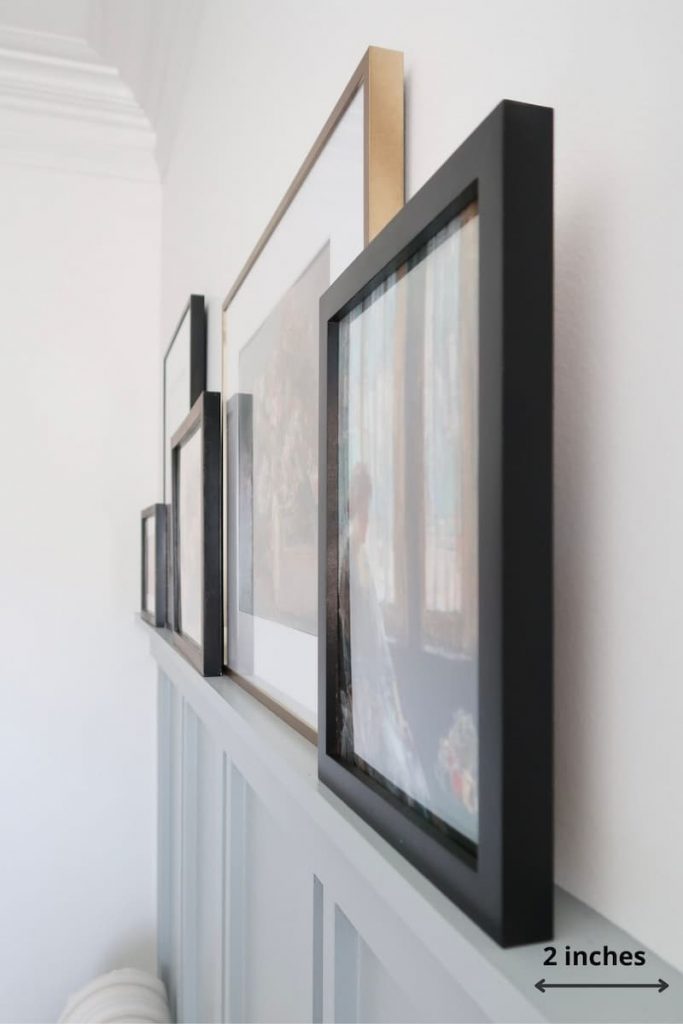
To prop up artwork, the minimum depth of the shelf is 2 inches but can be as wide as 4 inches.
You will also need to determine how to finish the ends.
Here are three different ledge treatments to consider:
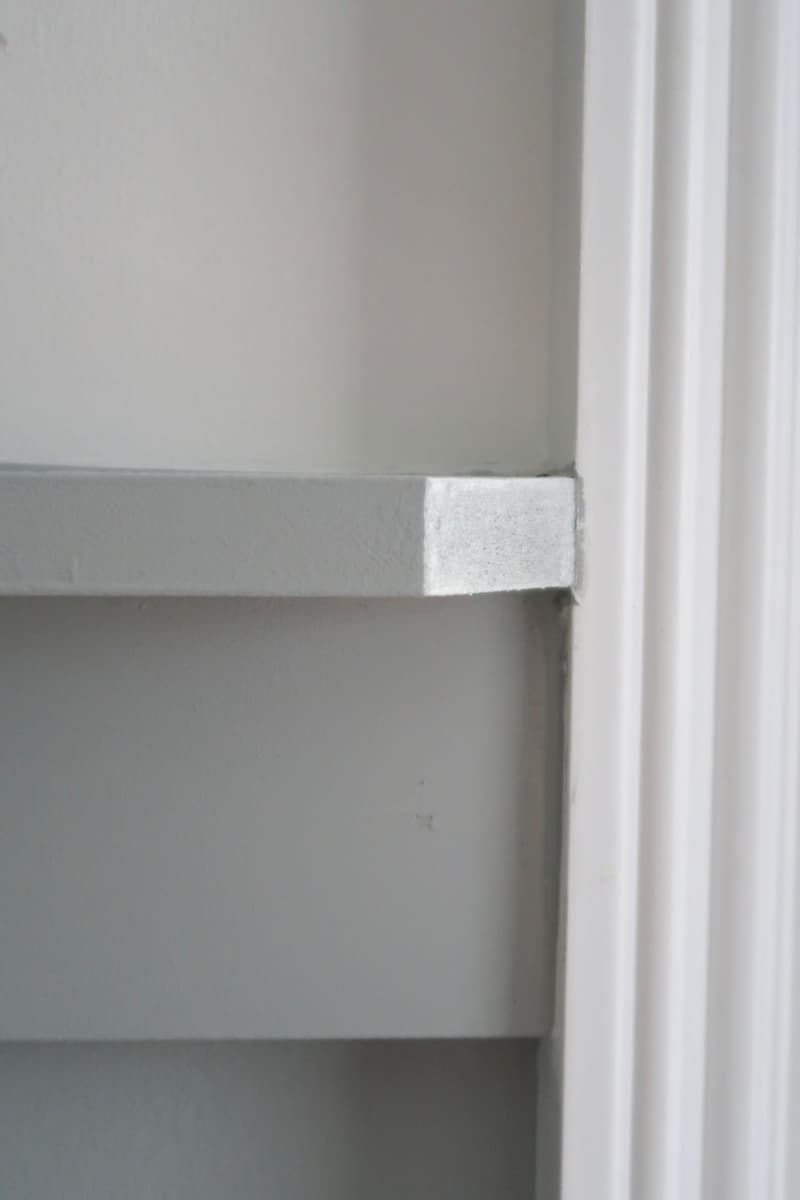
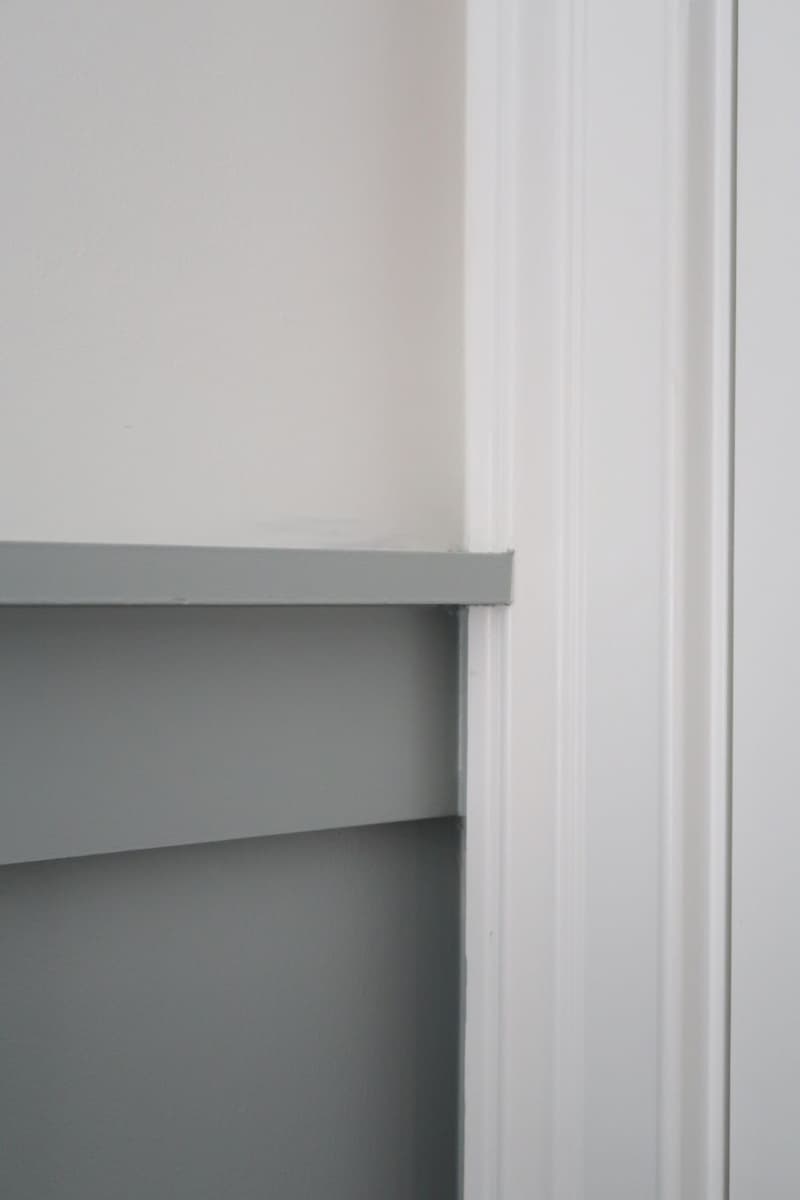
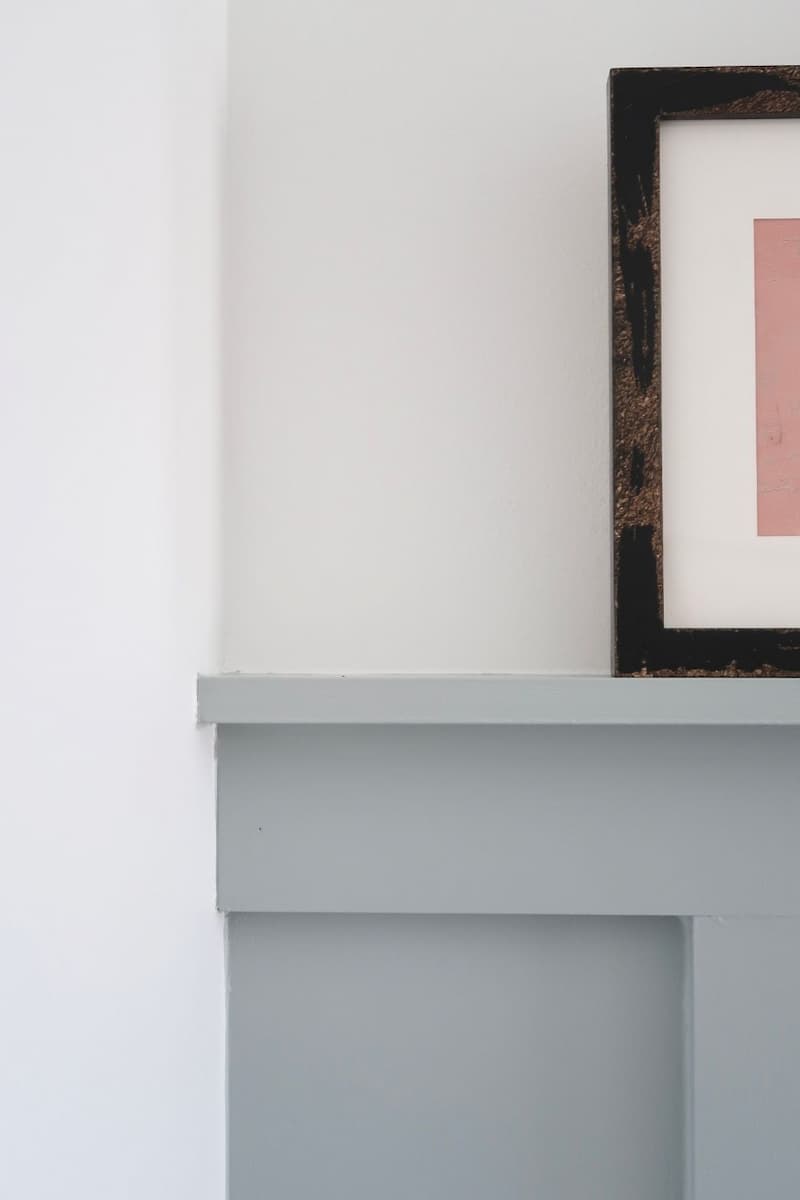
In the guest bedroom, I wish I would have installed a deeper ledge because 2 inches was very shallow.
For larger frames 3 to 4 inches will give you a much more stable foundation to prop the artwork.
Think about the artwork you want to prop on the shelf ledge and use that to determine the overall depth.
Step 3: Create the vertical board pattern
Remember the batten boards are the vertical boards on a board and batten wall.
First, you need to figure out the size of the batten you will be using.
It is ALL about visual balance and your eye will help you know what is correct.
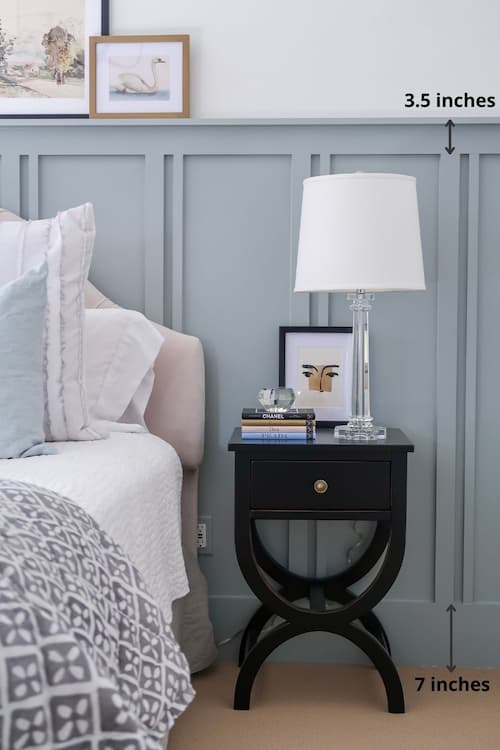
With the top board being 3 inches WITHOUT the shelf and 3.5 inches with the shelf, I wanted the batten to mimic the total width.
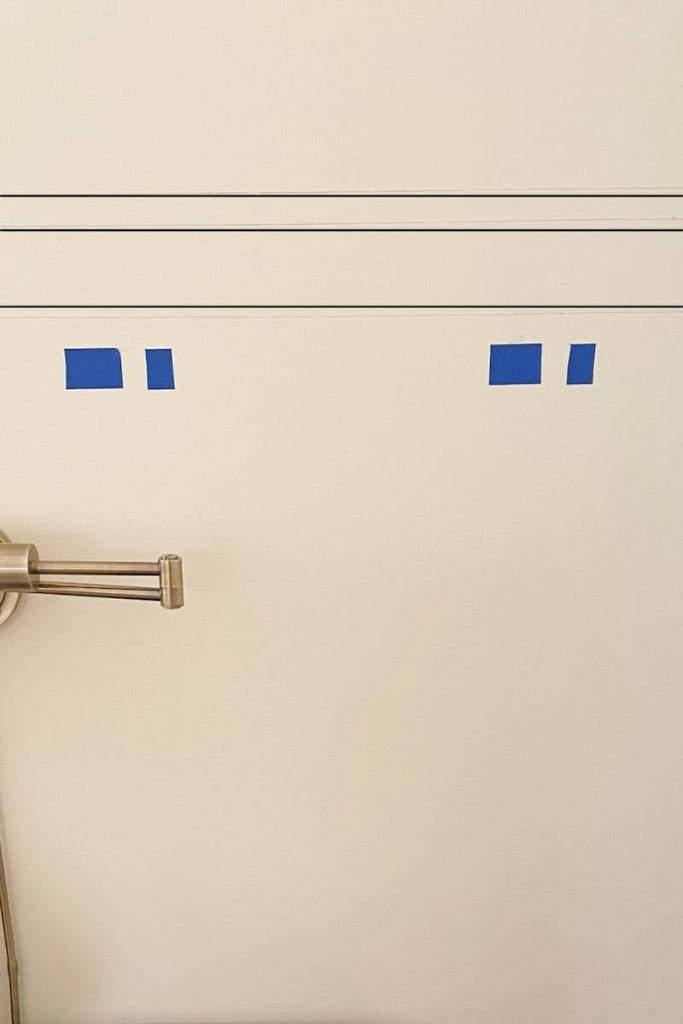
Tip: Measure painter’s tape to the width of the batten boards and mark directly on the wall to determine placement and total count needed.
Here is another example where the batten is more narrow than the widest horizontal board at the top.
Tip: A good rule of thumb is to make the vertical battens the same or within 1 inch the width as the horizontal board at the top.
In the guest bedroom, I ROUNDED up the 3.5 inch measurement of the top board to 4 inches.
That is the measurement I used for the total batten vertical space width.
This is where I got creative and decided instead of doing a single board between 3 to 4 inches, I mixed 2 inch and 1 inch vertical boards.
To create 4 inches visually, I spaced the two “striped” battens 1 inch apart.
The fabric on the chairs in the room inspired the double “stripe” pattern.
Board and Batten Measurement Map
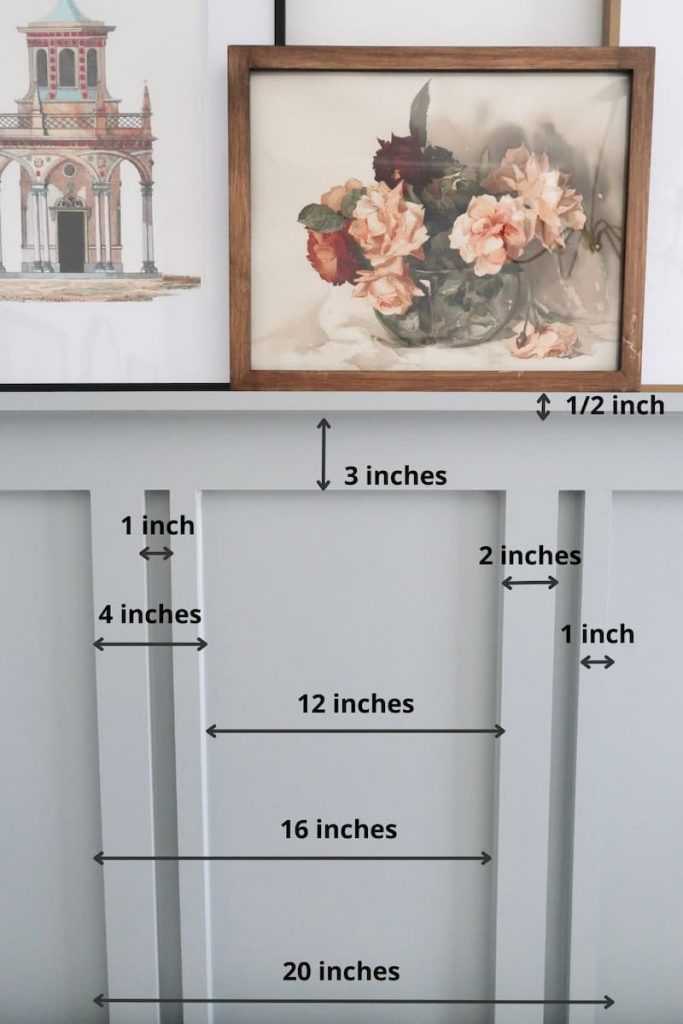
You also need to decide on the spacing of your boards.
Typical spacing is between 16 and 24 inches, with an average of 20 inches.
Wall studs are typically 16 inches center to center for perspective.
My Vertical Batten Spacing
- 2 inch batten
- 1 inch gap
- 1 inch batten
- 16 inches between
- 20 inches total batten pattern
You can see in my earlier picture that I actually taped the batten pattern on the wall with painter’s tape for my contractor.
You’ll see in this picture that I didn’t take into account the electric outlet placement.
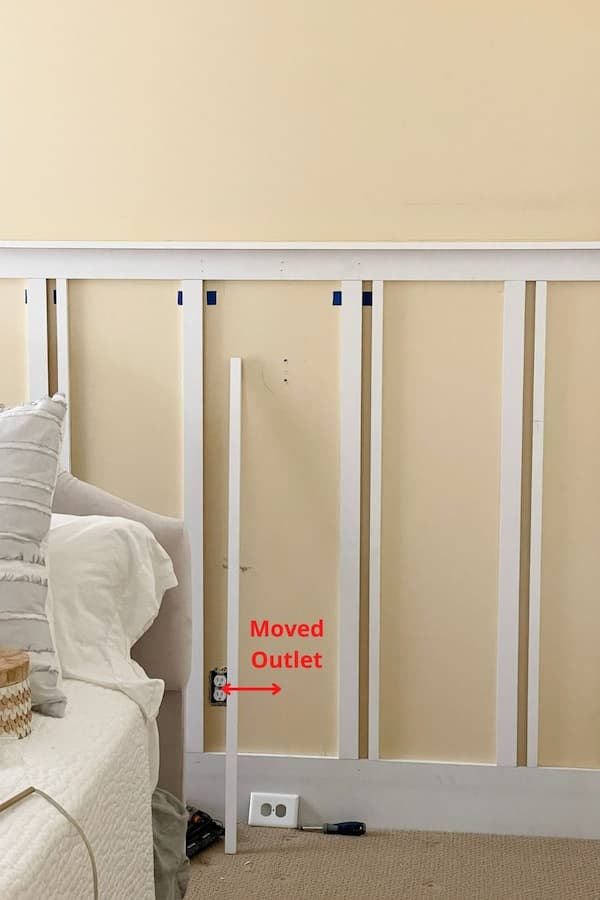
You can see this slightly modified my taped plan, but it didn’t change the number of battens I marked just their placement.
Pay attention to light switches and electric outlets!
In the powder room, I ended up having to relocate a light switch and an electric outlet.
This is why it sometimes can be best to hire an experienced contractor versus DIY.
Step 4: Determine how much material you need
Once you have both the board and batten measurements for the pattern, it’s time to figure out how many boards you will need to purchase.
This gets a little more complicated – MATH I KNOW, yuck!
Measuring the width of the wall is how you determine the length of board you need for the horizontal pieces.
Not a complicated thing to calculate.
The battens get a little more complicated to calculate. I have a little trick to help you skip the complex math.
By marking the pattern with tape on the wall, you can count how many batten boards you need – EASY!
Quick tip for DIY board and batten: Professionals cut spacer boards for the distance between battens to use as a pattern. That way everything is perfectly spaced without having to measure!
Porch Daydreamer
Actually marking the battens on the wall helped me COUNT exactly how many of each type of board (2 inch or 1 inch) I needed – easier math!
Hiring a contractor was well worth the money because he optimized the materials by cutting to size and was able to move the outlet for me too!
It’s not to say you can’t DIY it, but know it will be a learning process and plan an extra 10% in materials for mishaps or mistakes 🙂
Once you have your measurements, it’s time to start shopping for materials!
You can find boards at your local hardware store, home improvement center or lumberyard.
Now that you have all your materials, it’s time to get started on your project!
Follow the instructions in this tutorial and you’ll have a beautiful board and batten wall in no time.
Please consider following me on Pinterest and Instagram for daily inspiration.
Until next time…
Porch Daydreamer
Tracey
What color paint is this ?
It’s Mineral Deposit by Sherwin Williams.
How much should it cost if hiring a contractor to do one wall in one bedroom?
Hi, Kate! Sorry I can’t answer that because there are so many factors involved in quoting the project and where you live determines labor rates. You’ll have to get quotes from qualified contractors.
I have been dreaming of board and batten in my dining room. My hesitation is that this room, and actually the entire house is full of oak trim. Can I mix white board and batten with oak trim? Changing the trim is really not an option due to the amount of oak in the house. All trim, windows, doors are oak.
Of course! Any color of board and batten will work. It’s OK to mix 🙂