Easy Guide to Hanging Wall Sconces (damage free!)

You are going to love this easy trick to determine wall sconce placement and the fastest way to hang them without damaging your walls!
Luckily for you I’ve hung many different types of wall sconces from candle, outdoor, hardwire, and plug-in light fixtures in my lifetime.
Something that is always a little tricky to determine is how high and far apart to hang wall lights.
Especially if you are hanging them on either side of a piece of artwork, mirror or headboard. I’ve done it all!
All that practice led me to create a no-fail method to determine the right placement.
Plus I’ll teach you how to hang the wall plate for the wall sconce in minutes with my easy DIY process.
Don’t worry I’ll explain everything in detail with lots of pictures and a video to reference too.
No more messing up your walls with misplaced wall lights or having to patch and repair holes when you don’t like where they are hung!
Where to Hang Wall Sconces
Wall lighting is a great addition in any room to add visual interest and mood or extra lighting to dark walls.
Where to Hang Wall Sconces / Wall Lights
- Either side of a mirror or artwork
- Down a dark hallway or up a staircase
- Beside your bed to save precious nightstand space
- In a dark corner of a room.
- Flanking a tall piece of furniture
- Alongside a window
The placements are endless, but knowing where to place them and how to hang them can be tricky!
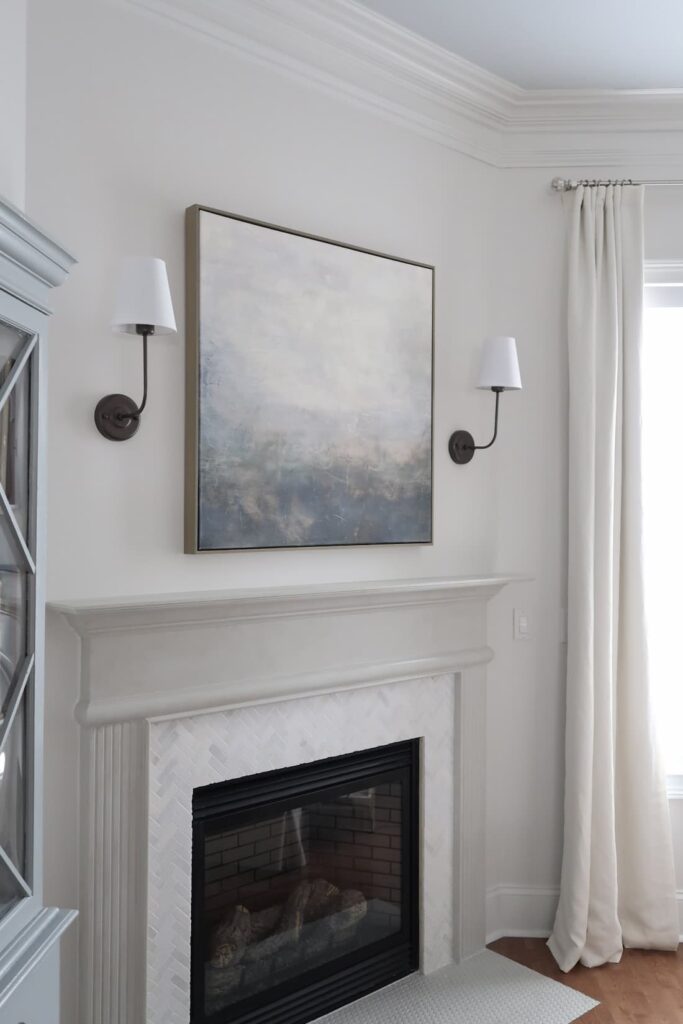
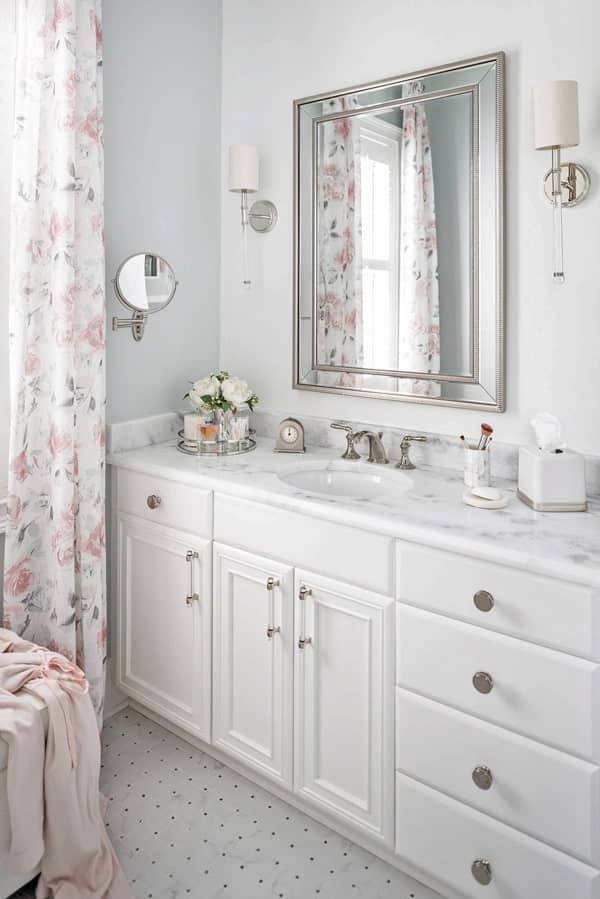
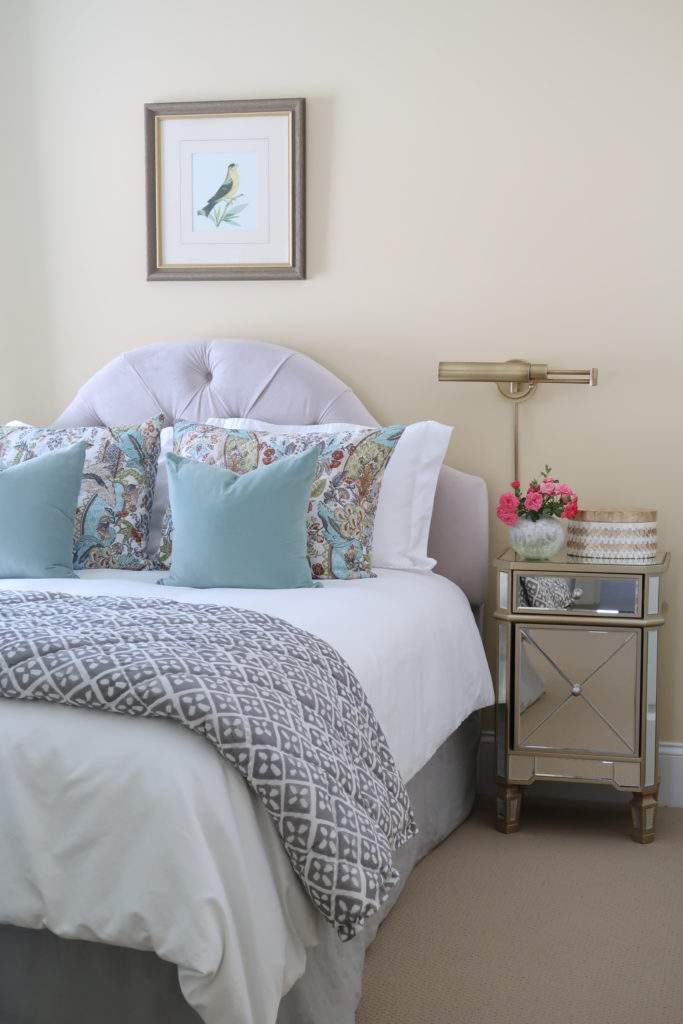
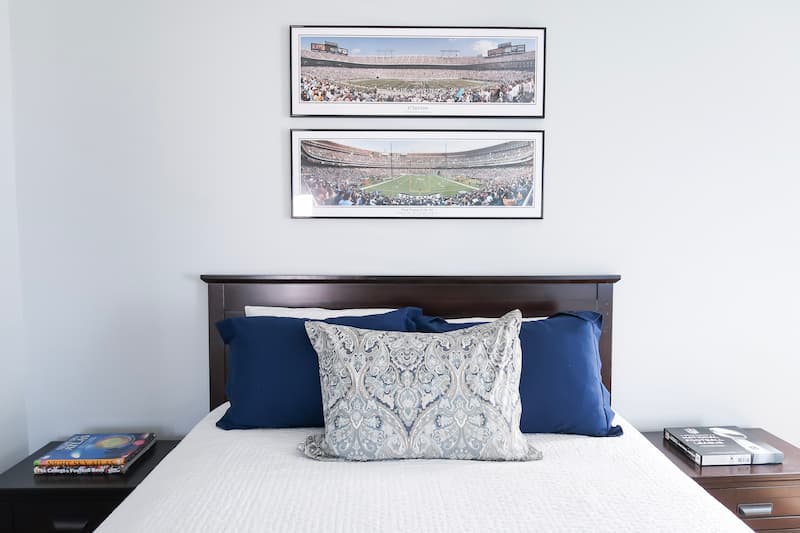
Here are some wall sconce examples from my home…
What’s really interesting about how these wall sconces are hung is I did it without drilling or wiring the fixture!
That’s a totally different wall sconce installation tutorial that you can read here.
After seeing all of these pictures you are probably asking yourself questions like:
- What’s the rule of thumb for hanging sconces?
- How high should wall sconces be hung?
- Is there a standard wall sconce height?
- What are the rules for sconce placement?
- How far should I hang a sconce from a picture or mirror?
You may be surprised by my answer. IT ALL DEPENDS! You can search Google for this information and get several canned responses.
I’ve literally IGNORED the standard height recommendations, but I do pay attention to the distance guidance.
The truth is the standard for wall sconce placements both height and distance can be misleading. It’s better to test how YOUR wall sconces will look in YOUR space.
Porch Daydreamer
Basic placement “rules” for hanging wall sconces
If you go and do a search on ChatGPT or Google, here’s what you get. NOT helpful at all right?
|
Sconce Height |
60-66 inches above the floor |
|
Sconce Spacing |
28-30 inches apart |
|
Sconce Distance (art/mirror) |
6-9 inches |
|
Sconce Sizing |
Proportional to the size of the bed and the wall or artwork |
The good news is I have an easy solution for you to test the placement BEFORE you ever mount them to the wall.
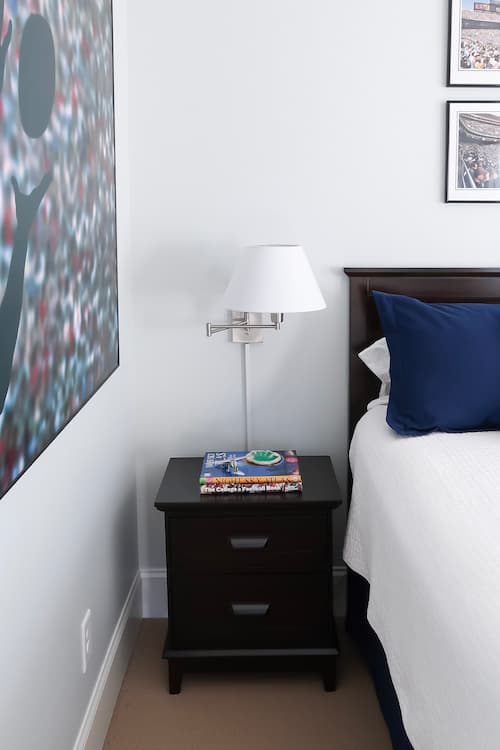
This is so easy you will love it! I’ll show you how hung wall sconces on either side of my son’s queen sized bed. He needed task lighting to make it easier to study.
My son’s room has tiny little nightstands, so wall mounted lights on either side of the bed made more sense. I also had to mount them on drywall, which is typical.
I’ll share two examples for determining wall placement and the DIY installation for any type of sconce lighting.
Contains hand selected products, with affiliate marketing links where I may earn a small commission if a purchase is made. {full disclosure here}
How-to Determine the Right Placement for Wall Sconces
When you see how easy this trick is you will use it for other hanging projects. This is my go to trick for hanging pictures too!
How-to Create a Hanging and Placement Template
The first step in determining wall sconce placement is to develop a hanging template. That way you can test the location height and distance, BEFORE drilling any holes.
This will help you avoid determine the the best wall sconce placement for your room and space.
The method works for all types of sconces that you can easily trace and/or measure. I’m giving you two options for creating a hanging template: regular sconces and swing arm sconces.
20 beautiful wall sconce options
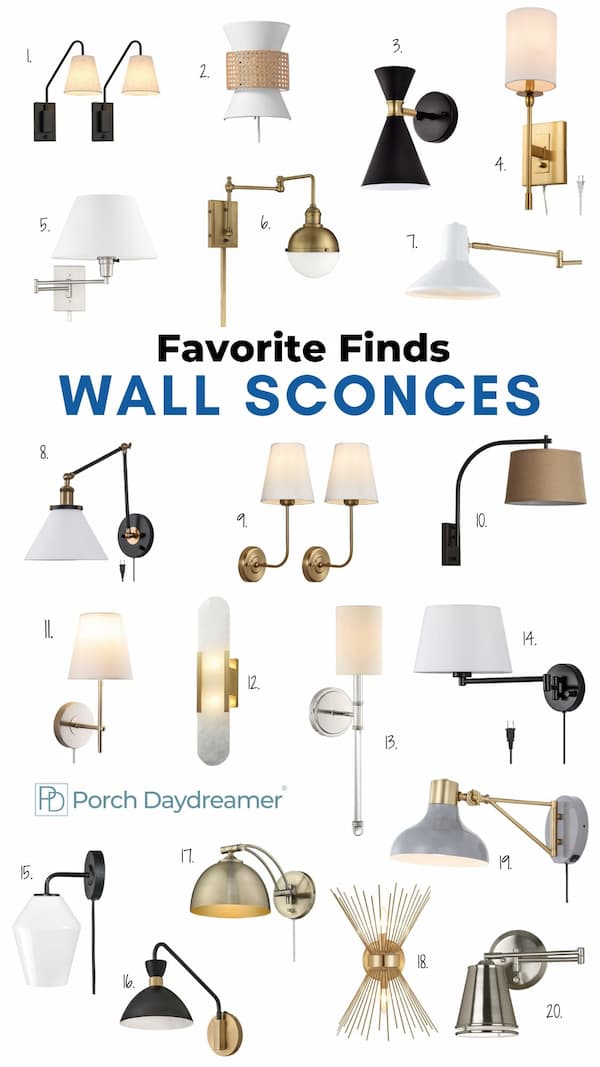
ONE | TWO | THREE | FOUR | FIVE | SIX | SEVEN | EIGHT | NINE | TEN | ELEVEN | TWELVE | THIRTEEN | FOURTEEN | FIFTEEN | SIXTEEN | SEVENTEEN | EIGHTEEN | NINETEEN | TWENTY
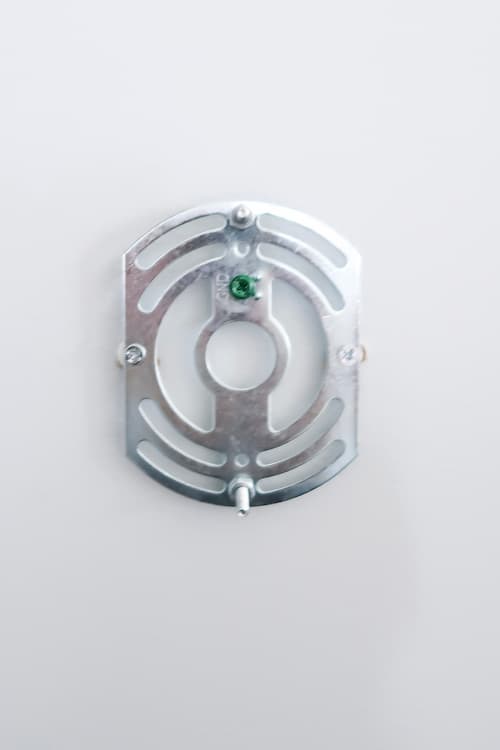
Terms to Get Familiar With
Before we get started, let’s cover some lingo first so it’s not confusing. When I say “mounting plate” I’m referencing the piece that holds the light fixture and is screwed into the wall.
The “wall plate” is how the fixture is attached to the mounting plate.
project supplies
- Pencil
- Wrapping paper (with a grid back is preferred)
- Painter’s tape
- Tape Measure
- Level
- Hammer
- Screw Anchors
- Power Drill and Drill Bits
- Phillips Head Screw Driver
Swing Arm Wall Sconce: Test Hanging Height, Distance and Spacing
how-to create a hanging template
- Take note of the sconce width and height
- Trace the fixture wall plate on wrapping paper and cut to size.
- Hang on wall where desired with painter’s tape.
- Pay attention to the width of the light fixture.
- For bedside mounts, make sure to account for the width, so it is far enough away from someone sitting in the bed.
- It needs to be close enough to swing closer for reading.
- Adjust until you are happy with the distance FIRST (if you are hanging two make a note to use for the 2nd one).
- Then move up or down until the height looks correct.

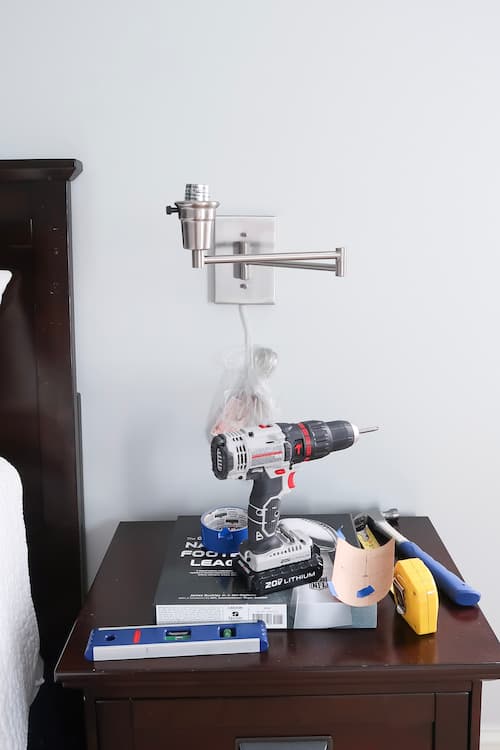
Here is how I placed the template in my son’s room. If you are hanging over a nightstand keep that in perspective.
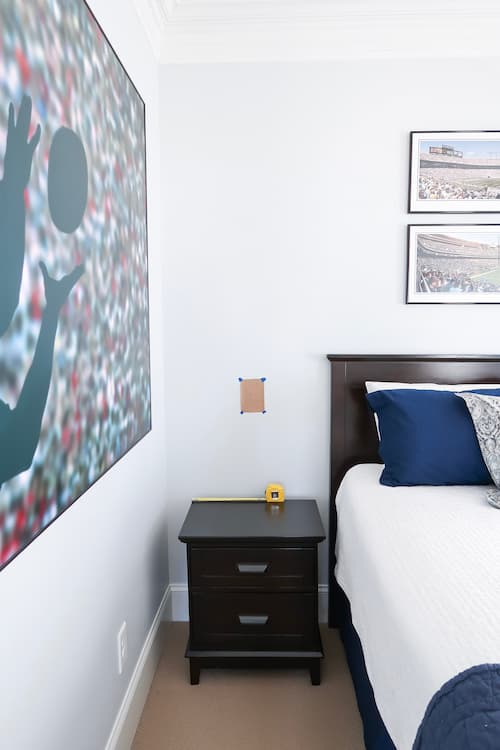
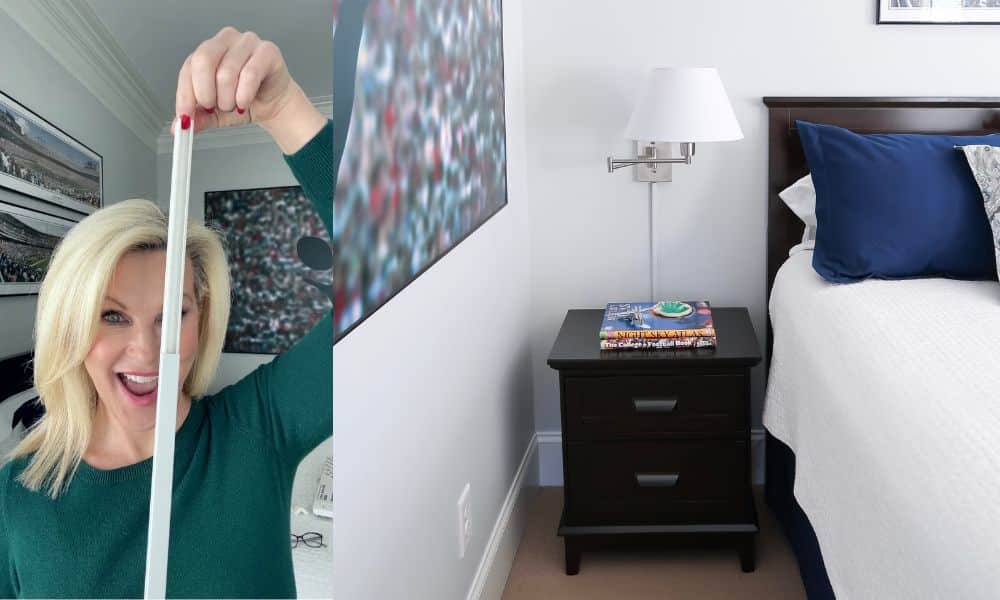
Swing Arm Sconce bedside Placement
Keep in mind someone will be sitting up in bed and using the light, so you need to place it at a level for the best lighting in two scenarios.
- The distance is important so the light is close enough to the bed that it can be pulled toward a person sitting in bed as a reading light.
- You need to make sure when the arm is pushed closed it still looks in proportion to the headboard.
The measurements in the example above are 12 inches from the headboard to the side of the wall plate and 16 inches from the nightstand to the bottom of the wall plate.
Overall the mounting plate is 40 inches from the floor and 42.5 inches to the center of the fixture.
My son’s nightstand and headboard are a lower profile:
- Headboard 50 inches tall
- Nightstand 24 inches tall
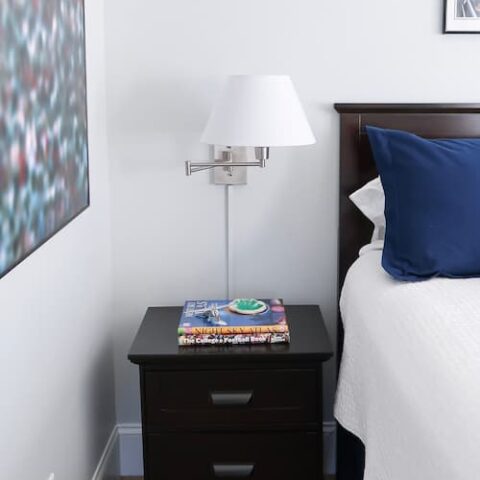
I ended up hanging the swing arm lamps 7.5 inches down from the top of the headboard to the center of the fixture.
The best option for the swing arm wall sconce I purchased was to center it over the nightstand. You don’t have to center the light!
For instance if you have a large dresser as a nightstand that wouldn’t look appropriate.
Focus on the distance from the headboard and someone reading in bed instead.
Regular Wall Sconces: Test Hanging Height, Distance and Spacing
how-to create a hanging template
- Take note of the sconce width and height.
- Mark measurements on wrapping paper and cut to size.
- If you can trace the wall sconce, DO IT!
- Hang on wall where desired with painter’s tape.
- Adjust until you are happy with the placement.
- If you are hanging two, measure to make sure they are hanging the same height at distance.
- Adjust as needed until they match.
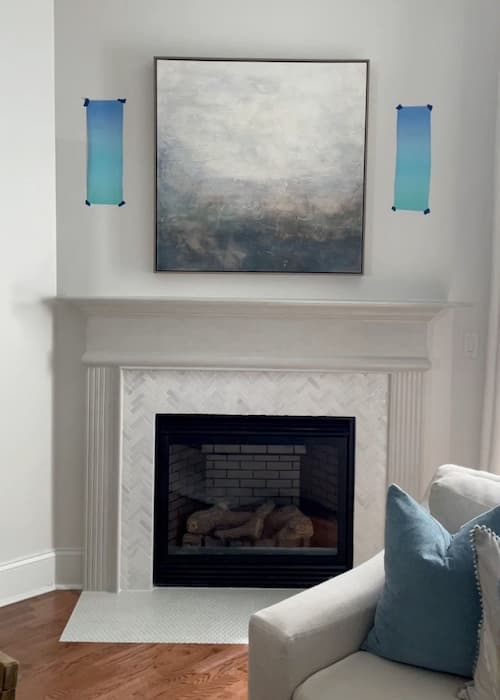
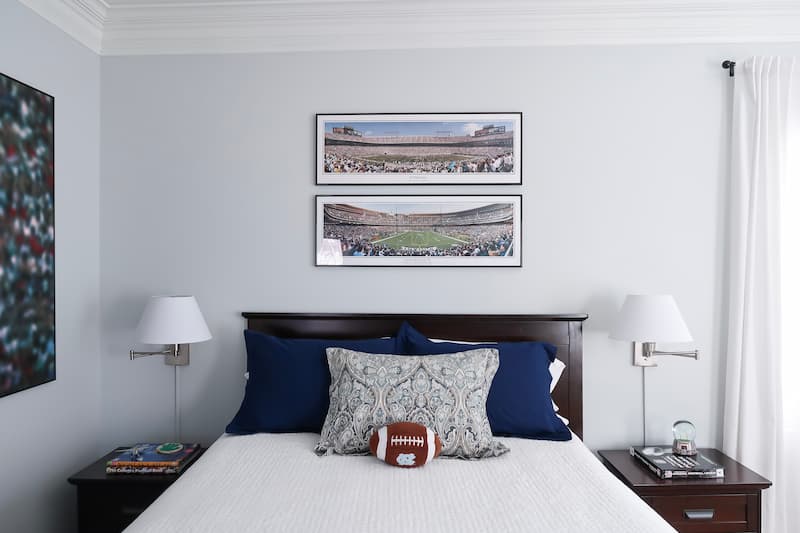
For the wall sconces on either side of the artwork above the fireplace, I moved ONE template until I liked the location.
Then took the measurements and hung the 2nd template. It’s important to stand back and look at the location from every angle.
Also, live with it for a day or so to make sure the hanging placement “feels right”.
Seeing the paper on the wall will help you get used to something hanging where nothing was previously.
In the example above, the sconces are hung 15.5 inches above the mantel and 6 inches out from the artwork.
if you are hanging sconces on either side of a window or artwork, this will give give you a starting point.
You have the perfect placement now don’t you? Now we are going to move into how to hang the actual light fixture.
How to Hang a Wall Sconce or Wall Light
3 easy steps to hanging a wall sconce or wall light. This tutorial uses a plug-in light, but can be used to install a hardwired light as well.
Materials
- Wrapping paper template for placement on wall, hung with painter's tape.
Tools
- Screw Type Anchors
- Pencil
- Hammer
- Level
- Tape Measure
- Small drill bit
- Power drill with a Philips Head attachment or Philips Head screw driver
Instructions
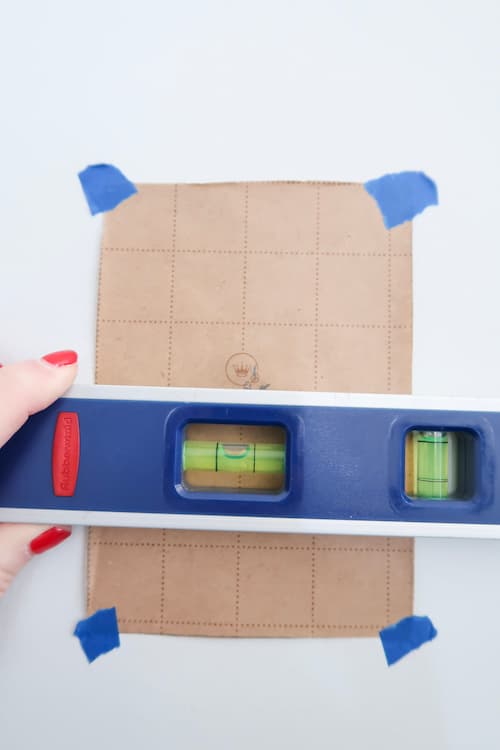
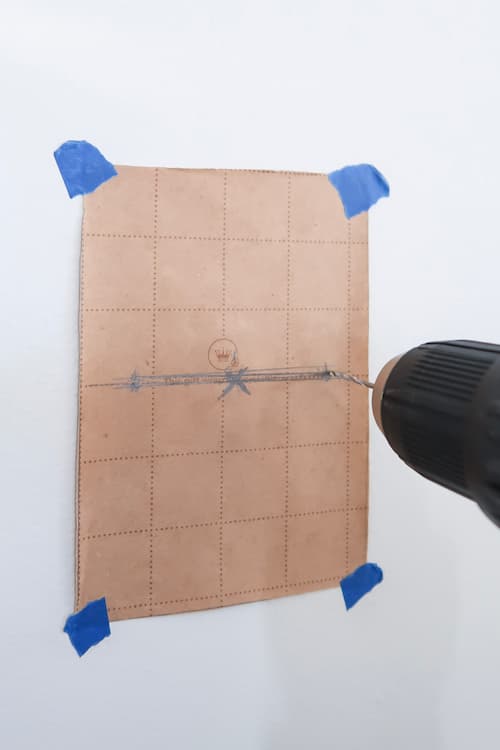
- Using a pencil, mark the location of the mounting plate onto your placement template. Make sure it is oriented to how the light fixture will be attached (vertical or horizontal). Mark the two drill holes for the mounting plate.

- Make sure the drill holes are level (horizontal mount) or plumb (vertical mount). Draw a line between the drill holes.
- If mounting on drywall, drill pilot holes for each screw location with a small drill bit. If you hit a stud (wood), then no anchor is needed. If it goes clean into the wall you need an anchor.

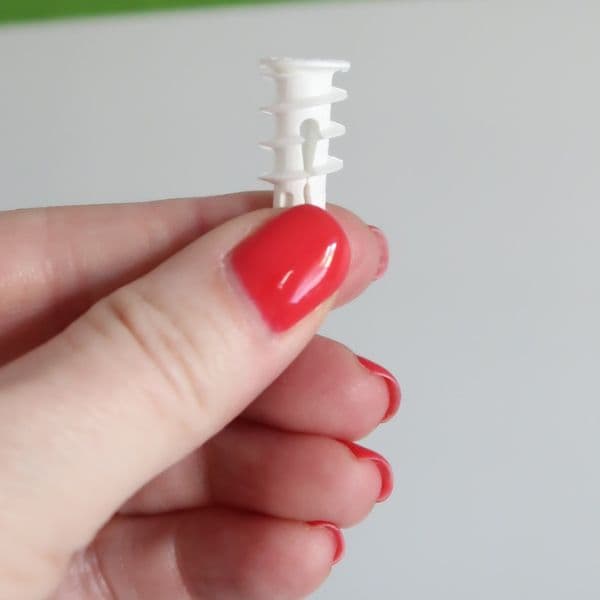
- Use a hammer and tap in screw anchors where required. Tap in flush with the screw threads.
- Switch to a Philips head screw driver or drill attachment and screw in flush to the wall. You will hear a little pop as the anchor opens. Remove paper.
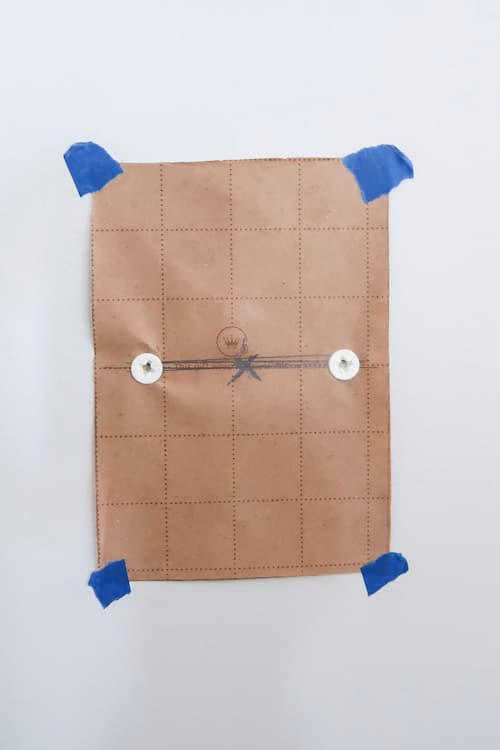
- Screw the mounting plate into the wall or anchors. If you have a hardwired wall sconce, attach the wiring per the manufacturer's instruction.
- Attach the fixture to the wall plate.
- If needed, repeat for a second wall sconce using the same process.


Notes
- Making sure you have the location correct for your light fixture using a pre-made wrapping paper template is key to your success.
- Just trace the fixture or draw using the measurements it on wrapping paper.
- Cutout and attach to the wall with painter's tape and move until you are happy with the placement.
How-to Install a Paintable Cord Cover
Like how nice the cord cover looks and how it matches the wall? I have a great post teaching you all about it!
Now you are the master of hanging just about anything! I hope you found the tutorials helpful.

Let me help you (for free)
- In 5 minutes, you’ll know how to avoid 4 common mistakes
- It’s not just about the color (I’ll show you why)
- How-to test paint colors the right way
Tags: non hardwired wall sconces, how to install sconces without electricity, non hardwired sconces, non hardwired wall sconce, wall lamps with cords, best wall sconces, accent lighting, ambient lighting, white fabric shade, interior designer
Appreciate the advice, but this method isn’t “damage free.” Will return for reference in the future when I’m ready to put holes in my walls. Thank you!
Hi Tracey, this is the most helpful information I’ve found on hanging bedside sconces- thank you so much! I’m hanging some on either side of my king size bed and I think I want to bring them in closer to the bed rather than centered over the nightstand. I think it will help fill in some of that massive real estate over the headboard. Creating and using a template is genius! Cutting out paper right now!
So glad this helps you!!
You (and so many other folks I googled) said the basic idea was a sconce should be 60 to 66 inches from the floor. But no one has said which part of the sconce to measure from. Is it 60 to 66 inches from the base of the sconce, or the top of the shade or the bulb (light source).
6 to 9 inches from art work, but is that from the base of the sconce or the widest part of the shade or the narrowest part of the shade.
Hi, Margaret! The point I make at the very start of this tutorial is the actual measurement guides are not helpful. It’s better instead to create a template to hang on the wall and SEE how it looks vs taking a straight measurement based on typical hanging specs. So I’d follow the tutorial as I’ve outlined it and create a template. It’s usually from the very bottom of the fixture and the widest point of the fixture (usually the shade).
These are great tips and I really loved all the sconce suggestions you added. In fact….I think I found the perfect one for my bedroom! Thanks!
OH my gosh, I’m so glad! It’s fun to “shop” for me and I found some really beautiful wall sconces. I don’t have any new places for them, so I like that I can help others!