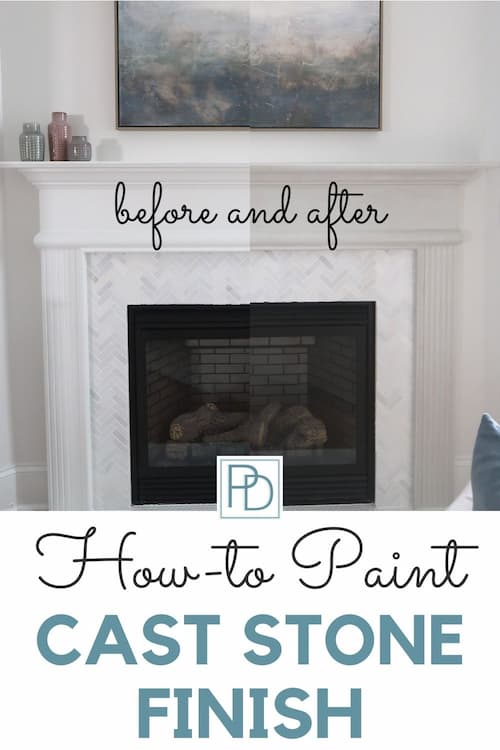
Paint a Fireplace to Look Like Cast Stone!
Do you have a basic white wood fireplace mantel, but want cast stone and can’t afford it?
For around $35 using only paint and glaze, you can create a faux cast stone finish on your fireplace mantel that will fool everyone!
It is an easy DIY project you can complete in a weekend to trade up the look of your fireplace.
Cast Stone Fireplace Finish Inspiration
If you’ve priced installing a cast stone fireplace, you likely got serious sticker shock.
For a simple cast stone fireplace mantel and surround, they run in the thousands of dollars.
If that isn’t in your budget, paint sure it!
If you are new to my blog, I am the queen of painting everything so of course I came up with a faux paint finish to mimic cast stone 🙂
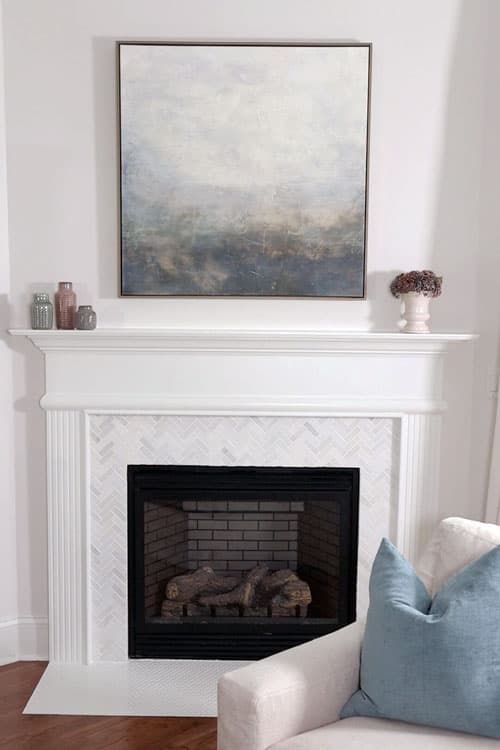
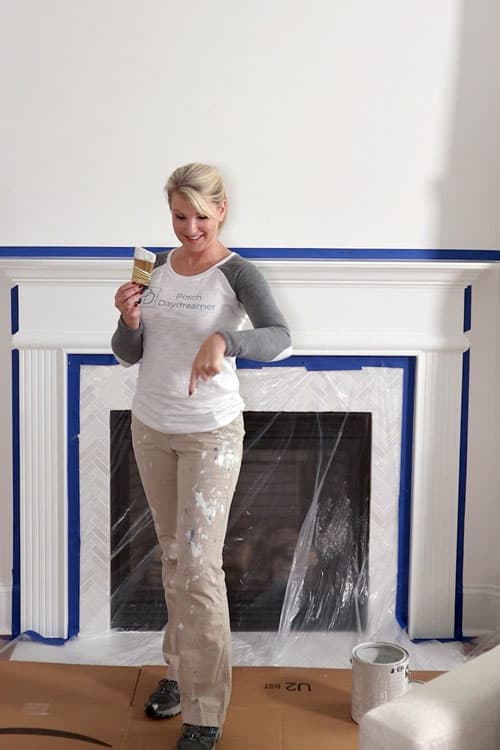
To show you where I started, here is the family room fireplace mantel and surround before the paint makeover.

A year or so ago I tiled over the marble surround and hearth. (Tutorial How-to Tile Over a Marble Fireplace Surround)
Unfortunately after repainting the family room walls to brighten up the room, the fireplace and surround felt too white and stark.
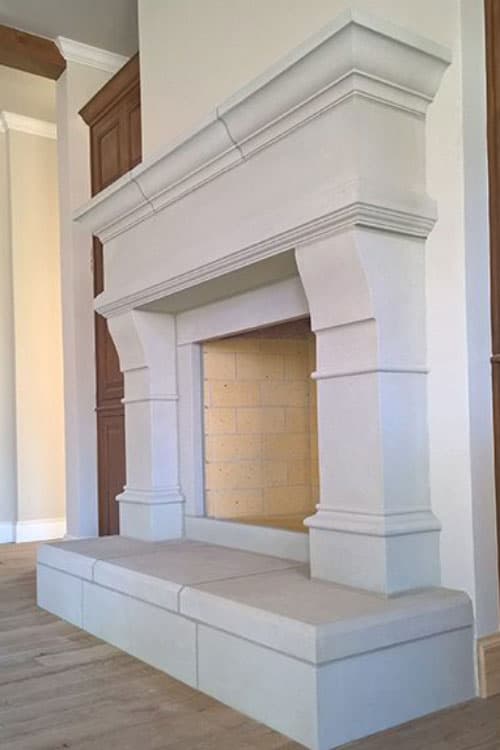
I craved more depth and character and went in search of an inspiration cast stone fireplace.
Cast stone comes in a variety of colors, from white to gray to creams and browns.
My goal was to find a look that was a warm gray or greige.
Contains hand selected products, with affiliate marketing links where I may earn a small commission if a purchase is made. {full disclosure here}
The example finish I found is this beautiful giant cast stone fireplace.
Off I went to find the right mix of paint color and glaze to mimic this look in a faux finish.
The perfect combination to create a cast stone painted finish:
This is a VERY affordable update only requiring a quart of paint and pint of glaze for a total cost of about $35 plus supplies.
Much cheaper than the labor and cost of a cast stone mantel that runs in the thousands!
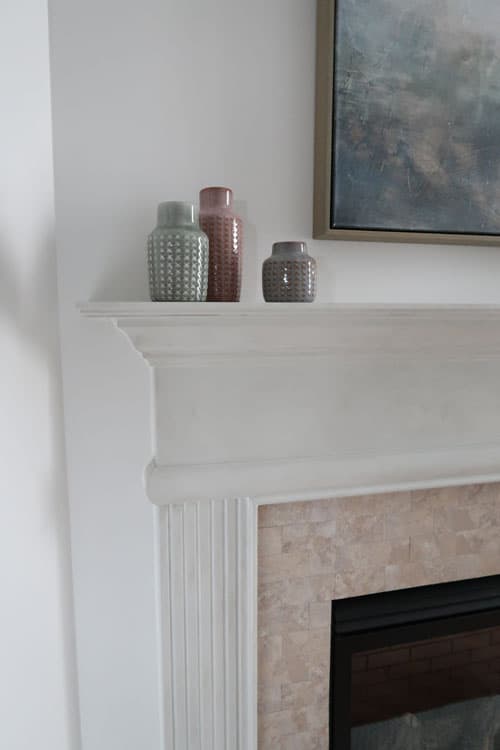
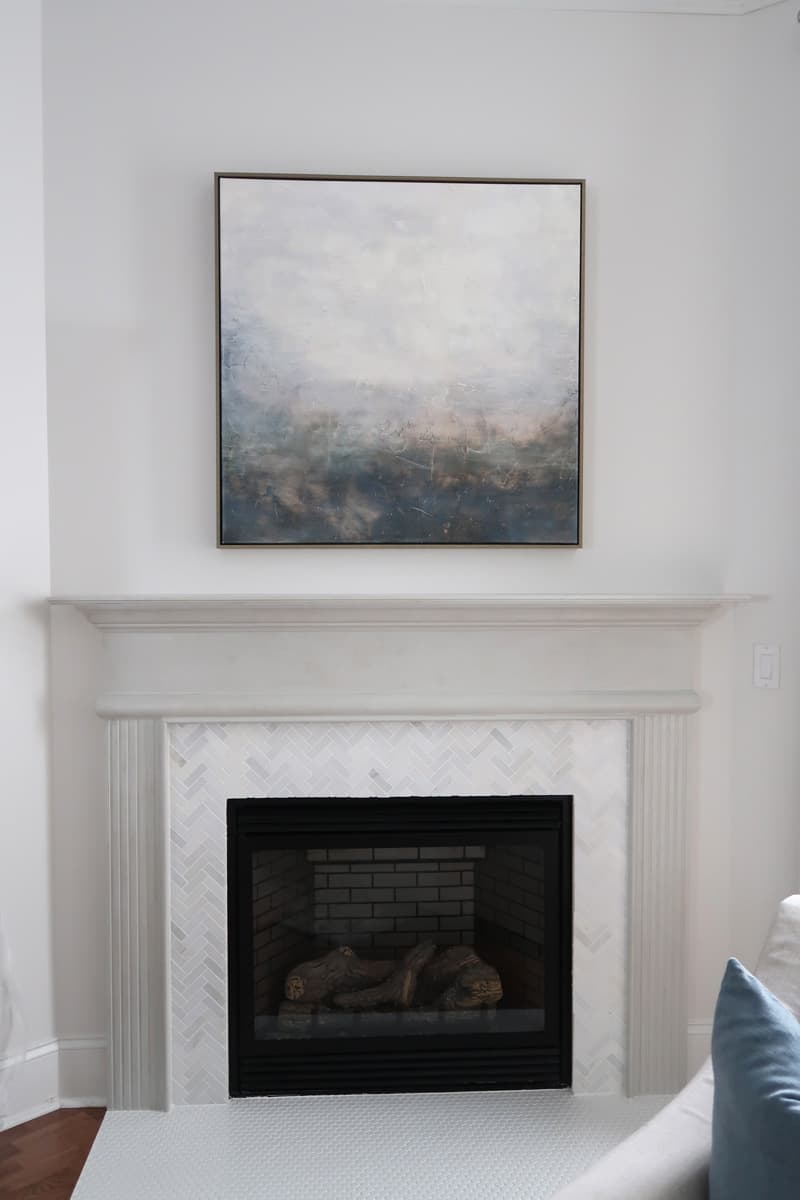
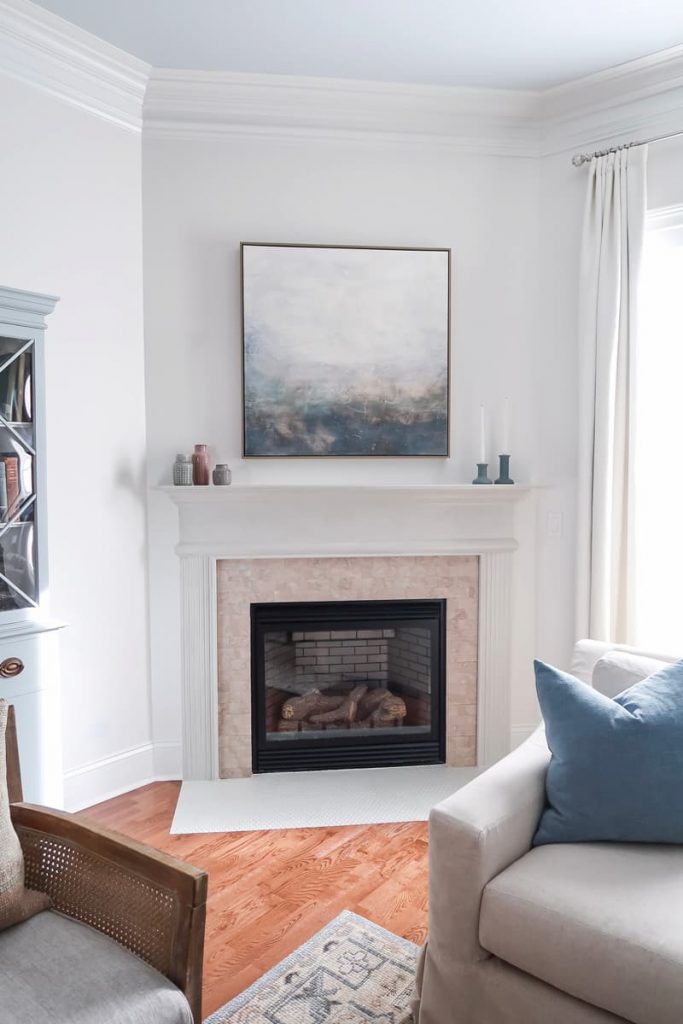
Here is a close-up of the final faux cast stone finish on my fireplace mantel.
Ready to learn how to create this beautiful cast stone finish?
It looks like the inspiration fireplace doesn’t it?
Pin It for Later!
Heads up that this tutorial is for a PAINTED WOOD MANTEL. Any other surface is not included in these instructions.
Faux Cast Stone Paint Finish for Fireplace Mantel
Paint a Fireplace Mantel to Look Like Cast Stone!

Use paint and glaze to create a cast stone look for your fireplace mantel.
Materials
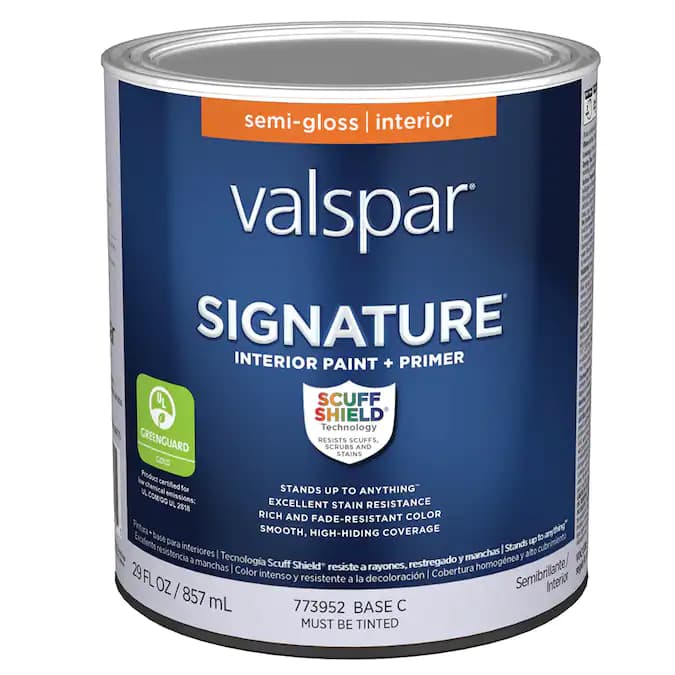
- Semi-Gloss Paint in Sherwin Williams Repose Gray
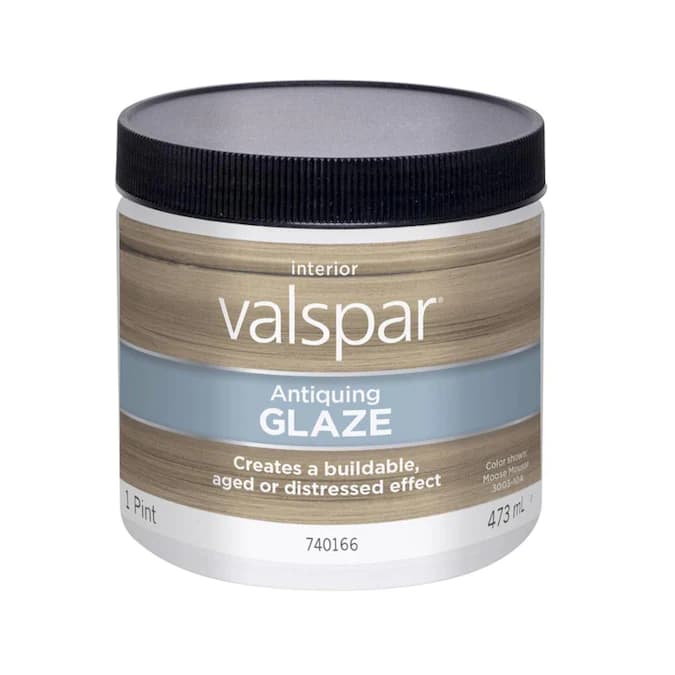
- Valspar Antiquing Glaze
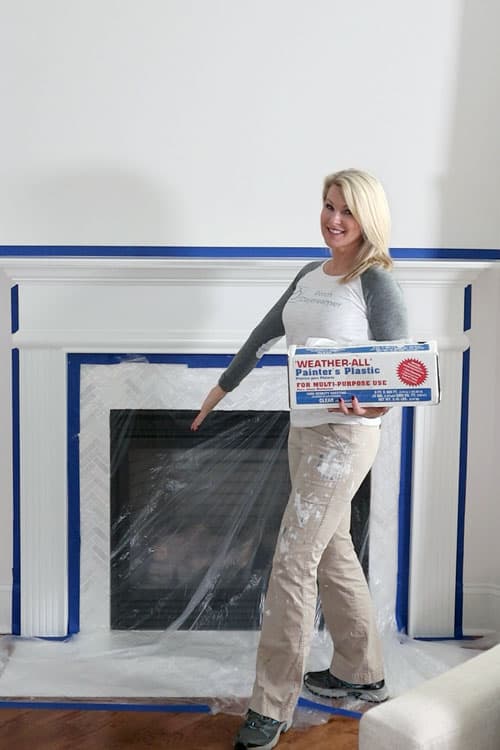
- Painter's Plastic
- Painter's Tape
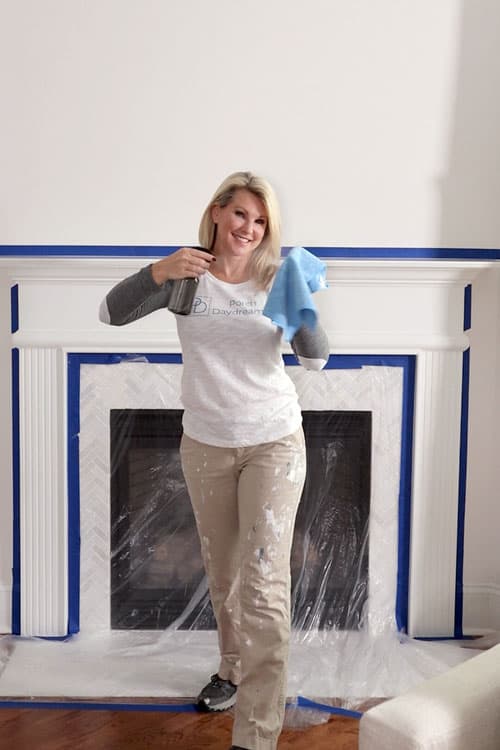
- Deglosser degreaser paint cleaner spray
- Gloves
Tools
- Nylon/Polyester Paint Brush
- Craft Paint Brush
- Microfiber Rag
- Kitchen Sponge
Instructions
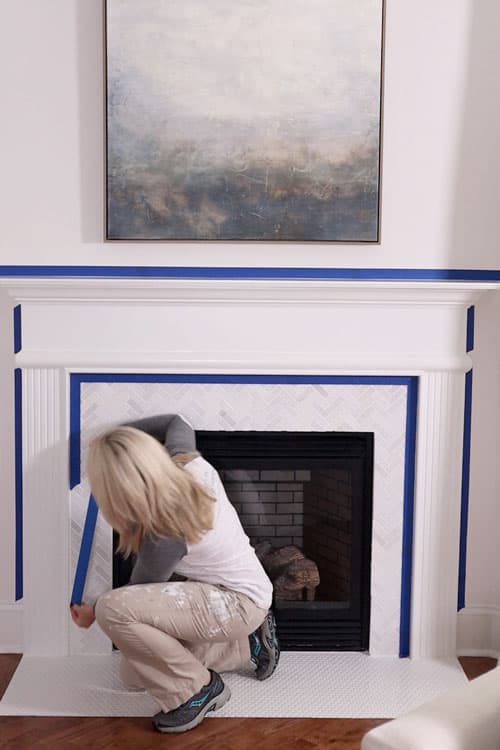
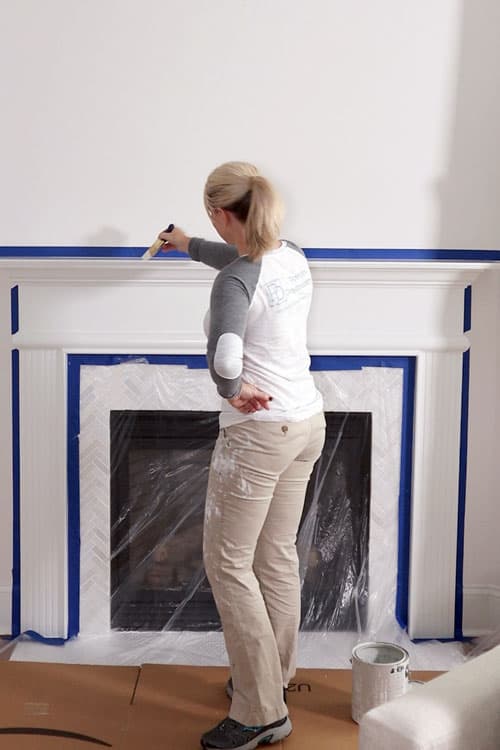
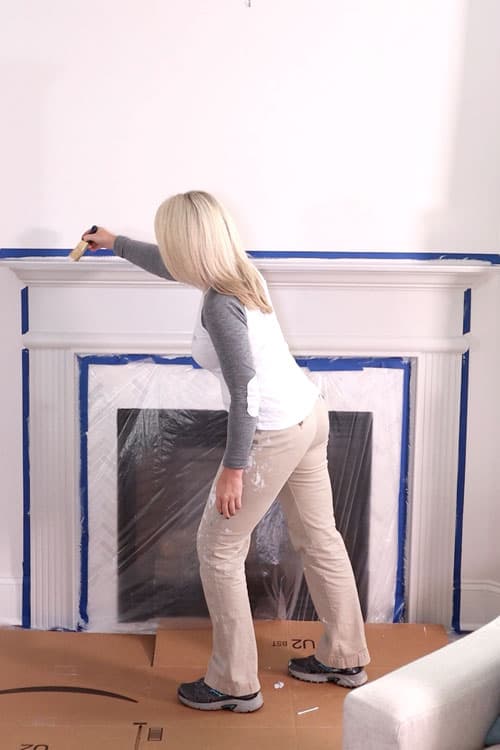
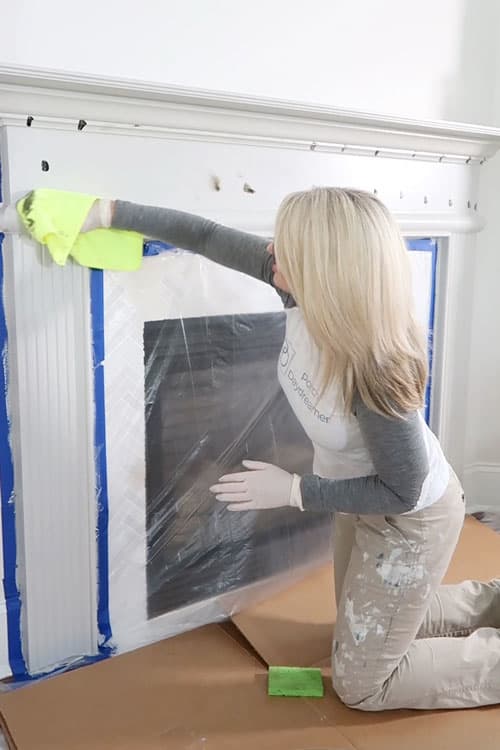
- Begin by using painter's tape, taping all areas that surround the mantel that won't be painted. Make sure to PRESS down the tape really well to seal.

- Using painter's plastic, cover fireplace surround, glass and hearth.
- Spray a degreaser deglosser paint cleaner onto a microfiber rag and wipe down all surfaces to be painted.
- Using a brush, paint first coat of Repose Gray paint. Let dry a minimum of 4 hours.
- Apply 2nd coat of Repose Gray making sure all of the previous paint color is covered, but don't over apply! If a 3rd coat is needed you are better off applying 3 thin coats letting them dry thoroughly in between.
- LET PAINT DRY OVERNIGHT OR LONGER BEFORE APPLYING ANTIQUING GLAZE.
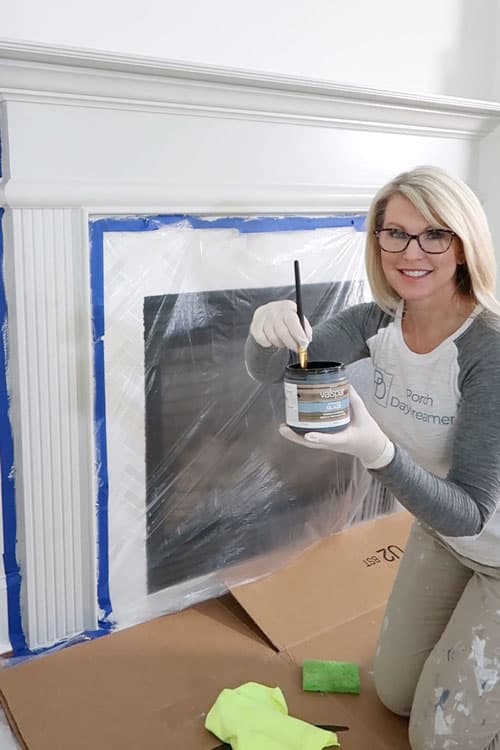
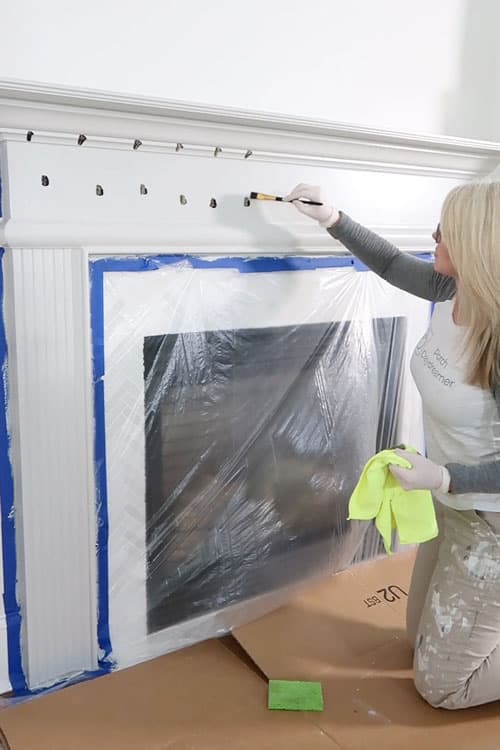
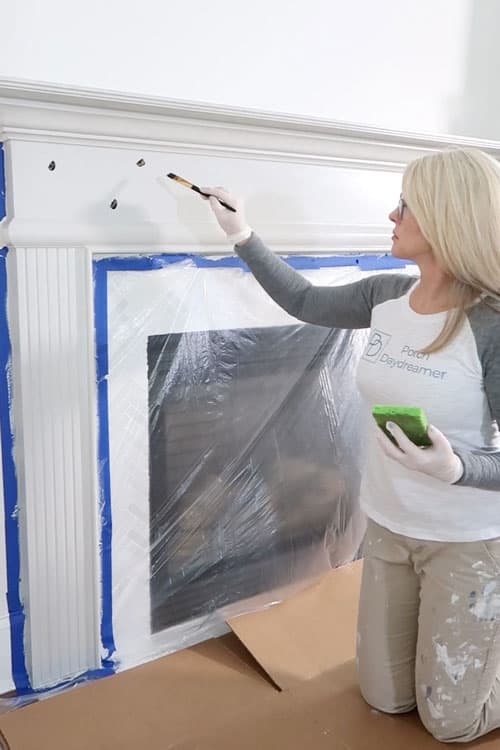
- Using a craft brush, apply dots randomly of antiquing glaze. work in small sections so the glaze doesn't dry before working it into the surface in the next step.
- With a clean and dry microfiber cloth, work the antiquing glaze into the surface of the paint making sure there are no specific dark areas left. Repeat applying glaze and working it in until all painted surfaces are covered.
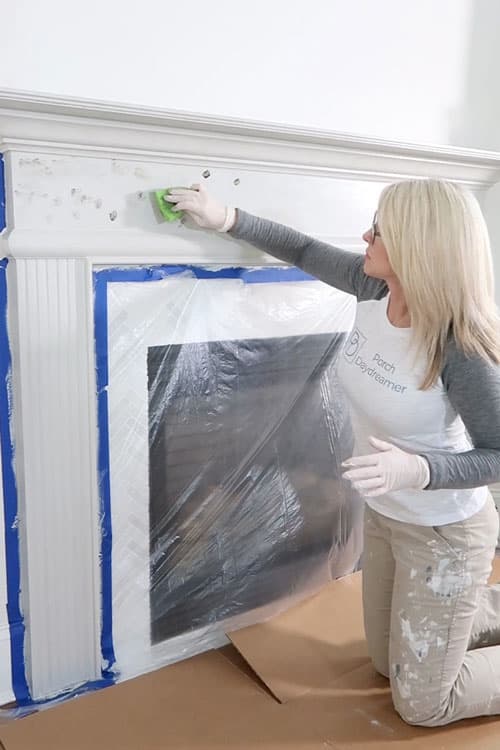
- Using the same dot method in small areas, apply more antiquing glaze.
- To create texture, using a DAMP kitchen sponge, tap in the antiquing glaze working in small sections. You can use a variety of patting and swiping motions to blend in the glaze. Wash out sponge after applying large sections.
- When all areas are covered to your desired effect, remove tape and plastic. LET DRY OVERNIGHT before placing items on the mantel or using the fireplace.

Notes
- Make sure to protect the floor with cardboard. It is also a great surface for your paint can and brush, so no spills happen!
- Applying the paint with a brush will leave behind some brush marks. This is great to add depth and character as the antiquing glass is applied.
- It's helpful to wear gloves as you apply the glaze with the cloth and sponge to protect your hands!
Recommended Products
As an Amazon Associate and member of other affiliate programs, I earn from qualifying purchases.


Here is the final look and you can see that the tile surround was updated too!
The white marble just didn’t give me the look I wanted, so I sourced a new peel and stick tile.
Shop my family room here!
Something you may have also noticed is the tile on the floor looks the same as the mantel.
YES, you can paint the tile too!
All you need to do is clean it the same way as you did the mantel, and apply two coats of Valspar Bonding Primer before painting.
I hope you found this tutorial helpful and are ready to makeover your fireplace mantel!
Here are some other faux paint finishes you may enjoy!
- Pottery Barn Driftwood Finish
- Pottery Barn Seadrift Finish
- Outdoor Driftwood Finish
- All About Antiquing Glazes
Please sign up for my weekly email newsletter, so you never miss a post!
There is a little pop-up in this post or follow me on Facebook or Instagram where I let you know new posts are live!
Until next time…
PORCH DAYDREAMER
Tracey
Tracey,
That really made a difference by toning it down. Really looks great.
Thanks so much Bill!