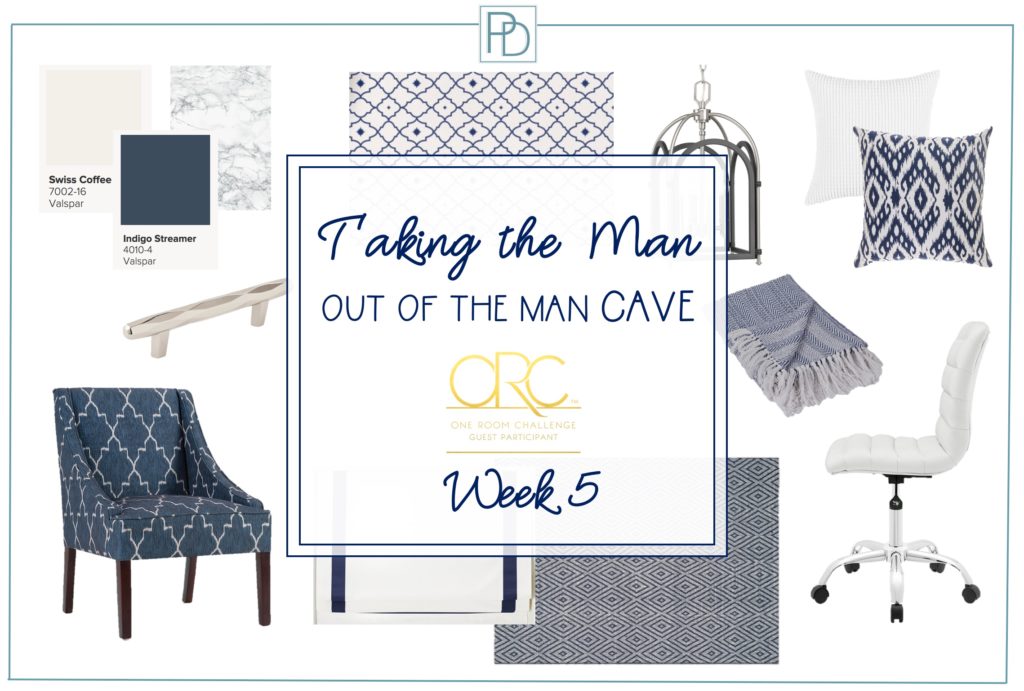
Taking the Man Out of the Man Cave: WK 5
Marble Contact Paper, Spray Paint and IKEA
If this is your first week visiting my One Room Challenge™ progress, welcome!
We are finished with week 5 and I’m feeling a little overwhelmed and tired. The final reveal will be November 16th!
The GREAT news this week is that the spray station is officially retired and I can park cars inside of the garage again! FINALLY 4 weeks later…
To follow along from the beginning, I’ll link the previous weeks here:
WEEK ONE | WEEK TWO | WEEK THREE | WEEK FOUR
Week 5 Focus: Marble Contact Paper, Spray Paint and IKEA Assembly
Do you have a counter that you want to update to marble, but can’t afford to spend the money? Me too!
When I moved into this house, the budget for the office area focused on built-in cabinets leaving no money for granite or marble counters.
Instead, the builder installed a veneered counter to match the cabinet stain. Here it is in mid-makeover and it HAD to be changed!
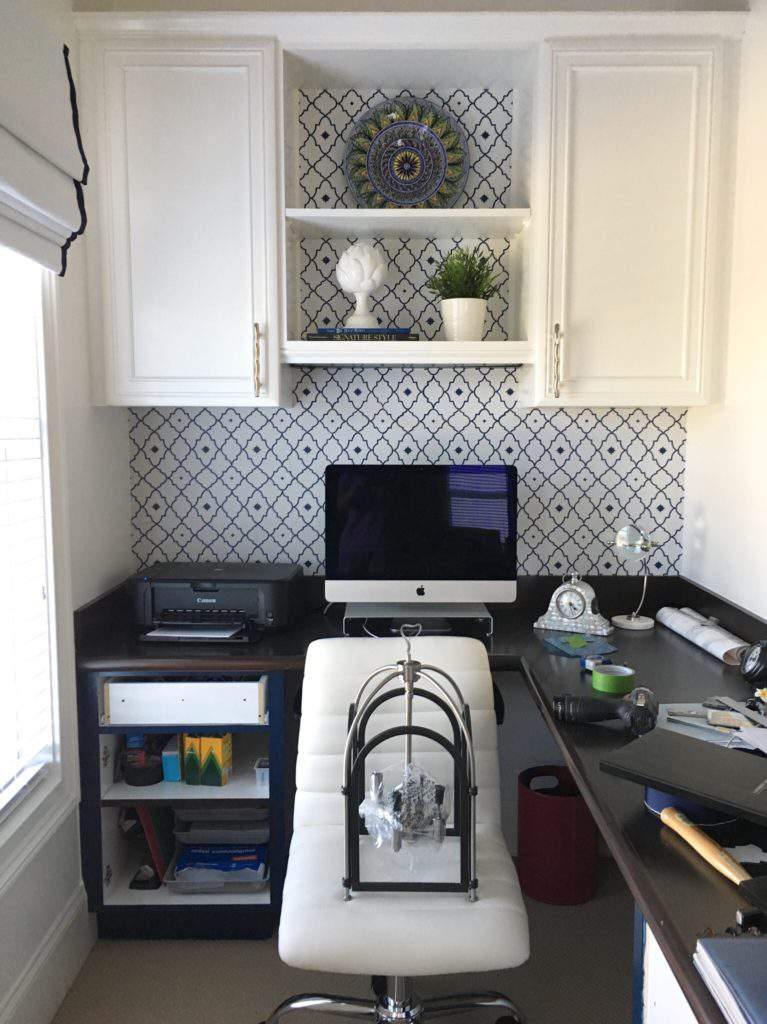
The office originally was brown, on brown, on brown.
After all these years, the budget still doesn’t allow for a counter update so I searched high and low for an affordable option and I LOVE the look of marble.
Luckily, others have ventured down the vinyl marble contact paper path prior to me trying it. By all accounts (I read COUNTLESS blogs) the vote was YES try it!
Here is the product I used (post contains some affiliate links):
After lots of measuring, I decided to order the wider width they offer to make installation as easy as possible. My counter is 22 inches deep and with the wrap around the edges I factored 2 more inches, which was perfect.
Installing Marble Contact Paper
If you are a complete and total perfectionist, this product is likely not for you because it will drive you crazy! If you are not detail oriented, then don’t install this product! Two dichotomies in one.
Yes, you need to be detail oriented as you measure, cut, and install. However, the final result will NOT be perfect or be real marble no matter how detailed you are with installation 🙂
If you are a perfectionist, this marble contact paper solution is not for you!
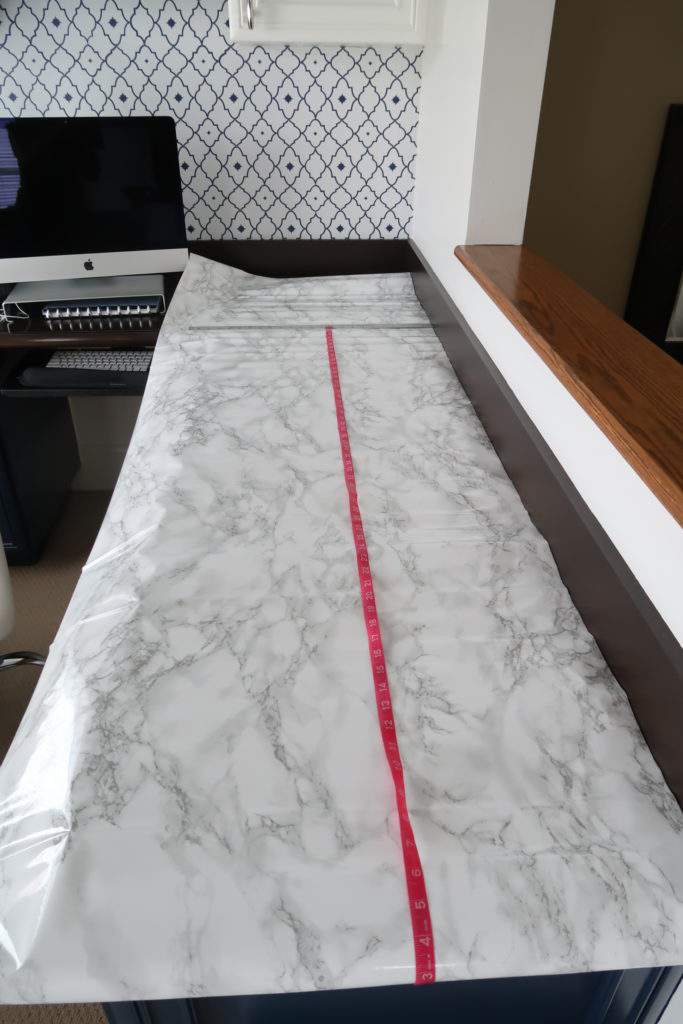
Since the marble contact paper is vinyl, it has a nice shine to it and it’s also flexible! So you can tug and pull on it to get it to fit properly. Plus I found that it pulled up and repositioned easily without losing adhesion.
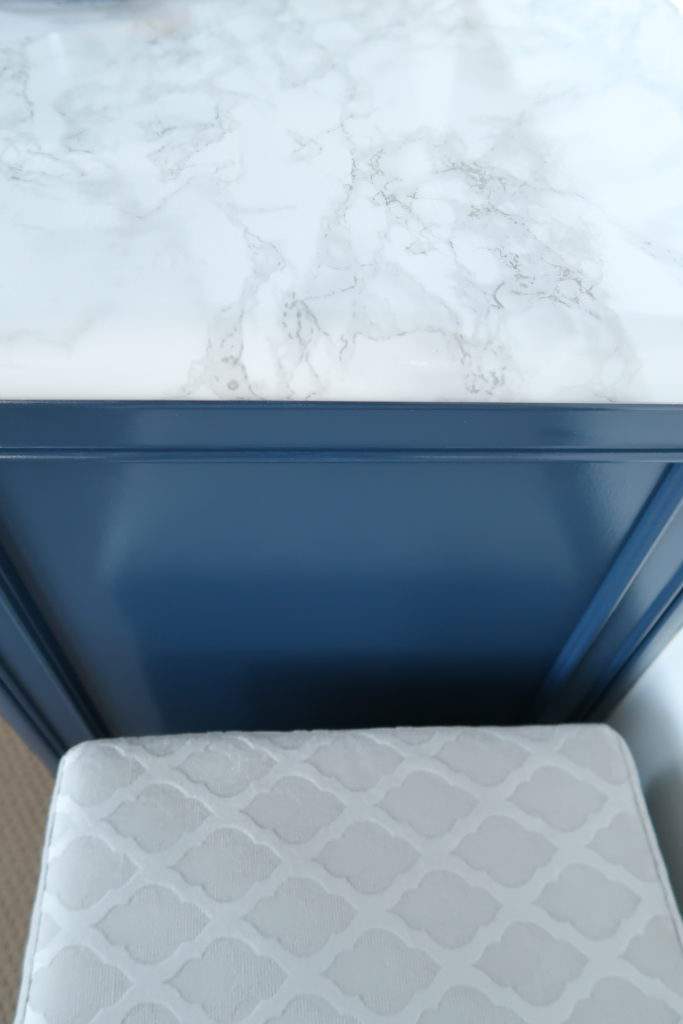
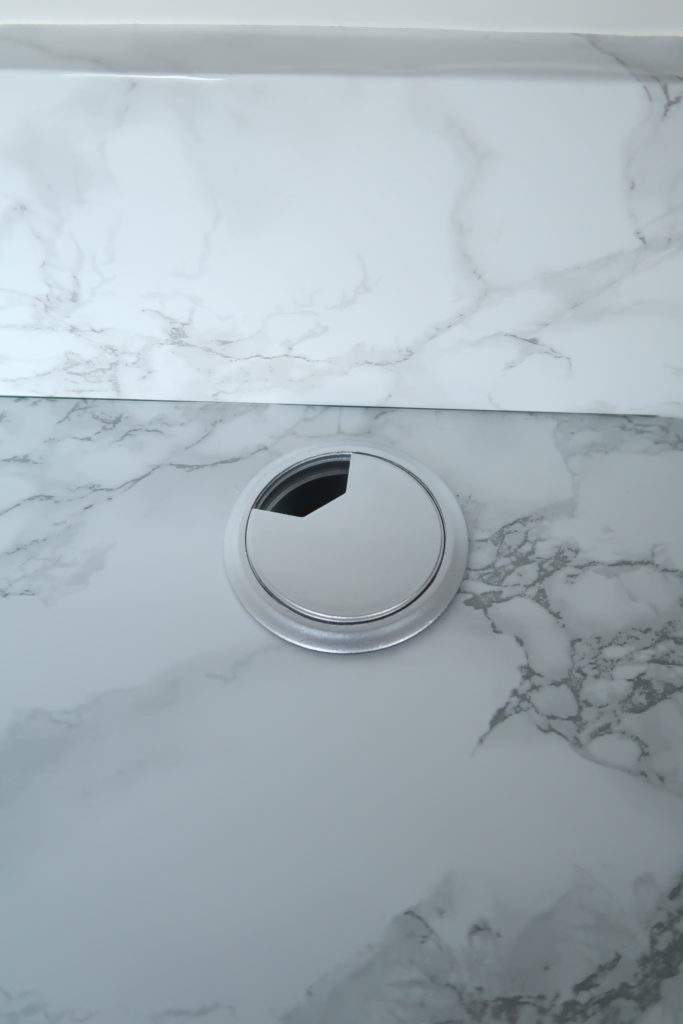
What I didn’t anticipate is that when I pulled up the contact paper to reposition it, my counter finish underneath would fail and come with it!
That’s where I ran into issues. When I pulled up the paper, little pieces of the current counter finish stuck to the adhesive backing!
That means little particles are now trapped under the marble contact paper.
One area of my desk counter now looks like it has pimples.
Yep. I’ve decided if I ordered a new roll and tried to fix it – it would just get worse. So I am living with the pimples 🙂 It’s kind of like a badge of honor that says I DID THIS and it is not perfect! I’m maturing as I get older.
At some point, I’ll devote a blog post to installation, but overall I am thrilled with the marble look of the contact paper and during the reveal you will see that the countertop is a game changer in the office space.
Here is a little sneak peak with the navy cabinet paint and bench.
Once installed, it was important that the cord covers matched too! So I grabbed some spray paint from another project and in just a few minutes the black covers are now silver and work perfectly with the counter and other accessories.

The spray paint I used was Krylon Metallic Silver, which is a bit deceiving because I thought it would be shiny but is more a Satin Nickel finish:
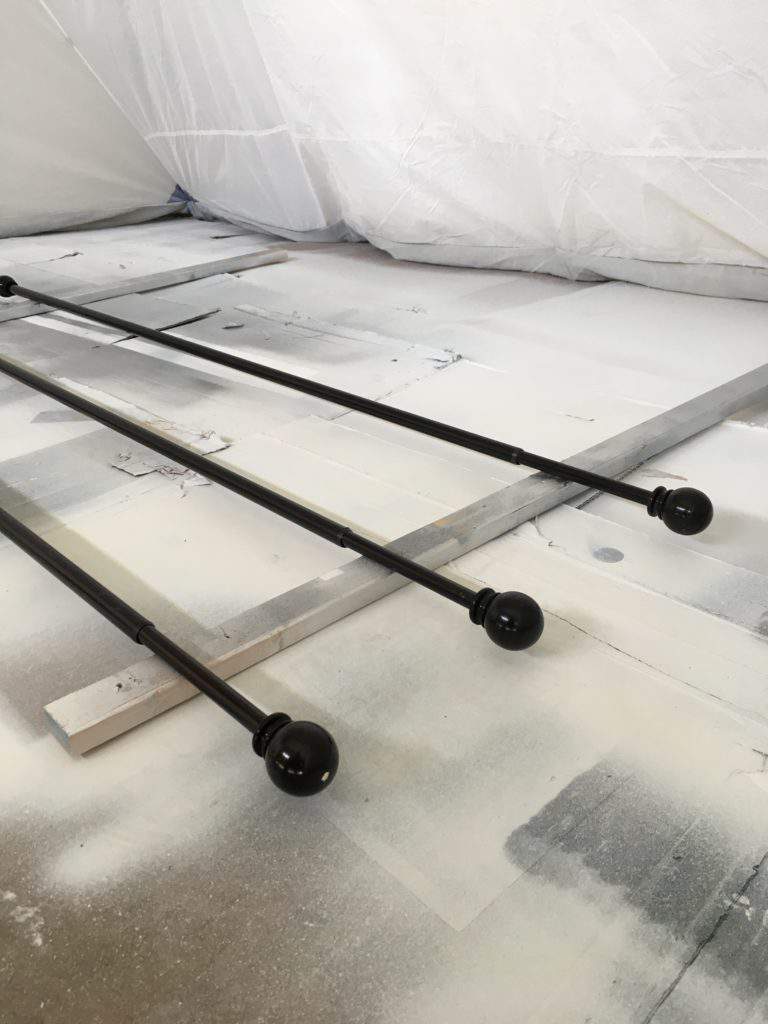
Painting Drapery Rods
To save money, I decided to spray paint the dark brown rods currently in place using the spray paint above. Plus it took installation of a new brackets out of the realm of my project, so I can install them into the same drill holes. Yay!
Here they were before:
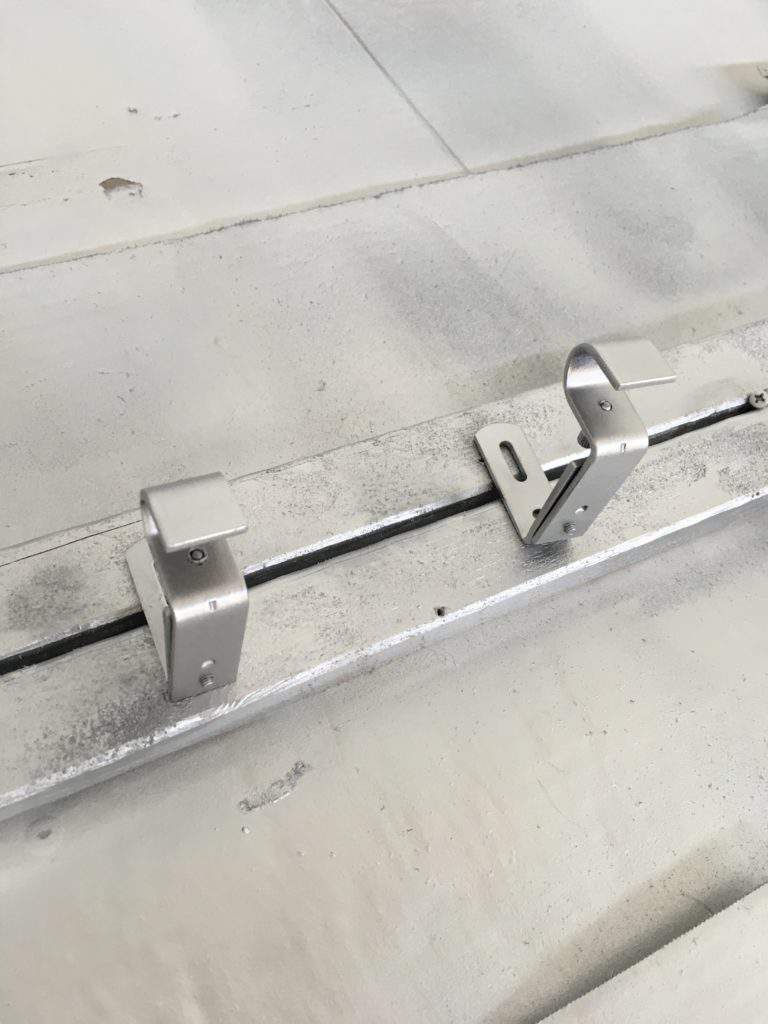
Here they are after the initial coat and remember to spray the brackets and screws too, so it all matches:
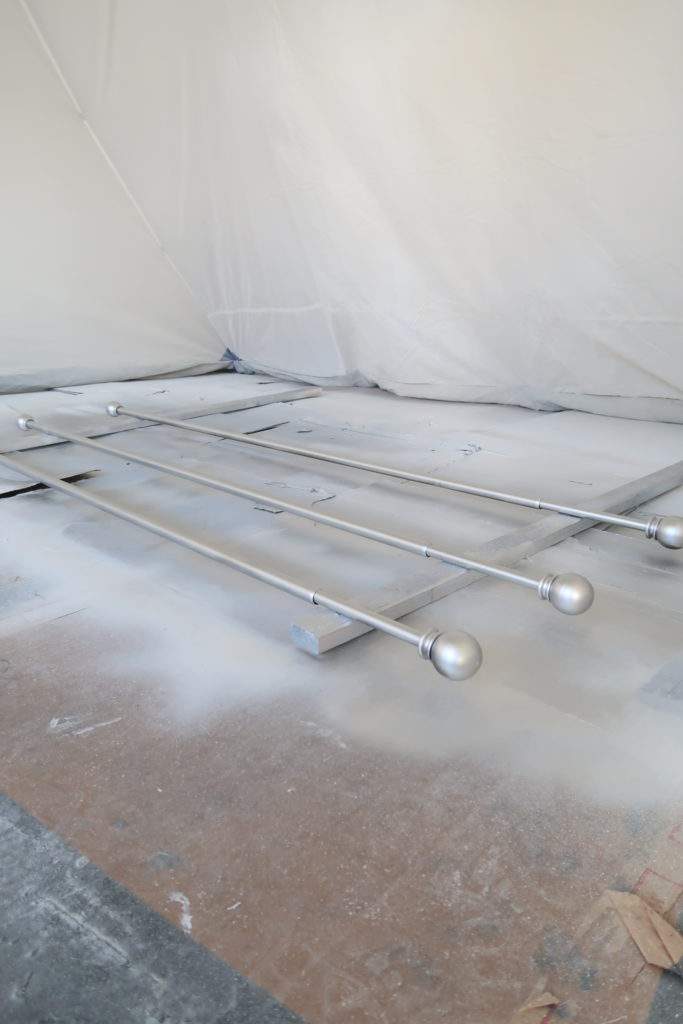
For $6 dollars, I updated 3 rods and brackets with spray paint! That was a big budget saver and takes more brown out of the room 🙂
IKEA Furniture Assembly
After seeing how beautiful the white cabinets looked in the office, I just couldn’t live with the current dark brown stained media set.
Painting more furniture was OFF the table, as I had no more painting passion left in me. Off to donation the Walmart furniture went that I lovingly assembled for my son 7 years ago.
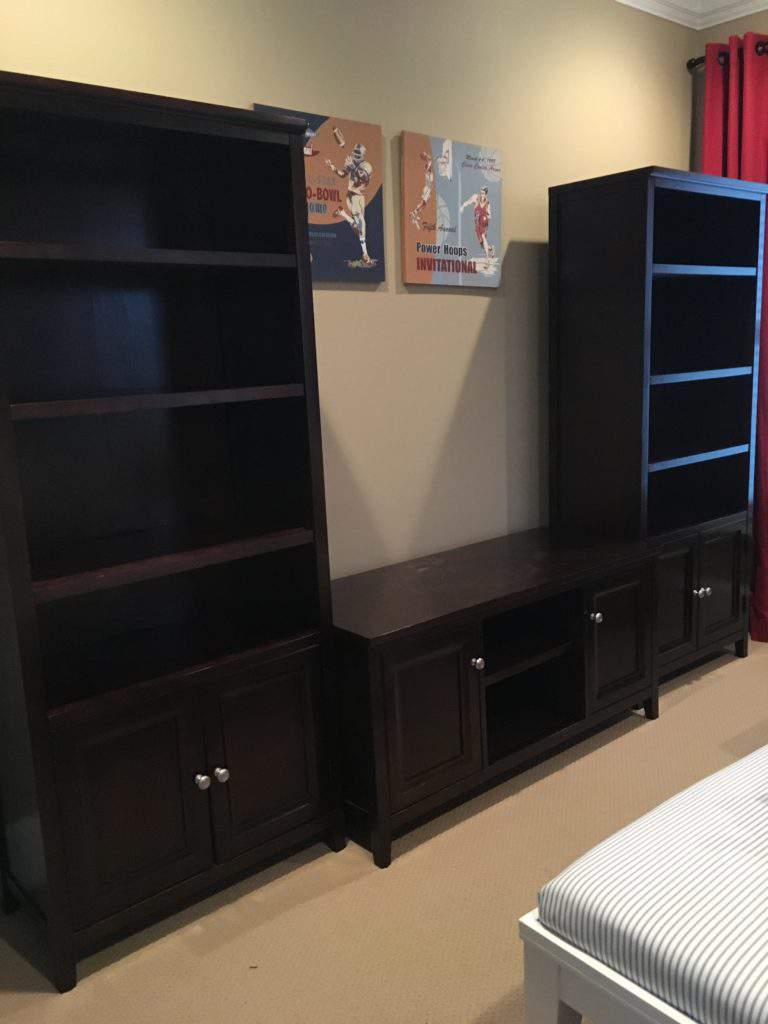
IKEA is where I found a budget friendly option to fill this wall, in white…

When you think of IKEA furniture assembly, is there a sinking feeling in your stomach?
Anticipating what was in front of me assembling 3 pieces of furniture – I felt sick with worry that it was going to be hard for me to handle alone.
Luckily, my friend and neighbor George offered to help with all of it, but me-being-me I ended up tackling the bookcase and cabinet myself.
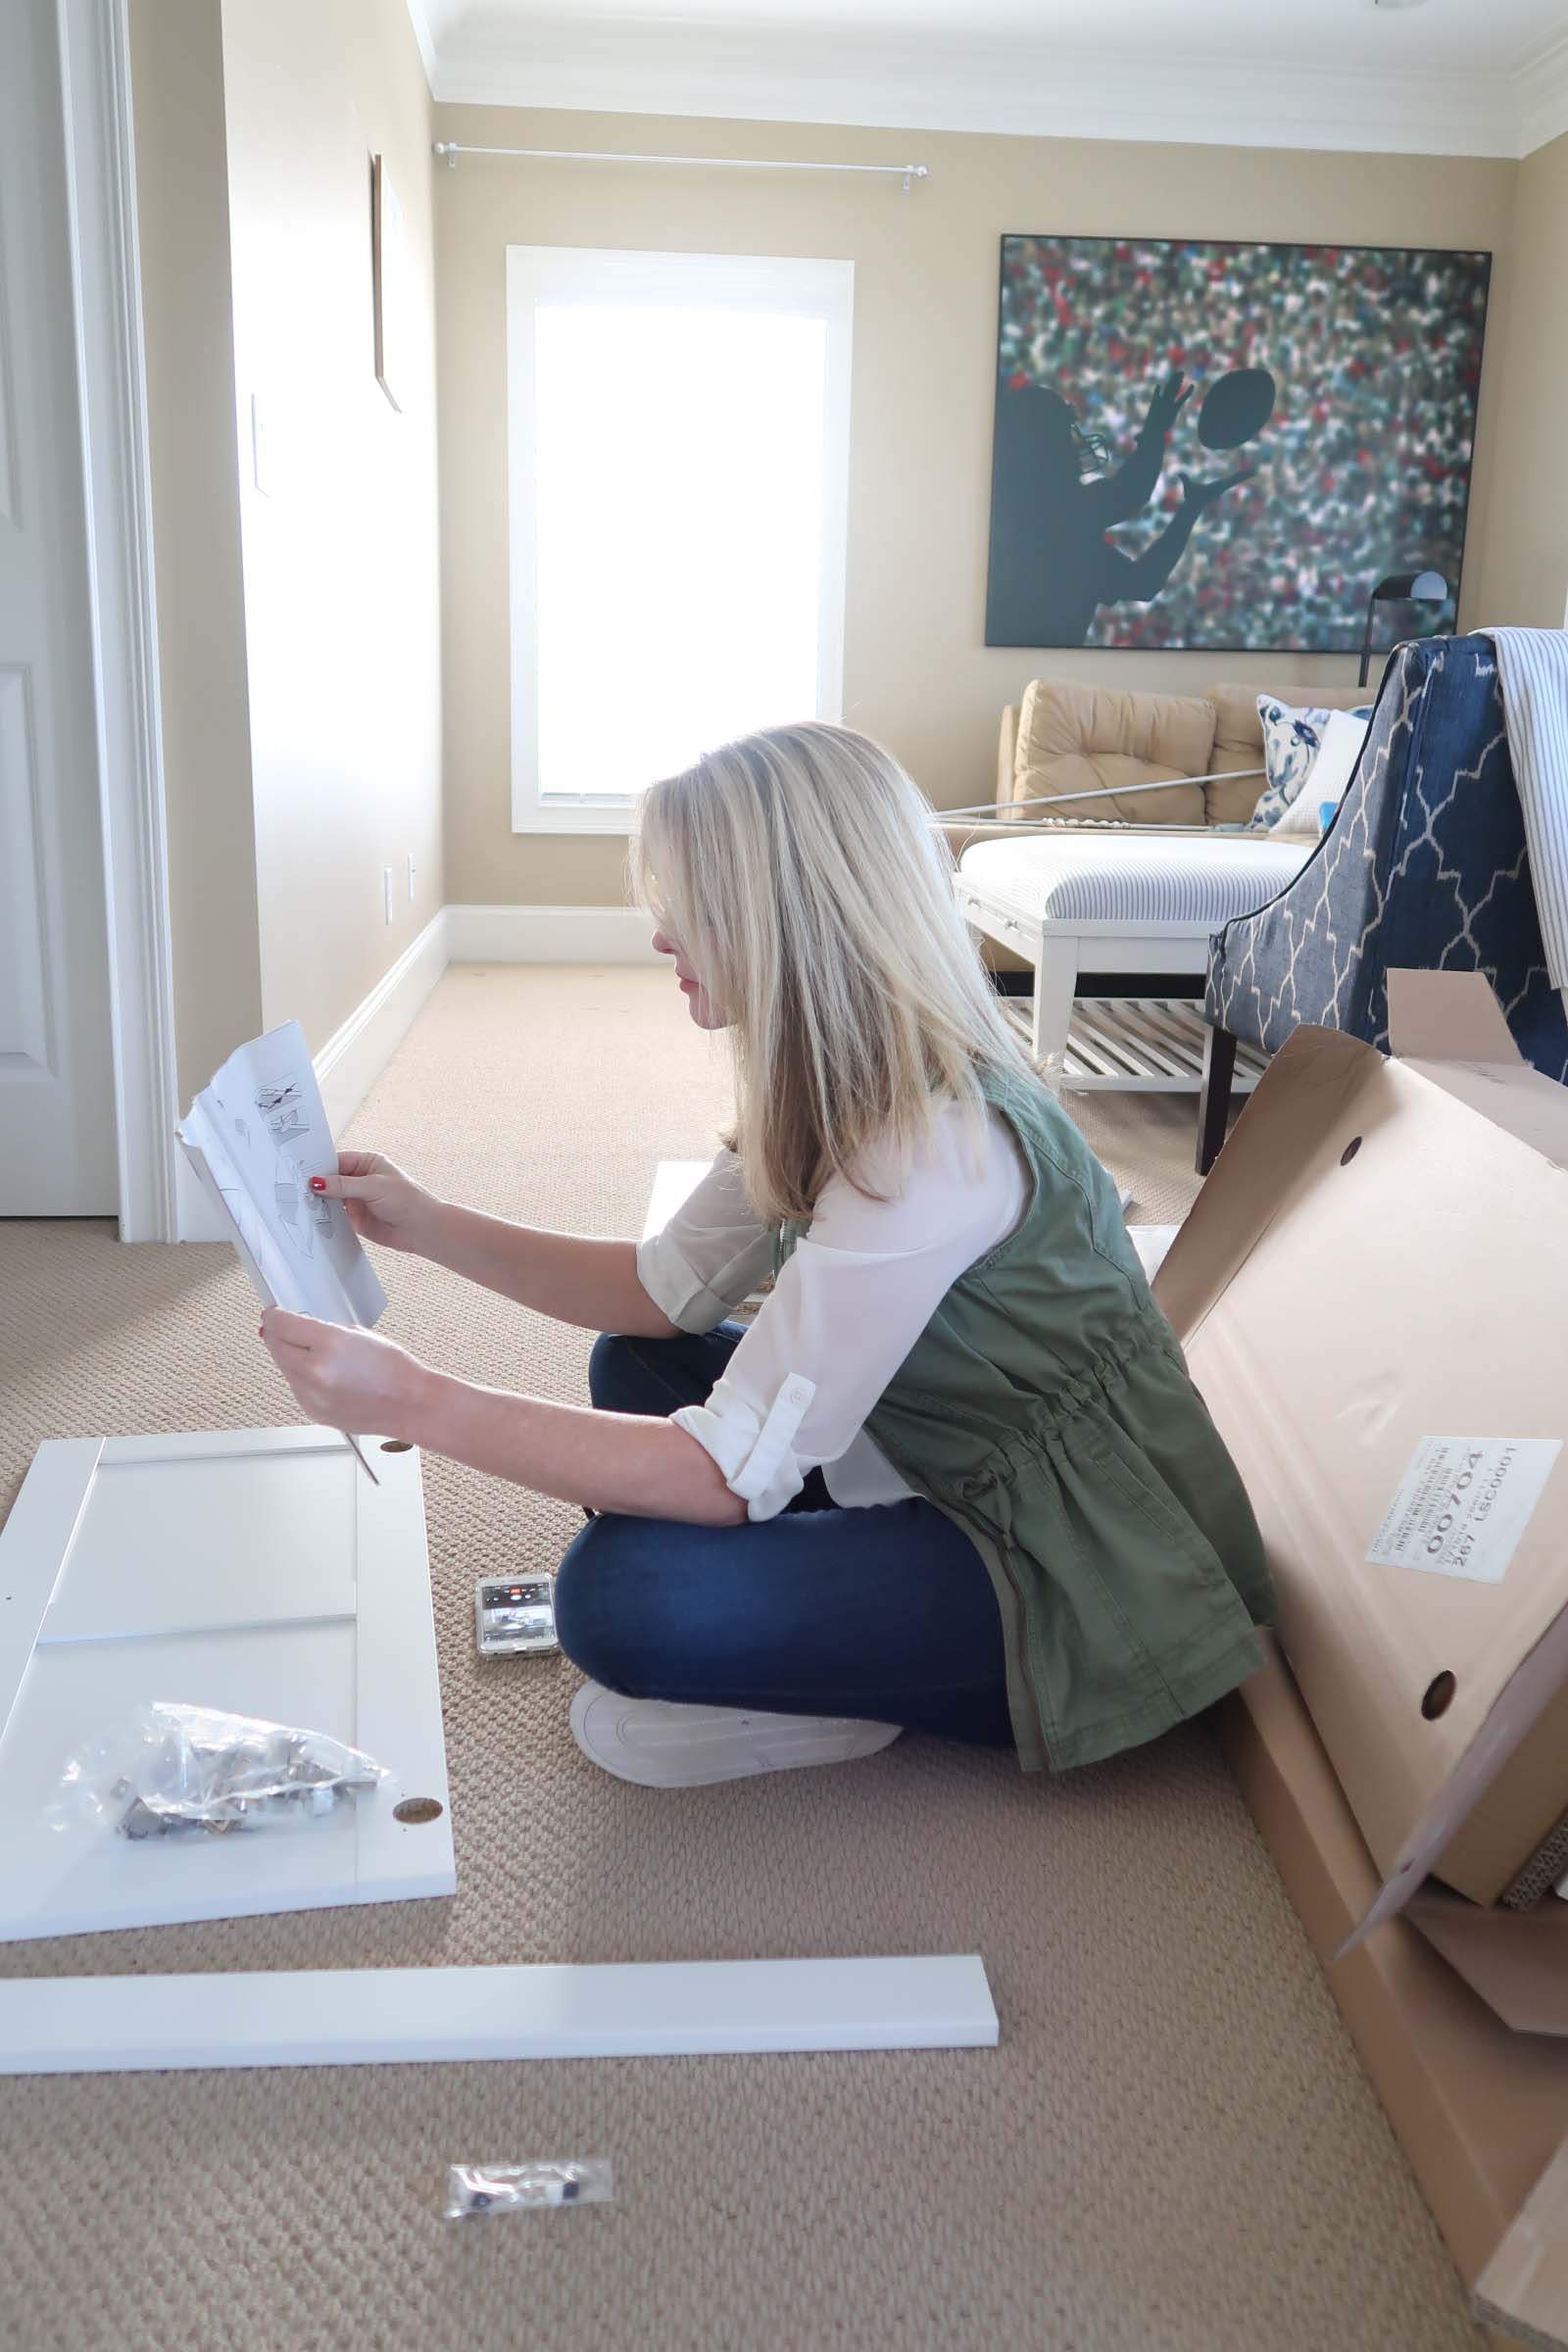
Guess what? It wasn’t that bad! I even timed myself on the first piece and was able to assemble it during my lunch hour – cool right?

My mind works a bit like an engineer’s, so I geeked out on learning the parts. It seemed more like a puzzle versus a job.
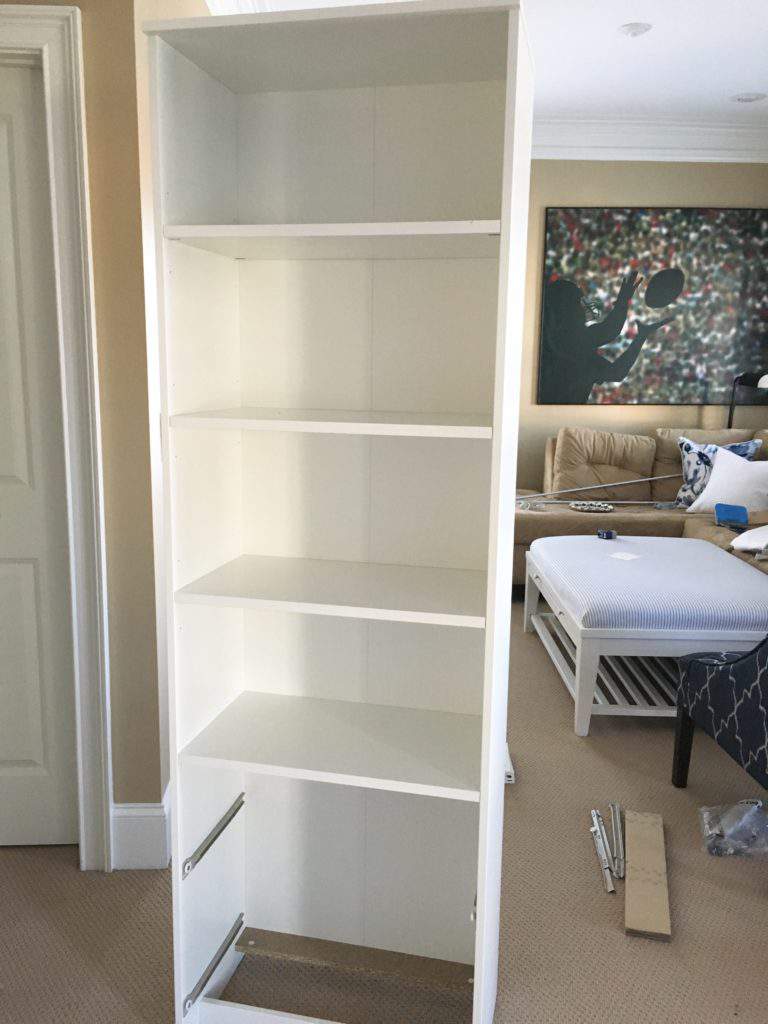
I was grateful for George’s help on the last piece because of the weight of the furniture. My body was so sore from pushing and pulling the pieces.
What he DOESN’T want me to mention is that that it took three tries to assemble the media stand, but who’s counting 😉 My advice was to leave it after discovering he used the wrong cam locks in some locations, but he wanted perfection!
To help, I tackled the drawer assembly while he fussed with that! Then we celebrated with Moscow Mules – my new obsession 🙂
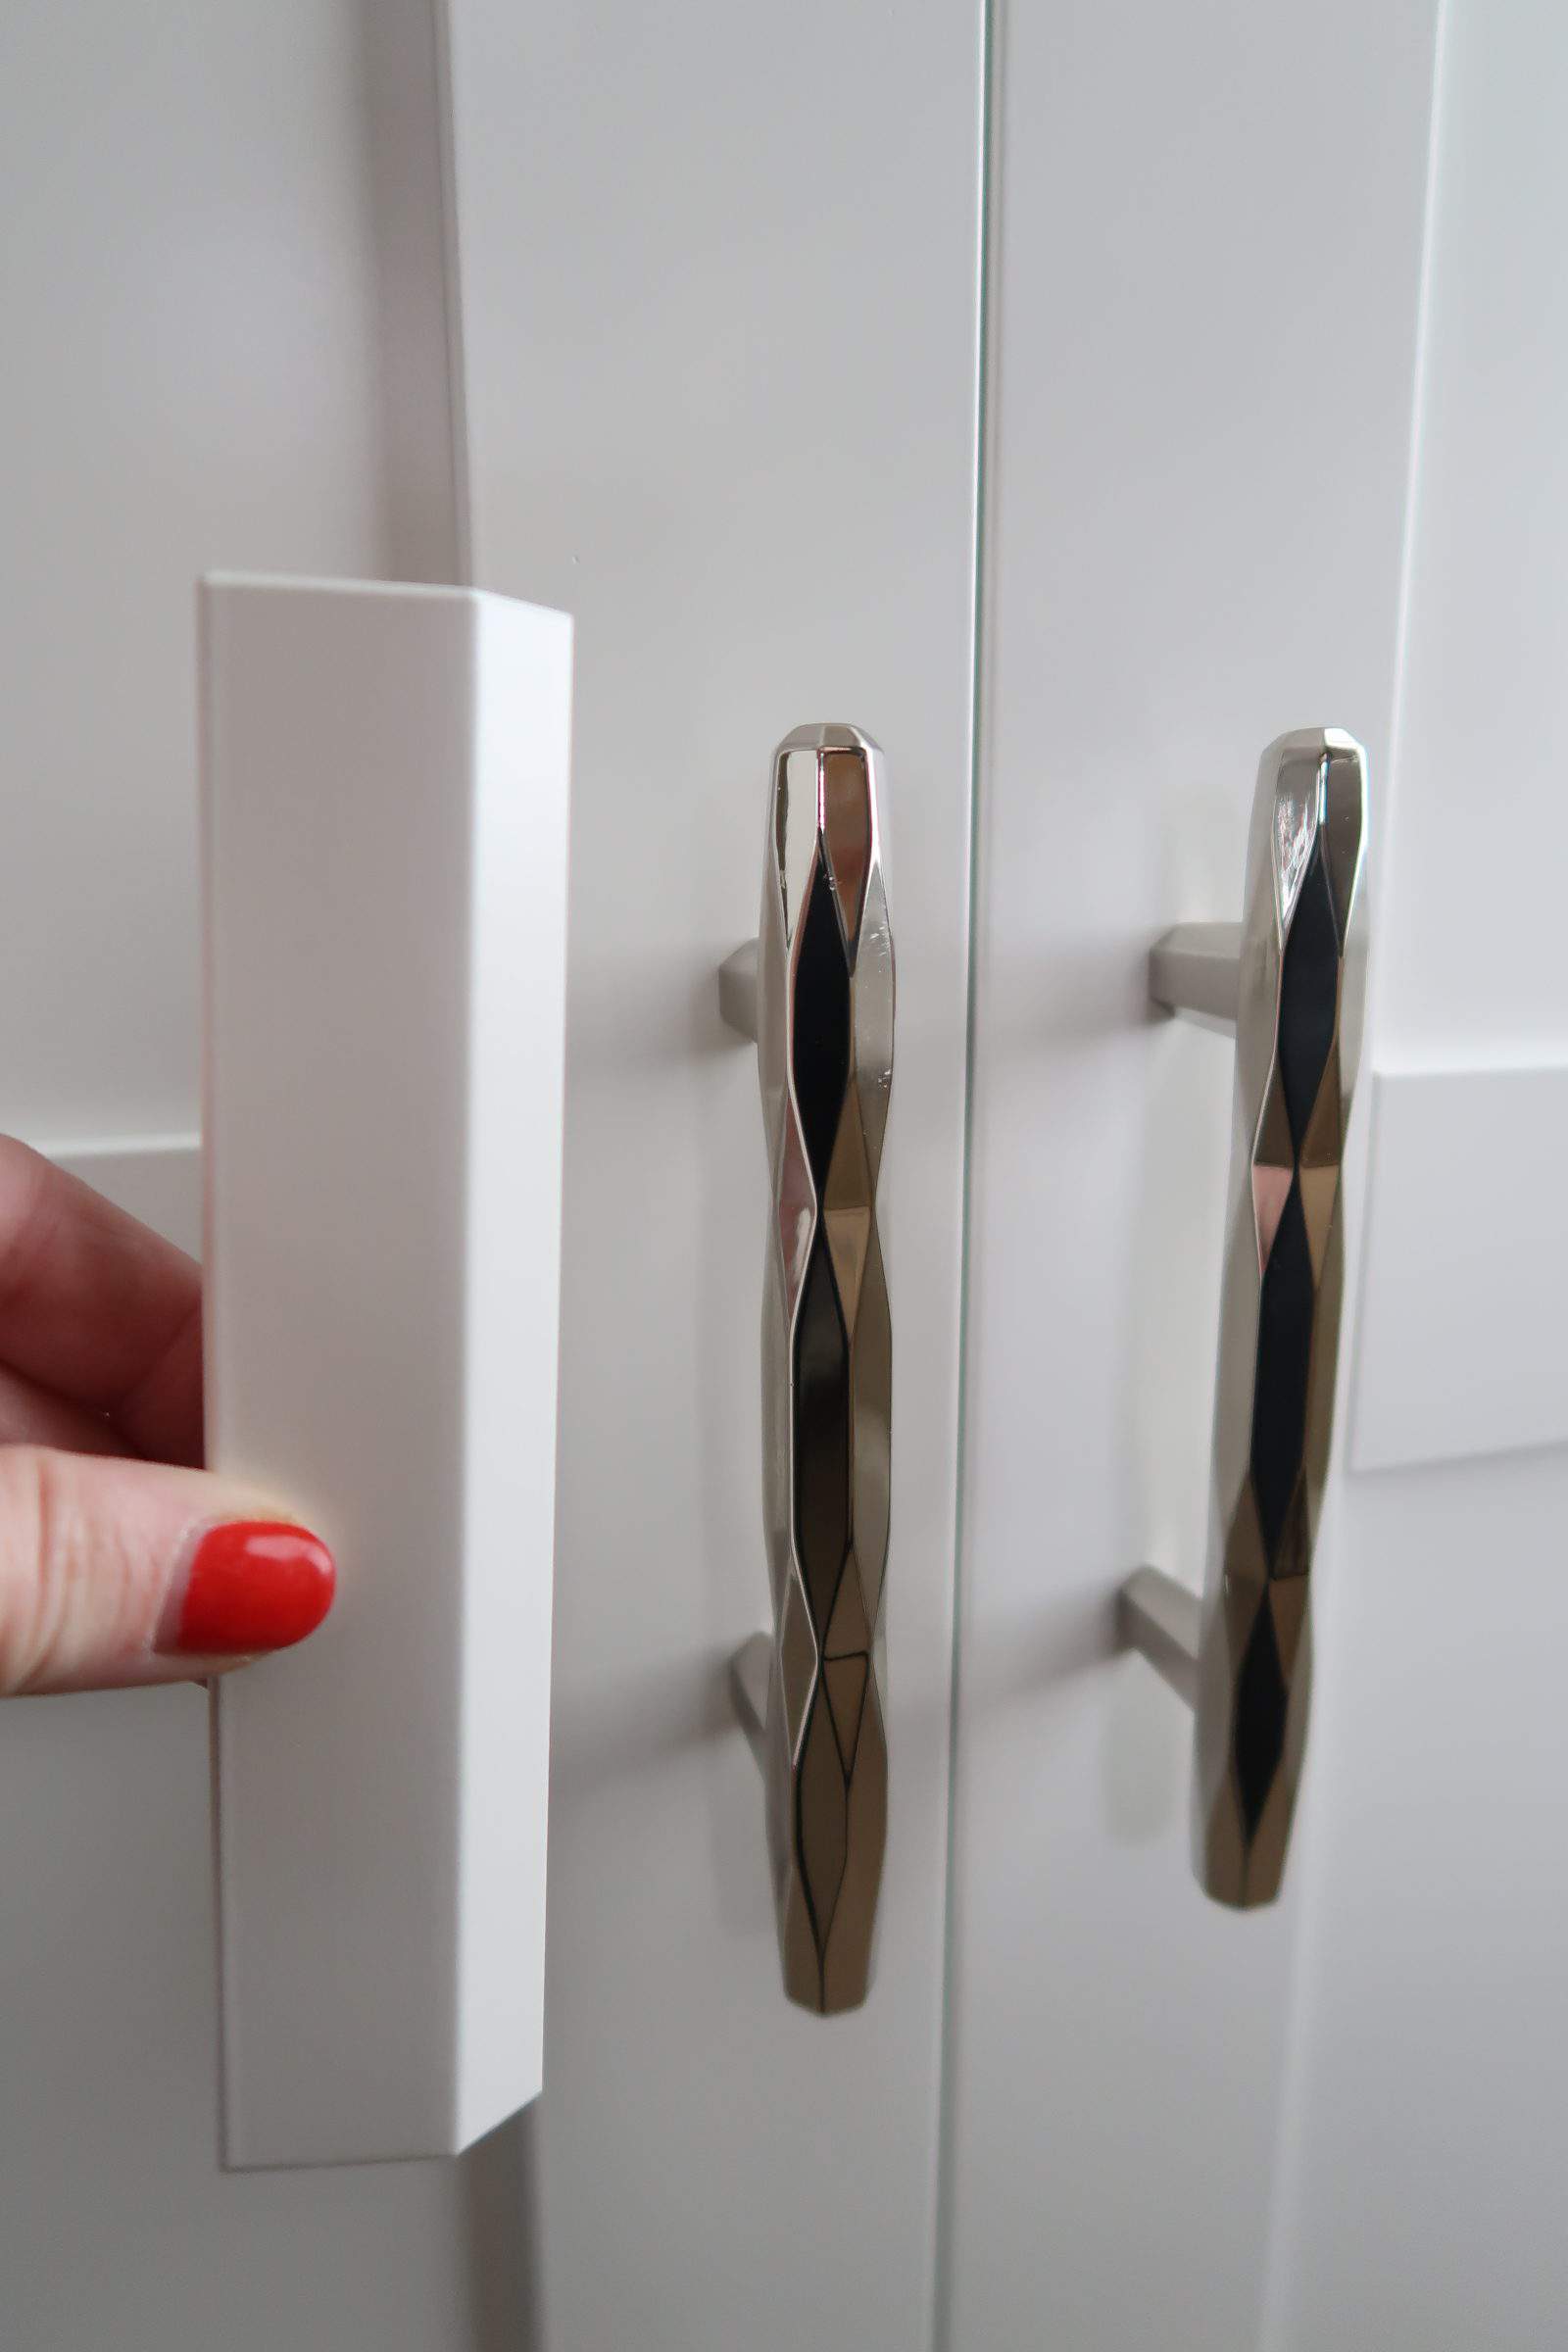
IKEA Hack!
The hardware that came with the Brimnes media kit was U-G-L-Y! Really bad as shown below.
I decided to pull the St. Vincent hardware through from the office cabinets to the IKEA furniture and what a difference! It added an extra $60 for 6 pieces of hardware. WORTH IT!
I’m happy to report that there now is a full wall of new furniture ready to house a TV, game consoles and accessories!
Mood Board and Plan
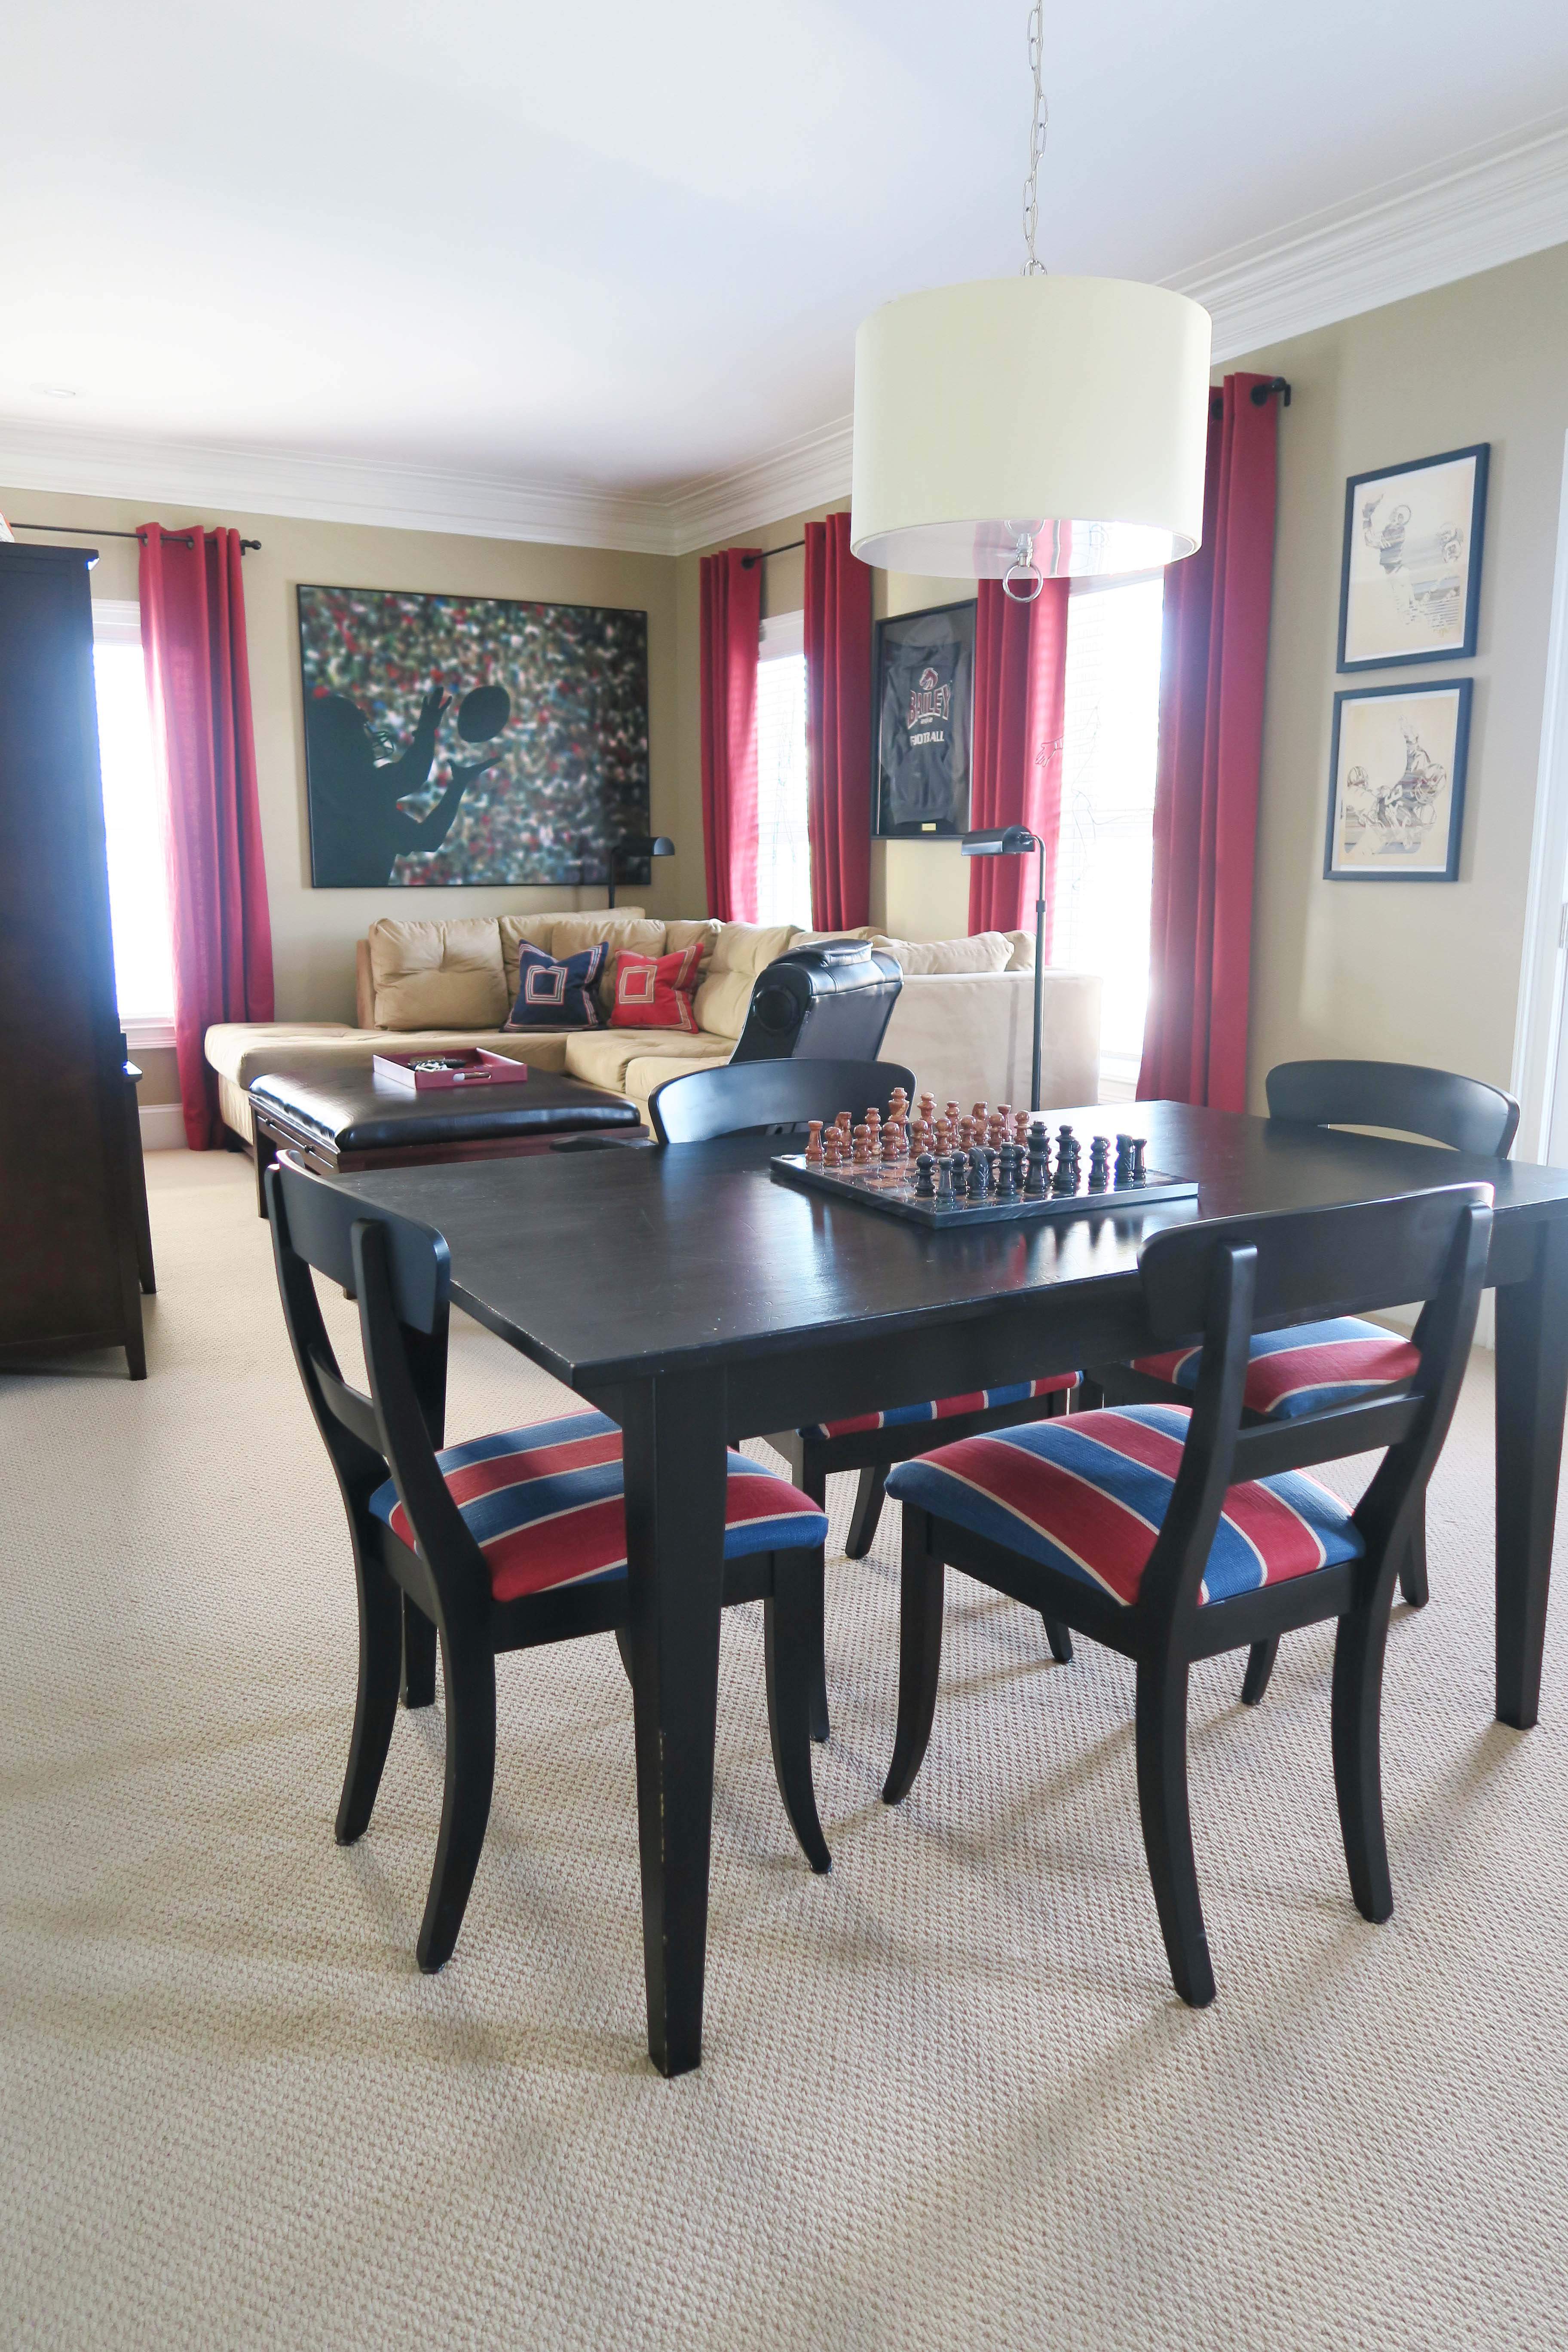
As a reminder here is the before picture of the Man Cave, which is the area that I am primarily focused on over the next two weeks!
Here is the original mood board and I’ve surprisingly stayed with my original ideas!
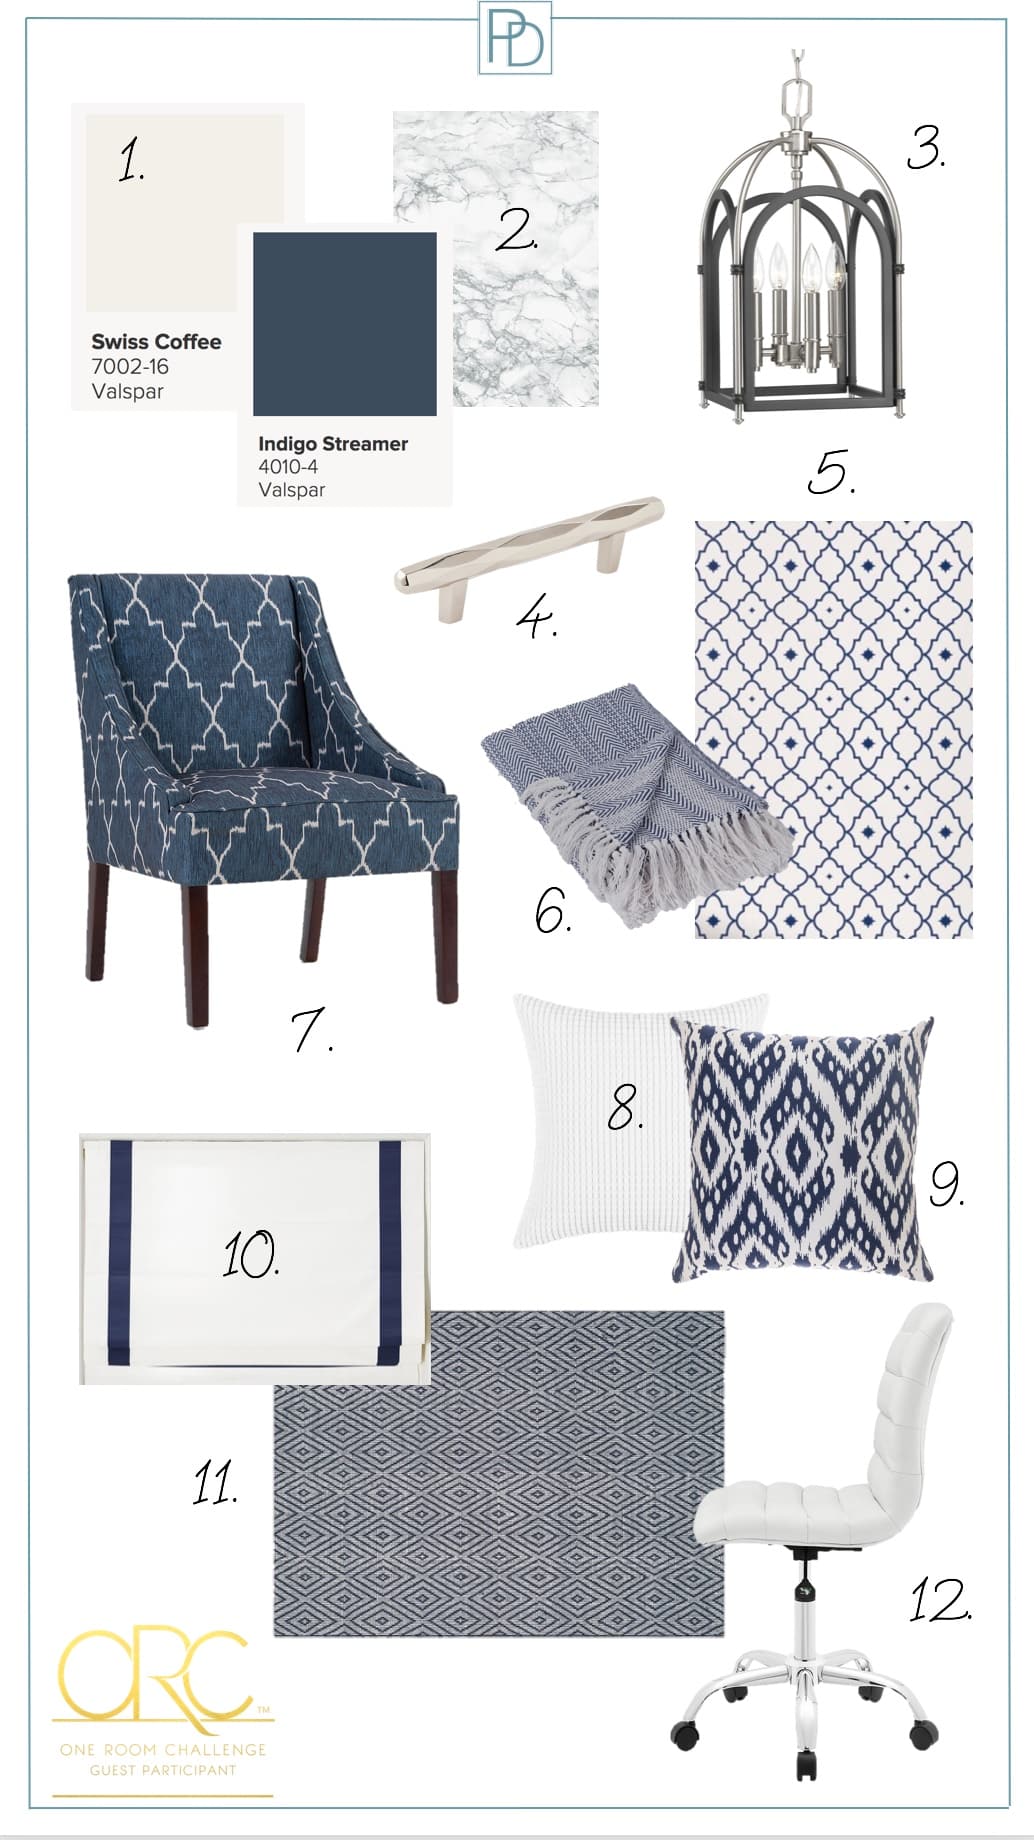
This list contains some affiliate links, but all items were hand selected by me!
- Cabinet Paint for Office
- Marble Film for Counter Top
- Progress Lighting Office Light Fixture
- Amerock Hardware for Cabinets
- Wallpaper for Office
- Throw for Sofa
- Loft Chair
- White Pillow for Couch
- Ikat Pillow for Couch
- White Drapes
- Rug Under Table
- Office Chair
What is next?
Oh this list keeps me up at night, as I keep trying to figure out how I’m going to fit it all in with travel and a new job! Some how I’ll figure it out, right?
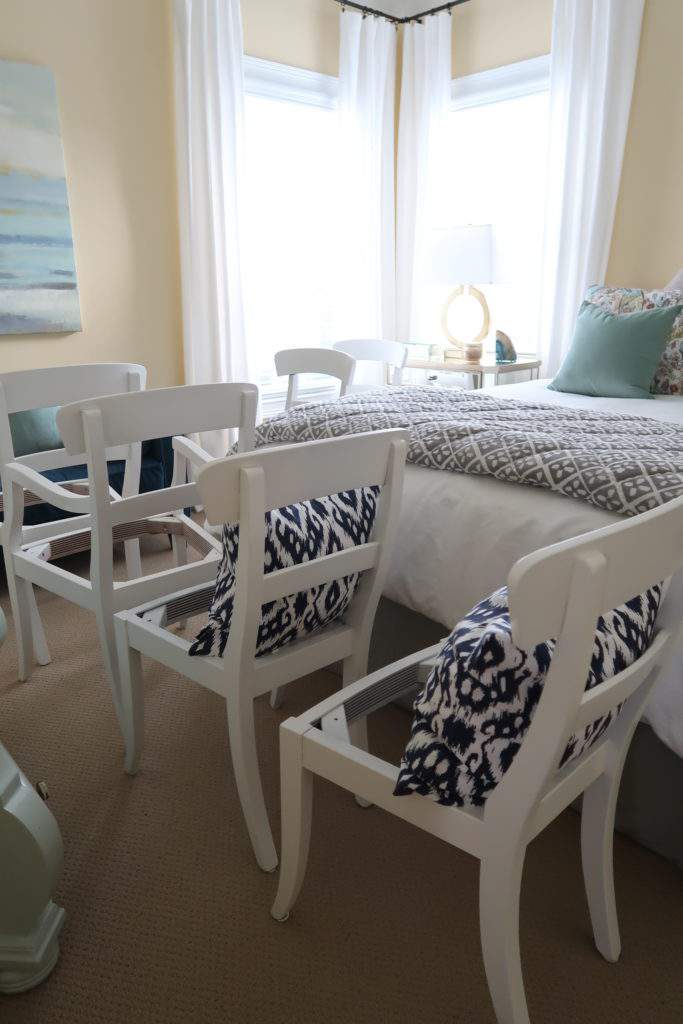
- Re-covering 6 chair seats
- Ironing curtains and adding navy trim
- Installing the drapery rods and drapes
- Faux finishing the coffee table
- Faux finishing the kitchen table
- Accessorizing the bookcase and office area
- Framing a T-Shirt
- Hanging pictures and a white board
- Install a rug
My guest bedroom is now home to 6 dining chairs that need the seats recovered.
This T-Shirt is going to become something special!

So is a series of pictures of my son playing football! He’s #42 and so tough 🙂

If you’ve never printed pictures through Shutterfly I highly recommend the service. For this makeover I’ve printed 7 ea. 8 x 1o photographs and the quality has been amazing!

While you are waiting for next week’s post, check out The One Room Challenge and all of the Week 5 Progress or the 20 Featured Designers to see their beautiful work too!
Thanks to the sponsor Calling It Home and media sponsor House Beautiful for hosting this fun event.
There are some amazing projects in the works and I can’t wait to see them with you.
Until next time…
Porch Daydreamer
Tracey
The room looks amazing already. Love that marble contact paper, this is going to be a very pretty space, I can’t wait for the reveal.
Julie, thank you! I appreciate it and I love the marble contact paper too 🙂
You’ve done a lot already and it looks great!!! I’ve always wondered about working with that contact paper…thanks for sharing the experience!
Thanks, Tana! I literally pet the counter because I love it so much!
Wow! You’ve been so busy – so many different projects! How do you keep it all organized?
To tell you the truth – lists and never sitting still! I make the most of my down time to get it all done ?
it is amazing!! Love that marble contact paper. I have been dying to use it for a while but didn’t get a chance to try it. I can’t wait to see the room completed in 2 weeks!
Definitely try it! I’ll be doing a tutorial soon and am already planning it for another counter in my home…thanks for stopping by.
The sneak peak of the “marble” countertop looks great, pimples and all! Looks like everything is really coming together…
Kristen, thank you! The pimples are hidden behind my office chair and RIGHT above my keyboard. I’ve embraced them and love the change!