Easy to Make Fall Tissue Paper Plates
Looking for fun affordable fall plates for your Thanksgiving table? Make them!
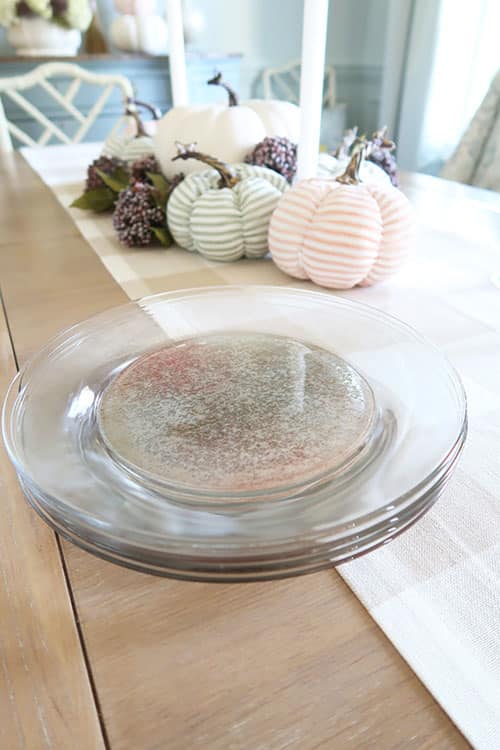
Finding fall plates that matched my dining room decor was becoming impossible, so I set out to make my own! Using some clear glass plates, fun tissue paper, and Mod Podge you can create your own designer fall plates.
The fall tissue paper plate design options are endless!
Fall Plate Inspiration
Now that I’ve made over my dining room I needed to makeover my fall tablescape. How fun right? I love any chance I get to be creative.
After having success with Mod Podge and creating custom pumpkins , I decided to explore using the same technique on plates.
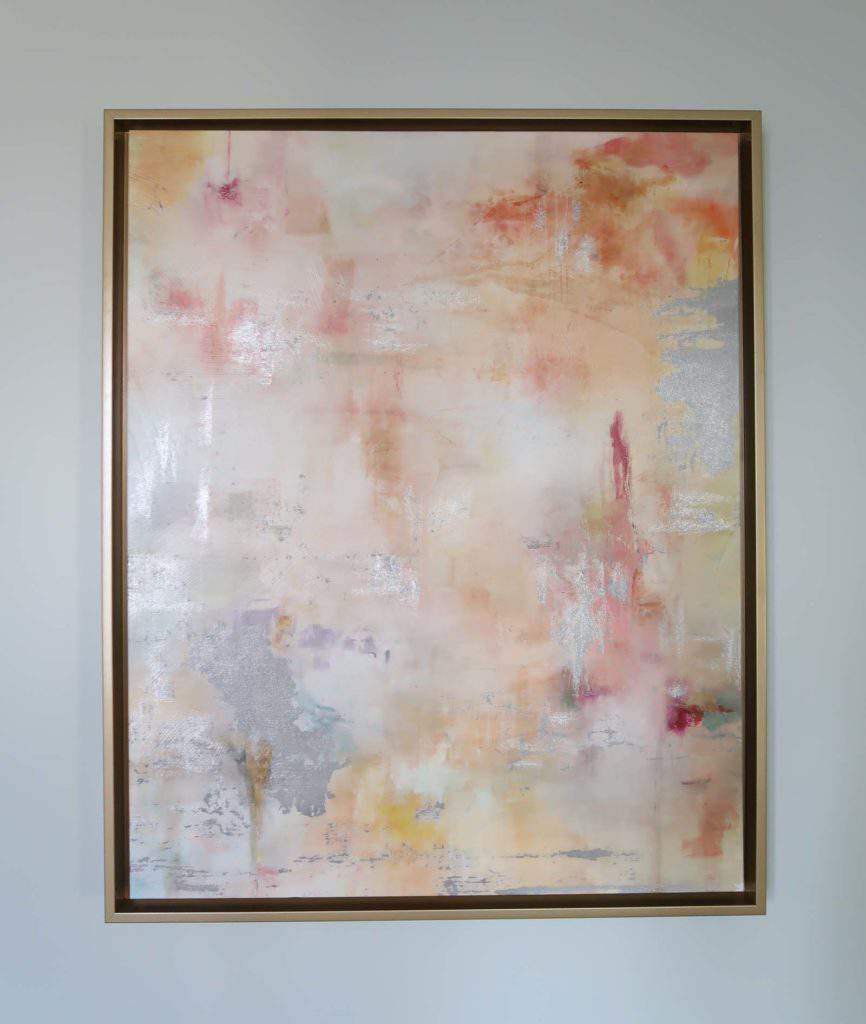
The color palette I wanted to mimic was already developed in a new piece of art I hung over my bar cart. I went on the hunt to find tissue paper that reflected the same colors.
There are a TON of tissue paper options on Zazzle. Here are a few ideas to get your creative mind going!
Post contains hand selected products, with some affiliate marketing links {full disclosure here}
Shop Fall Tissue Paper

Do you see the one I chose? It reflects the colors in my artwork perfectly and can be used all year long! Now for the fun part – how to make a tissue paper decorated plate.
Pin It for Later!
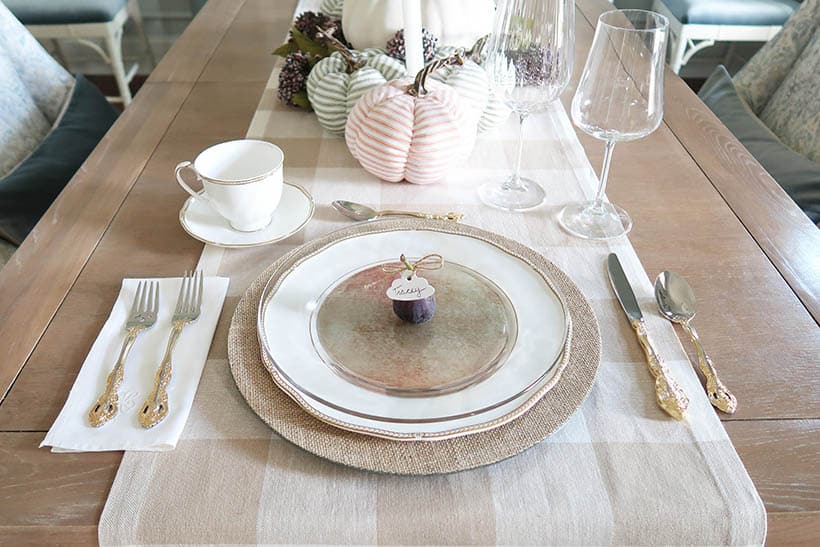
Fall Plate Made with Tissue Paper
Each plate costs around $5 dollars to make. Like I said SO affordable and it only took me about 30 minutes to make 4 plates. Easy right? It’s also a fun fall project for your kids that are 8 or older. They can make their own plates for use on the Thanksgiving table.
Ever year pulling out the plates will start that conversation “remember when”…
Supplies
- Craft brushes
- Mod Podge in matte
- Tissue Paper
- Clear Glass Plates
- Mechanical Pencil
- Scissors
- Paper Towels
Originally I planned to cover the entire plate with tissue paper, but found it was easier just to do the middle and not the edges. The option shown is using clear glass dinner plates, but clear glass salad plates would be a perfect option too!
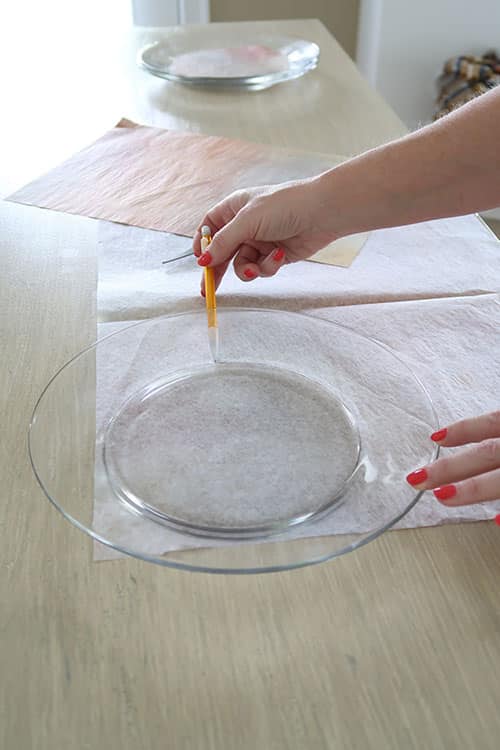
Step 1
Find the area of the tissue paper you want to show through on the plate. I found one area in particular that had all of the colors in my artwork and used that.
Flip the tissue paper over, with the mechanical pencil, trace the plate around the edges. I could get 4 plates out of one piece of tissue paper, if the design was identical.
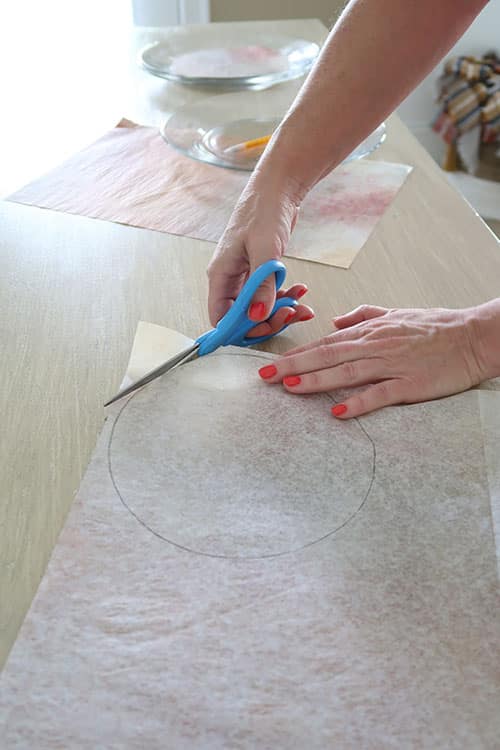
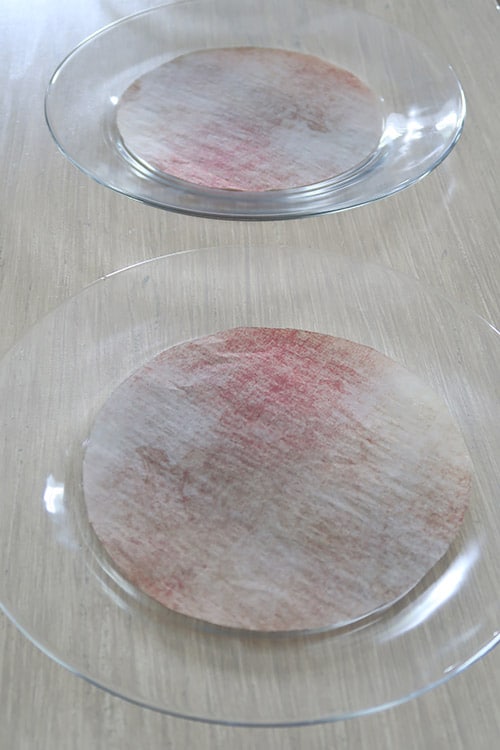
Step 2
Cut out the traced tissue paper circle and place on plate to make sure it’s even. Trim any edges that are uneven.
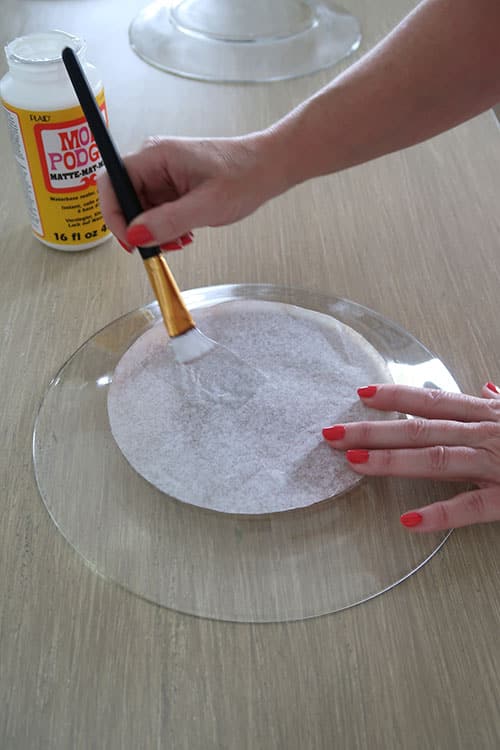
Step 3
Using a large craft brush, apply Mod Podge from the center outward. Be very gentle and generous with application, so you don’t tear the tissue paper.
Use your fingers to hold in place. DON’T go to the very edge.
Using a small craft brush pulling in from the outer edge, apply the Mod Podge. Try to avoid getting as much as possible on the glass plate.
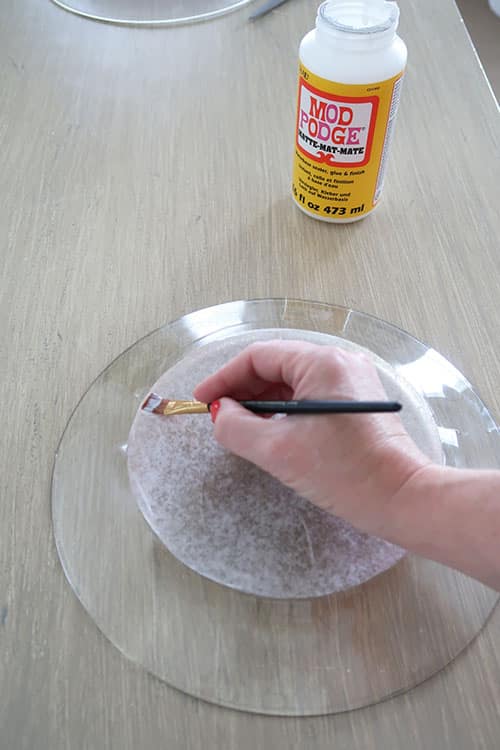
Make sure all edges are fully adhered. Keep applying until secure.
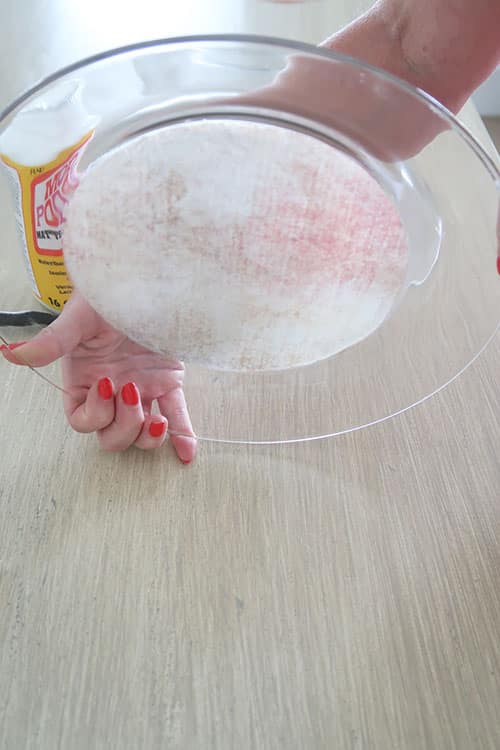
Step 4
With a damp paper towel, wipe any and ALL Mod Podge off of glass plate. Lift it up and look through to make sure you don’t see any “milky” areas.
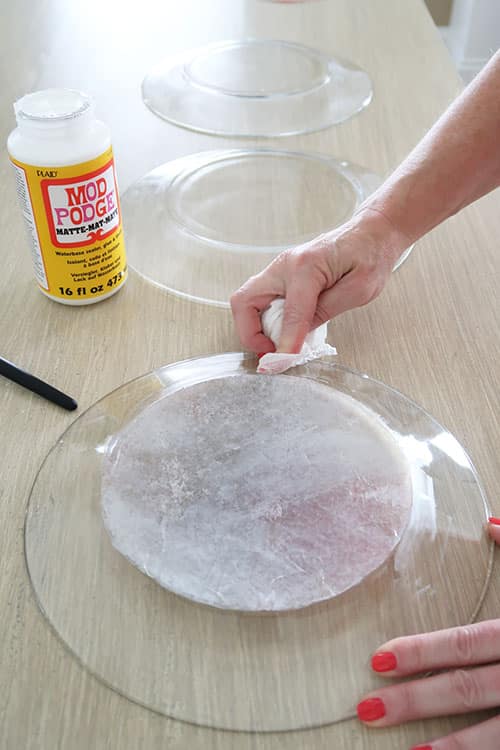
Keep wiping with fresh damp paper towels until all Mod Podge is removed.
Step 5
Dry for 1 hour between coats. Apply 3 to 5 coats of Mod Podge. You will be able to clean the plates with a damp sponge and soap. DON’T PUT IN THE DISHWASHER!
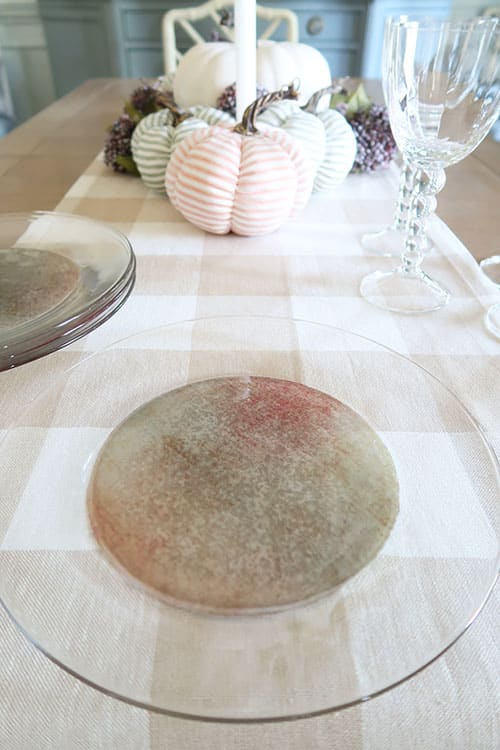
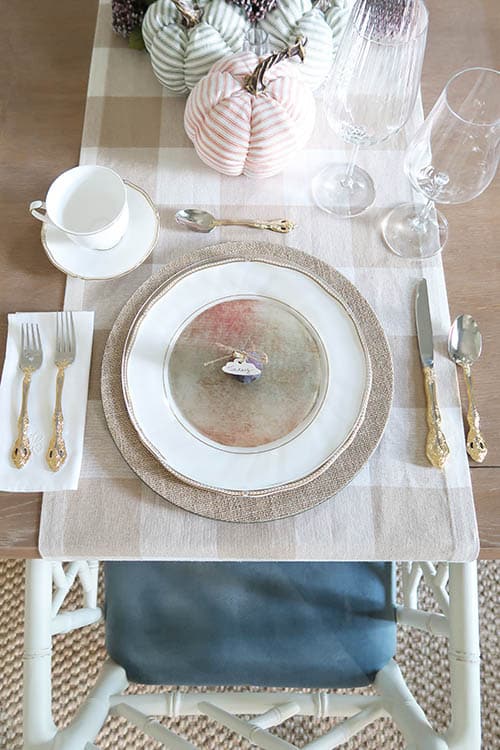
Set the table! Now wasn’t that easy? I really enjoyed making these fall tissue paper plates and love how they look in my dining room!
Shop the Look
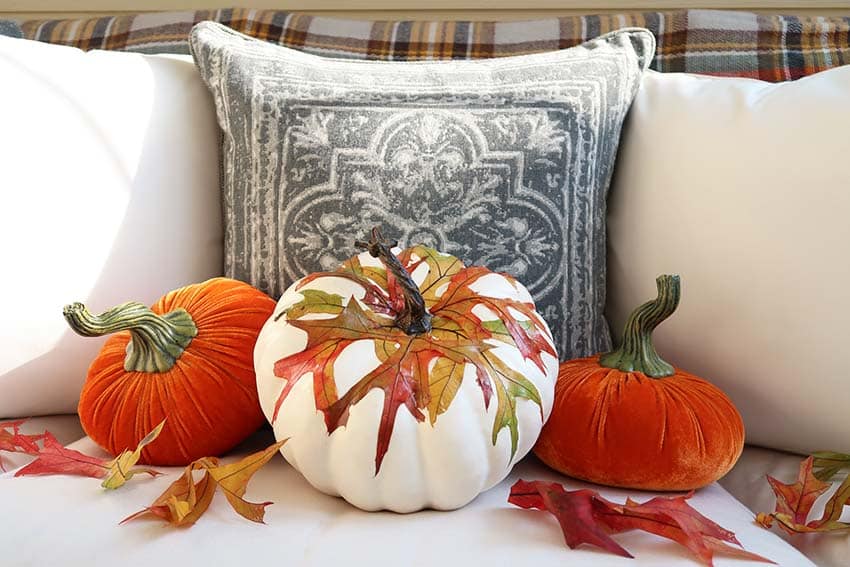
I’m sorry my sweet friends, but the ticking striped pumpkins are no longer available from Hobby Lobby (I bought them in late July). Etsy had some really fun options that I linked for you instead.
Fall Home Tour is Next!
This is just a little tease of what I’ve done in my dining room for fall 🙂 Next week I’ll be sharing a full reveal as part of a fun fall home tour with some of my other blogger friends. If you haven’t already, please consider signing up for my weekly newsletter, so you don’t miss a post!
Until next time…
Porch Daydreamer
Tracey