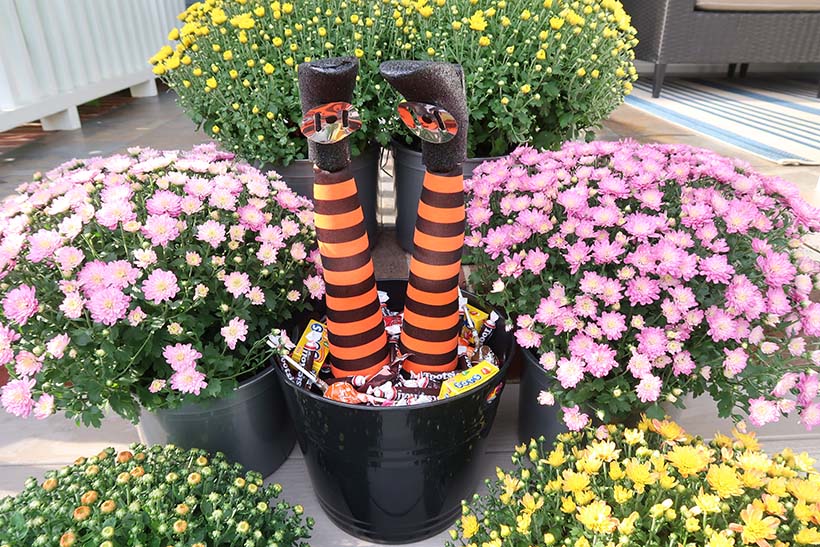
Make an Upside Down Witch Leg Candy Bucket
Looking for creative Halloween ideas or for fun ways to dress up a trick or treat candy bucket? How about adding upside down witch legs?
Kids love to be out trick or treating and it’s such a magical night! Having a fun Halloween candy bucket to share with the kids in the neighborhood is a great idea. Plus the adults will get a “kick” out of this one too!
It’s such an EASY project that can be completed in 30 minutes or less. Just a few materials are needed and you will have a fun witch leg candy bucket!
I’d like to think she’s the Wicked Witch of the West who’s gotten swallowed by the bucket 🙂
Post contains hand selected products, with some affiliate marketing links {full disclosure here}
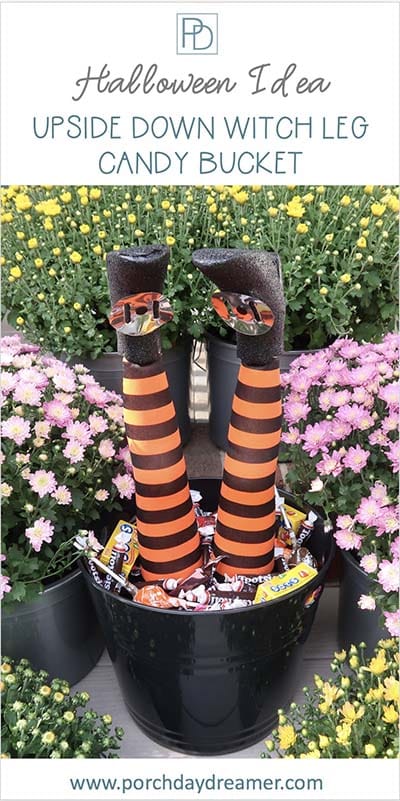
Upside Down Wicked Witch Leg Candy Bucket
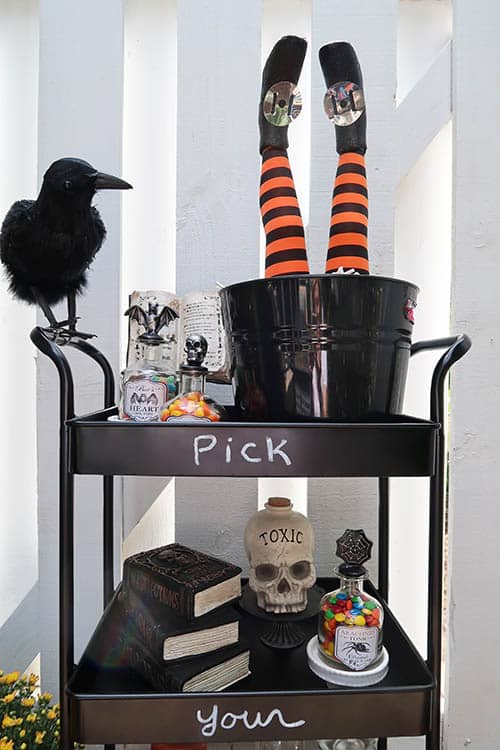
If you missed it last week, I debuted a “Pick Your Poison” Bar Cart. It features this fun candy bucket and how you can display it on a trick or treating or bar cart.
Several people asked “how did you make that?”, so I wanted to share!
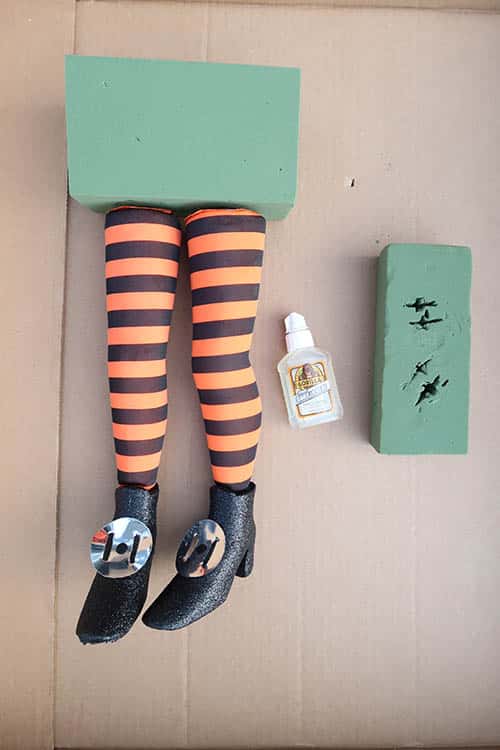
All of these items I had around my house, so this really was an easy project and CHEAP too! Here are the supplies you need:
- Black candy bucket
- Small upside down witch legs on stakes or these light up witch legs
- Craft foam or Dry floral foam
- Black spray paint
- Gorilla glue
I happened to have a large pack of oasis floral foam and that is why I used it. The dry floral foam that is more like styrofoam would work really well too!
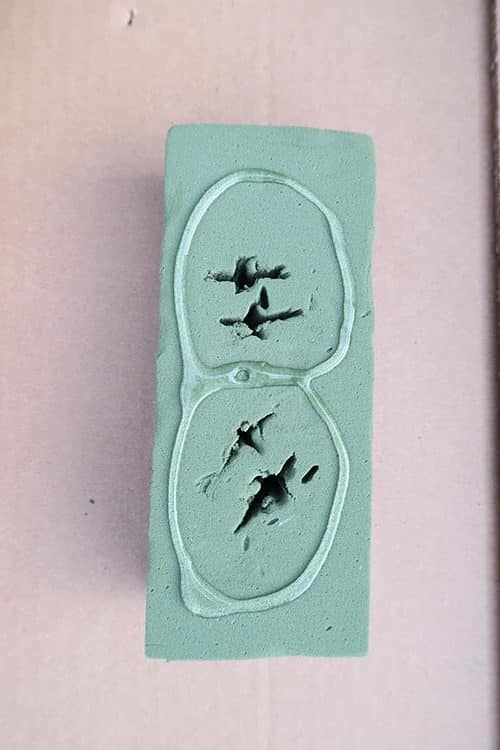
Step 1: Cut floral foam and Insert witch legs
Measure and look at the basic dimensions of the candy bucket. Cut off excess width of floral foam to fit bucket. Make sure to leave enough room for candy!
Place witch legs in the middle of the foam. I turned in one leg for effect 🙂
If needed, add a 2nd piece of foam to get the correct height.
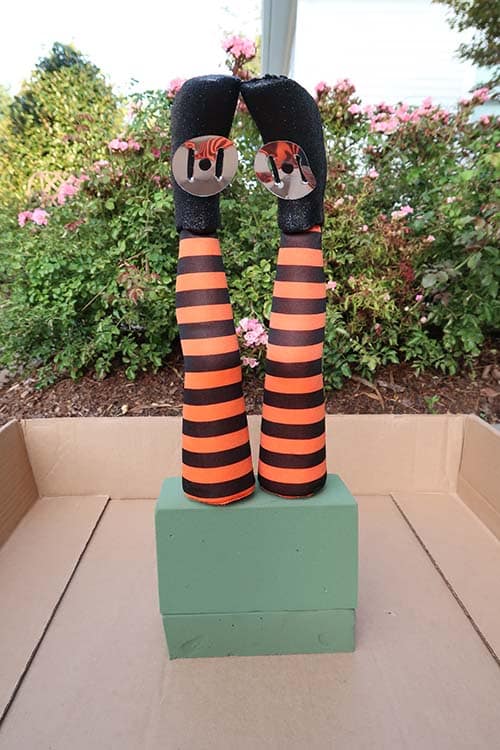
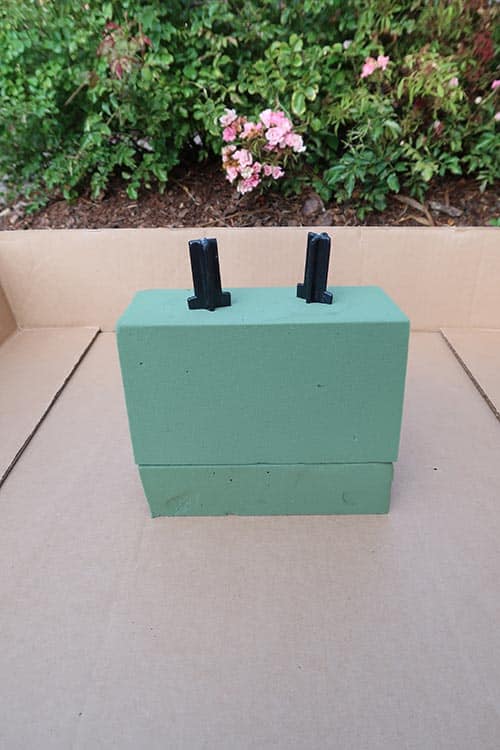
Step 2: glue pieces of foam together for stability
If you’ve added a 2nd block of foam, to add stability, glue the two pieces together. So you can remove the witch legs in the future, run glue around the holes created by the stakes.
You can see I tried a couple of leg positions before settling on one 😉
Step 3: remove witch legs prior to spraying
Remove the witch legs for spray painting. The witch legs I used are not glued to the stakes and easily pulled off, once I had the stakes in the foam.
Step 4: spray paint foam black
Using the black Rustoleum spray paint, spray two coats onto floral foam. I waited about 15 minutes between coats.
You can see that it doesn’t look solid black. Once it dries and is back in the bucket it will look black!
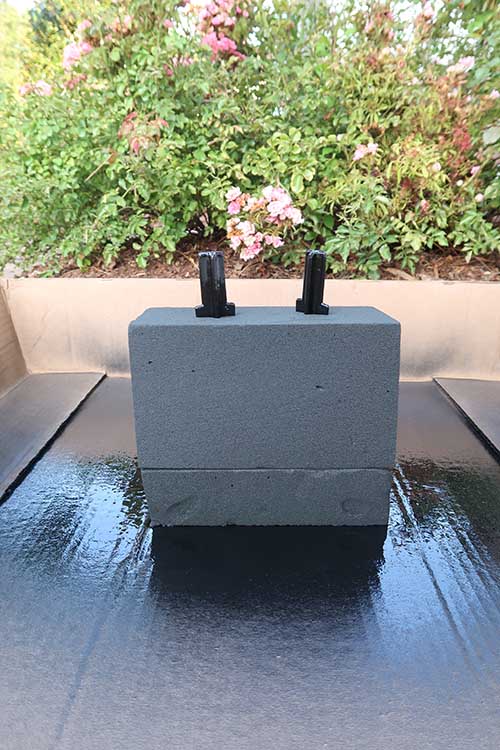
Let the spray paint dry fully, before reattaching the witch legs. I waited about an hour (I’m not patient!).
Step 5: place witch legs in candy bucket
Put the witch legs back on the stakes and put everything back in the candy bucket. You can see the foam just disappears!
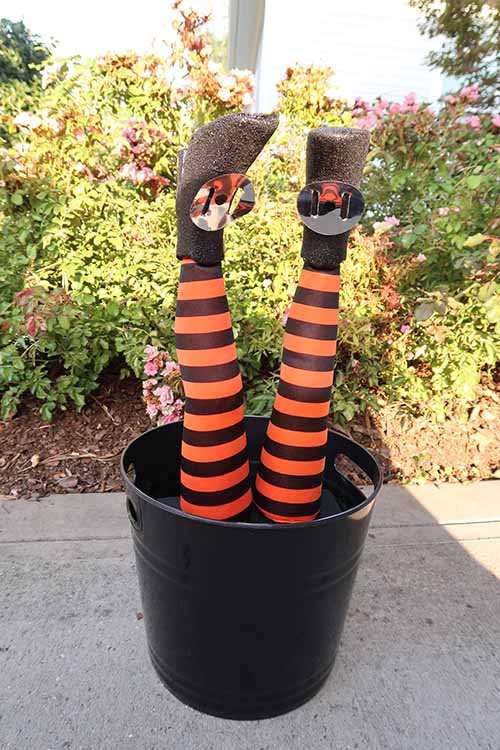
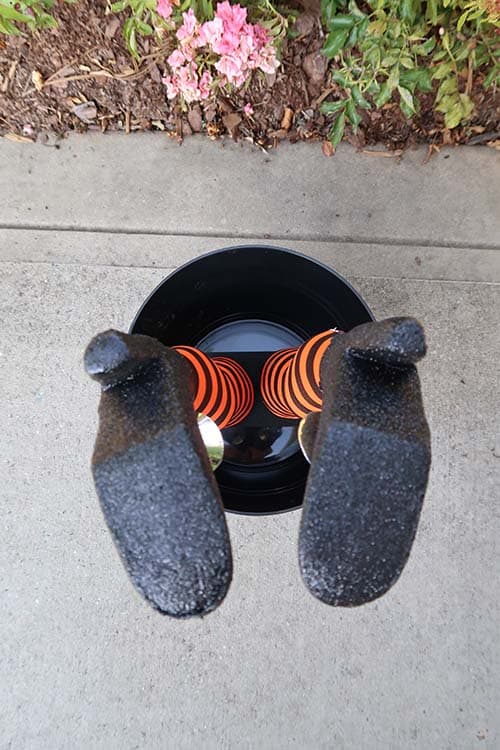
Now you have a FUN Halloween candy bucket complete with upside down witch legs that will have the kids talking. All that is left is to add candy!
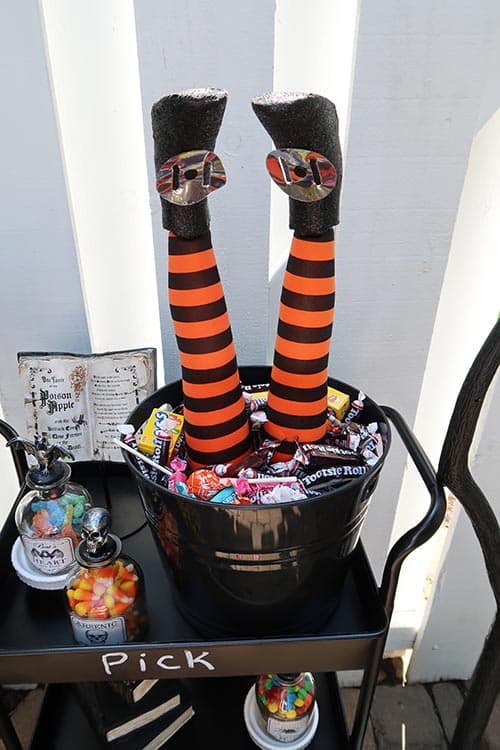
Umm it was a heat index of 100F, when I took pictures so I avoided the chocolate treats.
I will be serving them Halloween night 🙂
Pick Your Poison Bar Cart
If you are planning on creating a Halloween or trick or treat bar cart, you now have a fun candy bucket to feature!
If you missed the post on my “Pick Your Poison” bar cart, CLICK HERE for all of the fun details!

Until next time…
Porch Daydreamer
Tracey
I’m definitely going to try this with the group I work with. Such a fab idea. Thanks for sharing this.
Thank you! It’s one of my most favorite projects 🙂
Tracey, this is just the cutest idea! Love it!
Shelley
Thanks so much Shelley!
Wanted to let you know I borrowed your photo and featured your cute candy bucket today in my Friday Finds For Fall post. I just found your blog again recently and have been spending a lot of time being amazed at your lovely home and DIY projects, Tracey. My next house will definitely have a couple of porches to make over like you did.
Thank you! Sorry it got so blurry!