DIY White Wire Shelf Covers: No Cut, Nail, Paint!
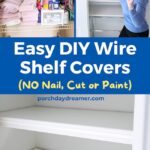
Tired of your ugly wire shelving? I’ve created a NEW way to DIY white covers for wire shelves and they fit perfectly!
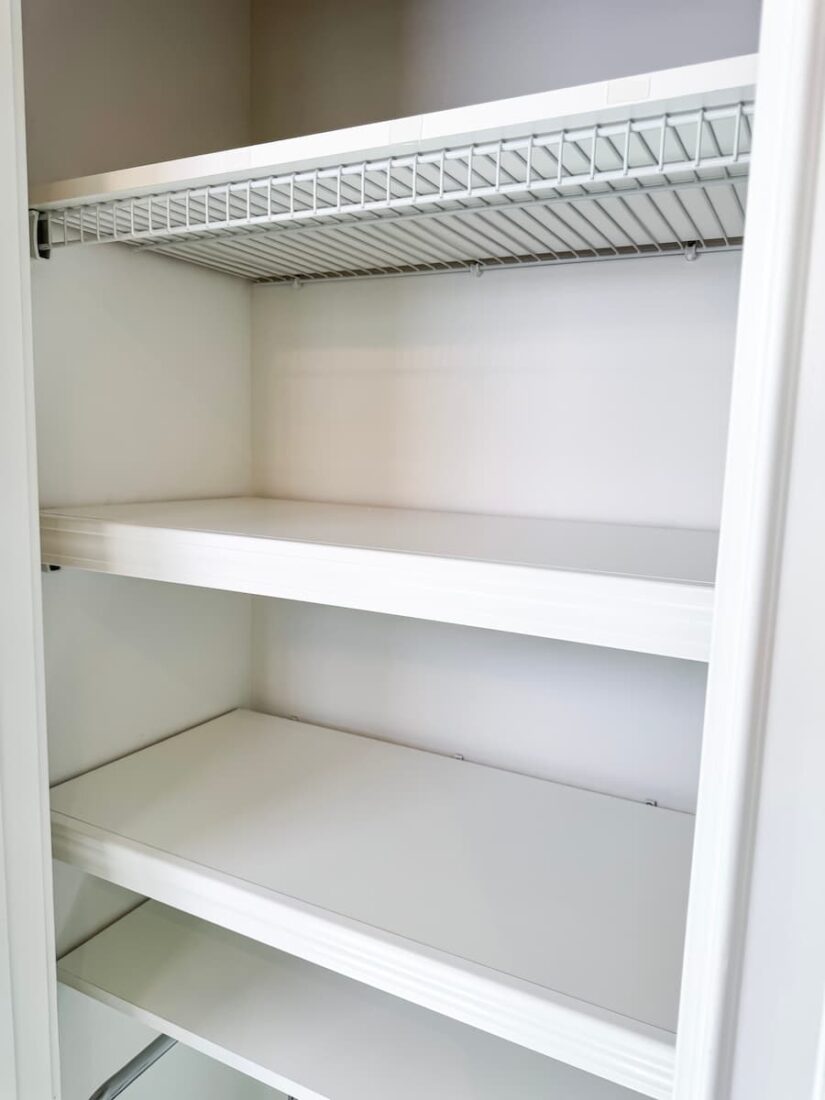
The BEST part about these white DIY solid wire shelf covers? You don’t have to cut, nail, stain, paint, or glue anything! Plus they’ll look like high-end built in shelves when you’re finished.
If you are new here, my name is Tracey (akaPorch Daydreamer) and I am obsessed with creating high end looks for less.
I can’t wait to show you how easy this DIY is! It will take an afternoon and you won’t even break a sweat.
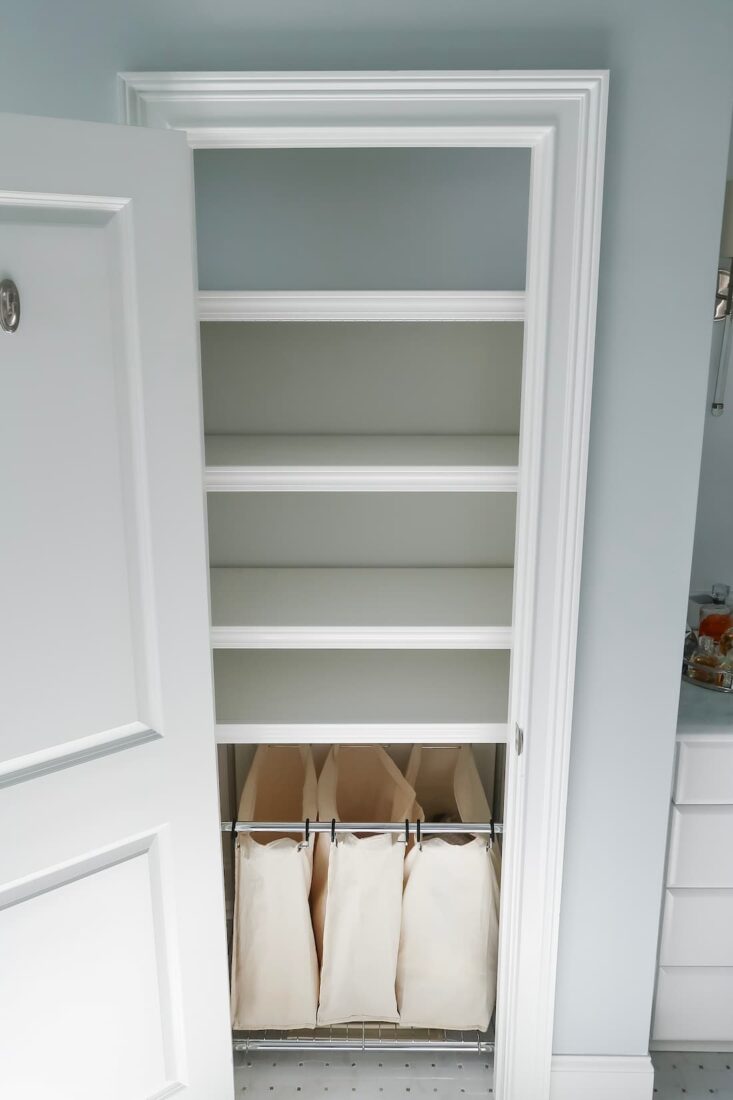
Where can you install these solid white wire shelf covers? Your kitchen pantry, laundry room, coat closet, bathroom, hall or linen closet to name a few.
This DIY white solid wire shelf cover costs about $25 per shelf. $100 for 4 shelves!
DIY Wire Shelf Covers: What You’ll Learn
- Options for Covering Wire Shelves
- How-to Measure for Covers
- No Paint or Cut Shelf Supplies
- Step by Step How-to Create Wire Shelf Covers
- How-to Create a Built-in Look
- FAQs About Installing Wire Shelf Covers
- YouTube Tutorial
Contains hand selected products, with affiliate marketing links where I may earn a small commission if a purchase is made. {full disclosure here}
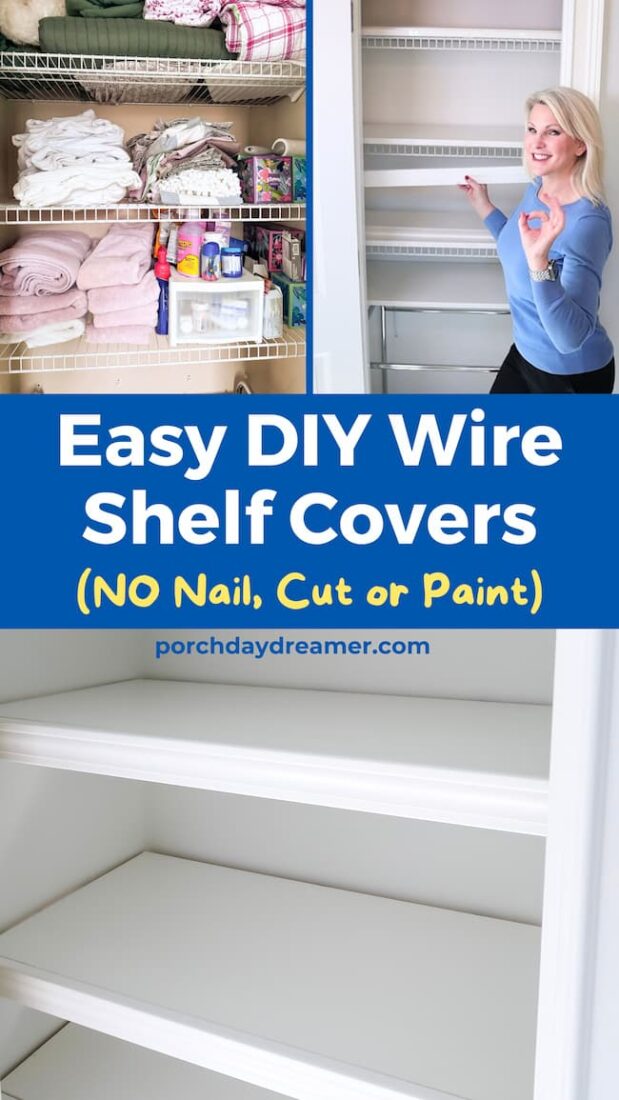
Pin for Later!
DIY Options for Solid Wire Shelf Covers
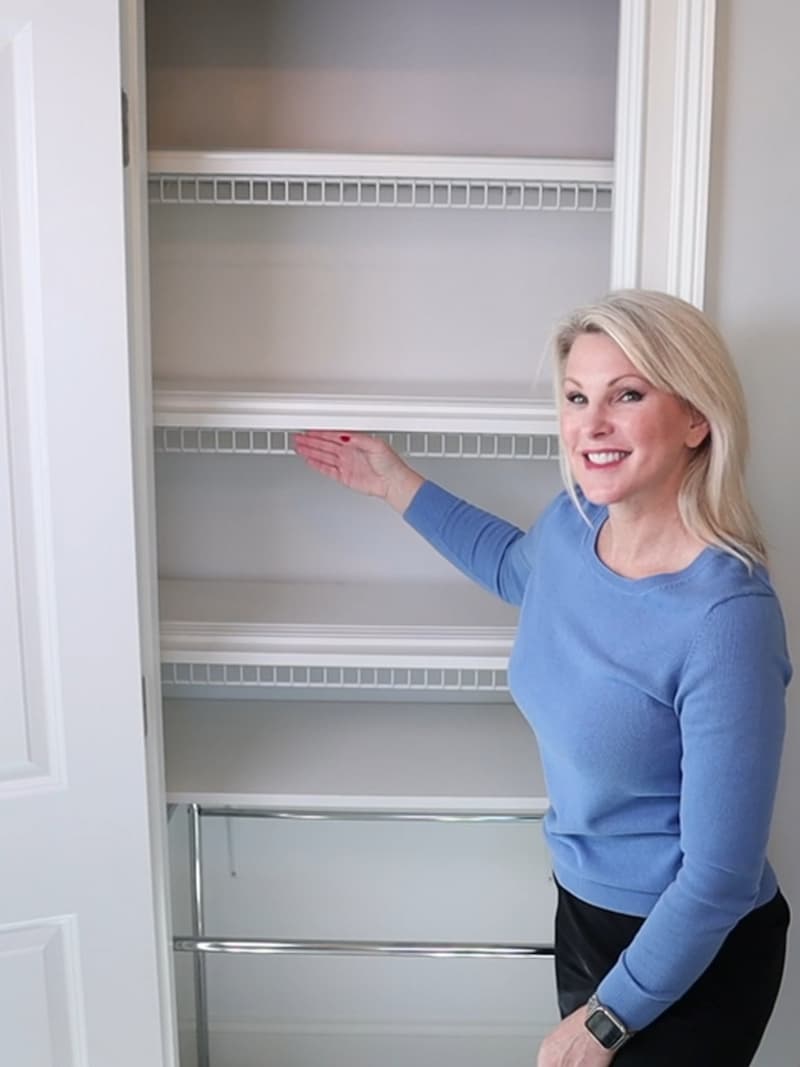
You may be searching like I did for DIY wood covers for your ugly wire shelving. Why does every builder grade home have wire shelving in our closets?
Heck if I know! Things fall through the openings, the wires leave marks on clothing and home goods, and they are uneven so nothing can balance on them.
After reviewing all of the DIY wire shelf cover tutorials, NONE of them looked easy.
They involved cutting wooden shelves and trim boards with a miter saw or circular saw. Then staining or painting them, attaching trim boards by nailing or gluing it to the wood shelf. NO thank you!
If you want to buy wire shelf covers, here is an option to have them custom made for you. But that gets PRICEY.
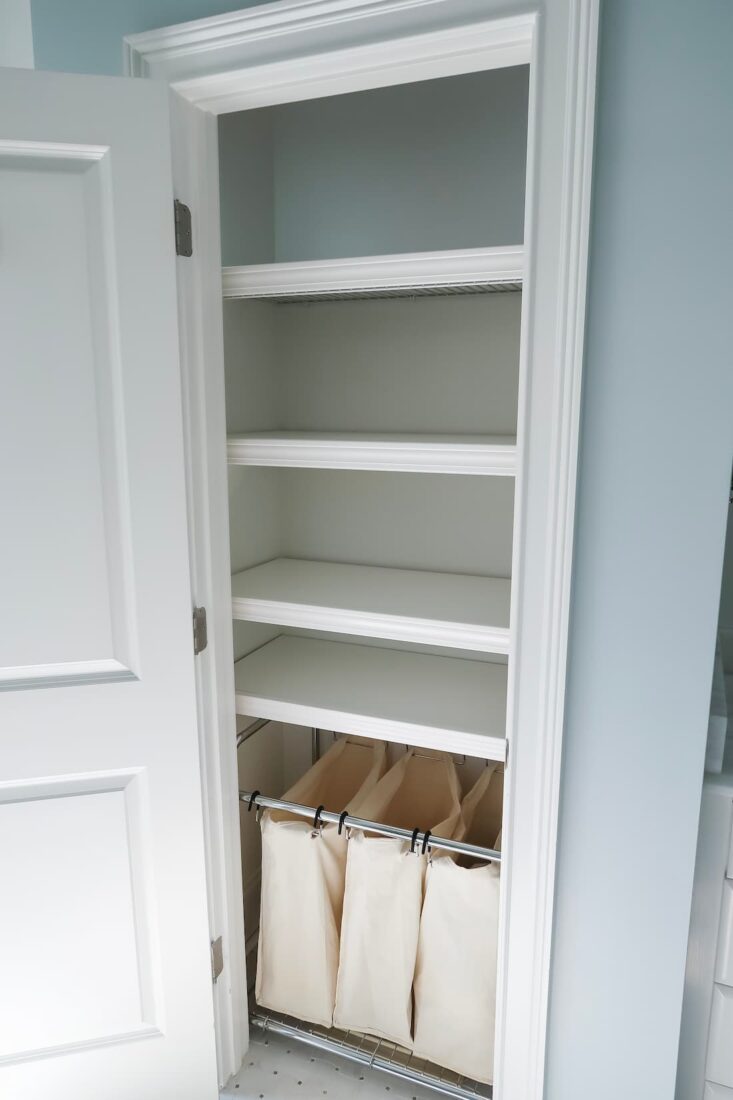
To AVOID all of this, I have come up with the most clever hack to cover over existing wire shelves. These shelf covers are renter friendly, no cut, no paint, no glue, no nail, that’s solid, cleanable, and durable.
If you are ready to DIY white wire shelf covers that look like high-end built ins, you are in the right place.
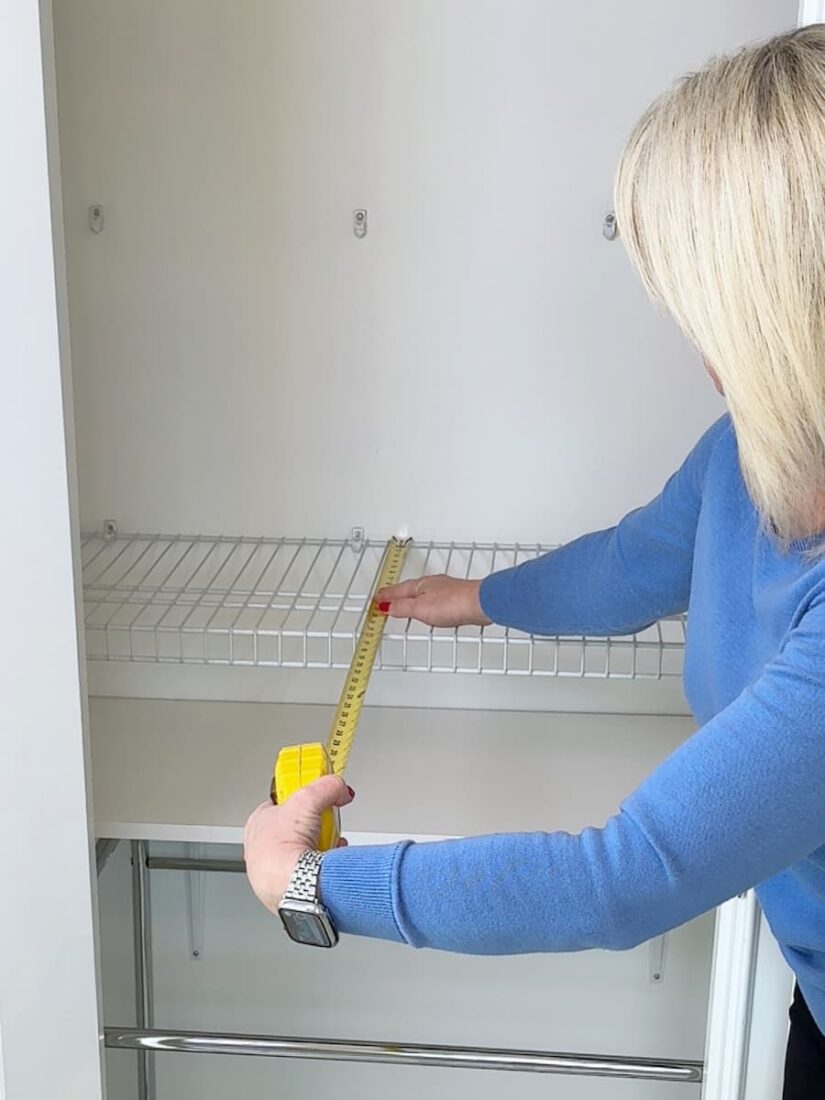
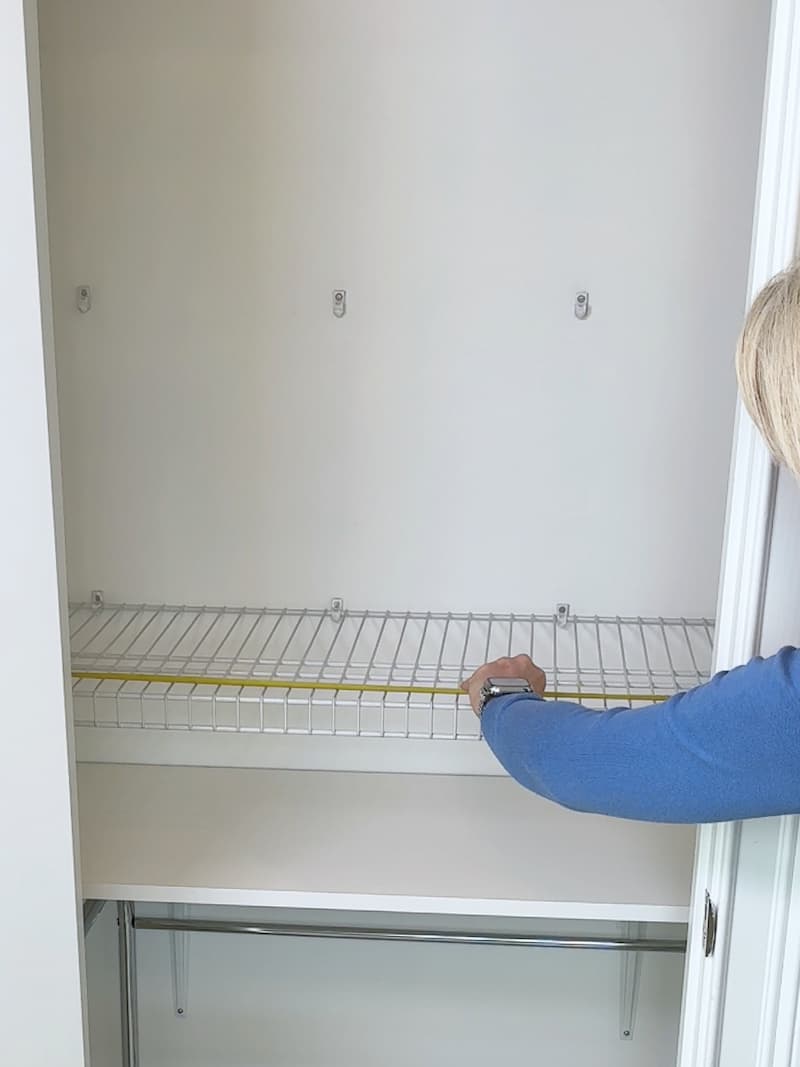
First: Measure Existing Wire Shelves
Measuring your wire shelves BEFORE you start this project is EXTREMELY important.
These measurements will help you determine the depth of the pre-made boards you need to buy.
Wire shelves come in standard DEPTHS, so you’ll need to know the depth and length of your current shelving.
Standard Wire Shelf Depths
- Depth (in inches): 8, 12, 16, 18, 24, 36
THIS TUTORIAL IS DESIGNED FOR WIRE SHELVES 12 or 16 inches deep.
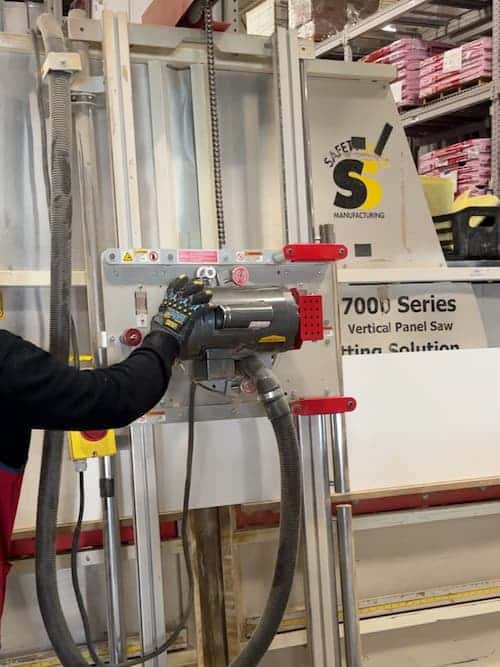
The shelving and trim pieces you will order online and pick them up at your local Lowe’s Home Improvement store.
Wire Shelf Cover Supplies
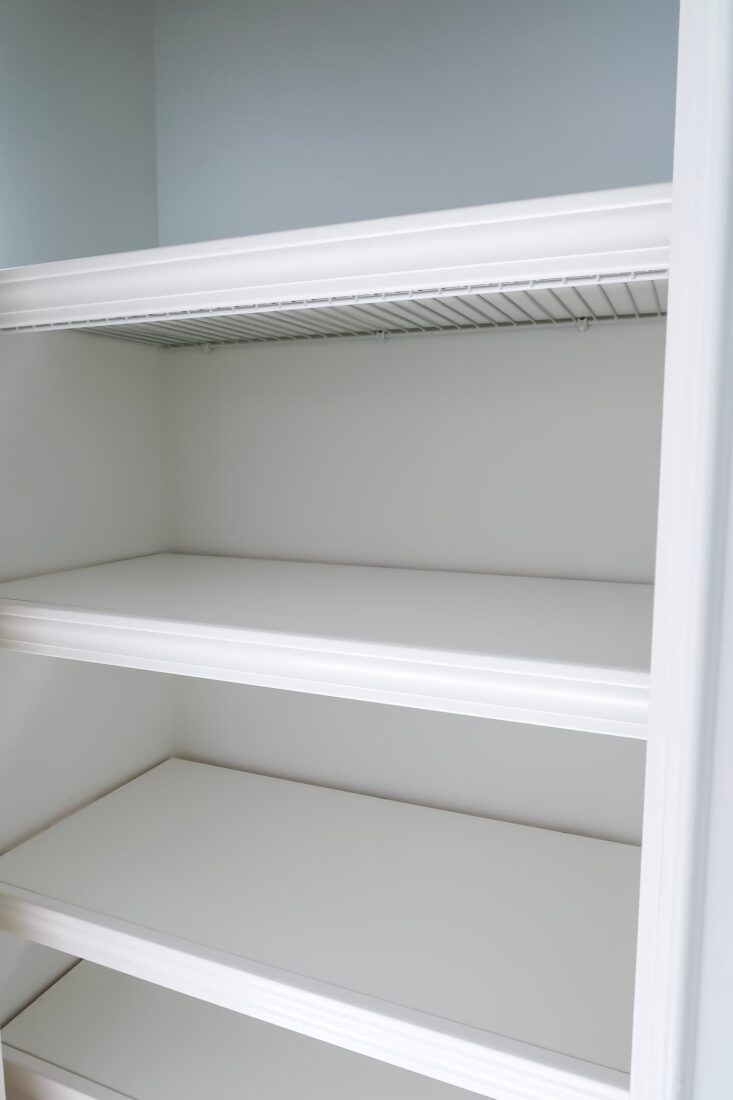
These pre-made closet shelves work with standard wire shelf depths 11 3/4 inches or 15/34 inches deep. They will cover your existing 12 or 16 inch deep wire shelves.
Buy shelving that is 1/4 in smaller in depth than your current wire shelves. Lowe’s will cut your boards and trim for FREE!
- NOTE: The minimum about Lowe’s can cut off any board or shelf is 16 inches. So factor that into the length of boards and trim you need.
For instance, my shelves are 39 inches wide. I bought 2 ea. 96 inch boards that were 15 3/4 deep. That is the standard depth of laminate shelving for my 16 inch deep wire shelving.
It may work out for you like it worked out for me. I had an extra board length that I was able to add to my closet with 2 white brackets, screw anchors, and #8 x 1/2 wood screws.
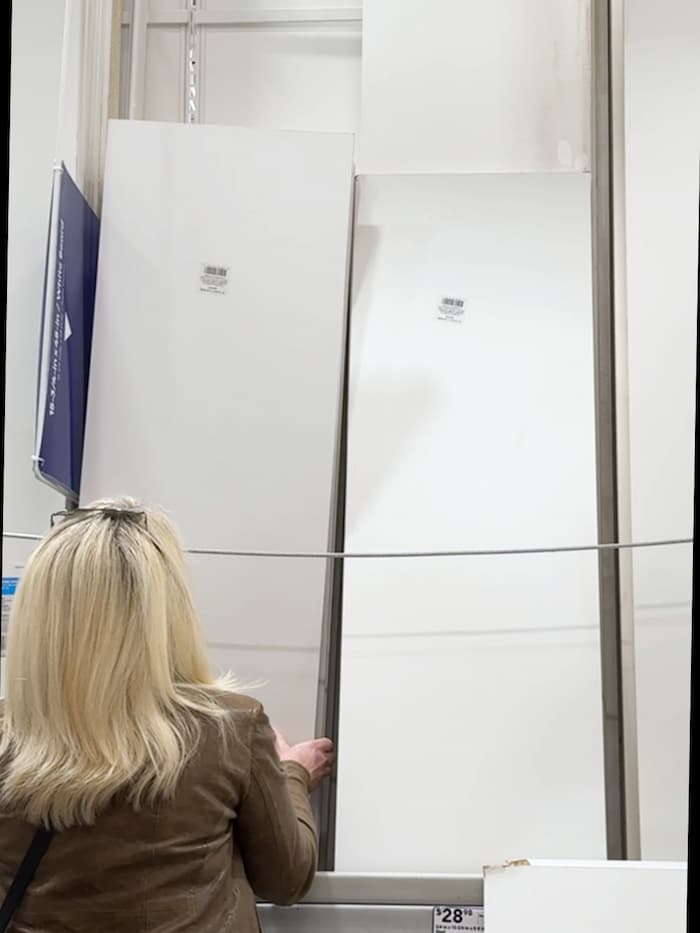
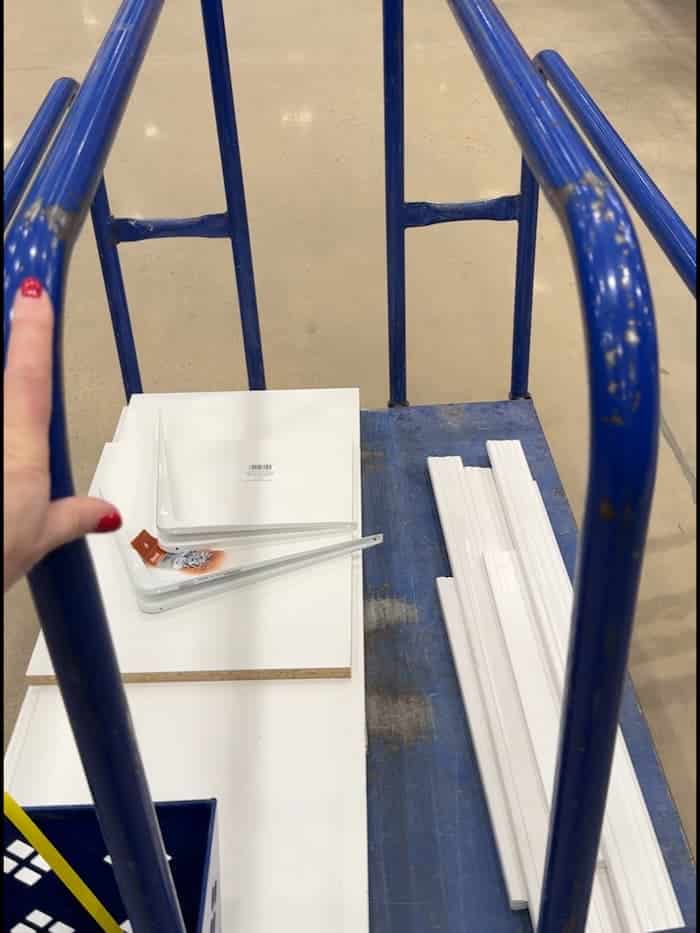
You need to have these cut to the right length and quantity to make the covers for wire shelves:
- 11 3/4 depth shelf to cover 12 inch wire shelves OR 15 3/4 depth shelf to cover 16 inch wire shelves
- White PVC trim boards 11/16-in deep x 2-1/4-in tall(minimum)
- Clear Nano Tape (from Amazon)
- Scissors and rubber mallet to remove and reinstall the wire shelves
- Rubbing alcohol,microfiber rag, cotton pad or balls
Why I chose these board and trim materials is you don’t have to paint either one!
How to DIY Covers for Wire Shelving
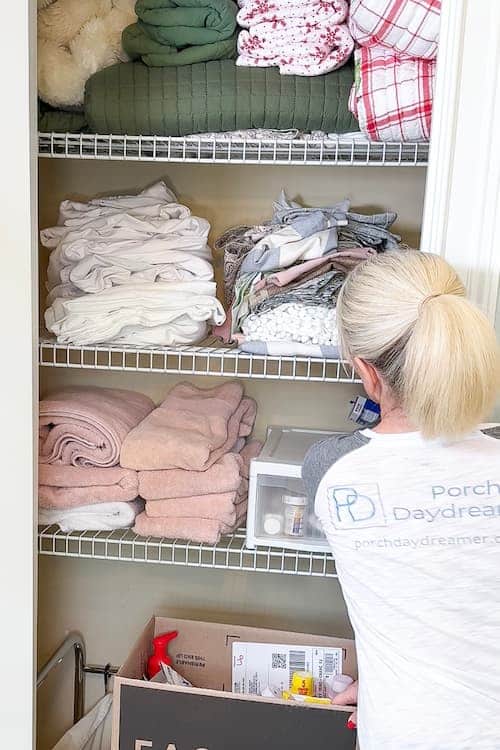
First of all, if you have multiple wire shelves in a linen closet (like I do), kitchen pantry, or laundry room you’re going to have to take EVERYTHING off the shelves.
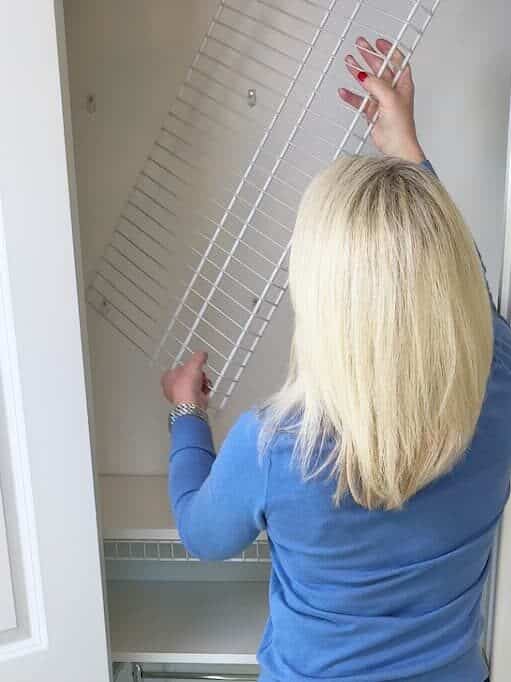
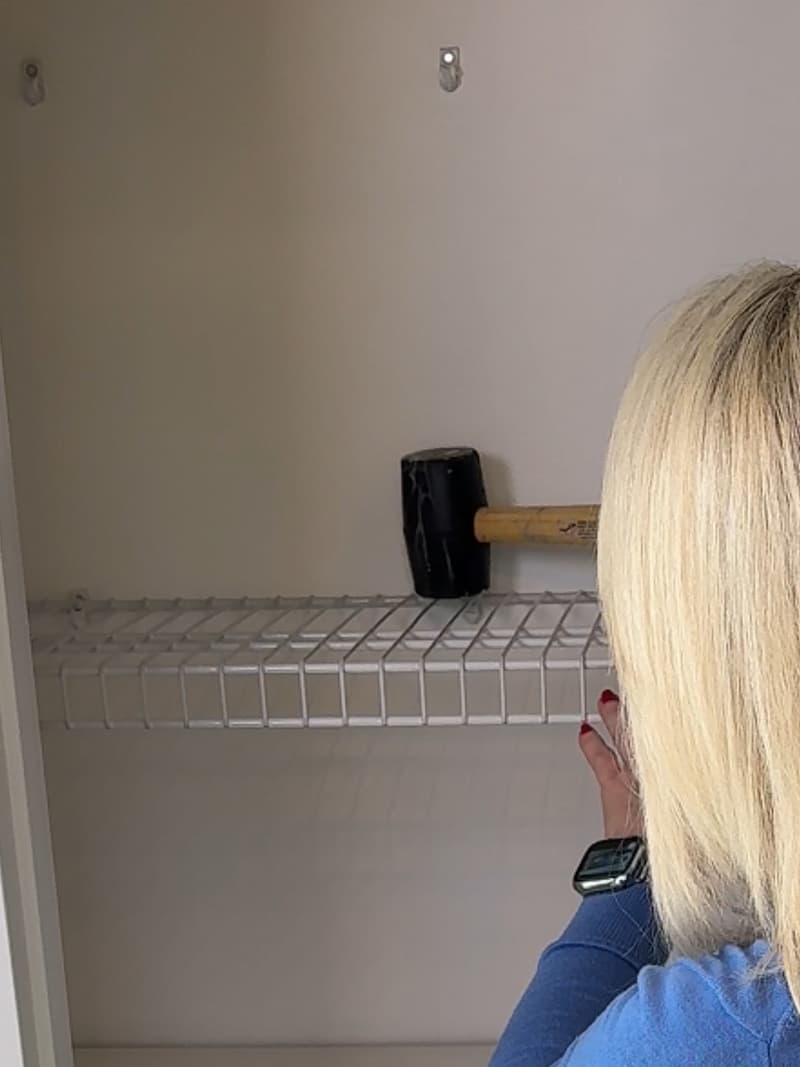
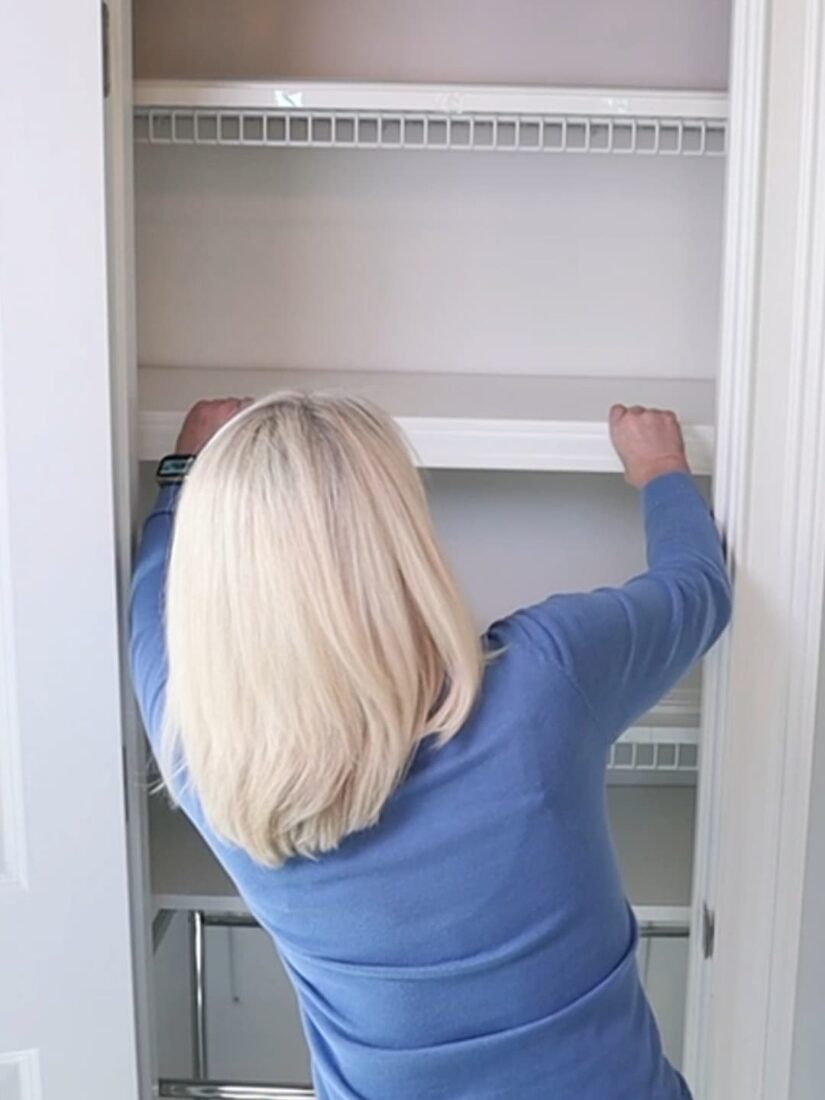
Step 1: Remove Existing Wire Shelves
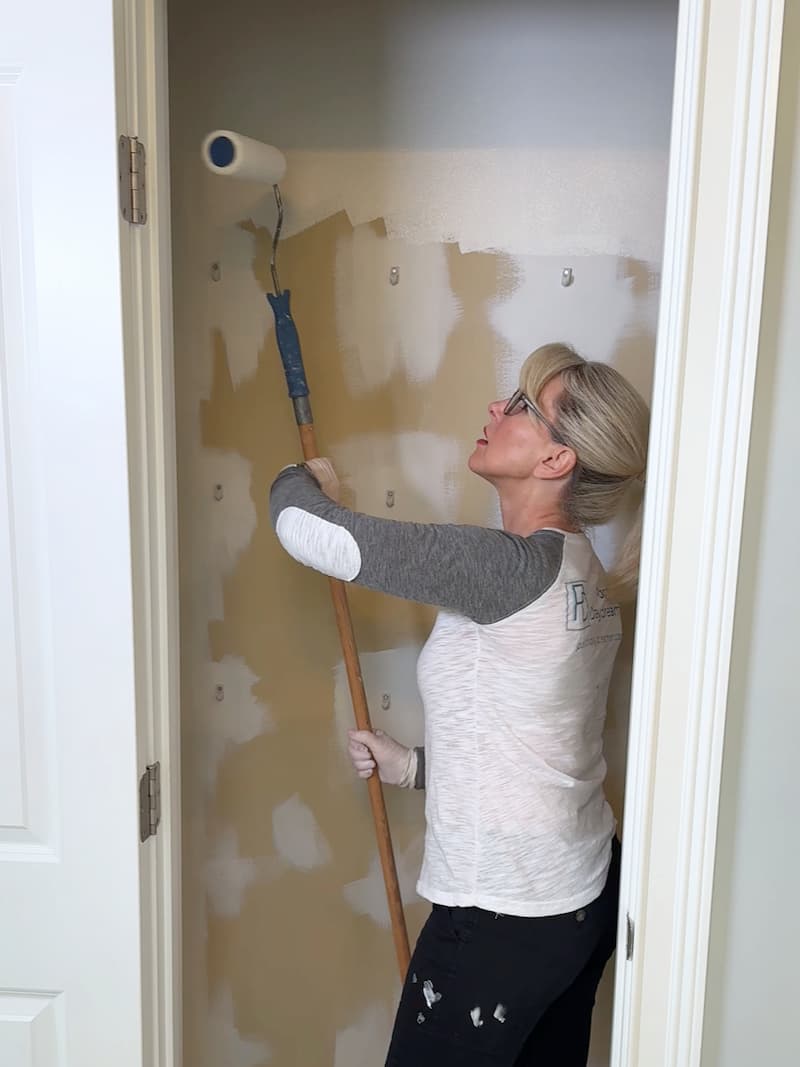
You may want to paint like I did! You can remove all shelves, paint, and replace just the bottom shelf.
Align with the back clips and use the rubber mallet to bang back in place.
NOT painting? Follow these instructions…remove ALL of the wire shelving EXCEPT the very bottom shelf, if you have multiple shelves in a closet.
Using a rubber mallet, bang in an upward motion in the back of the shelf to remove it from the wall clips. If you have only one shelf up high, it is easier to stand underneath and bang upward.
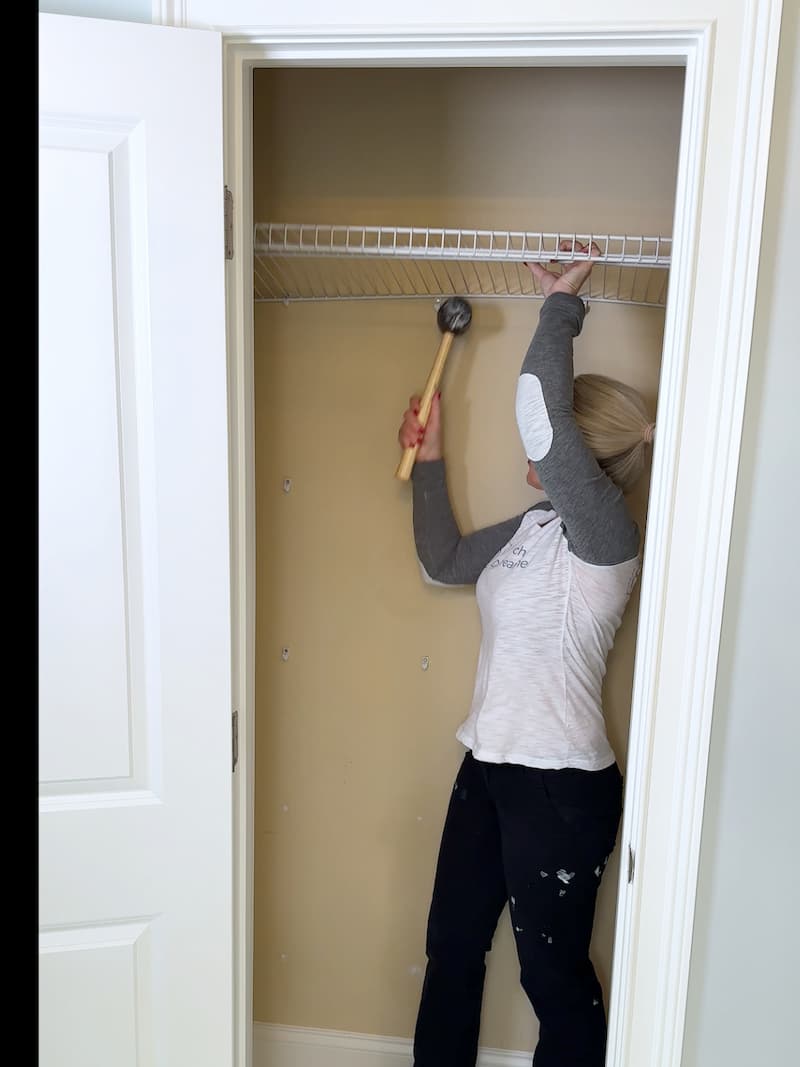
The wire shelves just sit inside side supports, so the shelves will easily come out once you’ve release the back clips.
Set them aside for later. You will reinstall them prior to adding the new covers.
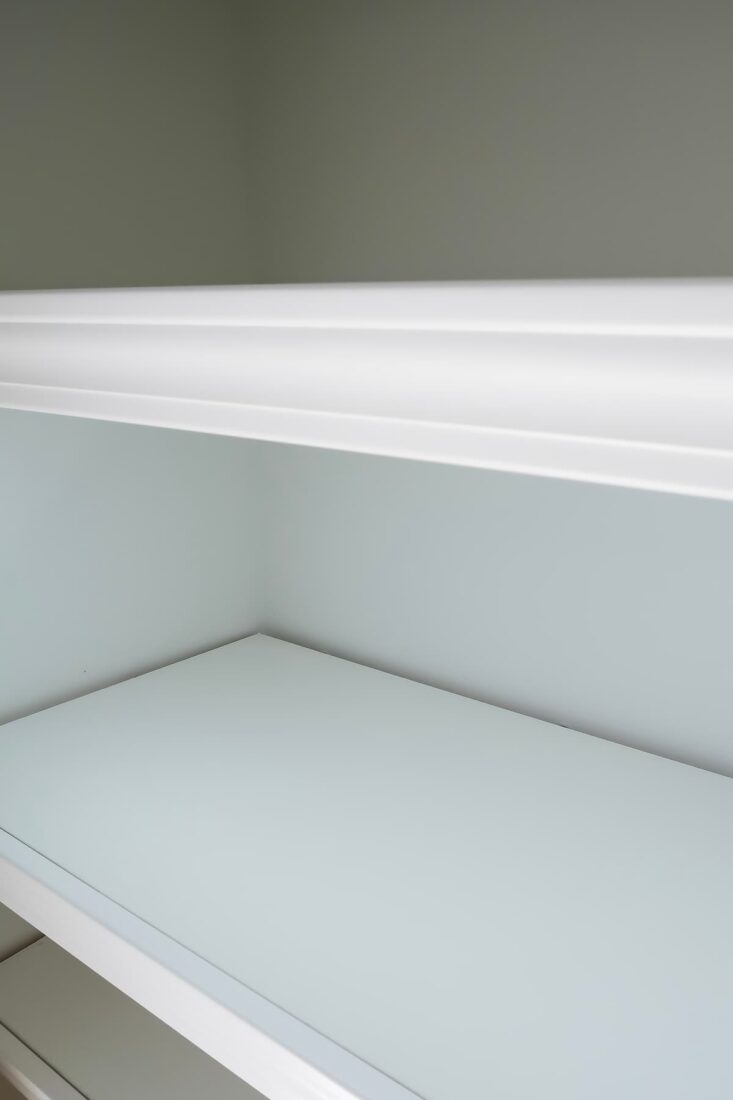
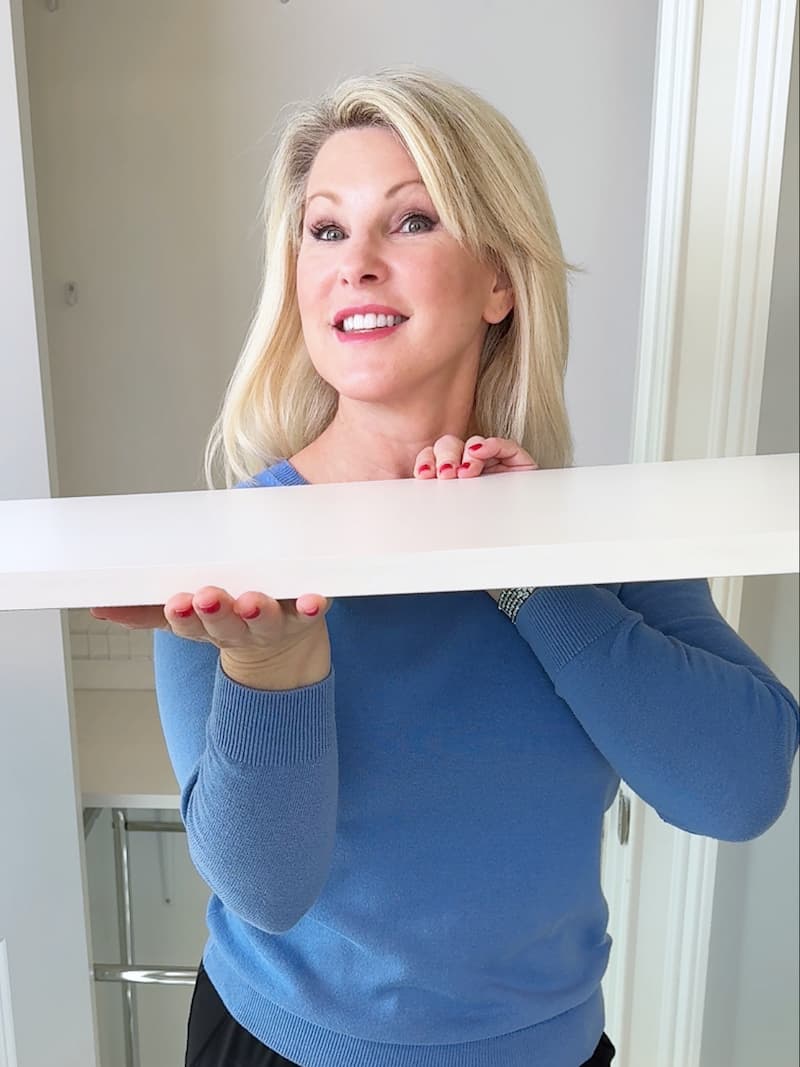
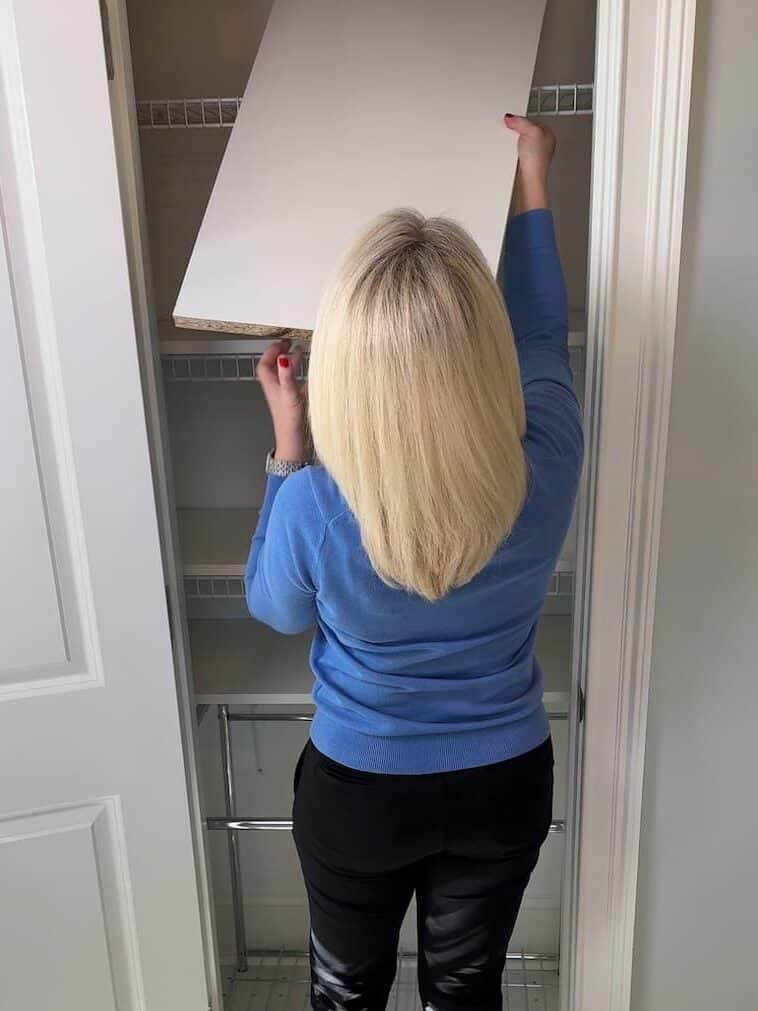
Step 2: Install White Covers
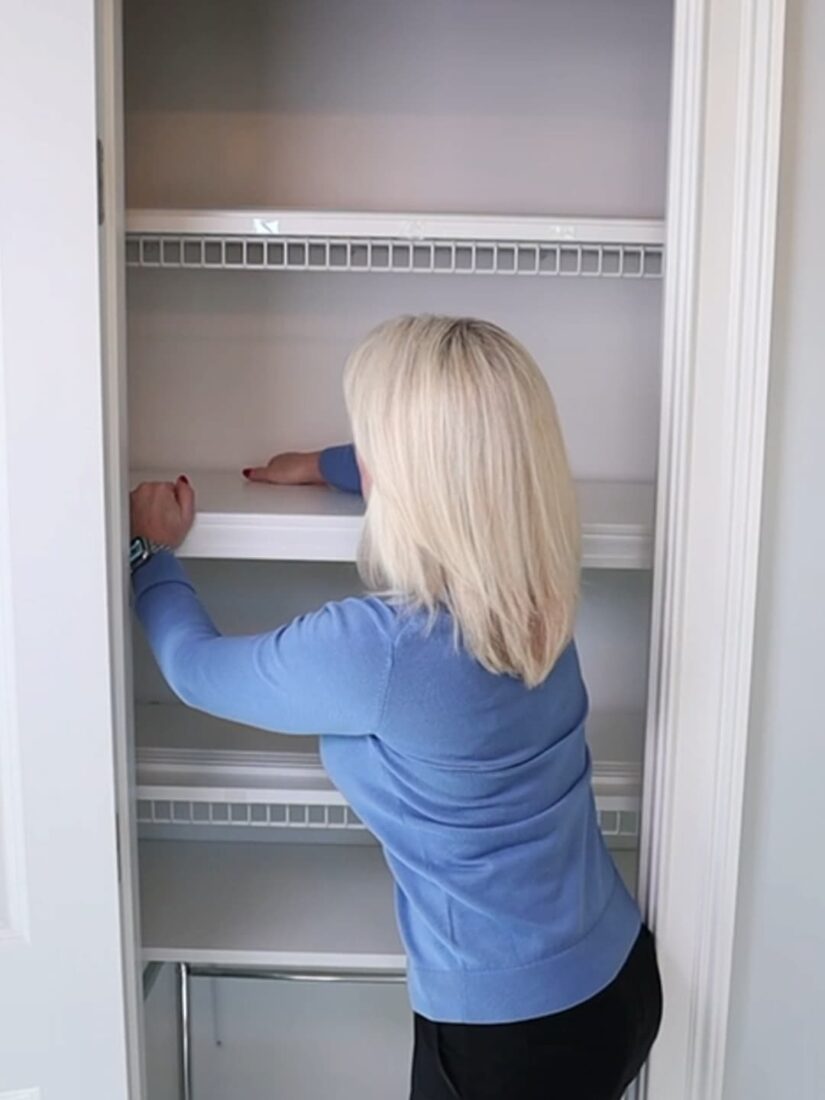
Gather your pre-cut white closet boards for installation. NOTE: there is a finished and unfinished side! Make sure the white side is facing OUT.
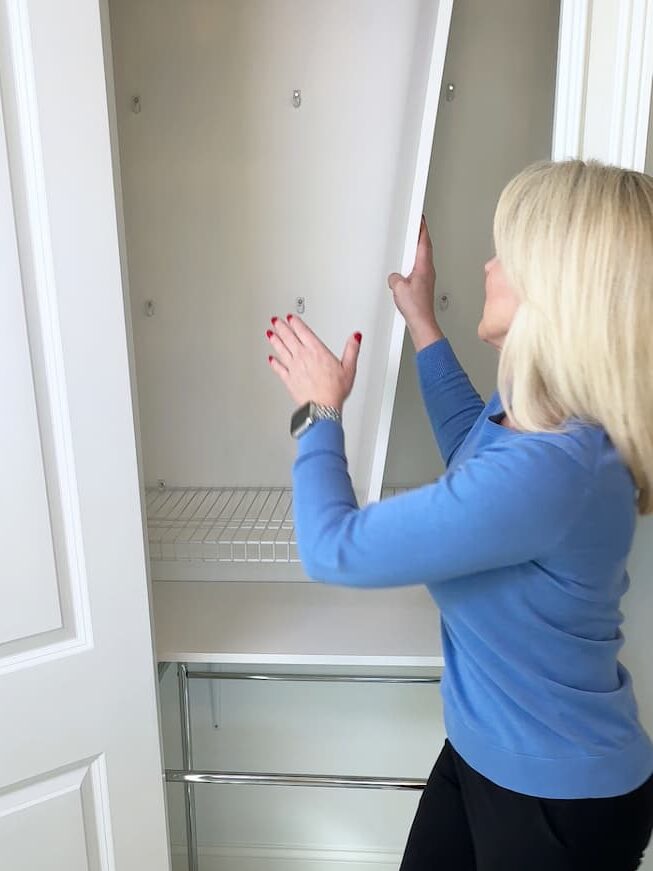
Start on the bottom shelf (all other shelves should be removed). Turn the board vertically and lift up.
Gently lay the board onto the wire shelf avoiding any brackets or side supports from the upper shelves – it takes some patience and maneuvering!
Install the next wire shelf above it and repeat the process until all wire shelves are covered by white boards.
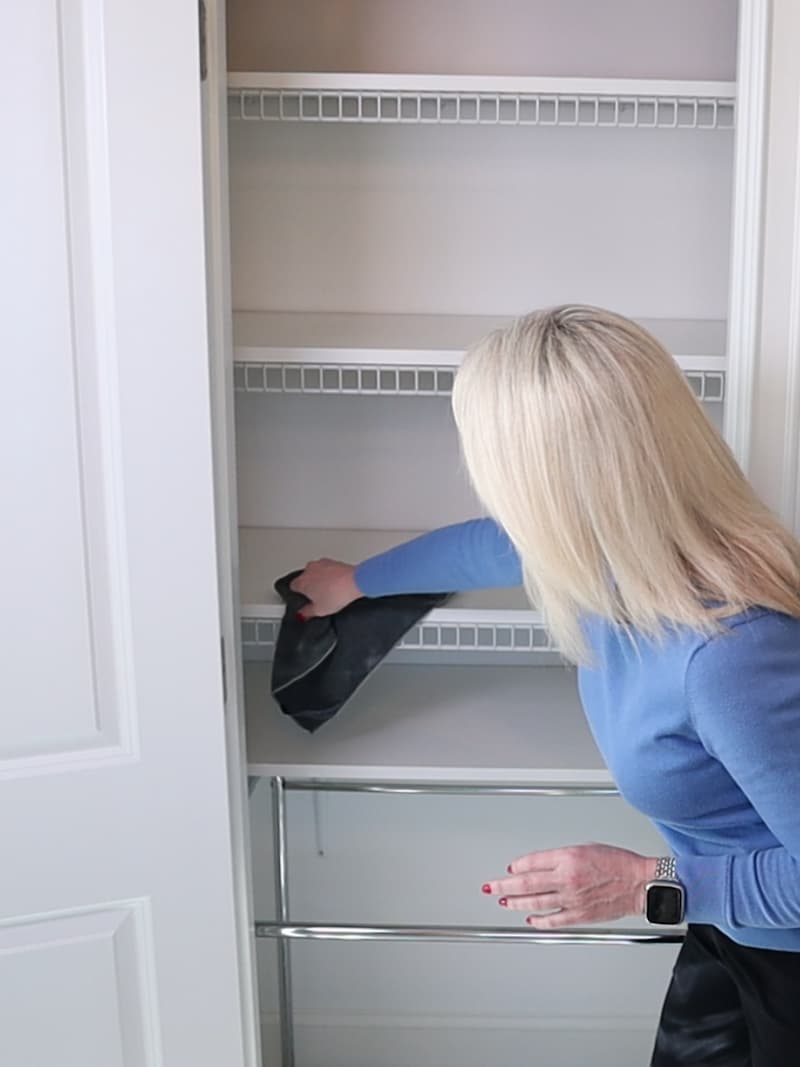
Step 3: Clean All Surfaces
After cutting, everything will be very dirty and dusty. In order to get secure adhesion of the tape, you’ll want to clean the board and trim surfaces really well.
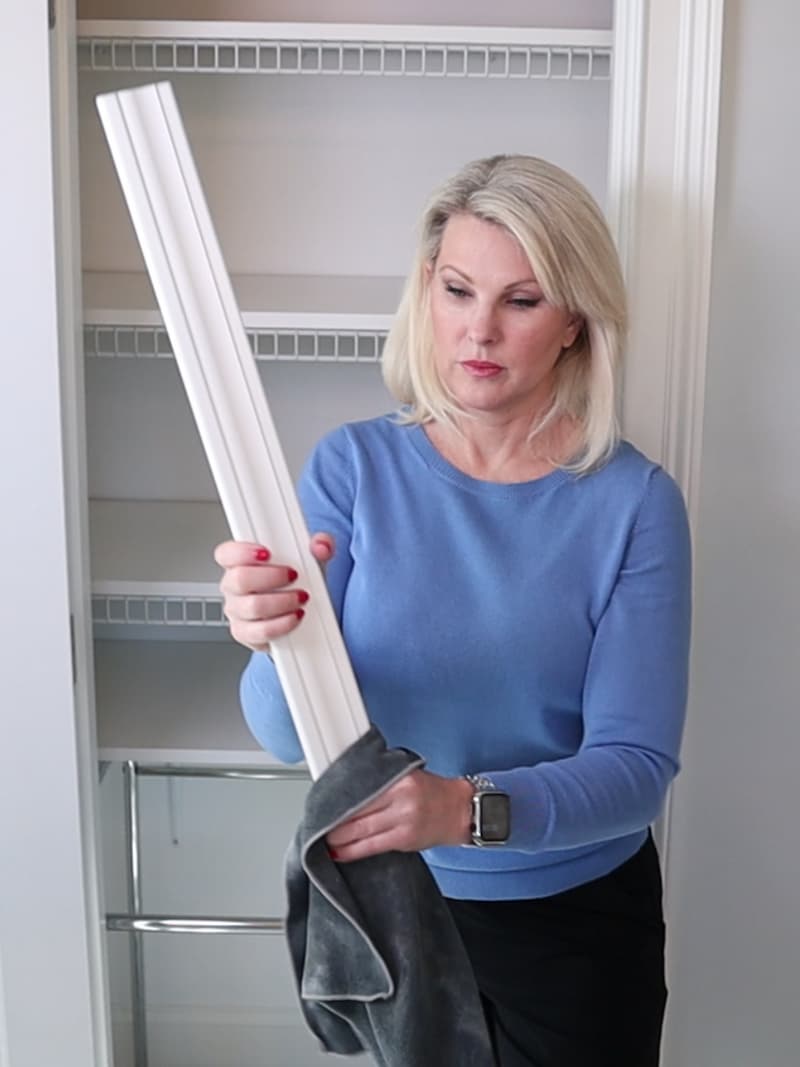
Use a damp microfiber rag to clean the boards and trim surfaces. To keep track of what you cleaned, lay the trim board on the shelf it will be applied to.
Apply some rubbing alcohol onto a cotton pad. Wipe the face of the white shelf to degrease it, so the nano tape has a clean surface to adhere to. Let everything dry.

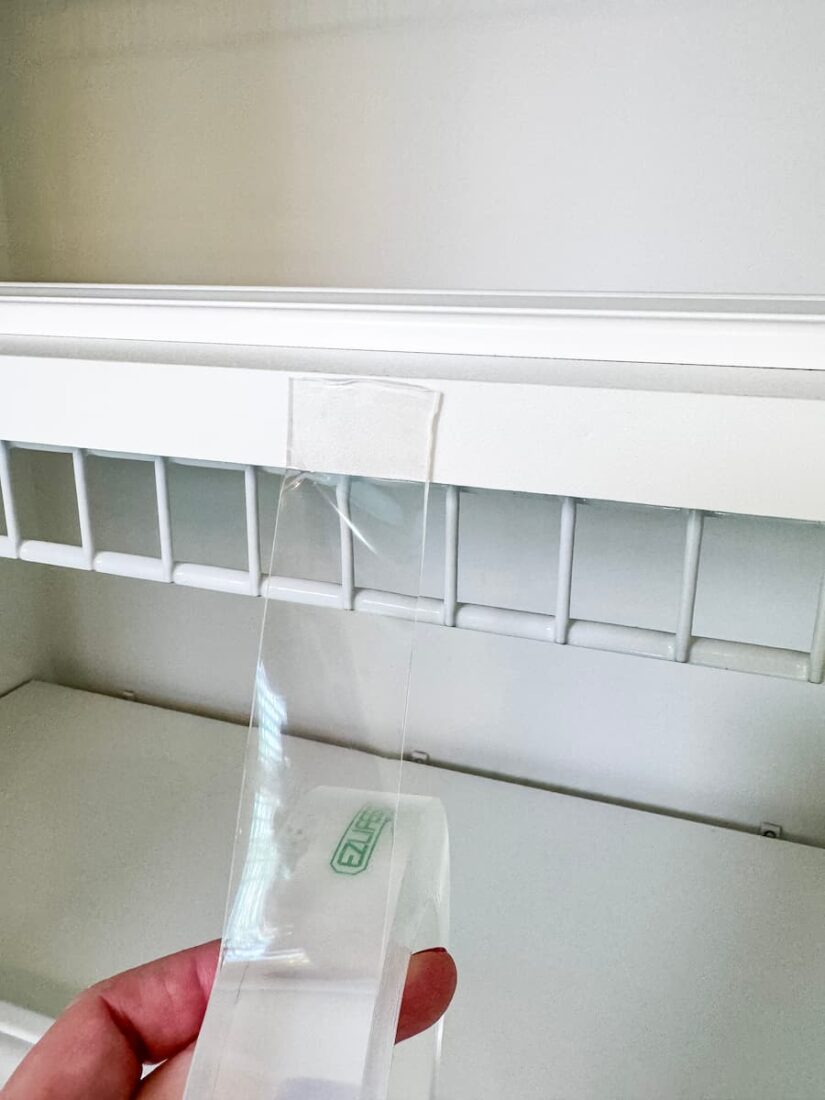
Step 4: Apply Tape to Board Face
Grab your scissors and nano tape. The outside edges are super sticky, so balance it on your fingers using the inner ring.
Warning! Any surface you set the tape roll on it will stick to, so lay it down on the bag it came in when not in use 🙂
Pull the board cover forward about an inch in front of the wire shelf itself. This will provide room to attach the trim later.
Start in the center of the face of the board and apply pieces every 6 inches or so. Make sure to apply a piece to each end.
It’s important to apply the tape JUST BELOW the board surface, so it won’t show after you attach the trim.
LEAVE ON the clear cover after you cut each piece. Repeat this process for all shelf boards.
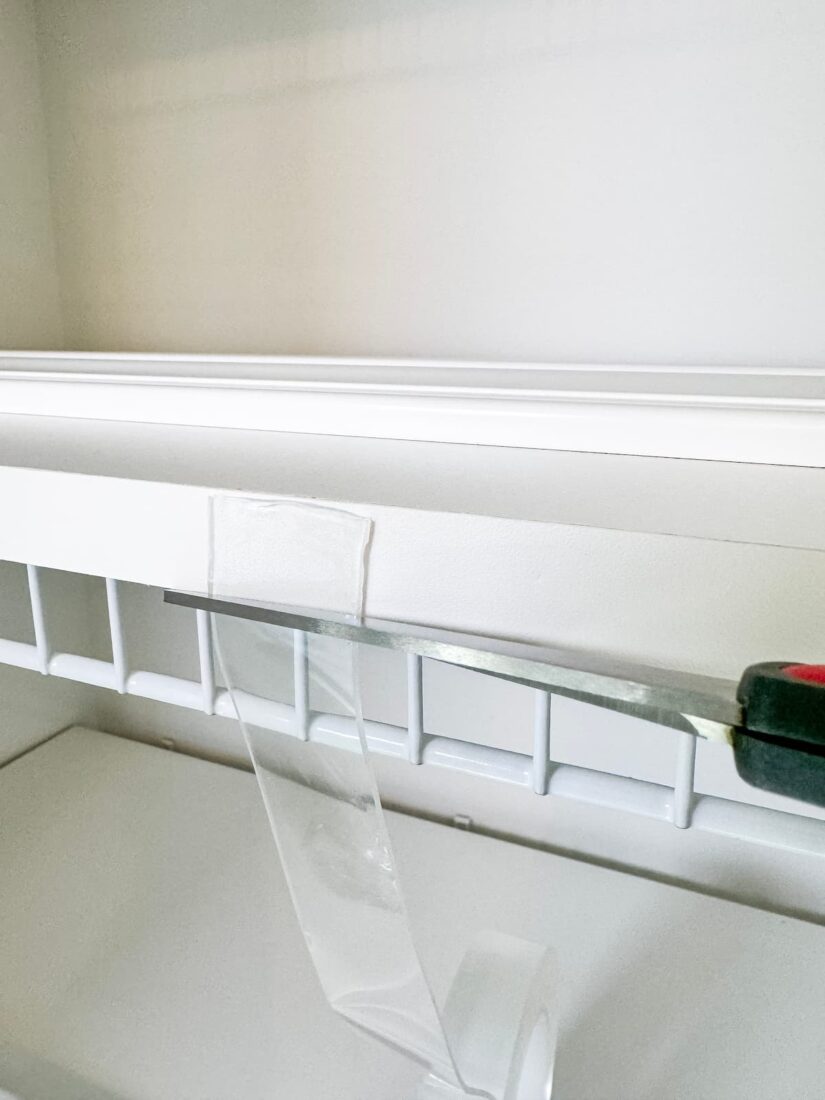
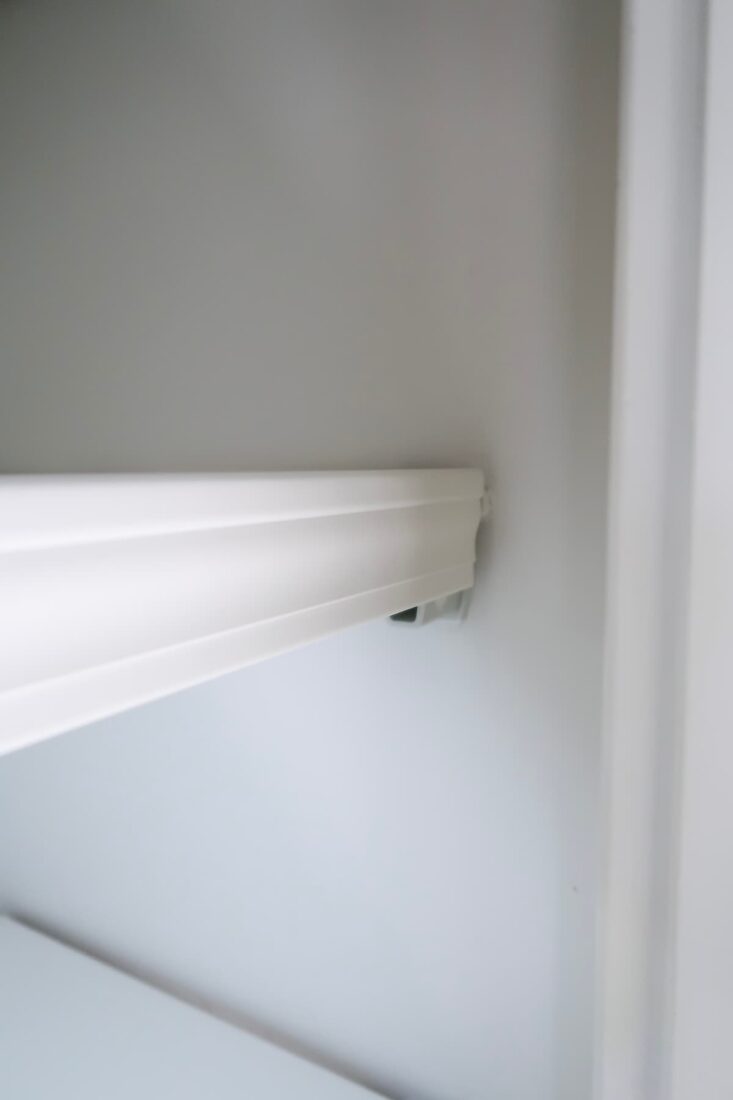
Step 5: Install Trim to Wire Shelf Covers
Work on ONE shelf at a time. Peel off nano tape clear cover to expose adhesive along the board edge.
Align trim to surface of board making sure it’s not too high. You want to be able to slide items easily on and off the shelf without it catching on the trim.
Gently roll the trim onto the board face. Reach to the back of the board and pull it toward you, while pressing along the trim to secure it to the nano tape.
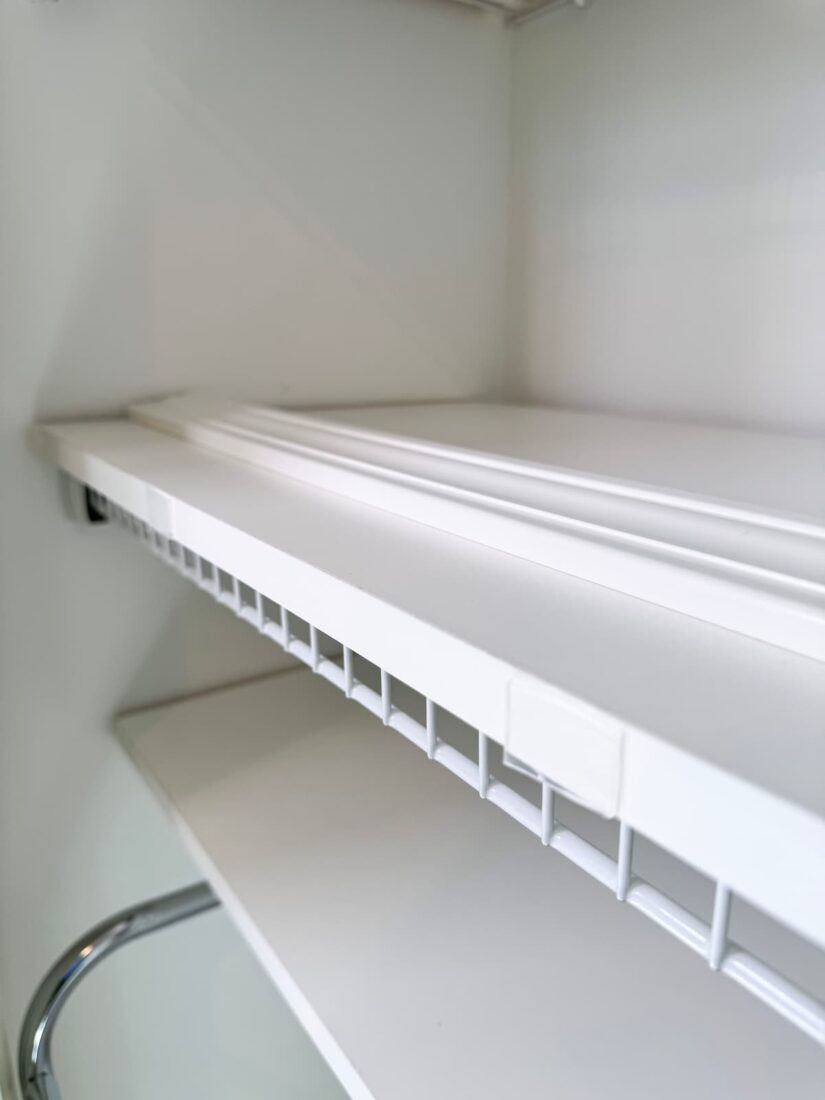
It INSTANTLY adheres and is ready to go! You should be able to pull on the trim and the wire shelf cover will come toward you.
Push the wire shelf color back so the trim is flush with the wire shelves. REPEAT for each shelf as needed.
FAQS about DIY Wire Shelf Covers
How much does each shelf cost to cover?
- This will depend on your specific measurements and how many board and trim pieces you have to buy.
- For my 4 shelves that were 16 inches deep and 39 inches wide, the total cost was $100. That works out to $25 per shelf cover!
My wire shelf supports are exposed. Will the 2 1/4 inch trim cover them?
- Before tackling this project, I was worried about the wire shelf side supports getting in the way of the trim.
- In order to fully cover the supports, you would need to use a PVC trim board much wider at 3 1/4 inches.
What if I am not happy with how I applied the trim to the board and it’s not straight or too high?
- Gently roll the trim board down and off of the closet shelf board. The tape will either come with the trim or stay on the board. You can easily remove the nano tape and reapply the trim.
The trim is applied, but a little piece of nano tape is sticking up and my stuff is catching on it. How do I fix this?
- Using either scissors to cut or a razor blade to trim. Pull up the area sticking up and cut off excess. Use your finger nail to push tape down below the board surface.
What if I have 8 inch or 24 inch wire shelves, can I still DIY wire shelf covers?
- You can use this tutorial and do your homework to find the right depth of shelf covers. If you can use standard length shelf boards like 24, 36 or 48 inches, there are usually deeper white laminate shelves available.
Are you SURE I don’t have to paint the trim and it will stay white? What if I want to paint the trim?
- The COOL part is the PVC trim is white through the core. It’s used in exterior home applications, so it’s durable and weather resistant. Wipe it clean anytime.
- The PVC trim is paintable! If you want a color other than white, paint them.
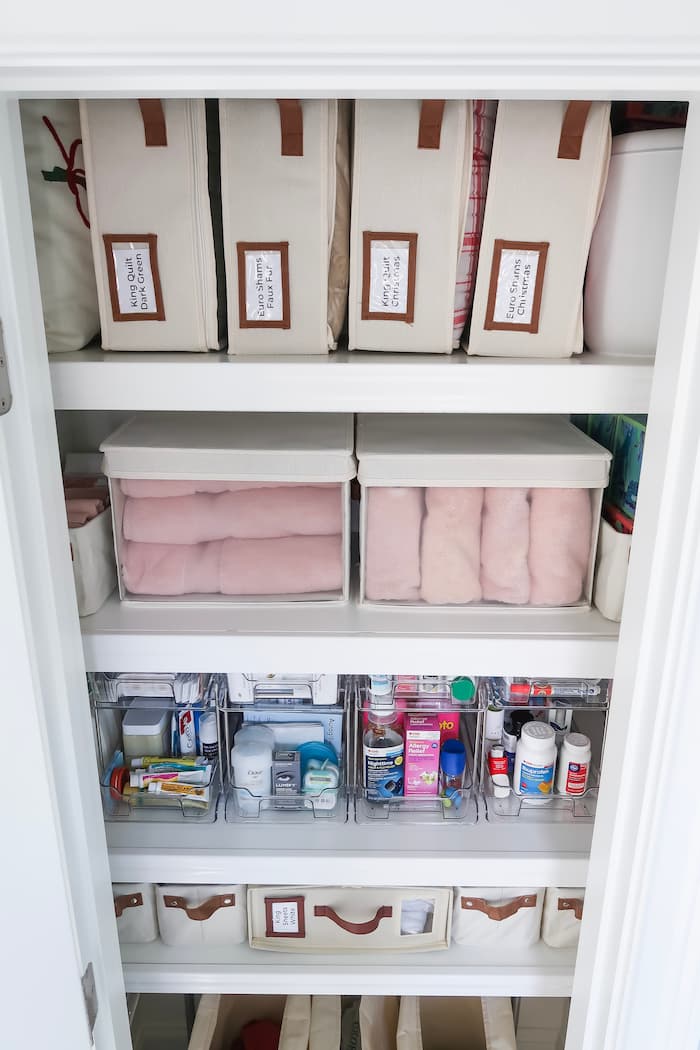
Next Steps: Closet Organization!
Now that you’ve said goodbye to your ugly wire shelving, it’s time to upgrade your closet storage too!
Read my next tutorial where I’ll reveal exactly how I organized everything in my linen closet.


Sign-Up for my Weekly Emails!
Straight to your inbox sharing can’t miss decorating and painting tips for your home.
I absolutely love this idea, especially not having to do the cutting myself. One of these days, I’d love to do this in all of my closets, but in the meantime, I went the cheaper route and covered the wire shelves in my pantry, bathroom, and linen closet with foam board from the dollar store. I simply cut them to size, then covered them with contact paper, which comes in a million patterns or solid colors. They’ve lasted beautifully for years, and you can’t even tell that they’re made from foam board. Plus, they’re easily changed out if I ever get tired of the pattern.
Great idea! Love it. Thanks for sharing. I saw that idea and didn’t want the hassle of cutting…so happy Lowe’s cuts the shelving and trim for free!
What a great idea! I love this! I will be doing this in my beach condo closet.
I love this idea! And it seems pretty doable. This will be a huge upgrade in my closets- thank you!
It’s totally doable! I’m so glad you love the idea. Let me know how it goes and if you have any issues.