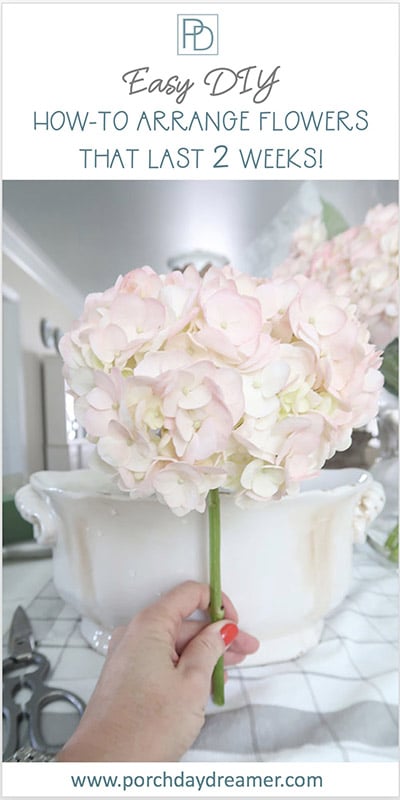
How-to Make Grocery Store Flowers Last Weeks
Are you wondering how to keep your grocery store flowers alive longer? How I create a floral arrangement that lasts weeks!
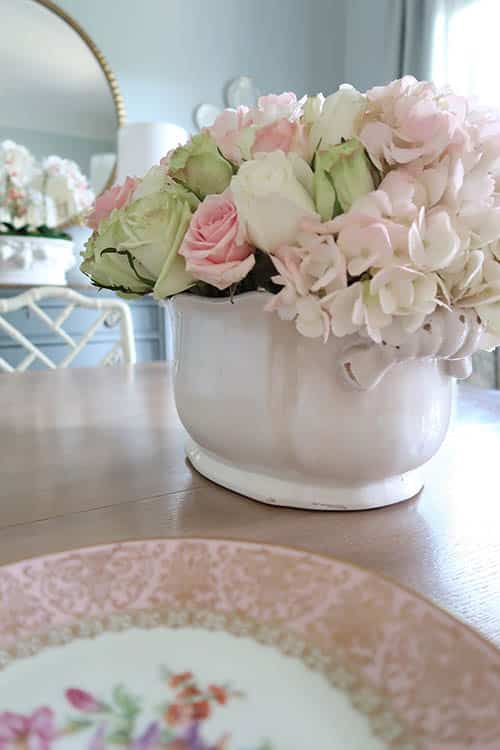
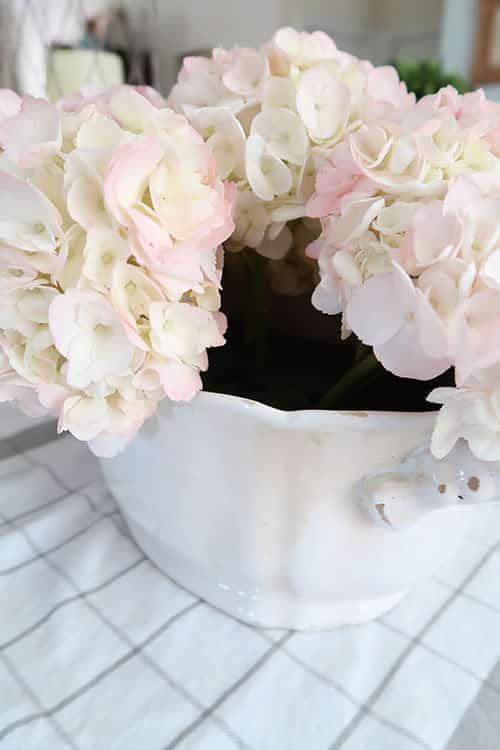
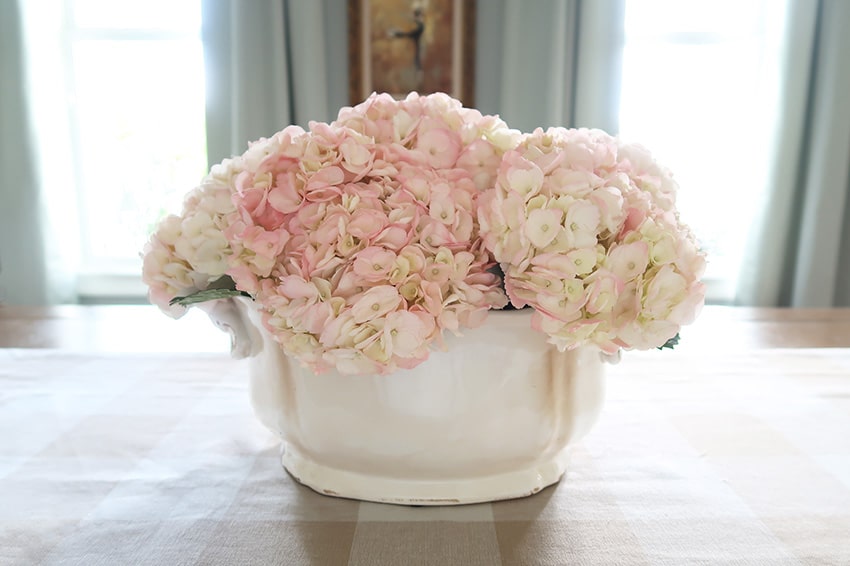
Have you seen the pictures of my dining room on Instagram and the beautiful arrangement in the center of the table? Guess what those hydrangeas are real and are there ALL of the time.
This summer my hydrangea bush didn’t produce its big beautiful blooms. Normally, that is my free source for flowers all summer. This year, I’ve had to make arrangements with grocery store flowers.

Long Lasting Grocery Store Flowers
After spending $12 to $25 dollars on flowers, I wanted to keep them alive as LONG as possible. I stumbled upon this concept, when creating an arrangement for my One Room Challenge reveal photoshoot.
This was a bargain basement closeout sale of flowers crammed into my planter. Every flower was 50% off and all of this was a mere $25!
Normally, I do an arrangement by creating a bouquet which you can read about HERE. This was my first time having to fill a large container and the bouquet method did NOT work! Trust me I tried and failed miserably.
My NEW method to fill a container with grocery store flowers survived for 2 weeks!
Not only did they survive the week of the photoshoot, but the entire NEXT week when I was in Europe. Surprisingly, I came home to flowers that were still alive!
Pin It for Later!
Post contains hand selected products, with some affiliate marketing links {full disclosure here}
How-To Make a Long Lasting Flower Arrangements
Luckily, this is the easiest and most inexpensive trick. Plus the system I’ve set up for my flower container is re-usable for months!
Just twice a month I replace the flowers and it’s saving me a TON of money and time. All year long I will be able to maintain a beautiful grocery store flower arrangement on the dining room table.
Supplies
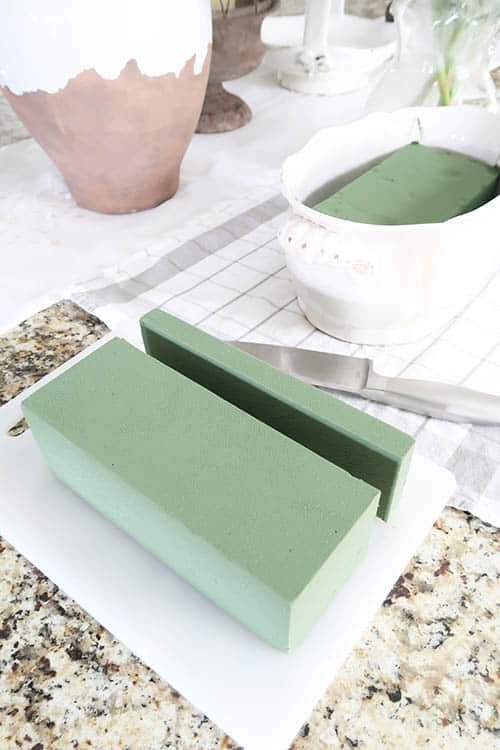
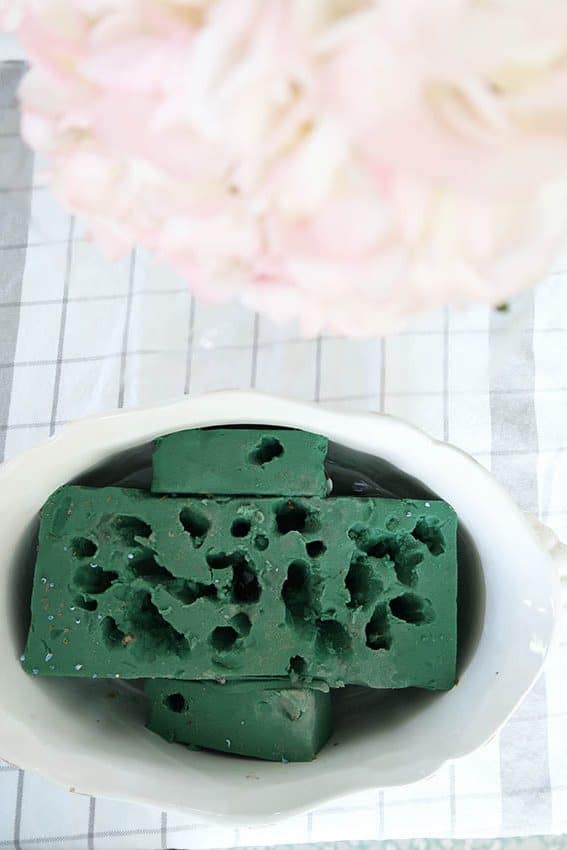
- Wet Floral Foam
- Planter You Love
- Flowers in uneven numbers 3, 5, 7 depending on container size
- Floral snips
- Chef’s knife
- Cutting board
- My container holds 7 hydrangea stems for perspective
Step 1
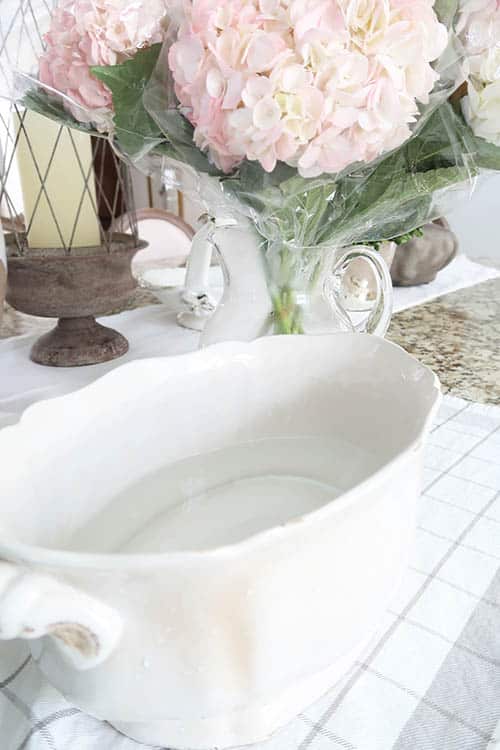
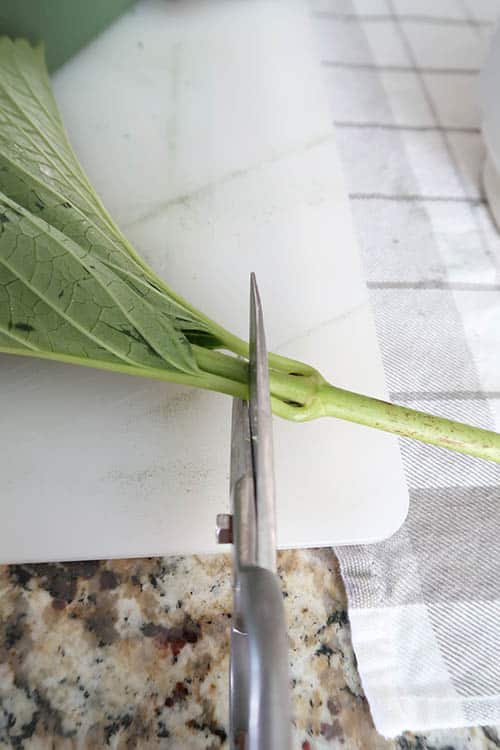
Keep your grocery store flowers in water until ready to use! Before placing them in water cut the ends just a bit at a 45 degree angle. I keep mine in a pitcher of water.
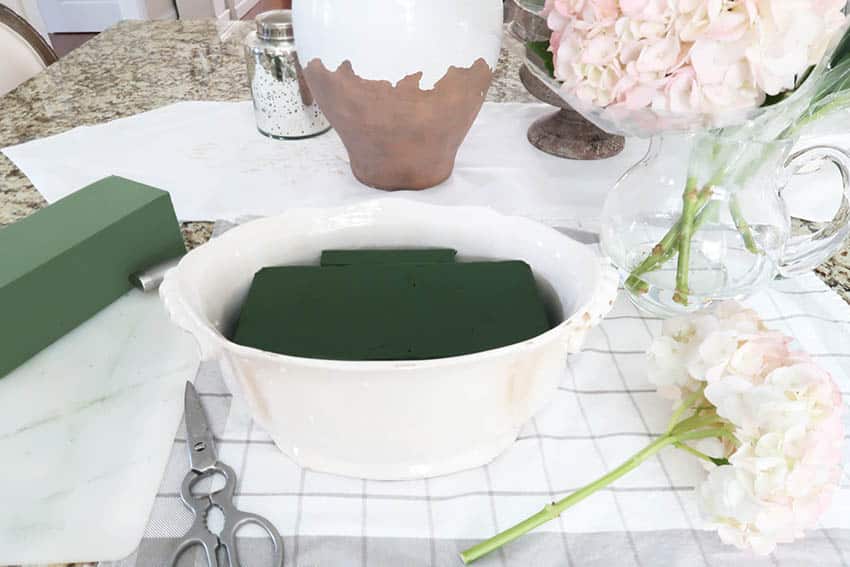
Fill planter with water about 1/3 full.
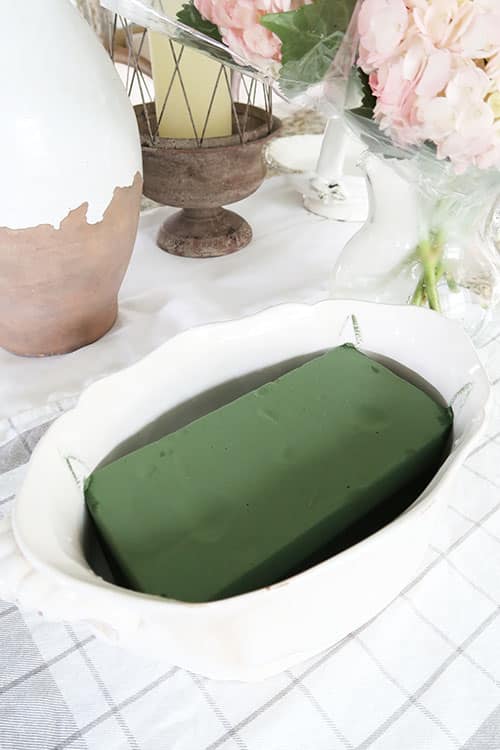
Step 2
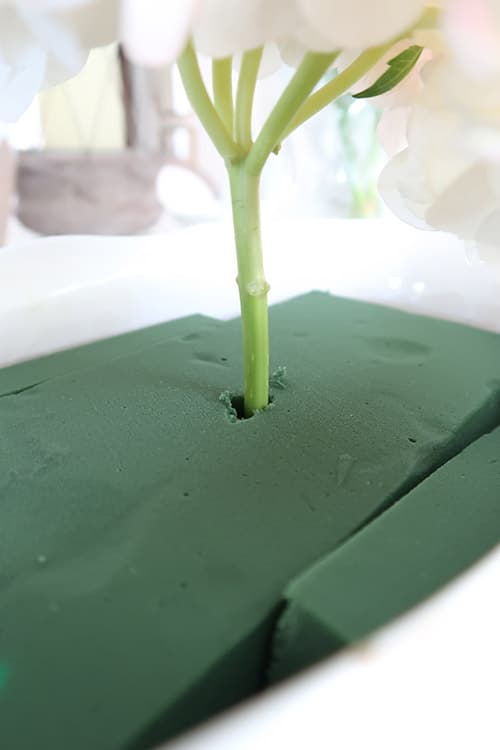
Map out how many bricks of oasis foam you need. Try to use one large piece in the center and fill in the gaps. It is very easy to cut! Push foam into planter.
Step 3
Technically, you are supposed to soak the foam overnight but I’m not good at following directions sometimes 🙂
Instead, I add more water over top of the oasis foam and don’t soak it. It hasn’t been a problem and the foam soaks up the water even after you place your flowers.
Step 4
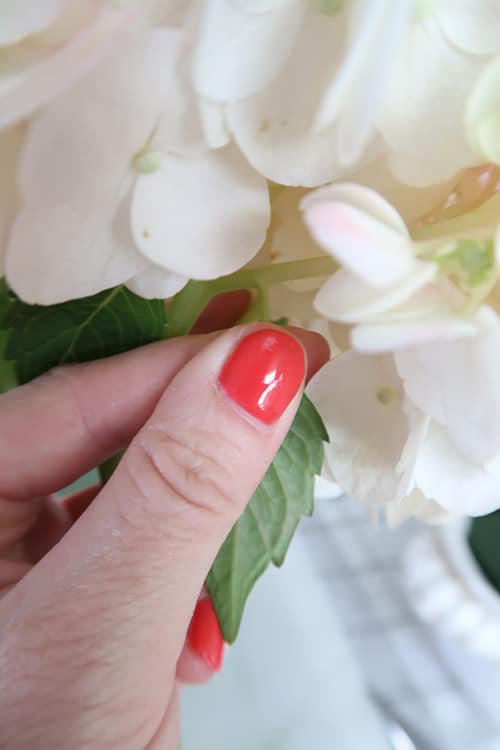
Remove leaves from the majority of the flower stems. With hydrangeas, I’ll save the large leaves on two stems and I’ll show you why later.
The fewer leaves the more water goes to the bloom itself. I even pinch off the tiny leaves on a hydrangea.
Step 5
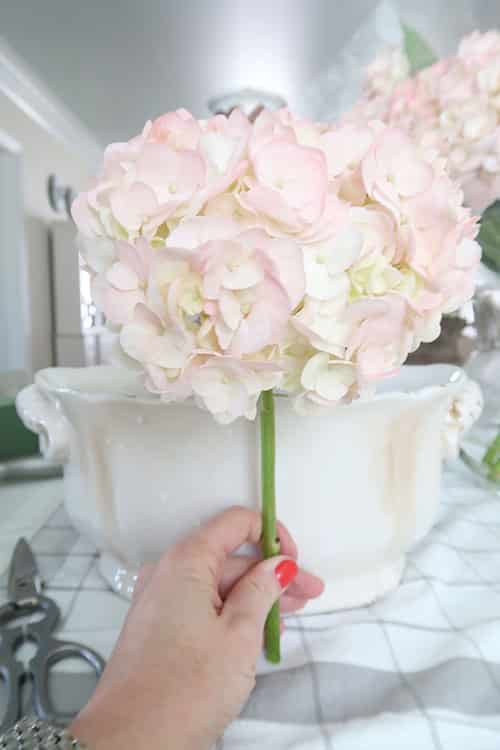
Place your flowers! Start with the center flower stem and work out from there. Hold up the stem to judge how tall it needs to be. Cut the stem at a 45 degree angle with your shears before placing.
If it seems too tall, keep snipping of a 1/4 inch at a time to prevent over cutting the length. Push into center of planter until it is near the bottom, but not at the bottom.
Step 6
Work your way around the planter using the same method. For an oval container like mine, I angle the flowers along the edges so they take up as much space as possible in the planter.
If you have to move them around, do it! Just gently pull out the stem and place again in a new location.
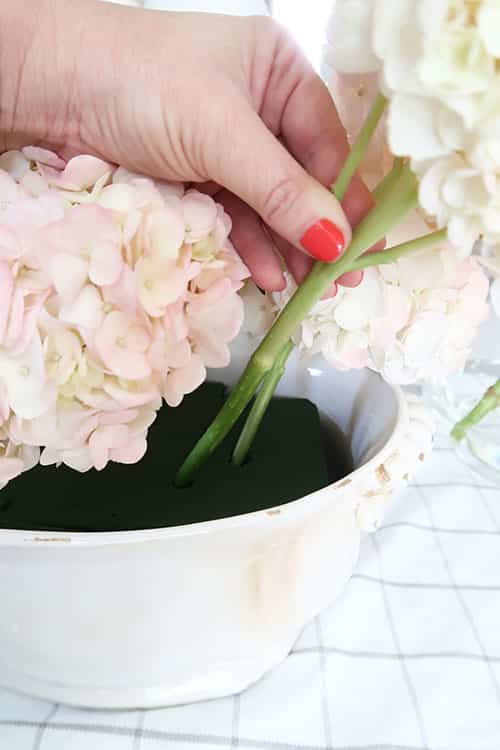

The stems with the large leaves I add to the ends of the planter, so they hang over and create more visual interest.
Flower Arrangement Care
Now that you’ve created the arrangement with love and it’s perfect let’s keep it alive! You are going to be shocked at how easy this is.
- After the flowers have been in the planter overnight, add water to the planter almost to the top.
- Every 2 or 3 days poke your finger into the arrangement to see if there is still water.
- No water? Add water to the top again.
Truthfully, by the 2nd week I let more days go in between. You will see a bloom or two start to wilt. Then you know it’s time to pick up a few more at the grocery store.
At times, I’ve been able to just replace a few at a time on a rotation. That will all depend how fresh the flowers are on the day you buy them.
TIP: Become friends with your grocery store florist! Find out what days they get flower deliveries.
Mine is 2 times per week. Then you can buy that day, so you get the best selection and freshest flowers available. Also, she’s given me discounts on the “off” days too.
Keep Reusing the Oasis Floral Foam
Here is how the foam will look after you reuse it a few times – yes a few! In between uses, I ALWAYS dump out the water and small chunks of foam come with it.
Every time fill with fresh water, before adding a whole new arrangement.
You will know when it’s time to replace because it will look a little too “holy” ha ha!
Good luck finding the perfect planter, flowers, and creating a floral arrangement that will last for weeks! Like this tutorial?
CLICK HERE to make a faux orchid arrangement that lives forever!
Until next time…
Porch Daydreamer
Tracey
I have daylily blooms in a vase now that have lasted nearly 2 weeks and plan to continue this streak using your wonderful suggestions with my grocery story flowers. I love your blog and ideas. I also LOVE your dining room chandelier. It is a stunner and would look fabulous hanging high above my entrance facing the large window. Would you share where you purchased it? Thanks so much.
Hey, Patricia! What a nice way to start Monday! Thank you for the compliments. Happy to share where the chandelier is from, but it’s no longer available. It’s from Ballard Designs and it seems like I got the only one produced. Sorry!
Great idea on the florist foam. I’m new to your blog. So lovely. I will try this. Thanks
Glad it helped! I am so happy I stumbled onto this too.
I love hydrangeas and can’t wait to try this! I’m new to your site and
have enjoyed so many of your stories. I saw your link on Rhoda’s
Southern Hospitality blog. I can’t wait to read more. Susan
Susan, thank you! I promise it works – my hydrangeas are still fluffy and healthy since writing that post 🙂
Well that’s good info, now if I can just do it😆😆
You can! That was the first time I chalk painted anything.