Adjustable DIY Closet System: Organize Anything
The most affordable adjustable easy DIY closet system you’ll ever need! Maximize vertical wall storage in your home
Have you been looking for a closet system that will help you organize your life? Do you struggle with a lack of storage? I think we all do no matter the size of our homes!
Luckily, I have discovered a do-it-yourself and easy-to-install closet system!
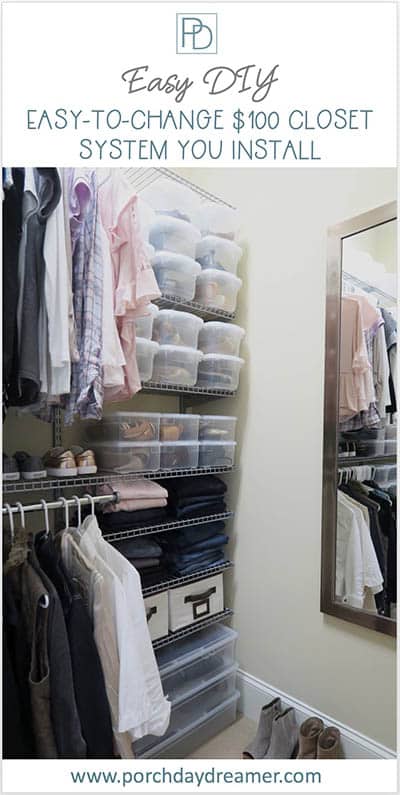
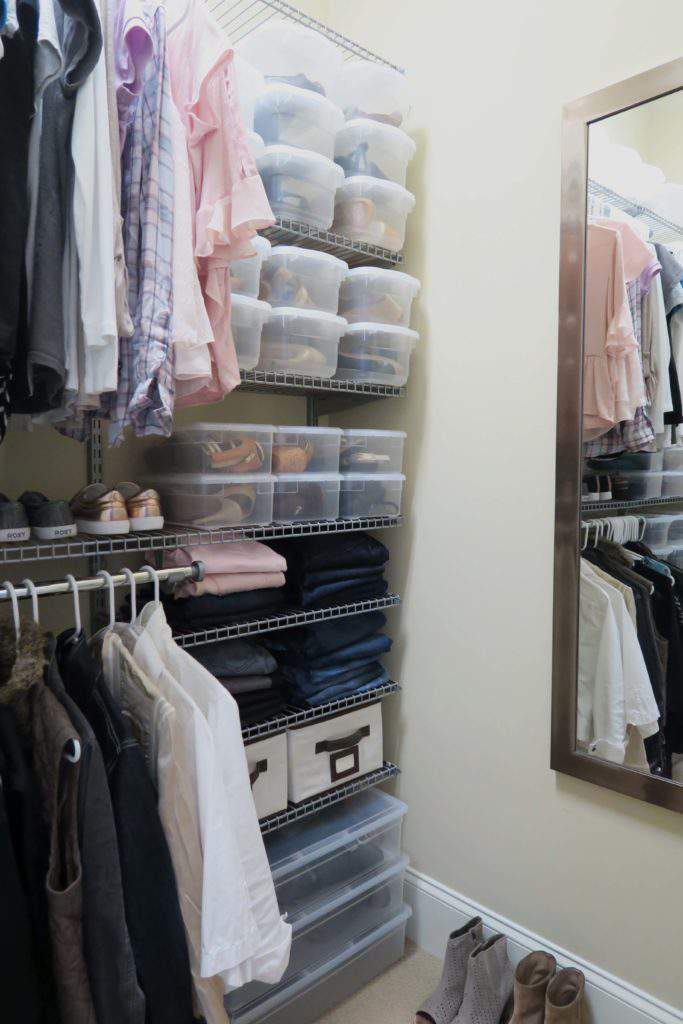
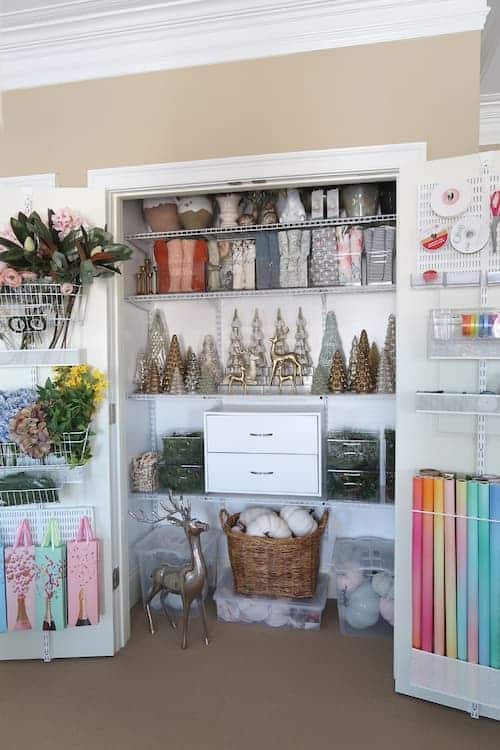
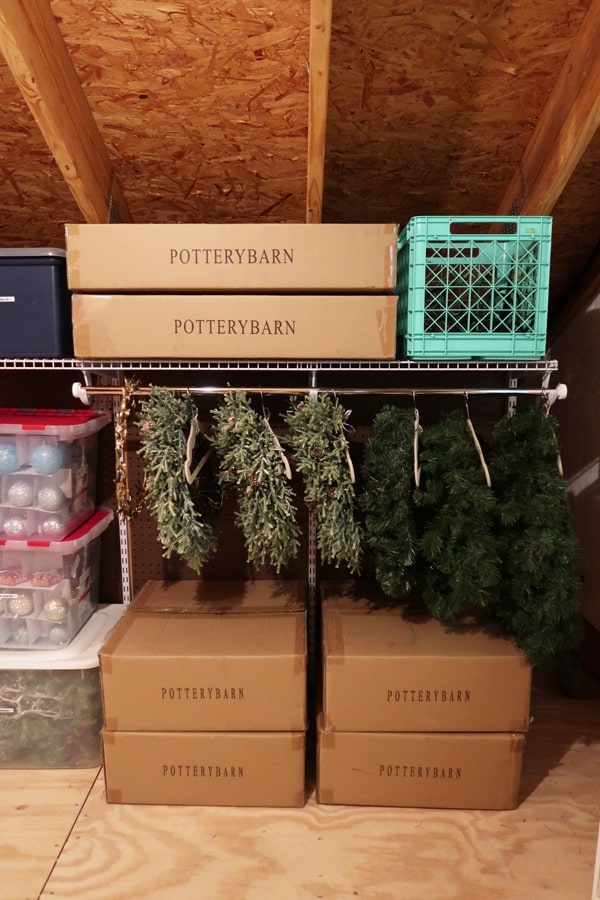
This closet system organizes literally anything and everything! Plus it is just over $100 for up to an 8ft wall and can be configured in more ways than I can count.
This closet system is so easy-to-install that I have added it to 4 of the closets in my home! ME. I did it.
Maximize Vertical Wall Space to Organize EVERYTHING
I’d like you to think through any blank wall space you have behind closed doors. That’s the space you can re-configure to work harder for you and store more stuff.
That blank wall will become a closet system that will transform a space and organize your life!
Do you have plain old white coated racks running around the walls of a closet? That closet system is NOT maximizing space. Pop it out and start over again!
Here is a little teaser of how I recently organized the space under my stairs. It USED to be a blank wall storing NOTHING!
Adjustable Closet System: Changes with Your Needs
Now that we are in back-to-school season I’ve been stocking up on “stuff” from my favorite warehouse club.
Never did I have enough space in my cabinets and I don’t have a pantry. Not creating a pantry was a BIG miss when I built this house, but that is a another blog post!
After living here 7 years, I finally realized I had the perfect space to create a “pantry” and I knew that I had a go-to closet system that I could put up in a half an hour!
Here are just some of the ways this closet system can be used to organize everything and anything in your home.
Pin It for Later!
10 Ideas for a Closet Organization System
- Coat closet
- Pantry
- Garage
- Under the stairs
- Laundry room
- Clothing closet
- Craft room
- Linen closet
- Office shelving
- Storage closet
- Attic
6 Closet Examples Using Adjustable Shelves
No judgement zone! You can see all of the creative ways I’ve used this system.
This closet system really is magical in that it can be adjusted to fit your needs.
The first one I ever installed was in my son’s room when he was a toddler.
SO much better than standard stationary wire shelving!


Contains hand selected products, with affiliate marketing links where I may earn a small commission if a purchase is made. {full disclosure here}
What Adjustable Closet System to Buy
There are two color options White and Titanium (I have both).
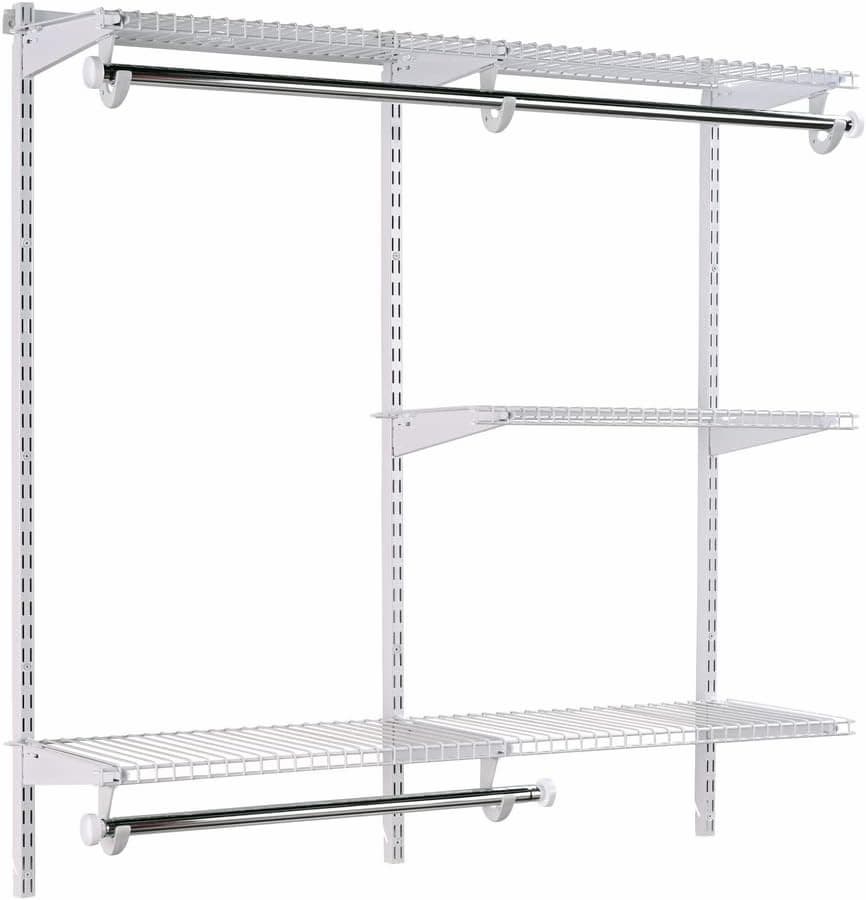
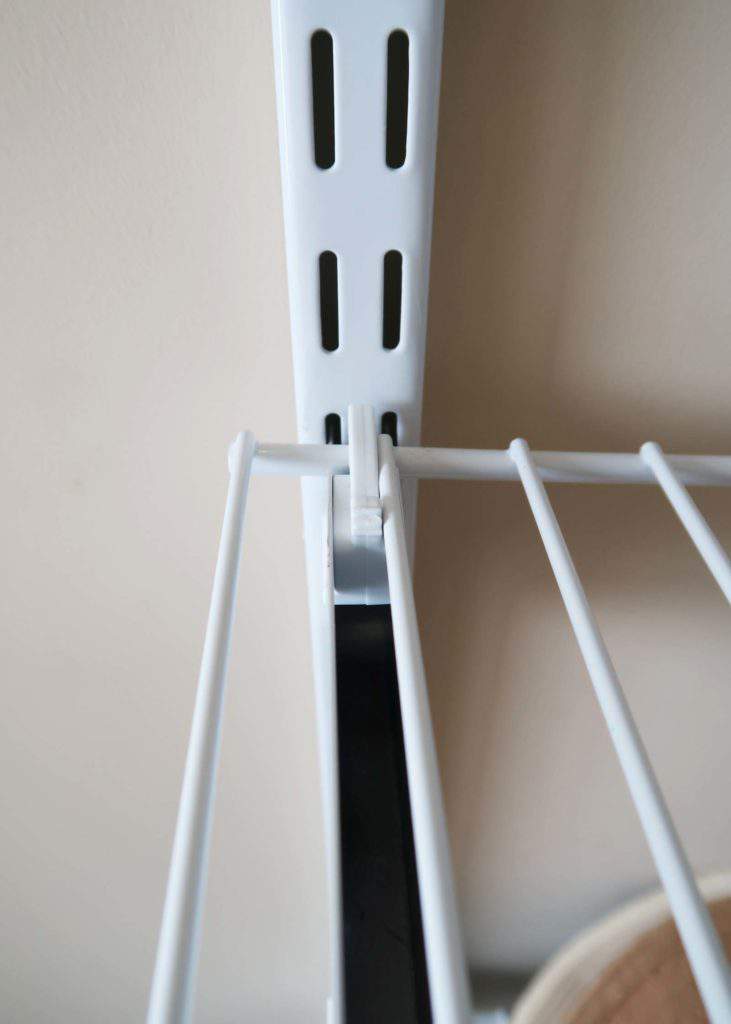
Each closet started with the same 4 components: header, uprights, shelves and hanging rod/pole
However, each closet is configured a little differently but using the same system. I LOVE when I can express my creativity with a product, it keeps me organized, and I can customize it whenever the need arises!
Over time I’ll add cute storage cubes and baskets under the stairs to make it look even better and be more effective.
Have growing children? This is a perfect system to adjust as their clothing sizes and types grow too!
Tools for Installation
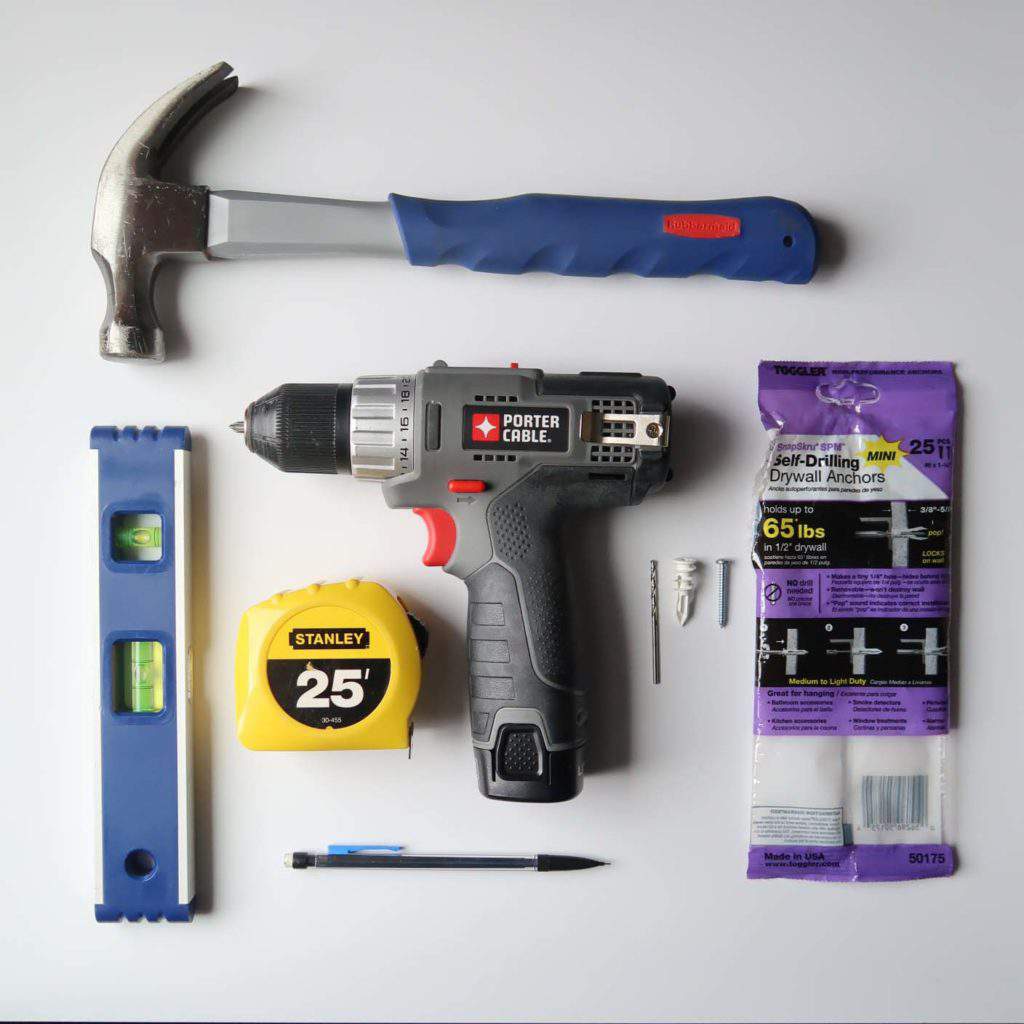
Closet Installation Supplies
These are my FAVORITE drywall anchors to hang anything when a wood stud isn’t available and you are going straight into drywall. I use them for heavy mirrors, rails with hooks, towel bars, etc because they each hold up to 65 lbs.!
My recommendation is to NOT use the anchors with the kit because you will have to drill fairly large holes. The screw-in anchors create a much smaller hole, so if you mess up or have to patch later it’s less of a problem to repair.
Basic Outline of the Closet System Installation
- 2 horizontal rails are attached to the wall and a plastic cover slides over to cover the metal
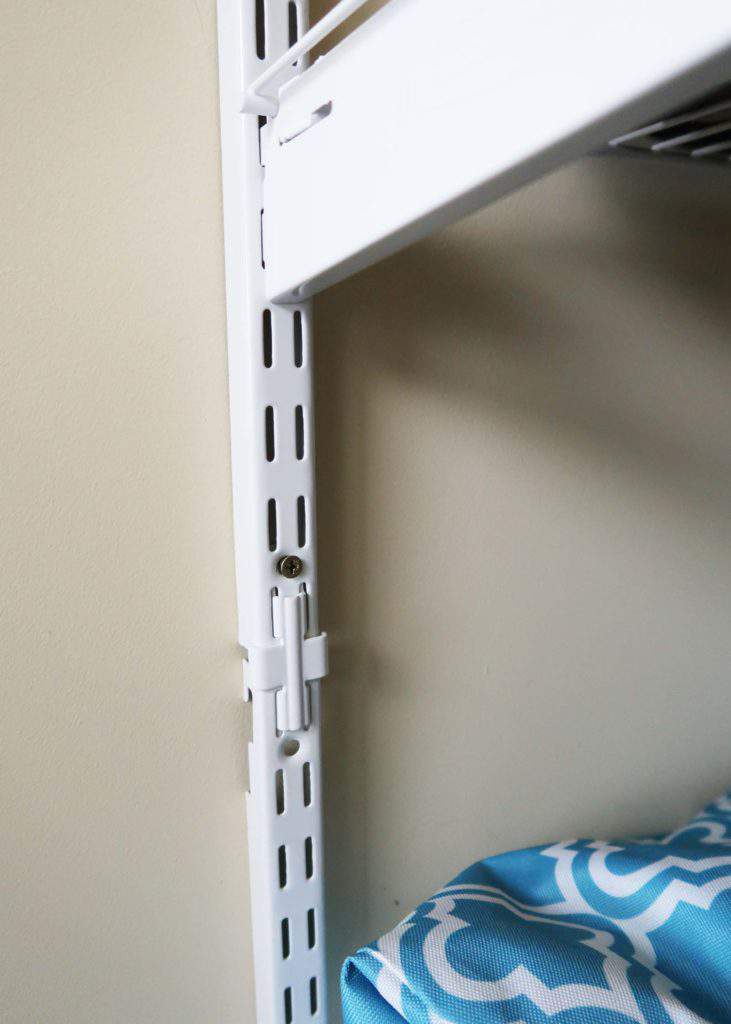
- The upright vertical rails hook onto the horizontal rail at intervals
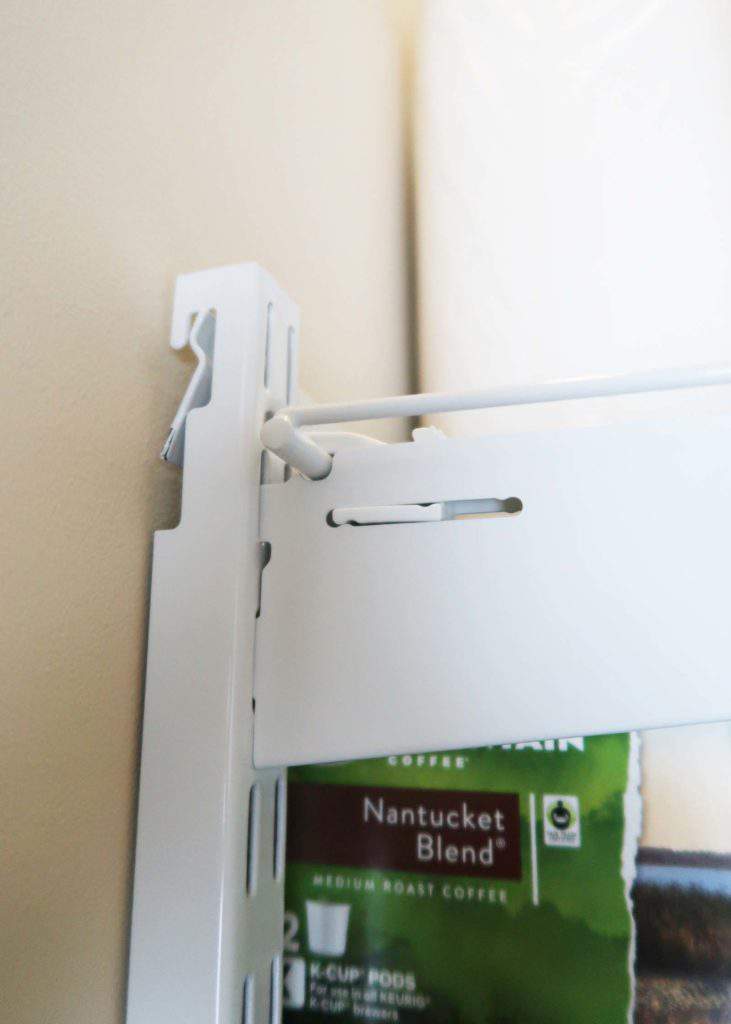
- The brackets attach to the vertical upright rails
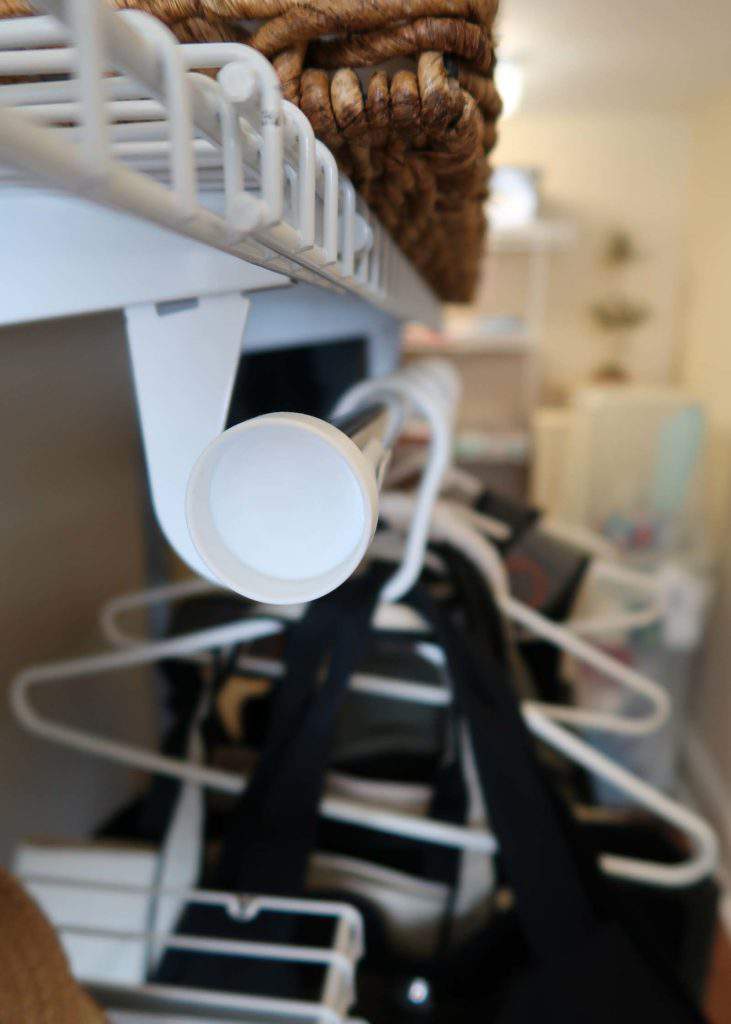
- Hooks attach to the end of the brackets for the rod/pole
- Shelf A is placed before Shelf B. Shelf B is deeper than Shelf A (watch my video)
General helpful hints for installing the closet system
- Order the kit for the width of wall space: 3 ft.- 6 ft. or 4 – 8ft kit
- Determine the height of the rail, since it is the first item to install
- Clothing closet rail is hung at 7 ½ ft. from the floor
- Closet under the stairs is hung at 6 ft. from the floor
- The uprights create 4 ft. of length to hang the shelf brackets
- If you want more height, you can purchase extenders and extra rails.
- This is what I did for under my stairs to get more vertical shelving on one side.
- My recommendation is if you don’t have a stud finder don’t worry about it! I’ve never used mine to install this closet system.
Getting Started Hanging the Closet System
- Mark the holes for the horizontal rail, but no more than 24 inches apart. Use a level to make sure they are LEVEL!
- Using a 1/8 in. drill bit. Drill through each mark and see if you hit wood or go straight through the dry wall.
- If you hit wood, attach the wood screw through the rail directly into the wood.
- If you don’t hit wood, using the hammer, tap in the anchor I recommend above into the drywall.
- Use the power drill with the Phillips head attachment and screw each anchor into the wall.
- Don’t forget that you attach the first rail and then the second sliding to get the right width you need
- The plastic rail cover I easily cut with scissors, so no special tool required.
- Uprights attach and hang directly onto the horizontal rail. Use your level to make sure they are “plumb” before drilling in the anchors/screws.
- The extender upright pieces can be ordered here to extend the system vertically.


