
I Replaced My Old Sprinkler Controller with a Rachio Smart Sprinkler Controller


I’m going to be honest. Replacing a sprinkler controller sounds like one of those “easy DIY” projects until you’re standing in a hot garage, staring at a bunch of tiny wires, wondering if you’re about to mess up your entire irrigation system.
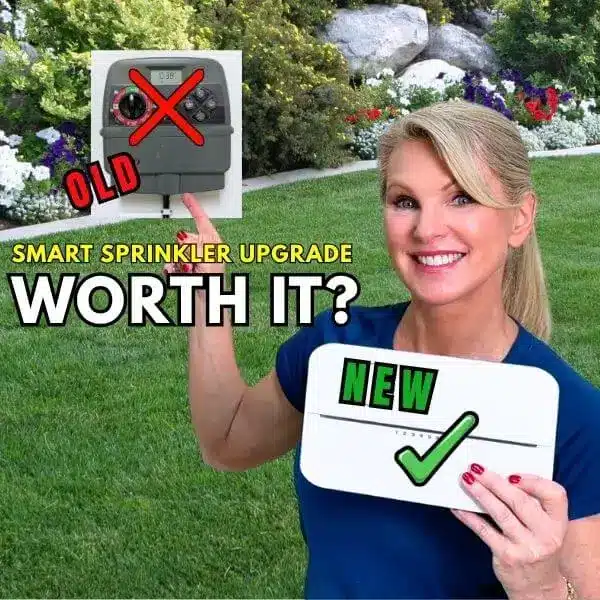
That was exactly where I found myself when I decided to replace my old Toro sprinkler controller with a new Rachio 3 Smart Sprinkler Controller. Rachio makes this look simple, and to be fair, the actual installation was more user-friendly than I expected.
Contains hand selected products, with affiliate marketing links where I may earn a small commission if a purchase is made. {full disclosure here}
But simple does not mean “don’t pay attention.” This is one of those DIY projects where you need to slow down, label everything, take photos, read the instructions, and not let your confidence get ahead of your common sense.
In this post, I’m sharing:
- My real experience installing the Rachio 3 Smart Sprinkler Controller.
- What I learned and what tripped me up.
- Where it lands on Tracey’s Truth Meter, so you know if this is a DIY you should try.
- My YouTube Rachio installation video
Quick Disclaimer Before You Start
I’m not an electrician or irrigation professional. This post is based on my personal DIY experience replacing my own sprinkler controller.
Sprinkler controller wires are typically low voltage, but you still need to be careful. Always unplug the controller or turn off power before working, follow the manufacturer’s instructions, and hire a professional if your wiring looks damaged, confusing, hardwired, or different from what you expected.
What Is the Rachio 3 Smart Sprinkler Controller?
The Rachio 3 Smart Sprinkler Controller is a Wi-Fi connected irrigation controller that lets you control your sprinkler system from an app.
Instead of walking into the garage and manually adjusting an old-school sprinkler timer, you can control watering schedules, zones, and timing from your phone – even remotely.

I installed the 8-zone version, which was the right choice for my yard. At the time of installation, I had four active zones, but I wanted room to expand because I may add more shrubs and landscaping later.
That is one of my biggest tips before you buy one: know how many sprinkler zones you have.
Most homeowners do not need more than eight zones, but you want to check before buying. Don’t guess. Look at your existing sprinkler controller and count the zones currently being used.
Why I Replaced My Old Sprinkler Controller
For me, this wasn’t about adding another smart gadget to my house just because it looked cool. I wanted better control over my sprinkler zones.
I had an older Toro sprinkler controller and it worked until it didn’t, after a power outage. The truth is I got sick of the dial program system.

It wasn’t giving me the kind of precise control I wanted for my landscaping and grass. I’ve been working hard on the outside of my house and during a Charlotte, NC summer – watering matters.
The Rachio 3 Smart Sprinkler Controller appealed to me because I could control everything from the app, test zones, name zones, and manage my watering in a smarter way.

Rachio WiFi Smart Sprinkler Controller
App-Based Scheduling, Local Weather Intelligence, Rain Skips, Easy DIY Install
Tools and Supplies I Used
You don’t need a massive tool collection for this project, which is one reason I think many homeowners can handle it.
Here’s what I used:
- Rachio 3 Smart Sprinkler Controller, 8-zone
- Painter’s tape
- Pen or marker
- Screwdriver
- Power Drill and small drill bit
- Level
- Wall anchors
- Phone for photos, video, and app setup
- Step stool, depending on where your controller is mounted
The most important “tool” in this entire project was honestly my phone. Before removing any wires, I took photos and video of how everything was connected.
Do not skip that step. Your future self may need proof of where every wire started.
Step 1: Unplug the Old Sprinkler Controller
The first thing I did was unplug the old controller.
I couldn’t figure out which breaker controlled that garage outlet because I had only been in the house a few months. Since the controller was plugged into an outlet, unplugging it was the simplest way to cut power.

If yours is hardwired, stop and hire a pro unless you know exactly what you’re doing.
This is where you want to remind yourself that “easy DIY” does not mean “ignore electricity.” Even if sprinkler wires are usually low voltage, you still need to take the project seriously.
Step 2: Remove the Front Panel
Next, I removed the panel from the old sprinkler controller so I could access the wires.
This was one of those funny DIY moments where the hardest part was figuring out how the old thing came apart. I could see the wires, but I wasn’t immediately sure how the controller itself was attached to the wall.

That happens more often than people admit. Half of DIY is not the actual installation. It’s figuring out how the previous thing was installed in the first place.
Step 3: Label Every Sprinkler Wire
Before removing any wires, I labeled them with painter’s tape and a pen.
I labeled zone one, zone two, zone three, zone four, and so on. Some of the wires were more obvious than others, but I made my best map based on how they were connected in the old controller.
This is the step that can save you from a big headache.

Don’t think, “Oh, I’ll remember where that went.” No, you won’t. Not once all those little wires are loose and staring at you like a tiny electrical spaghetti bowl.

Take pictures. Take video. Label each wire. Make yourself a simple wiring map.
Step 4: Remove the Old Controller from the Wall
Once the wires were labeled and removed, I had to get the old Toro controller off the wall.
This part was more confusing than it should have been. I pulled. I twisted. I stared at it. I questioned my life choices.
Eventually, I stood on a stool, looked down inside the unit, and realized all I needed to do was lift up and pull out.
That is such a classic DIY moment. You struggle for ten minutes, then discover the answer was embarrassingly simple.
Step 5: Use the Rachio Mounting Template
The Rachio 3 comes with a mounting template, which makes it much easier to line up the holes.
I decided to reuse one existing hole from the old controller so I would only need to drill two new holes instead of three. That worked out fine, but I still checked everything carefully with a level before drilling.

This is where my visual perfection side kicks in. If something is going to be mounted on the wall, I want it straight. Even if it’s in the garage.
Even if nobody else cares.
I care.
Step 6: Choose the Right Wall Anchors
The Rachio kit comes with wall anchors, but I decided to use sturdier screw anchors instead.
That was my personal preference, but here’s the important warning: make sure your screws fit through the holes on the Rachio mounting plate.
I’ve made that mistake before with other projects. You think you’re upgrading the hardware, then the screw head doesn’t fit where it needs to go.
Also, when I tried to put an anchor into one of the holes I was reusing, I discovered there was a stud behind it. Not a disaster, just one of those little surprises that changes your plan mid-project.
Step 7: Mount the Rachio Controller Base
Once I had the wall anchors figured out, I attached the Rachio mounting plate to the wall.
One thing I liked about the Rachio design is that the magnetic faceplate comes off, which makes the install easier. You’re not trying to fight the entire unit while working with the wires.

The mounting plate felt secure once it was attached, and luckily I was able to hit a stud with one of the screws.
That made me feel better because I don’t want anything wiggling on the wall, especially something connected to wires.
Step 8: Reconnect the Sprinkler Wires
Then came the part that makes everyone nervous: reconnecting the wires.
Because I labeled everything ahead of time, this part was actually pretty straightforward. I connected the zone wires into the matching Rachio terminals.

I had one moment where I questioned whether I had a master valve. After reading the instructions and looking back at my old wiring map, I decided I did not. Then I realized one wire was likely another zone, so I assigned it as zone six.
Step 9: Plug In the Rachio 3
Once the wires were connected, I plugged in the Rachio controller.
And there she was. Power.

Was it the most perfect-looking installation I’ve ever done? No. Was it working? Yes.
Sometimes that is the DIY win.
Step 10: Download the Rachio App and Connect to Wi-Fi
After the controller was installed and magnetic cover attached, the next step was setting it up in the Rachio app.
This part was much easier than I expected. The app walked me through the setup, and the light bar on the controller gave helpful cues about what was happening.

At one point, mine did not connect to Wi-Fi correctly, and the controller showed a red light bar. That helped me immediately know something wasn’t right.
Once I got the blue lights, the controller was connected and ready to go.
Step 11: Test Every Sprinkler Zone
Do not skip testing each sprinkler zone.
Once my Rachio 3 was connected, I tested every zone through the app. I also named the zones, which makes it easier to manage the system later.

This is where the smart sprinkler controller really starts to make sense. You can turn on a zone from your phone, walk outside, see what’s watering, and name it accordingly.
That is so much better than running back and forth to an old controller in the garage.
What Went Wrong After the Installation
Here’s the part I want you to pay attention to. The installation worked. The app worked. The controller connected. The zones tested.
But after I finished filming and editing, I realized one of my zones was not watering the back trees during a heat wave. I had to call a professional because the line had been cut by my fence installers.
That doesn’t mean the Rachio installation failed. It means the controller replacement was only one part of the sprinkler system story.
Sometimes the controller is working, but a valve, wire, sprinkler head, or zone issue somewhere else in the yard is the real problem.
That’s a good reality check. Replacing your sprinkler controller can modernize your system, but it will not magically fix every irrigation issue hiding underground.
Watch the Rachio 3 Installation Video First
Before you start pulling wires out of your old sprinkler controller, I highly recommend watching the full video tutorial.
Sometimes seeing the process makes all the difference, especially when you’re dealing with old wiring, wall mounts, and app setup.
Watch the YouTube video here:
In the video, I walk through removing my old Toro sprinkler controller, labeling the wires, mounting the new Rachio controller, connecting it to Wi-Fi, testing each zone, and deciding whether this is truly a DIY-friendly project.
The installation took me about one hour from start to finish, including app setup and zone testing.
Here’s the full Tracey’s Truth Meter scale:
So how hard or easy is the DIY installations on my 5 level scale?
☕ Coffee Project
- Easy, low stress, basic tools.
📖 Readers Required
- Doable, read carefully.
📞 Phone-a-Friend
- Possible alone, easier with help.
😤 Patience Tester
- Awkward, physical, or frustrating.
🧰 Call the Pro
- Not worth the DIY drama.
Here’s where this project lands on Tracey’s Truth Meter:
📖 Readers Required
Doable, but read carefully.
This is not a ☕ Coffee Project where you just grab a screwdriver and wing it. You can absolutely do it yourself if you have light DIY experience, basic tools, and a phone connected to the internet.
But you need to slow down. You need to label wires. You need to read the instructions. You need to pay attention during the app setup.
Is the Rachio 3 Installation Beginner Friendly?
I would say it’s beginner-friendly for someone who has basic DIY confidence and is comfortable using an app.
If you can label wires, use a drill, follow directions, and troubleshoot Wi-Fi setup, you can probably handle this.
But if technology frustrates you, or if wiring makes you nervous, hiring a pro may be worth it. Not because the project is impossible, but because peace of mind has value.
The physical installation was not hard. The mental part was making sure every wire went where it belonged.
How Long Did It Take?
The full project took me about one hour from start to finish.
That included removing the old controller, labeling the wires, mounting the Rachio 3, reconnecting the wires, setting up the app, connecting to Wi-Fi, testing zones, and naming them.
If your old controller is hard to remove, your wiring is confusing, or your Wi-Fi gives you trouble, it may take longer.
But this was not an all-day DIY project.
Rachio 3 Installation Tips I’d Tell a Friend
If you’re replacing an old sprinkler controller with a Rachio 3, here is what I’d tell you before you start.
Take Photos Before Touching Wires
Your phone is your best friend here. Take a clear photo of the old wiring before removing anything.
Then take a video too, because video gives you a backup if the photo angle isn’t clear.
Label Every Wire
Painter’s tape and a pen are all you need.
Label the wires before disconnecting them. Do not rely on memory.
Read the Instructions
I know. Nobody wants to hear this.
Read the instructions anyway. This is not the moment to freestyle.
Know How Many Zones You Have
Buy the controller that fits your current system and gives you room to expand.
I chose the 8-zone Rachio 3 because it gives me flexibility.
Test Every Zone Before Calling It Done
Once the app is set up, test every zone and make sure water is going where it should.
This is how you catch problems before your landscaping starts suffering.
Would I Install a Rachio 3 Again?
Yes, I would.
I liked the Rachio 3 Smart Sprinkler Controller much more than I expected. The physical installation was manageable, the app setup was user-friendly, and I love being able to control my sprinkler zones from my phone.
The biggest benefit for me is control. I can manage my landscape watering more precisely, which matters when you’re trying to keep plants alive through a hot Southern summer.
I also loved saving money. Irrigation professionals can charge a lot to install a smart sprinkler controller, and in this case, I only paid for the controller and used my own free labor.
Check out this post: DIY Drip Irrigation: Automatically Water Flowers
Best Smart Sprinkler Controller for DIY Homeowners?
Based on my experience, the Rachio 3 is a strong option for a DIY homeowner who wants smart watering control without a complicated installation.
It’s especially appealing if you:
- Want app control of your sprinkler system
- Need better zone management
- Want to replace an outdated sprinkler controller
- Have basic DIY skills
- Are comfortable connecting devices to Wi-Fi
- Want to save on installation costs
It may not be the best choice if you hate apps, have unreliable Wi-Fi, or your sprinkler system already has unresolved zone problems.
Shop the Rachio Line of Smart Sprinkler Controllers
Ready to upgrade your old sprinkler controller?
Shop the Rachio line of smart sprinkler controllers here:
I installed the Rachio 3 Smart Sprinkler Controller, 8-zone, and it gave me the smarter watering control I wanted without turning into a full-day DIY drama.
FAQ About the Rachio Smart Sprinkler Controller
Can I install a Rachio 3 myself?
Yes, many homeowners can install a Rachio 3 themselves if their existing sprinkler controller uses low-voltage wiring, the wires are clearly labeled, and they are comfortable following the app setup. If your system is hardwired, damaged, confusing, or has a pump or master valve setup you don’t understand, hire a pro.
How hard is it to replace a sprinkler controller?
Replacing a sprinkler controller is usually not physically hard, but it does require careful wire labeling and setup. On Tracey’s Truth Meter, I rate my Rachio Smart Sprinkler Controller installation as 📖 Readers Required, meaning it is doable if you read carefully and pay attention.
How long does Rachio 3 installation take?
My Rachio 3 installation took about one hour from start to finish. That included removing the old Toro controller, labeling wires, mounting the new Rachio controller, connecting Wi-Fi, setting up the app, and testing every sprinkler zone.
Do I need to know how many sprinkler zones I have?
Yes. Before buying a smart sprinkler controller, count how many zones your current system uses. I installed the 8-zone Rachio 3 because I had room to expand beyond my current active zones.
Does replacing the sprinkler controller fix sprinkler zone problems?
Not always. A new controller can improve scheduling and control, but it will not automatically fix broken valves, bad wiring, damaged sprinkler heads, or underground irrigation issues. After my installation, I still had to call a professional for one zone that was not watering my back trees correctly.

Sign-Up for my Weekly Emails!
Straight to your inbox sharing can’t miss decorating and painting tips for your home.