Create and Organize a Hanging File Drawer!
Need to create hanging files in your plain old deep drawers? Here’s a cheap and easy fix!
Tired of not having a space for your hanging file folders and have them tucked away in boxes?
It’s time to get organized now that we are all working from home offices.
Here is an inexpensive and easy way to turn your deep drawers into file storage!
Contains hand selected products, with affiliate marketing links where I may make a small commission if a purchase is made. {full disclosure here}
Start by Getting Your Documents Organized
What paperwork of yours is tucked away that needs to be filed?
Where is it? Stacked in a drawer, sitting in a pile or in a box? Let’s get organized together!
Think through what needs to be filed: insurance papers, car information, tax returns, expenses, manuals, bank statements, business papers, etc.
After 14 years as head of a household, I had all the above and then some!
Plus I moved the same old stuff 3 times. My son seems to be a paperwork hoarder on top of it.
Anyone who knows me knows “I do pretty”, which means it doesn’t matter what I am doing – even organizing – I want it to look nice.
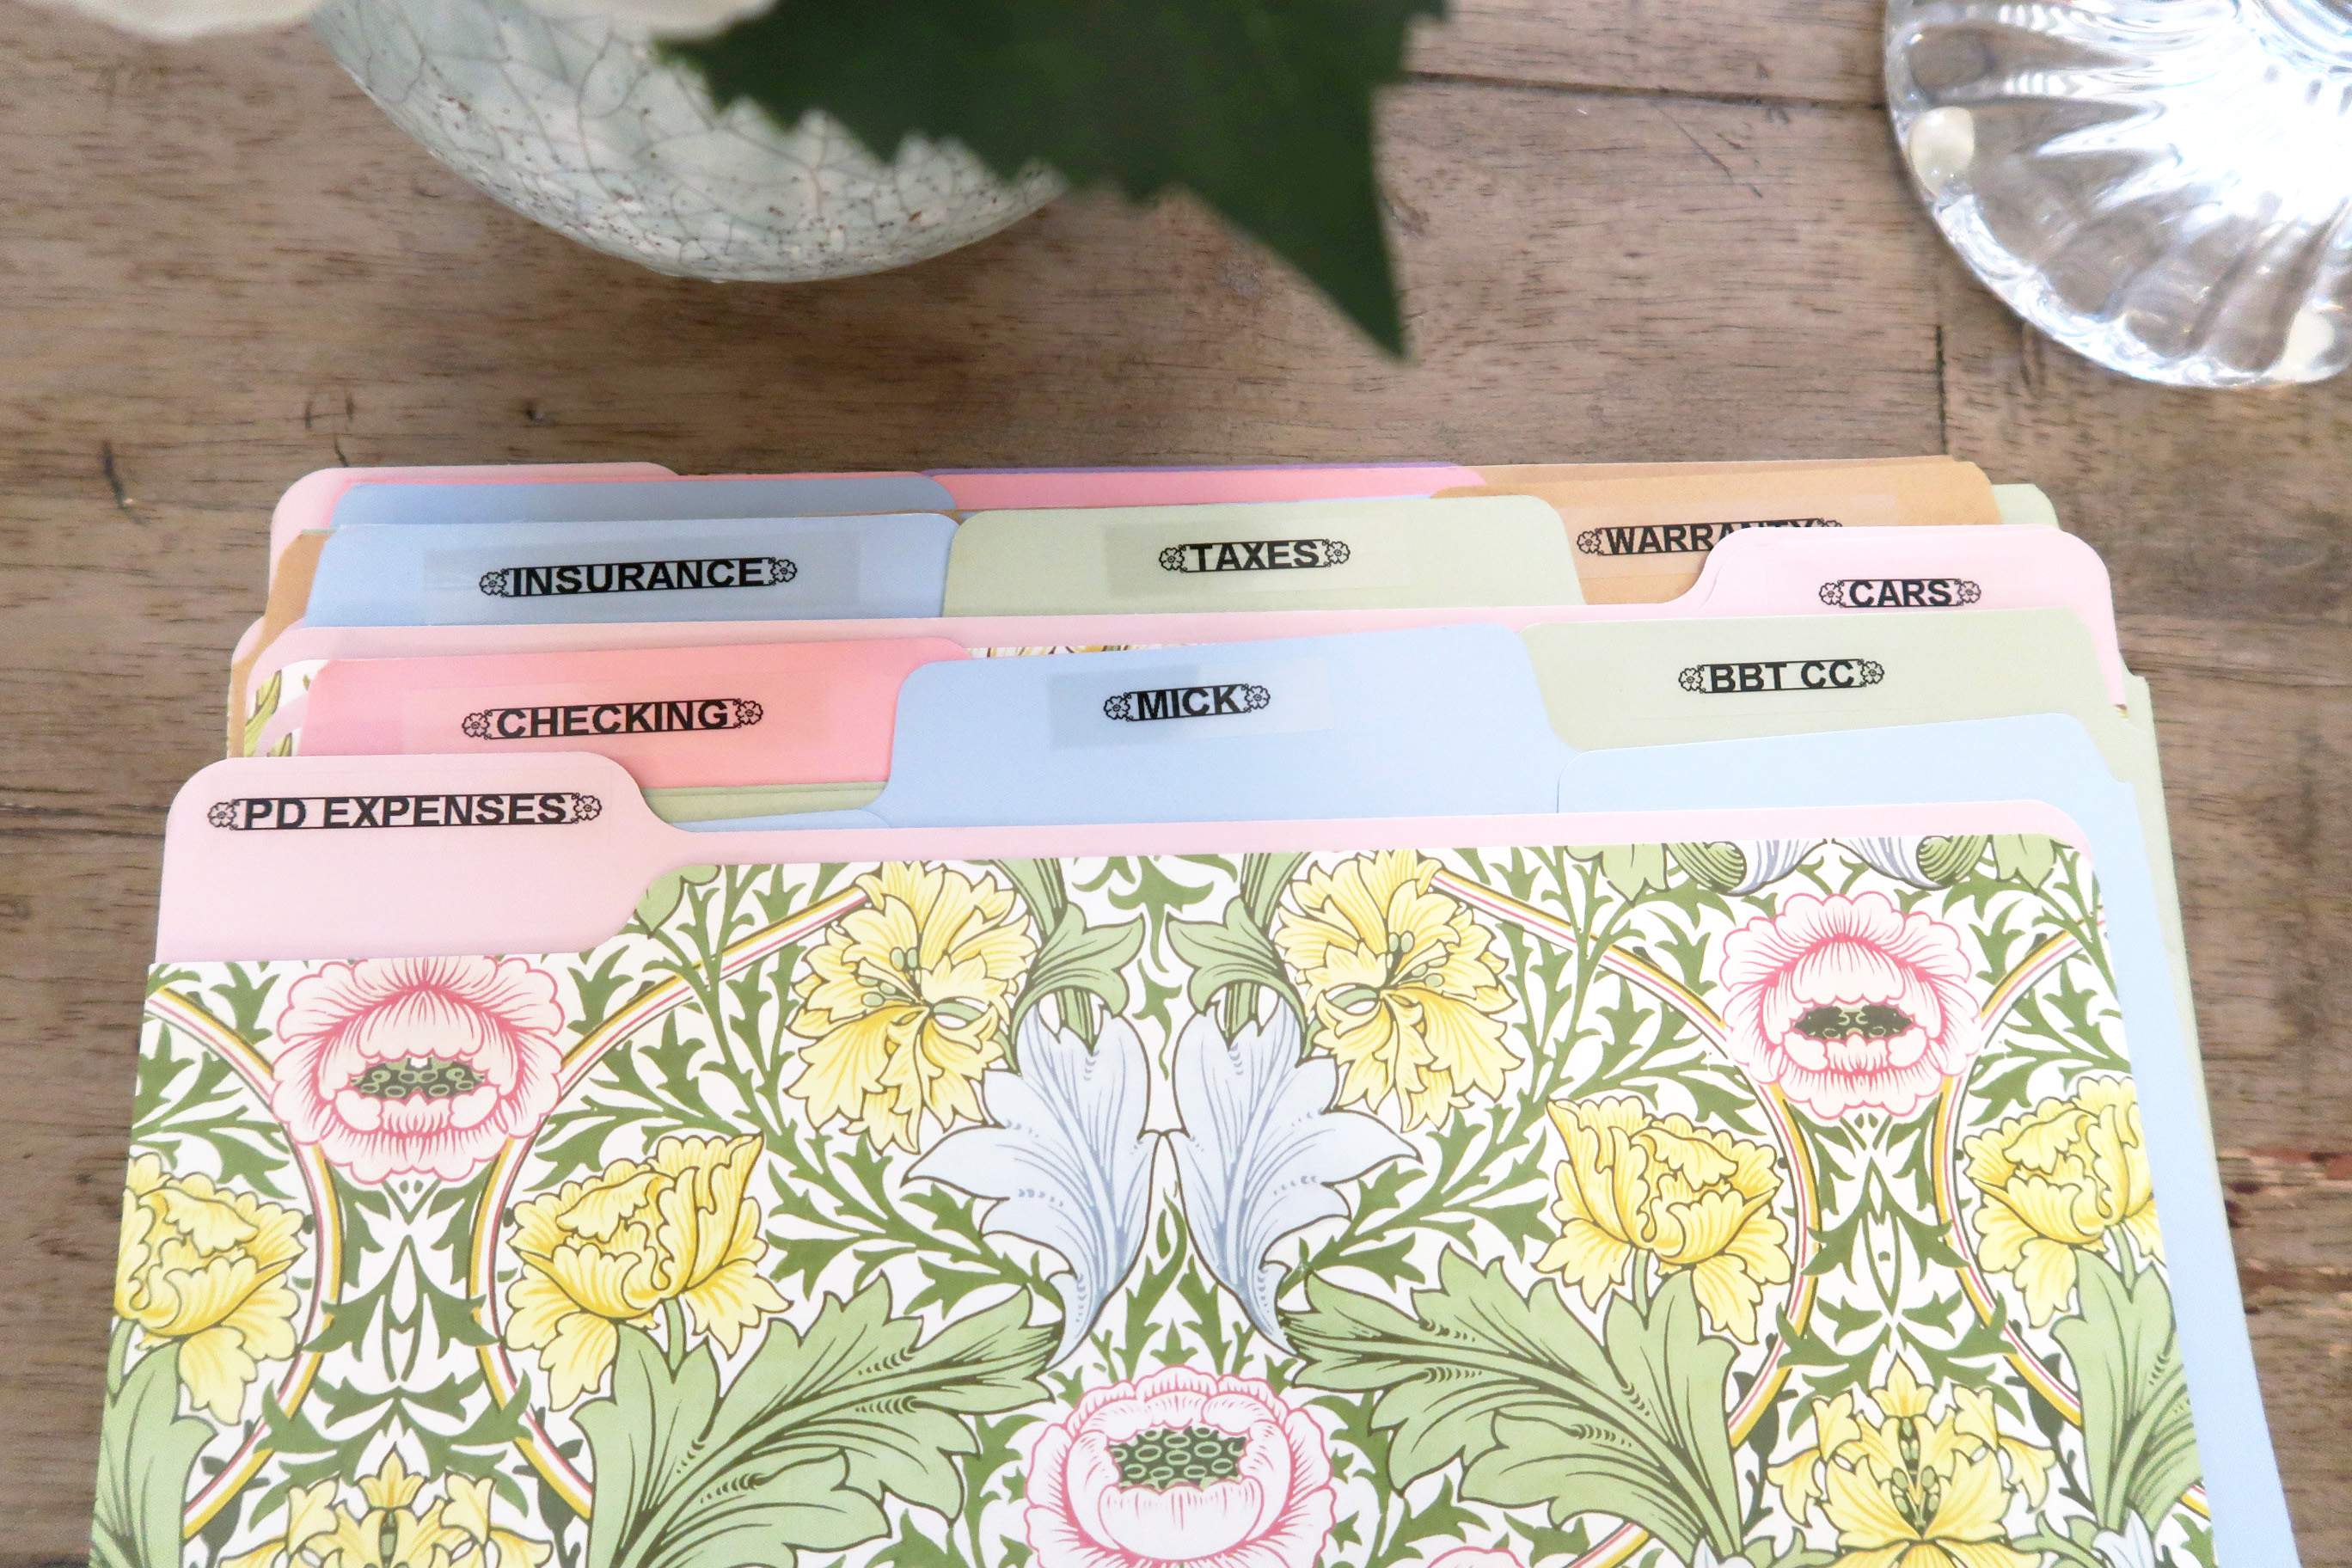
So that’s where I started. Pretty folders make a tough job easier and a label maker is a MUST to really be organized!
Place Hanging File Documents in Labeled Folders
Then (the best part) while watching TV, gather and organize important paperwork and put it in those folders.
Add labels. My label maker even had a setting to add flowers around the text, which is a nice touch!
Whatever is leftover that has your personal information shred it!
10 years of tax returns just got shredded while I watched TV 🙂


You must protect your information and identity.
Honestly, shredding is really fun after a while!
Pin It for Later!
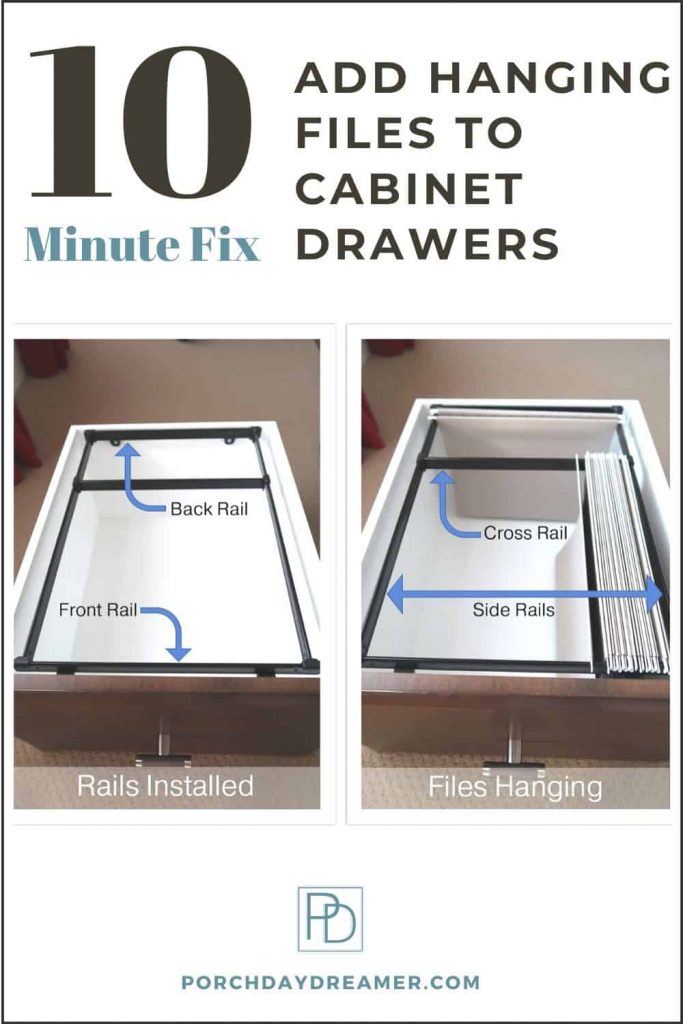
How-to Create a Hanging File Drawer
That leads me to my office drawers.
Do you have deep office drawers that house junk? Me too!
Or maybe you are lucky and have another filing system and your files are now hanging and organized. Good job!
If not, for under $10 I’ve found a DIY solution to turn deep drawers into hanging filing drawers.
In just 30 minutes the drawer will be more useful and keep you organized.
What You Will Need
Here is what you need to get started. Through a wood working website I found an easy to install hanging kit that is linked below.
Please make sure you have 4 ea. 1/2 inch wood screws as they don’t come with the kit.
- Hanging File Rail Kit
- Tape Measure
- Power Drill
- Drill Bits
- Hand Saw/Miter Box
- Pencil
My drawers are pretty standard in size (they are considered file drawers in the cabinet world).
My drawer measurements:
9 ½” Wide x 14 ½” High x 9 ½” Deep
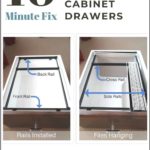
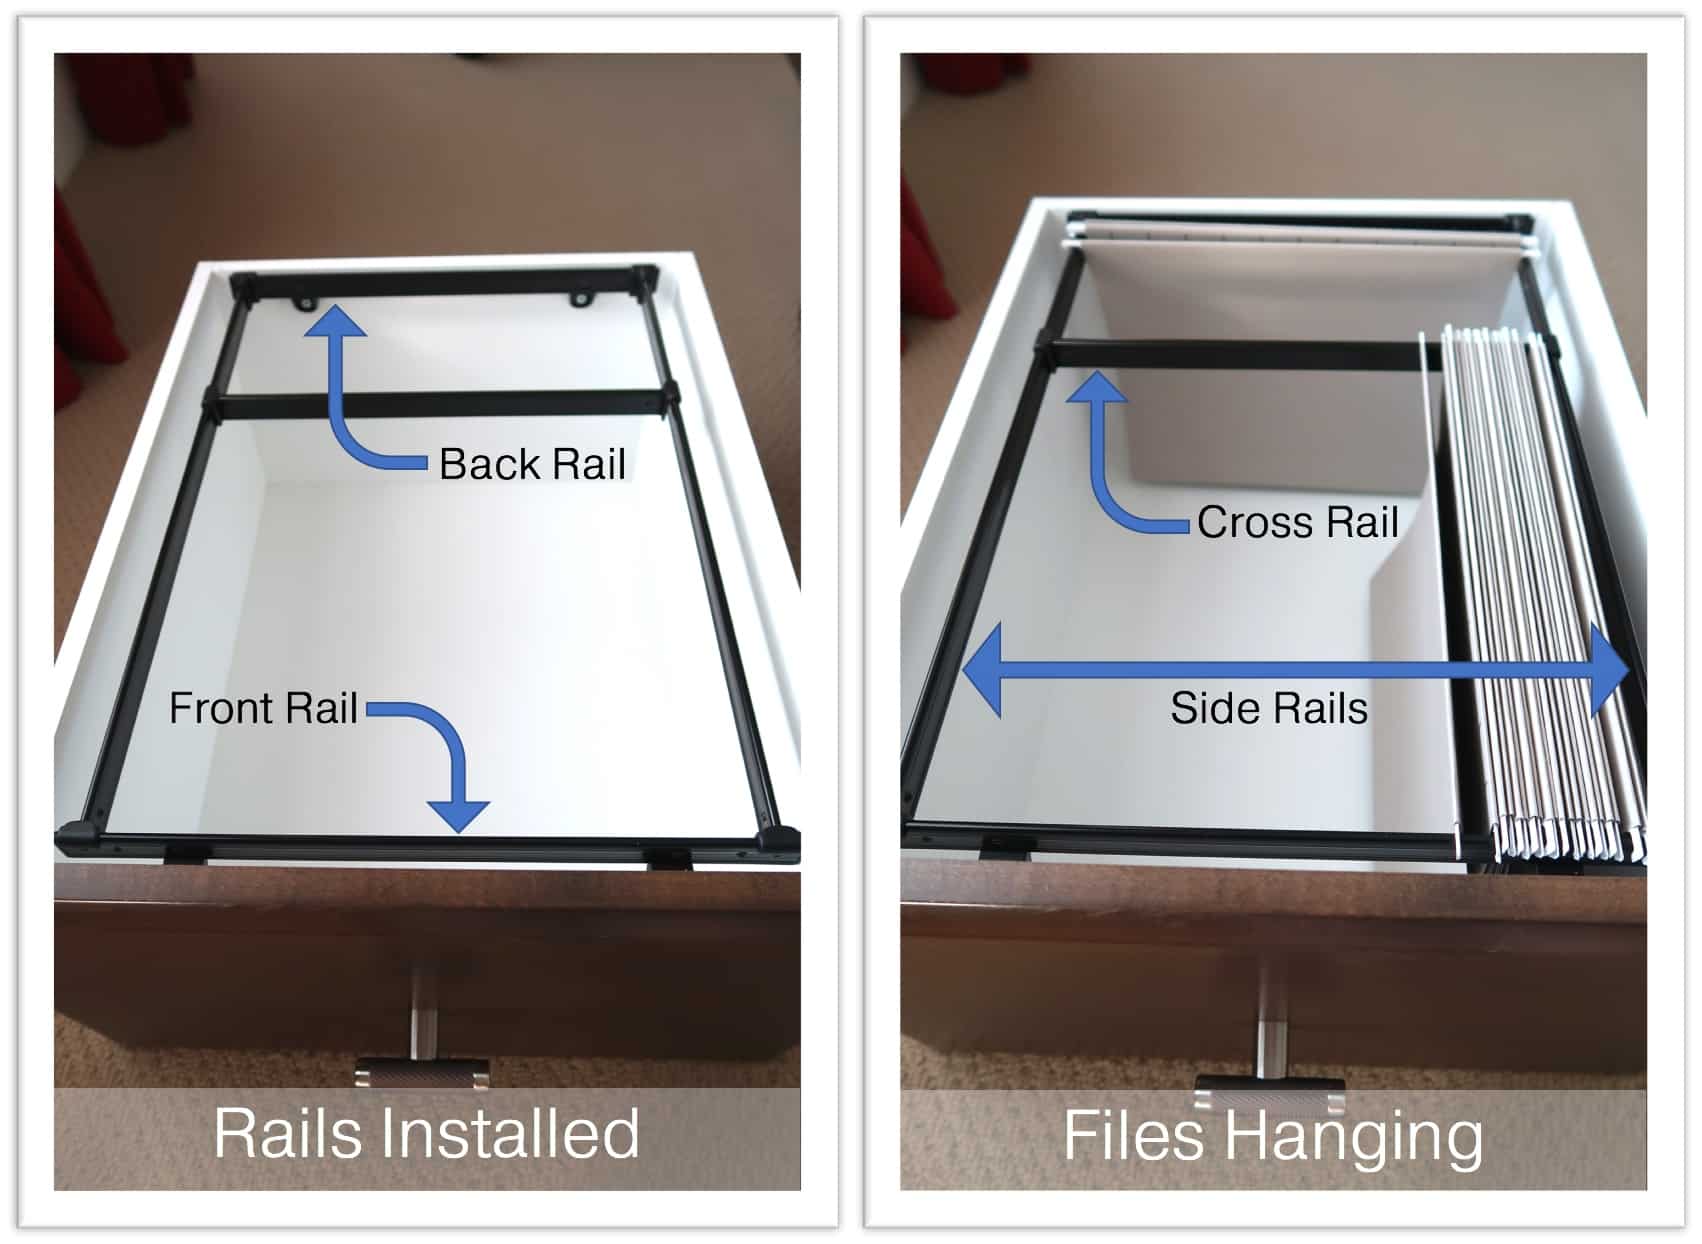
Rail Installation
Step 1:
Hold the front and back rails in place using a level to make sure they are aligned.
You need to have 1” clearance between the top of the drawer and the frame of the cabinet, in order to hang filing folders with tabbed folders inside them.
Mark screw holes with a pencil.
Step 2:
Using a small drill bit, drill pilot holes for the screws.
Step 3:
Using a Philips attachment, attach front and back rails with wood screws.
Step 4:
Lay in the side rails on the left and right to measure how much will need to be cut off to fit.
They are plastic and easy to cut.
DO NOT BE SCARED OF THIS!
That is what the miter box/saw is used for and is a simple tool.
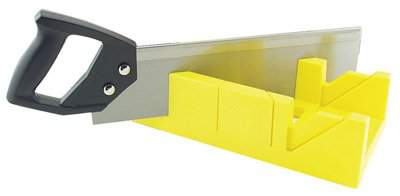
Step 5:
Place the miter box against the edge of a table and hold in place.
On the yellow box there is a guide in the middle that will make sure you cut straight.
Place side rail and cut each one to length.
They are thin, but if you have trouble cutting all the way through flip them over and start cutting again.
Step 6:
With clips provided, install the cross and side rails then hang folders.
You can slide the cross rails to either a letter or legal sized folder.
I used the empty space in the back of the drawer for additional folders.
Fill with the pretty pre-labeled and organized folders!
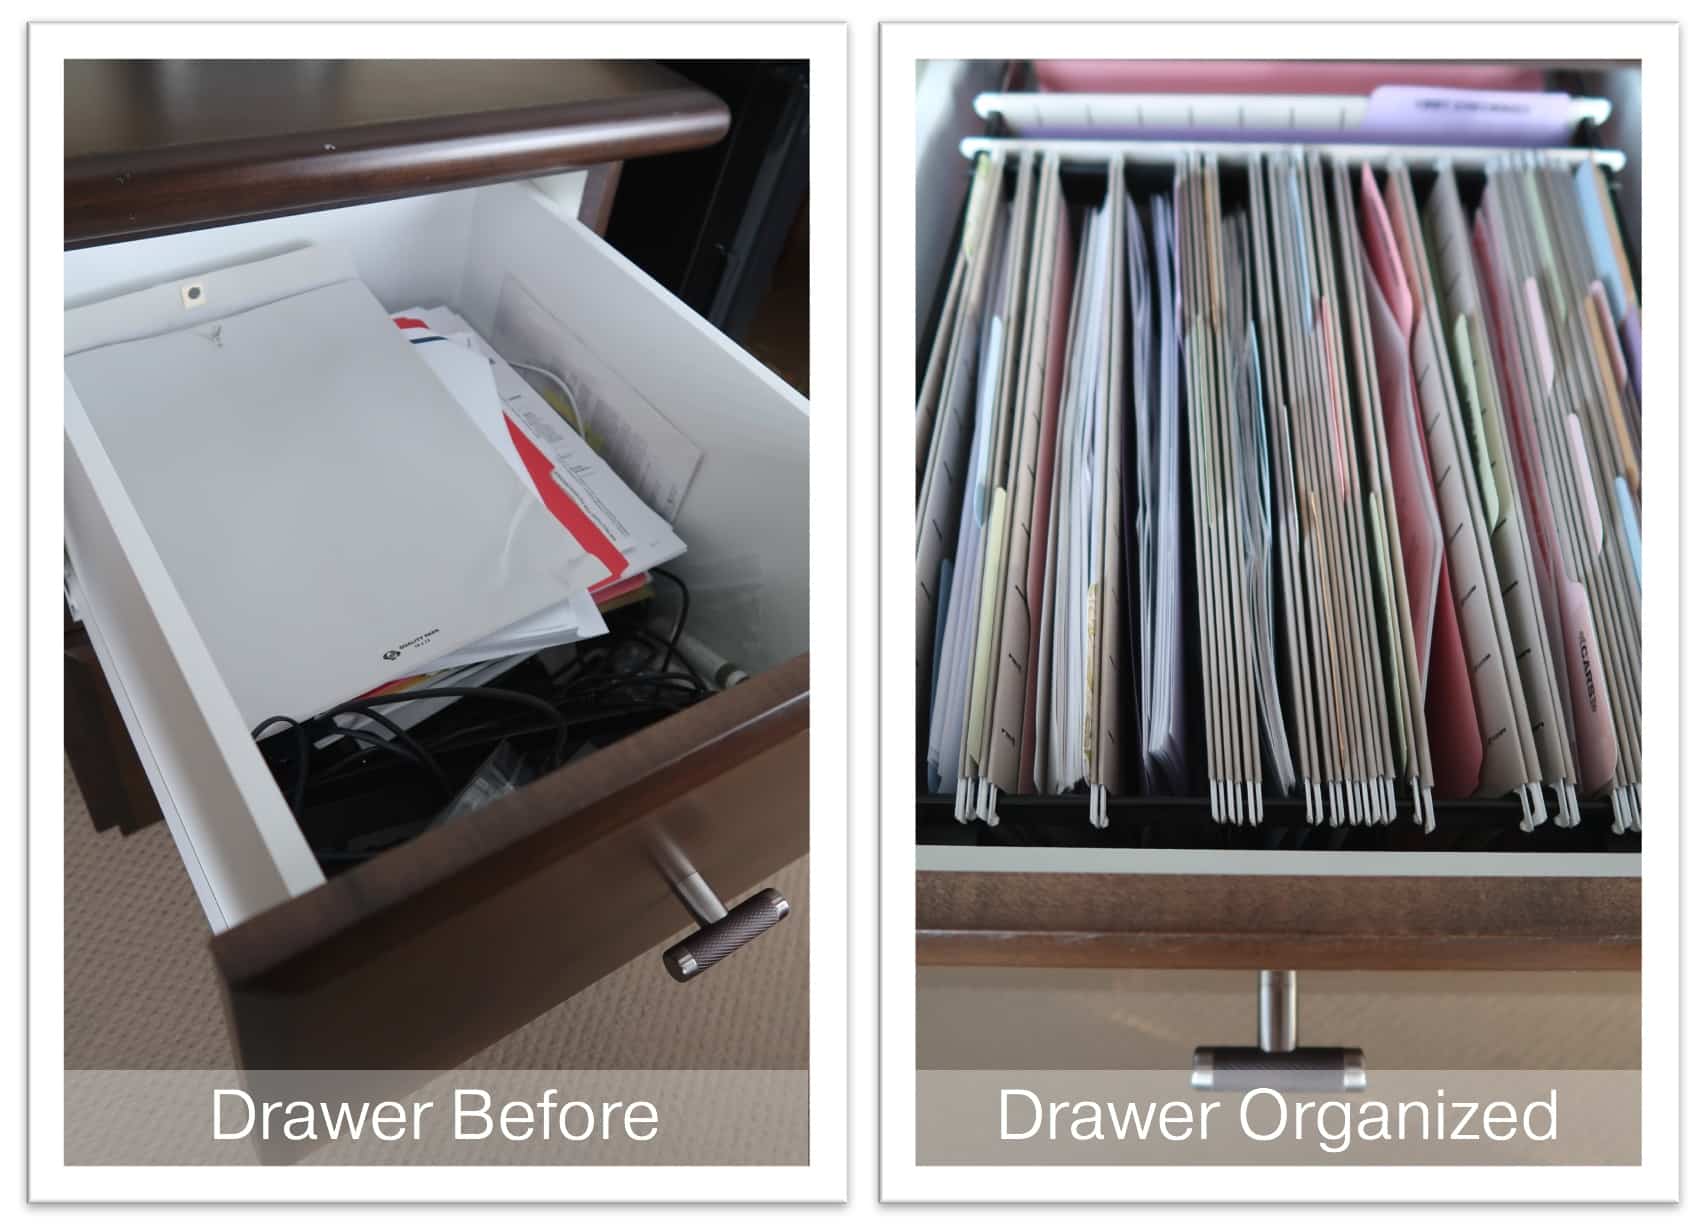
An Organized Drawer of Hanging Files
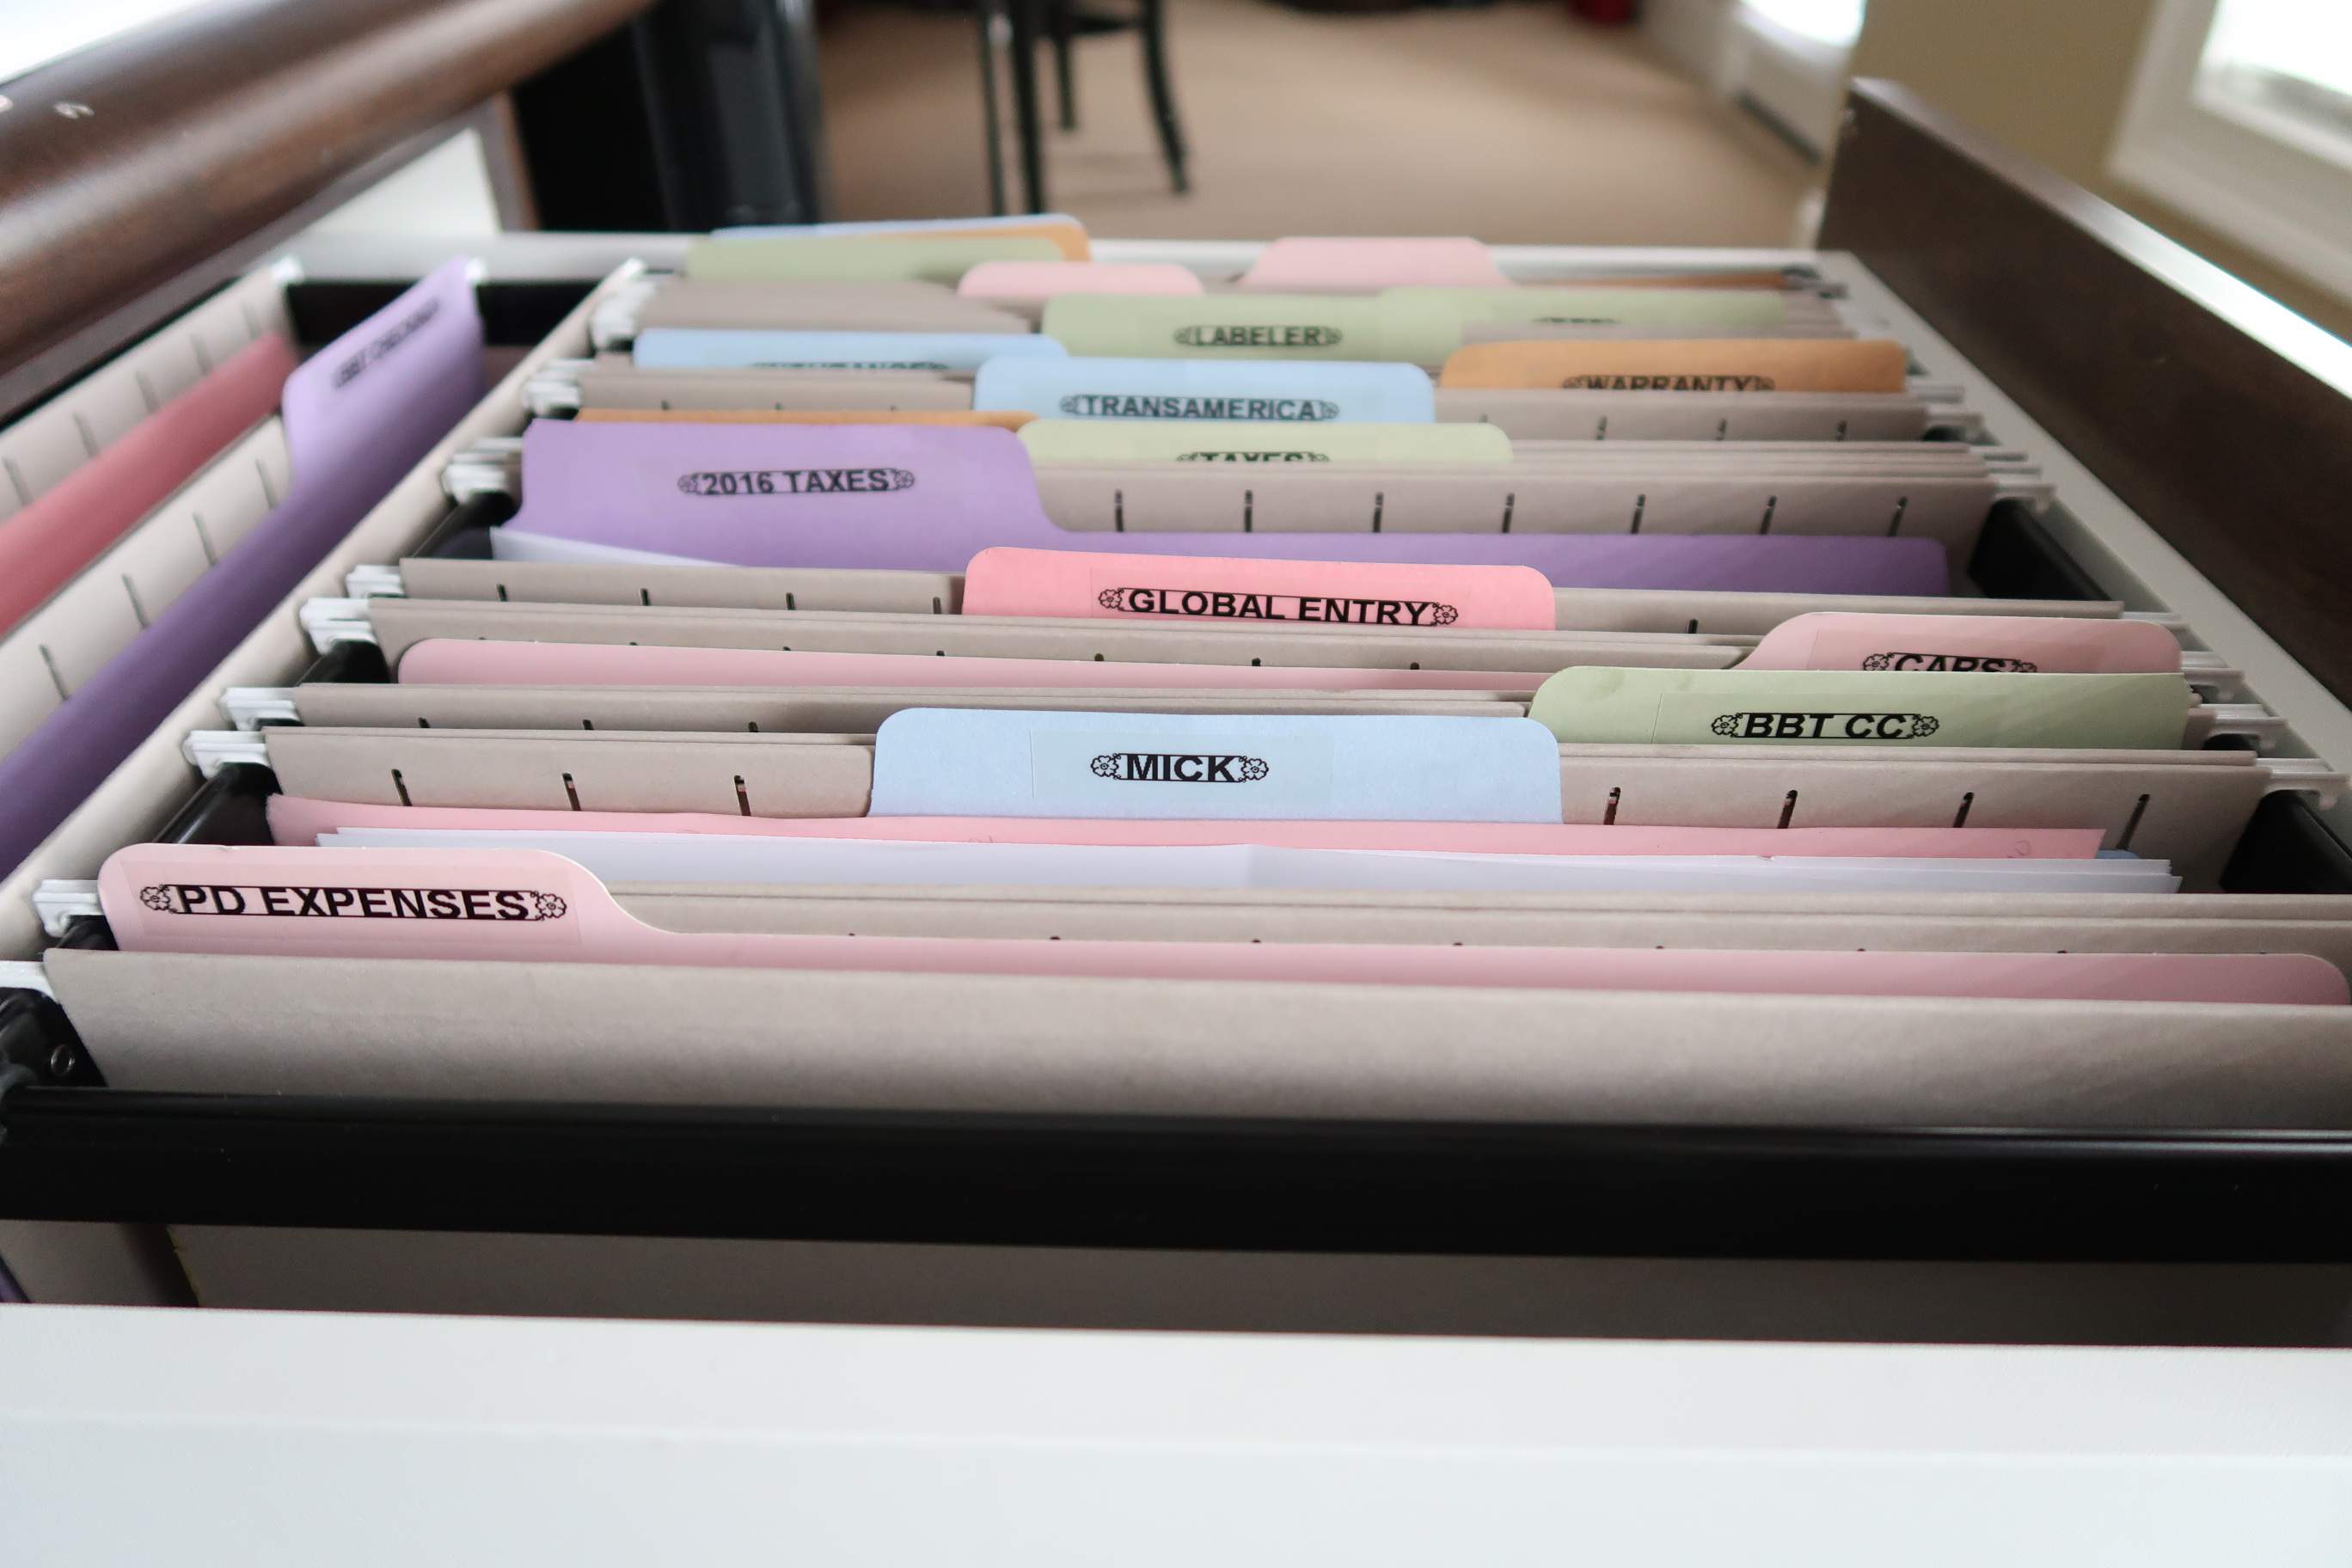
Voila! Organized files, labeled, in folders and in a drawer that hangs files.
Now it is time to get your hanging folder project started. Good luck!
Like this organizational project? Here are others that may inspire you!
- Organize Cabinets with Pull-Out Drawers
- Simple Ideas to Organize Spices
- Create a Home Decor Closet and Gift Wrap Station of Your Dreams!
- DIY Closet System That Will Organize Your Life!
So you never miss a post and to keep up with what’s new at Porch Daydreamer…
Please consider signing up for my weekly email newsletter and following me on Pinterest and Instagram for daily inspiration.
Until next time…
Porch Daydreamer
Tracey
Until next time…
Porch Daydreamer
Tracey
You mentioned that the link to the hanging kit would be linked below but i’m not seeing it. Can you please point me towards it? Thanks.
Eric, thanks for alerting me to a new issue on my site! Yes, the images and links have disappeared for some reason. Here is the web site link for your convenience, until I can get that corrected. Just copy into your browser, if it isn’t linking through the comment form. https://www.woodworkerexpress.com/file-drawer-frame-systems-side-mount-150lb-ball-bearing-slides-letter-kit-system-1-kit.html
Thanks!