
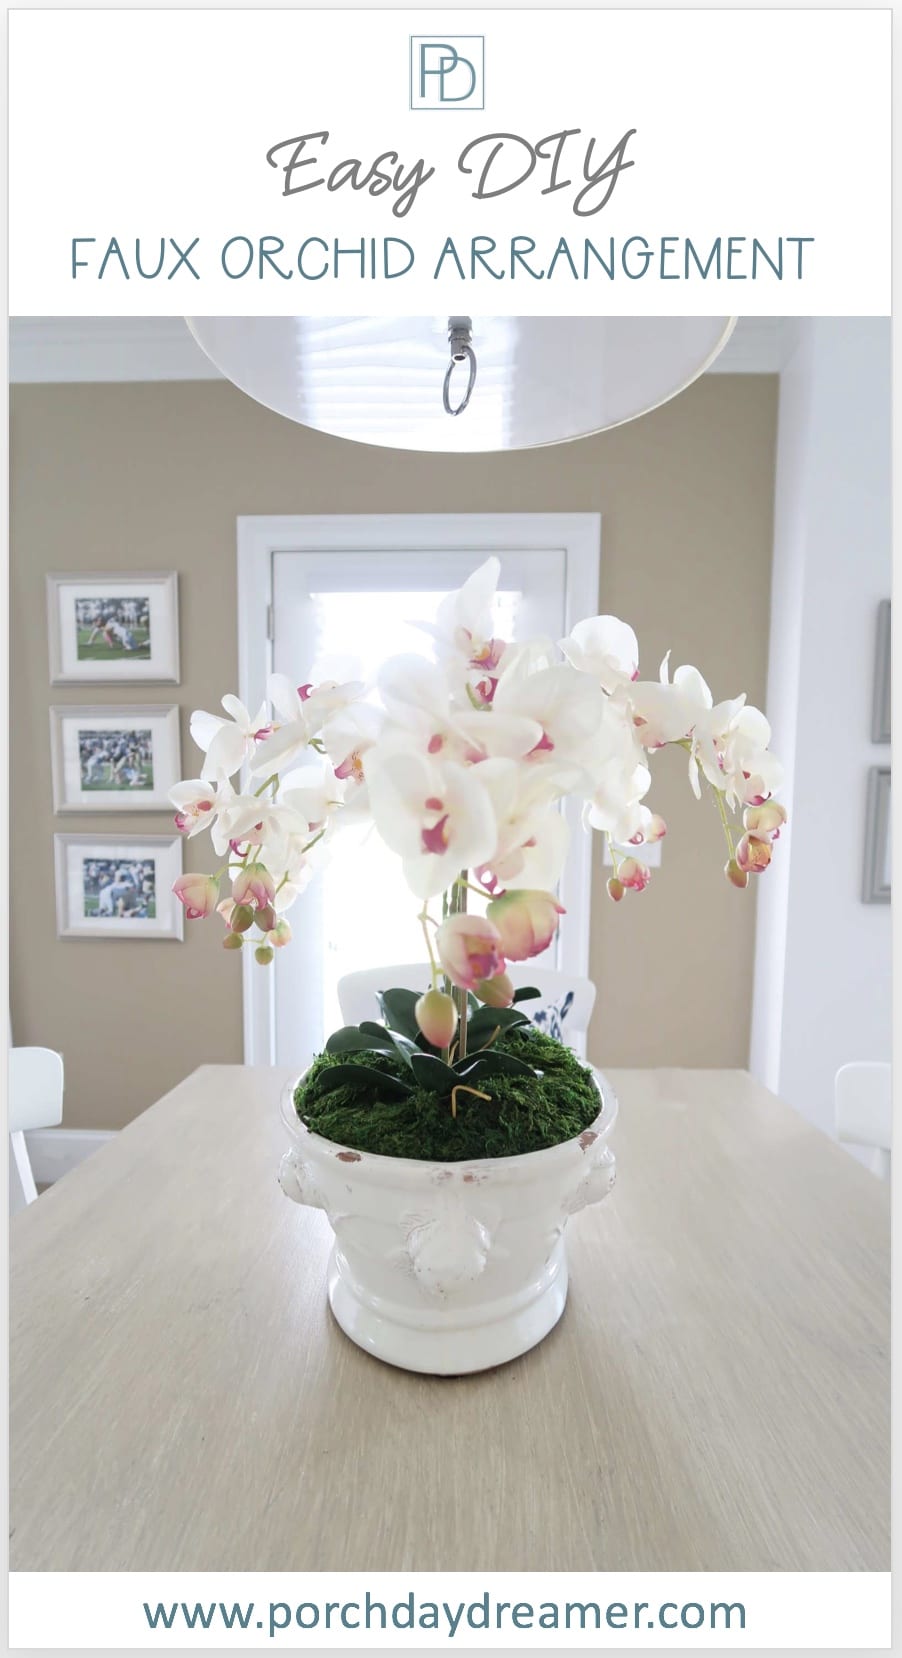
How to Create a Faux Orchid Arrangement
How to create a faux orchid arrangement that will never die or need to be watered – ever!
Luckily, there are very realistic faux orchid alternatives that no one will know aren’t real.
They even feel real! I’ve been so impressed with the quality of the faux orchids I’ve found.
Plus for around $100 you can create a LARGE floral arrangement that will last forever!
Why Faux Orchids are a Fantastic Option
Orchids are SO beautiful, but SO expensive and don’t last very long in relationship to the cost.
My son usually gives me an orchid for Mother’s Day and I love it every year, but not for very long.
Plus I am not patient enough to wait for it to bloom again and end up replacing or tossing the orchid, which gets expensive at $20 a pop.

Post contains affiliate marketing links, but all products were hand selected by me! If you buy through one of my links, I may make a small commission that helps support producing content and maintaining this website.
Pin It for Later!
How to Create a Faux Orchid Arrangement
First, I wanted to share with you that I have NEVER created a faux floral arrangement in my life – this was the first one.
So I’d set the floral arrangement DIY difficulty level at a 2 out of 10 🙂
This is more of an artistic project where you get to decide how the arrangement will look. Luckily, it is very easy to make adjustments and get it just right to fit your room!
What is most important is finding a planter that fits the shape and size of the area you want to display the orchids.
Find the planter BEFORE buying the floral supplies, so you have an idea of what will fit in the container.
I chose a large planter because this arrangement is on a large piece of furniture and a key component to my dining room decor.
This floral arrangement is part of my One Room Challenge Modern French Country Dining Room Makeover.
To start at the beginning CLICK HERE. and see the final reveal May 9, 2018!
Shop Planters

Shop Orchids
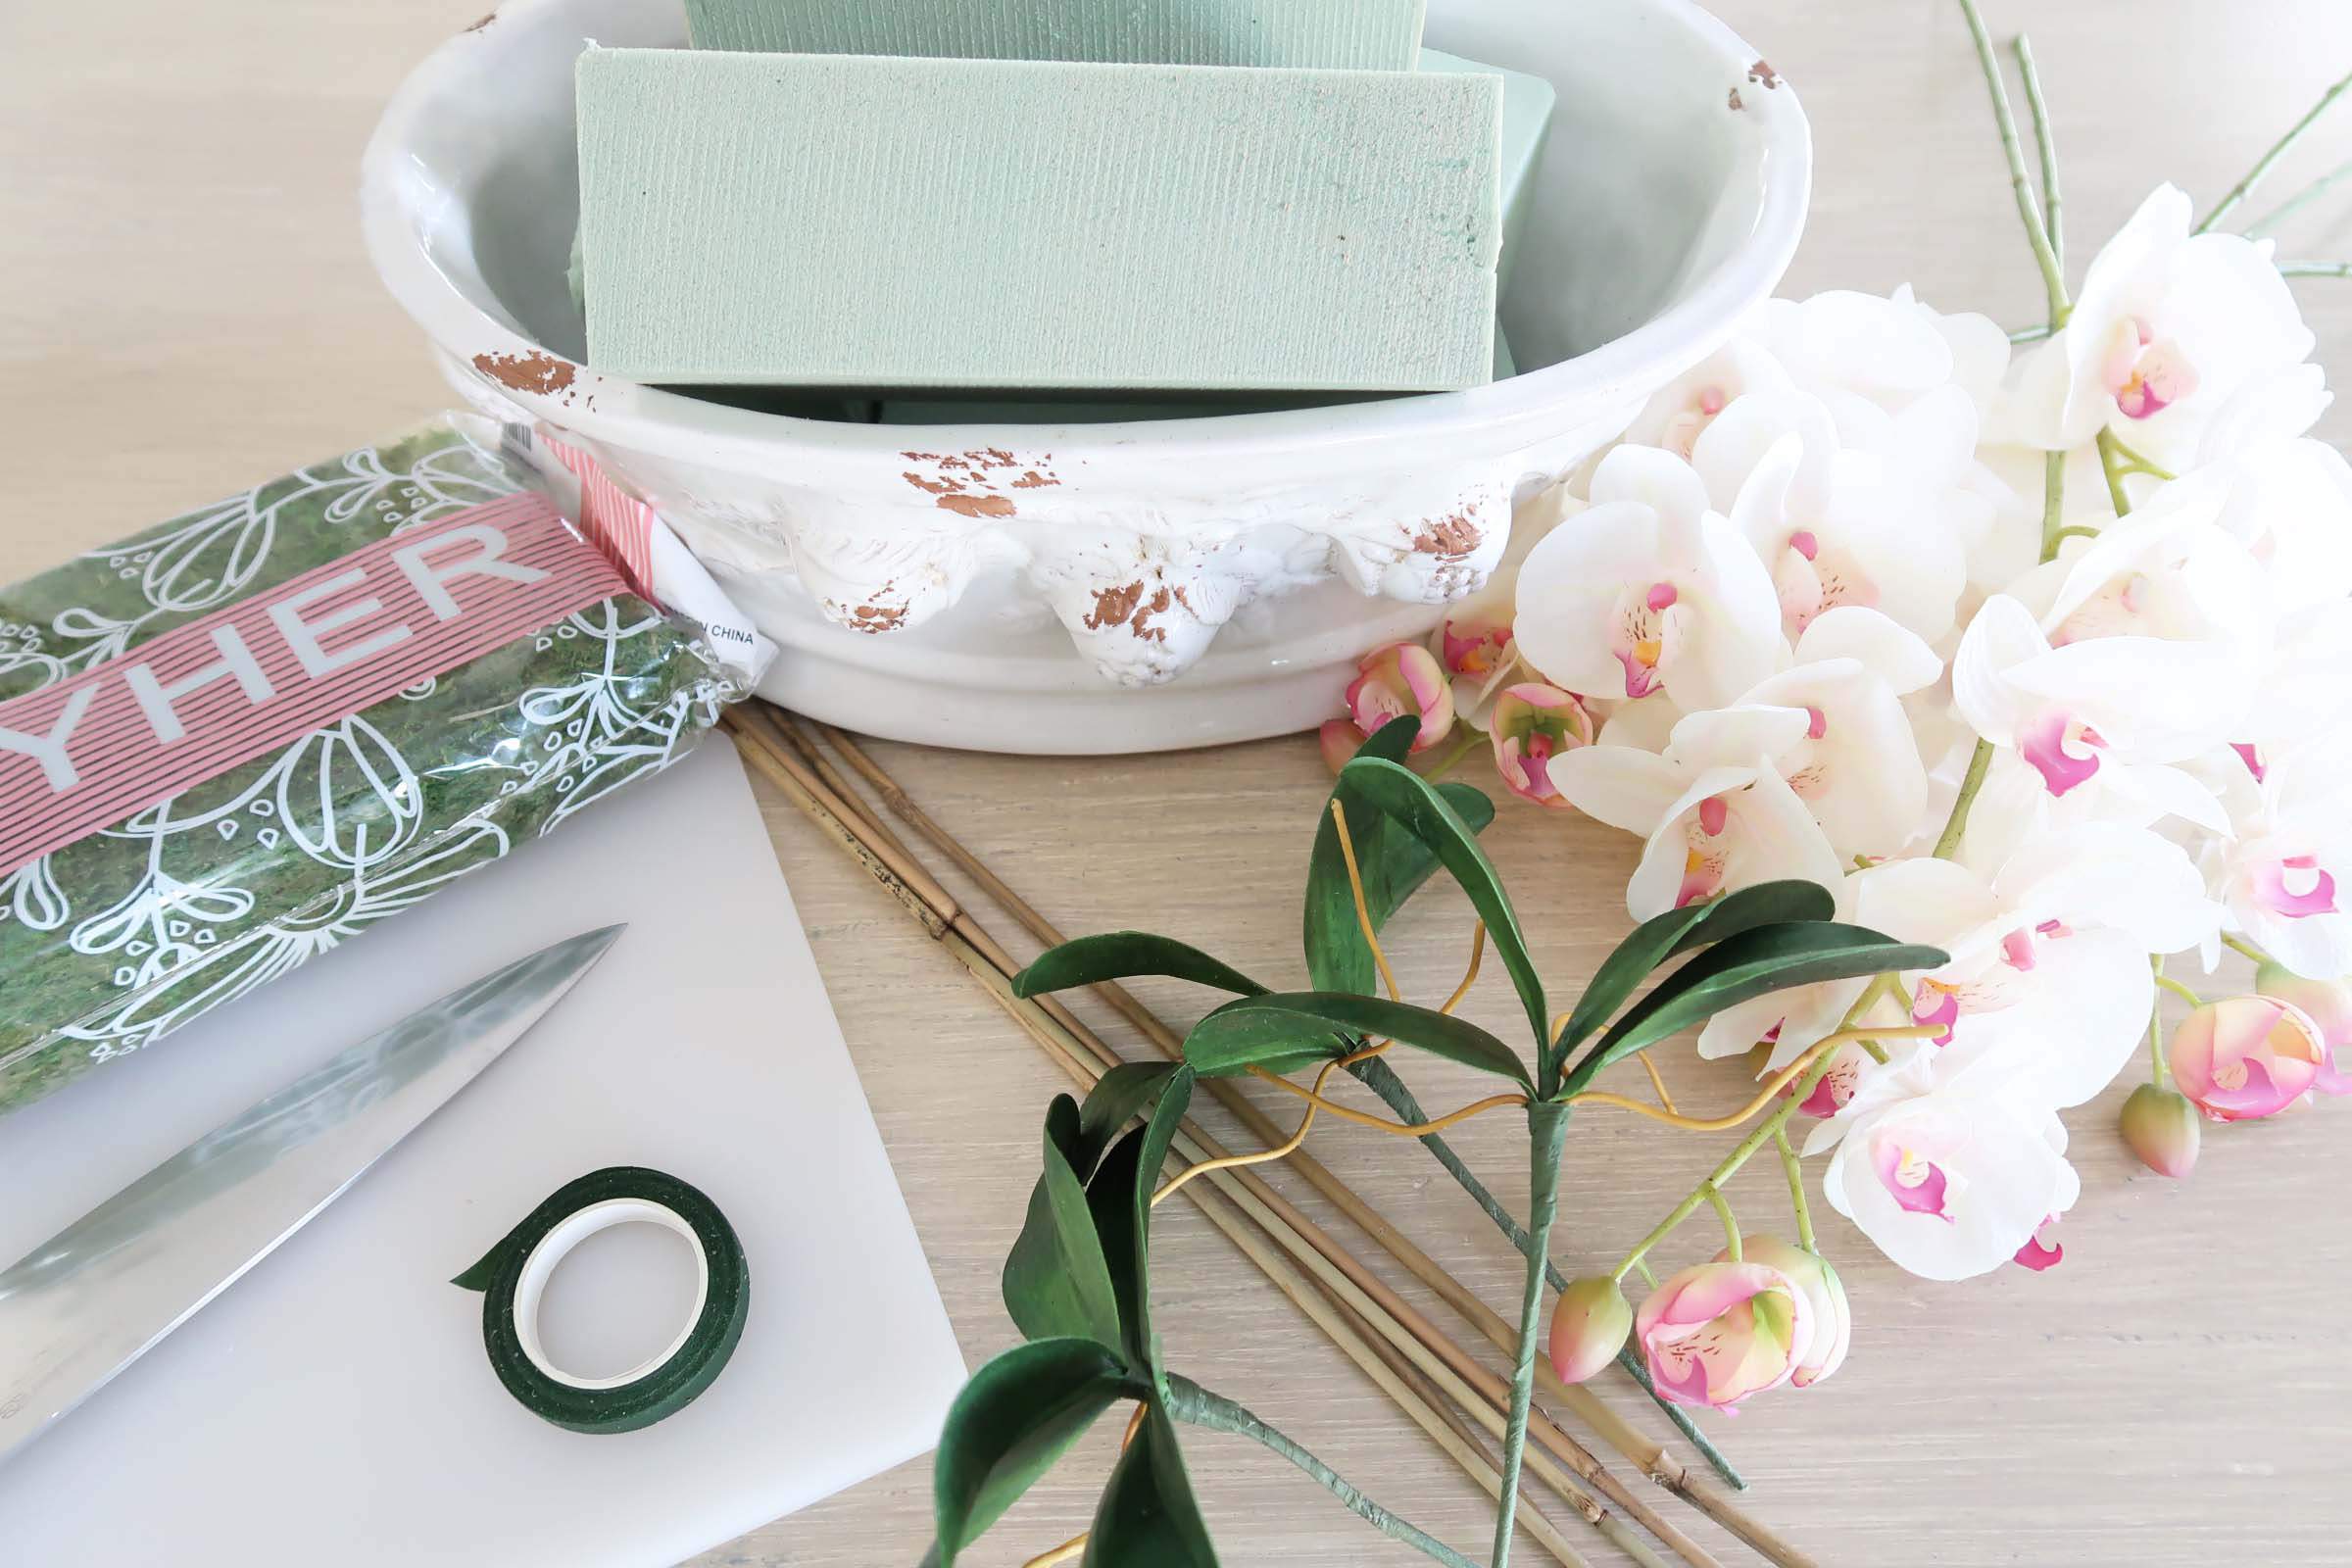
Supplies
Since my planter is so large, I ordered:
- 2 sets of floral foam for a total of 4 blocks
- 5 orchids
- 3 orchid leaves – wish I’d gotten 4
- 1 bag of moss
- 1 set of bamboo stakes, but used only 3
Depending on the size of your container or planter just keep in mind that you should always use orchids in uneven numbers: 1, 3, 5, etc. Then it looks nice to have a couple of stems with one leaf segment.
A couple of other supplies to have handy that you likely have in your home are a cutting board and large Chef’s knife as pictured below.
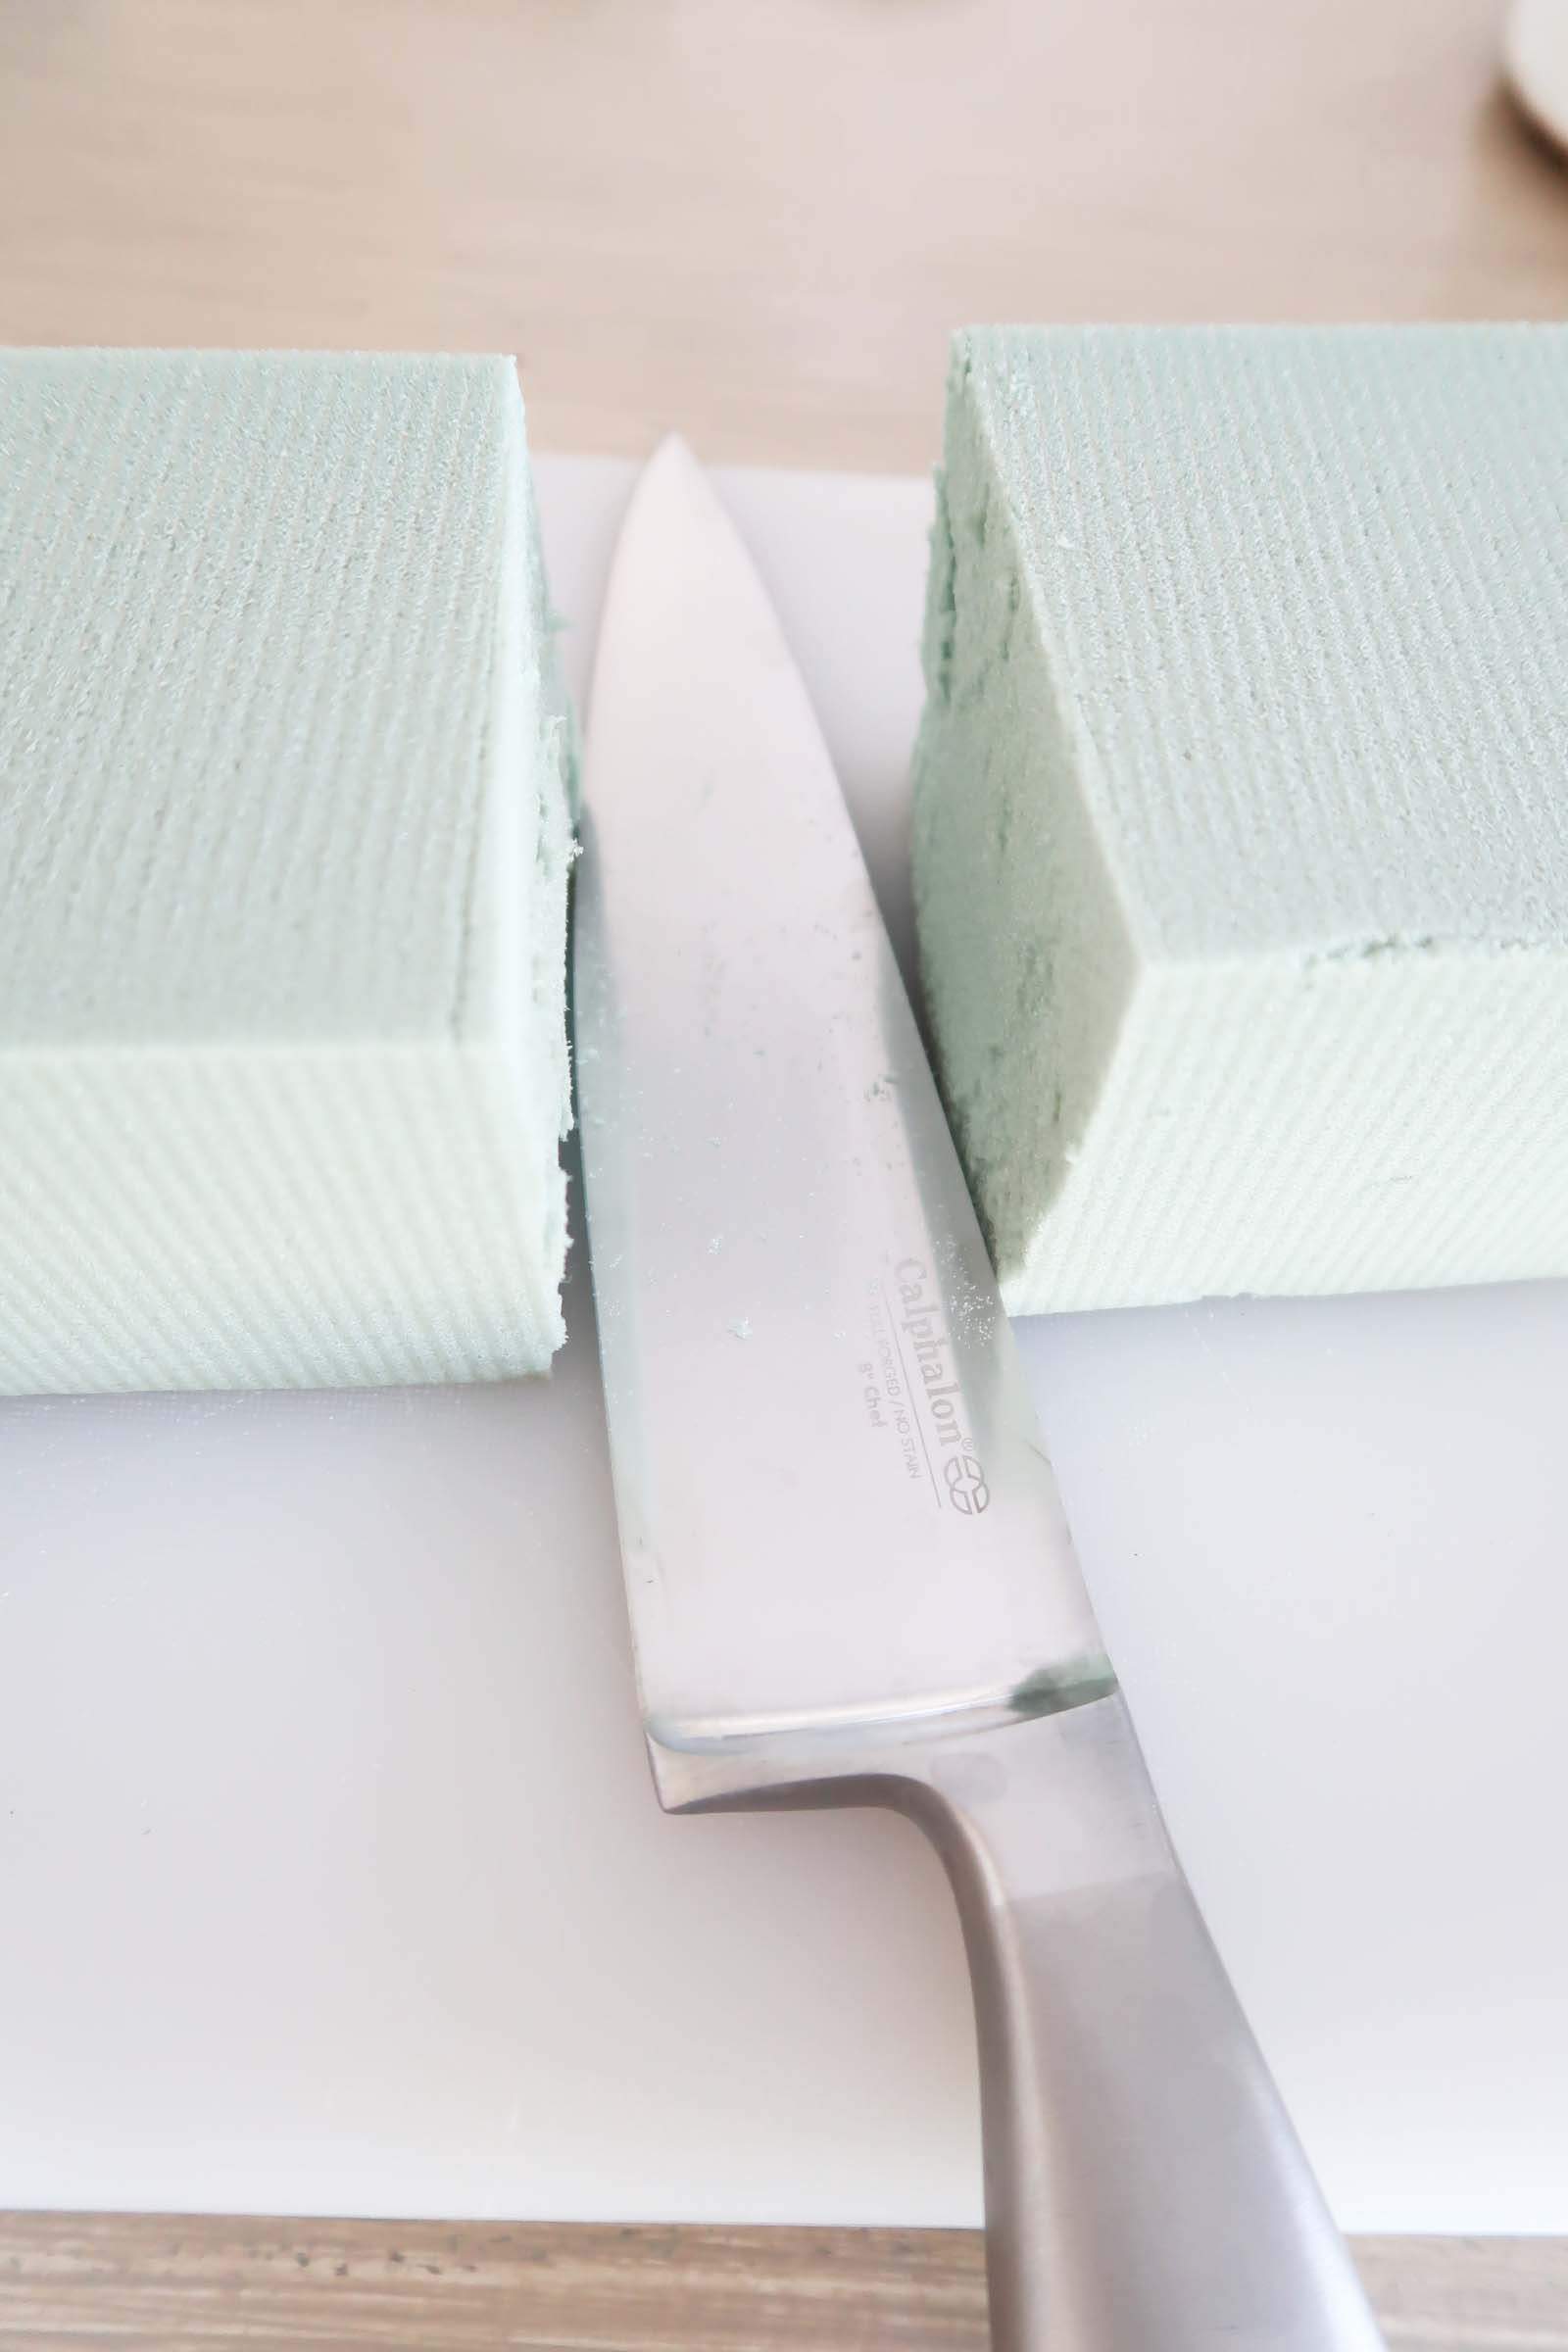
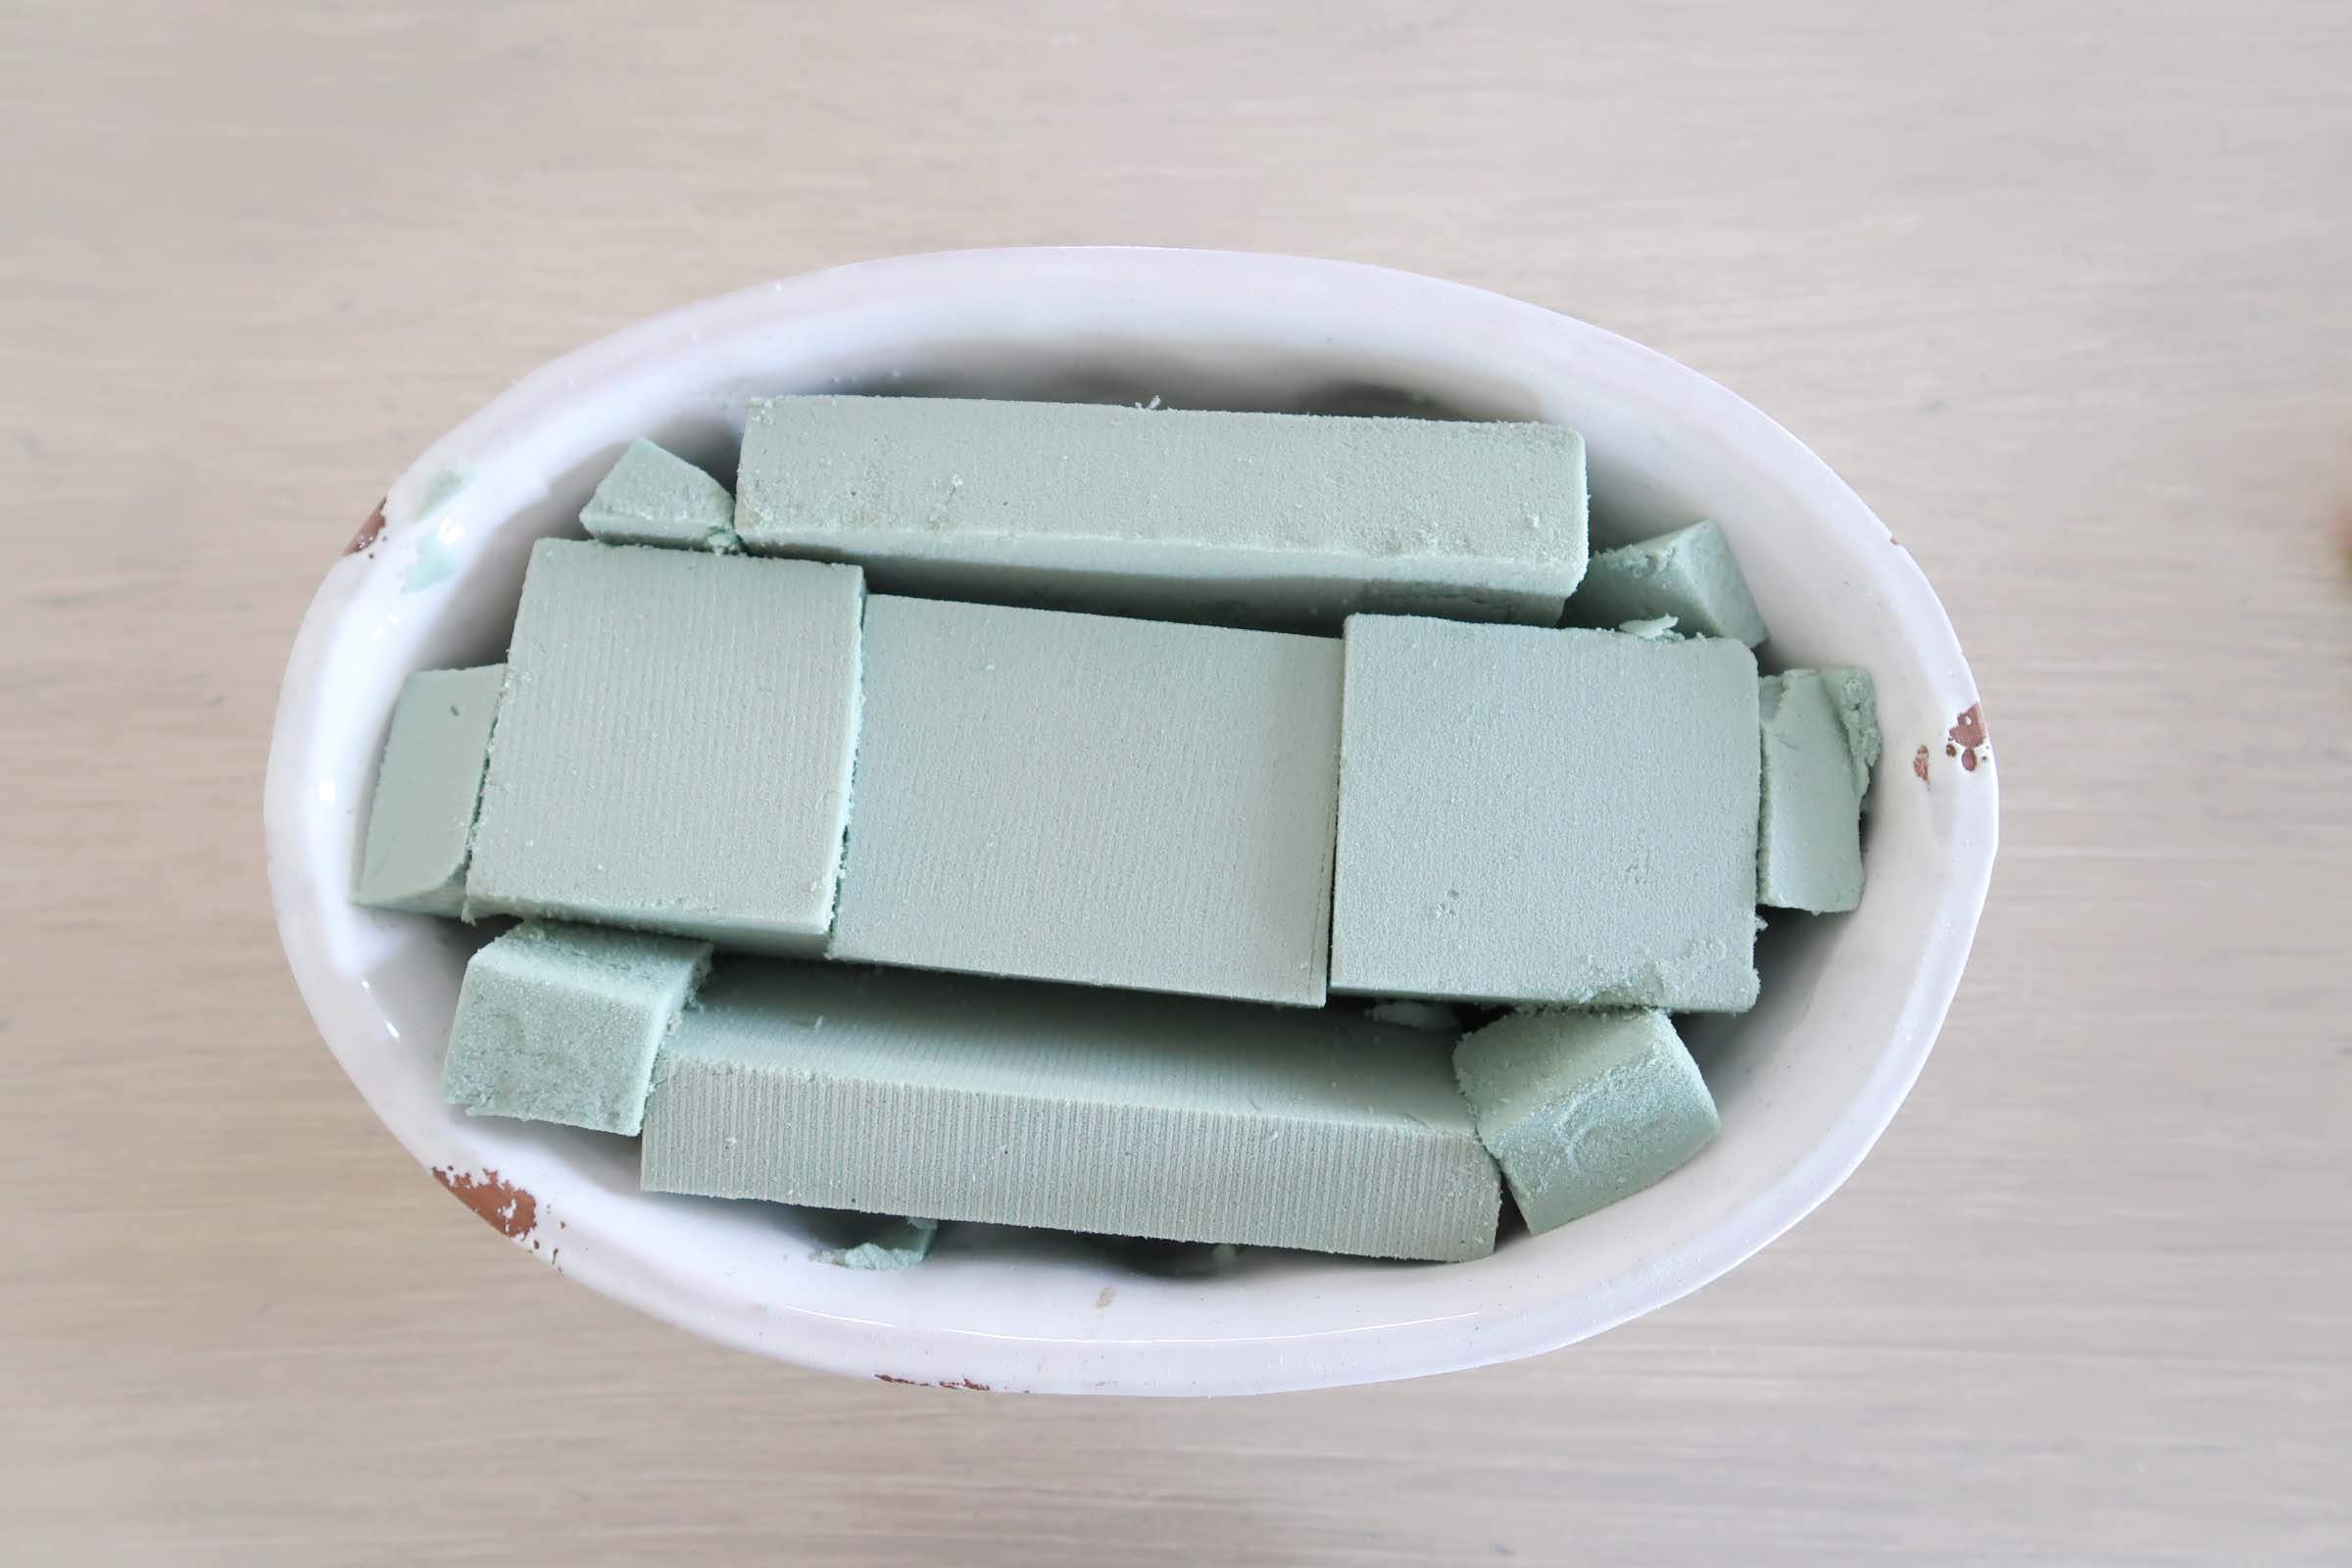
Step 1
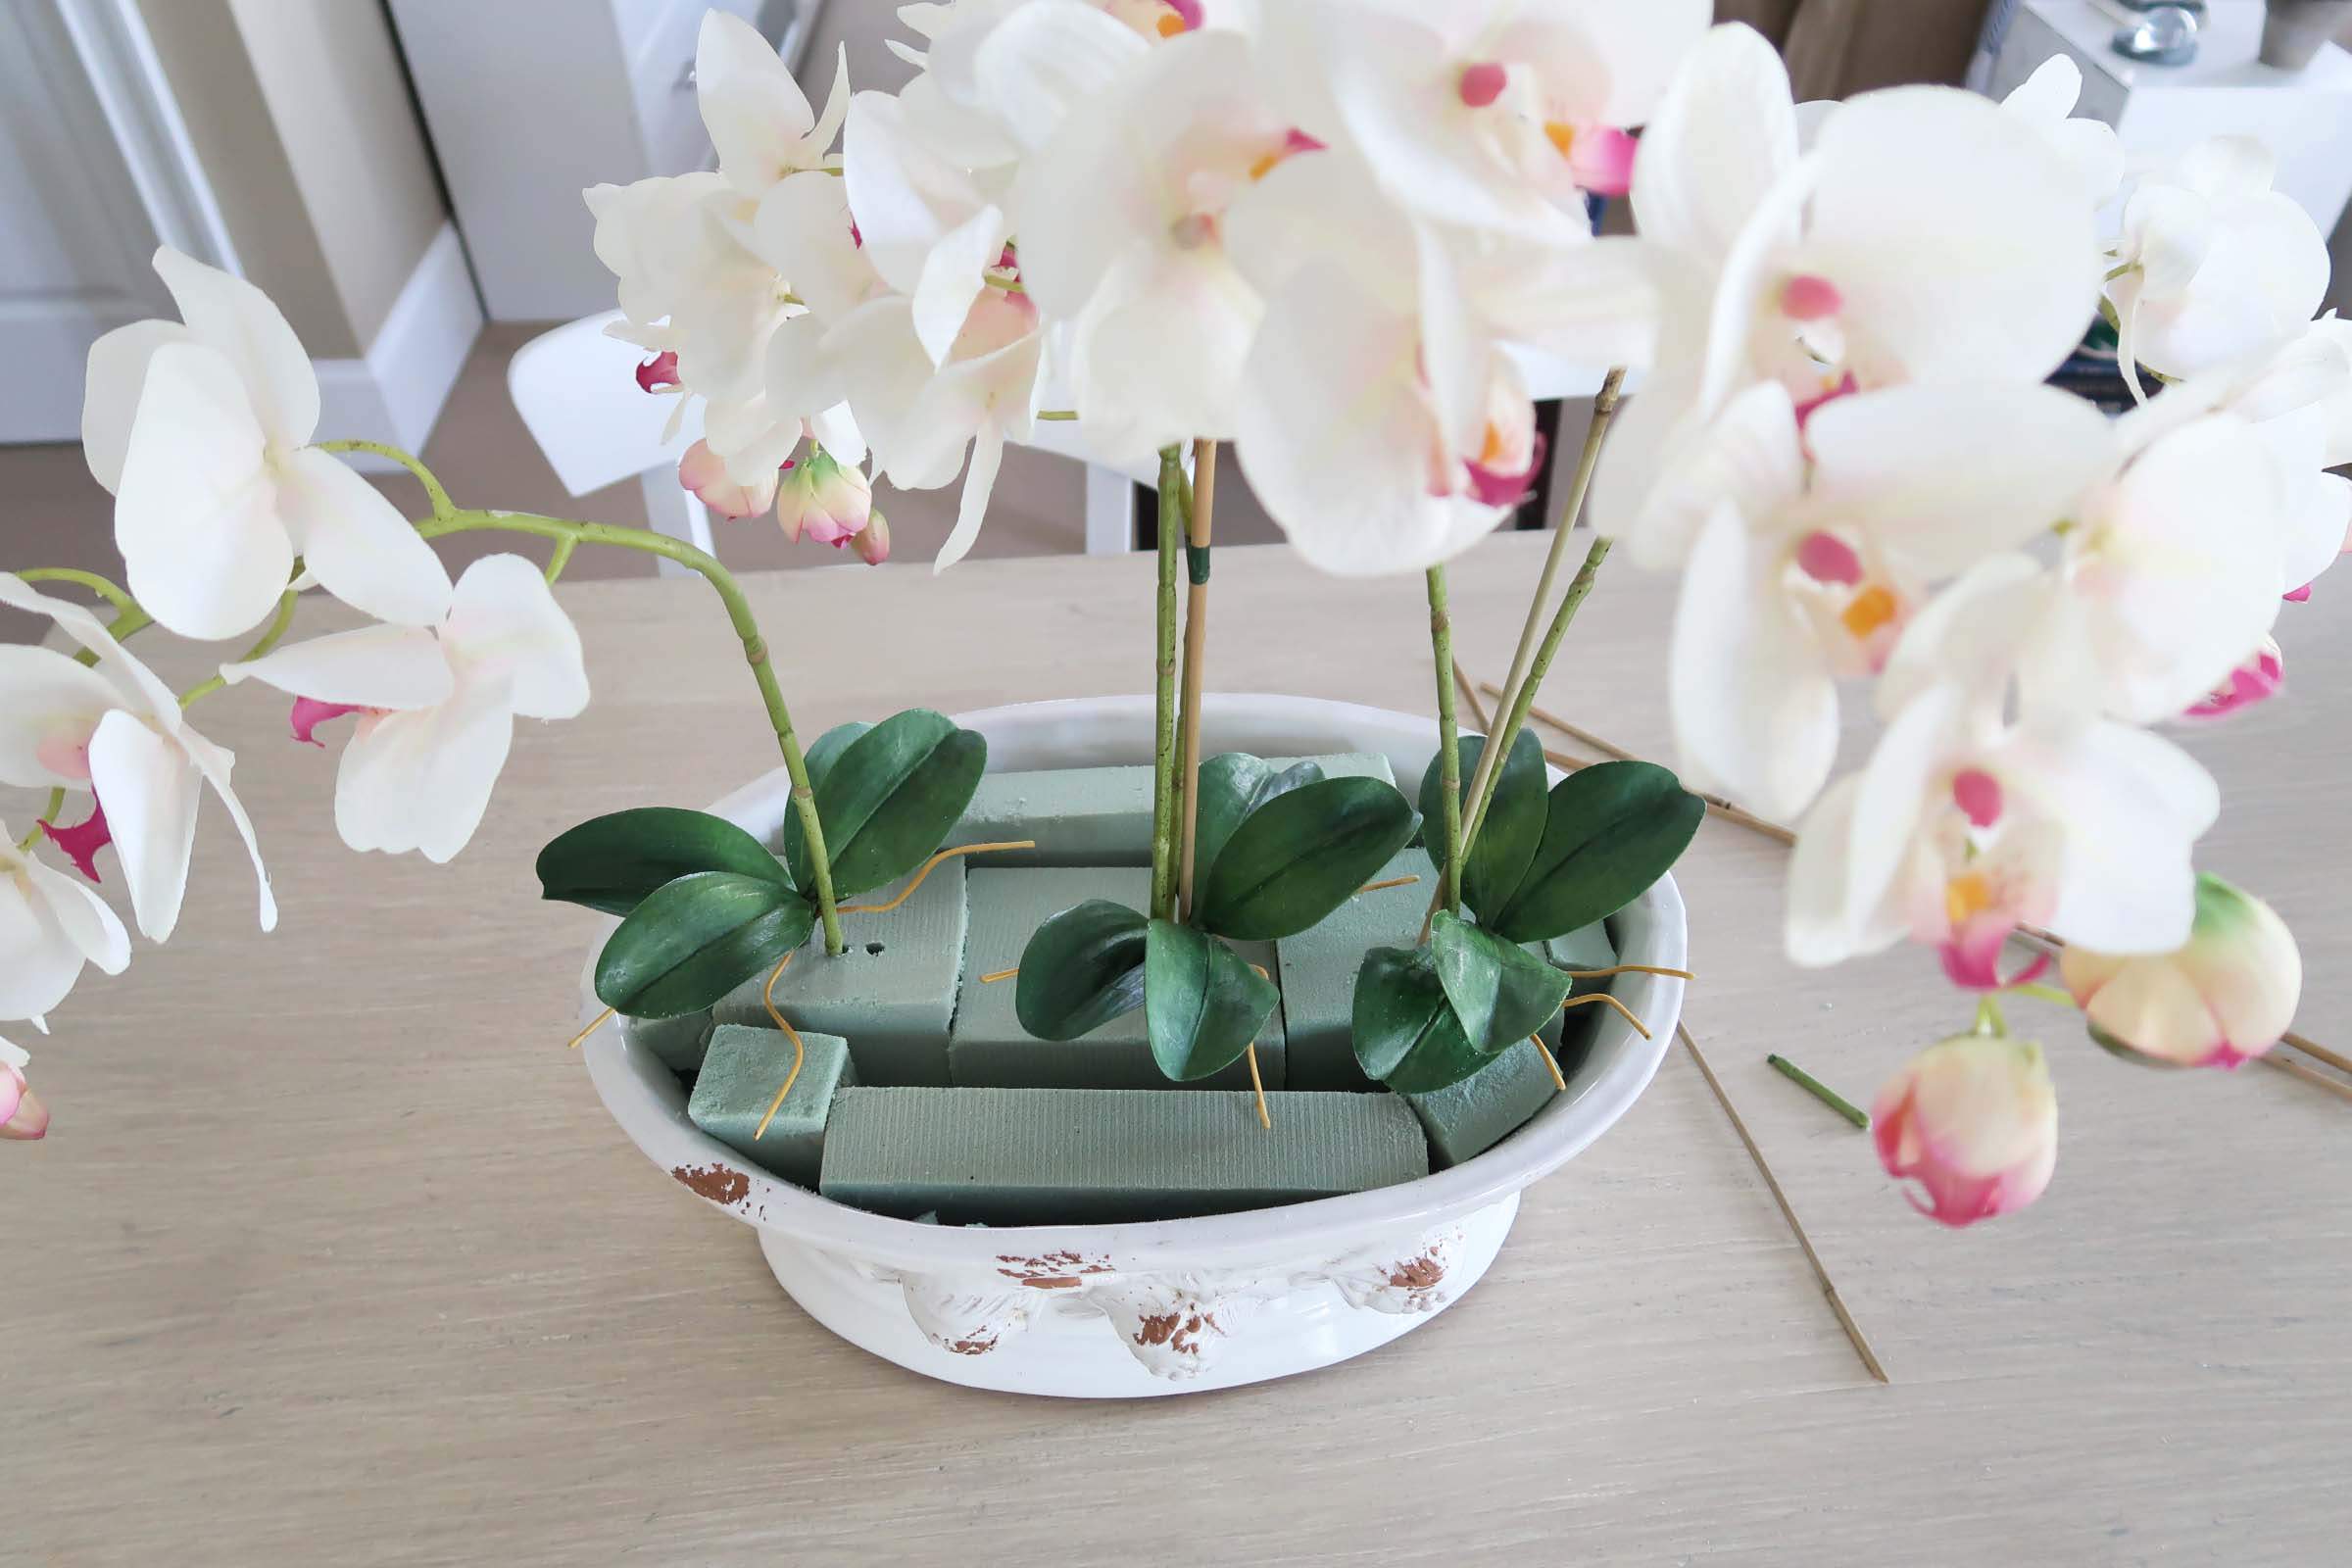
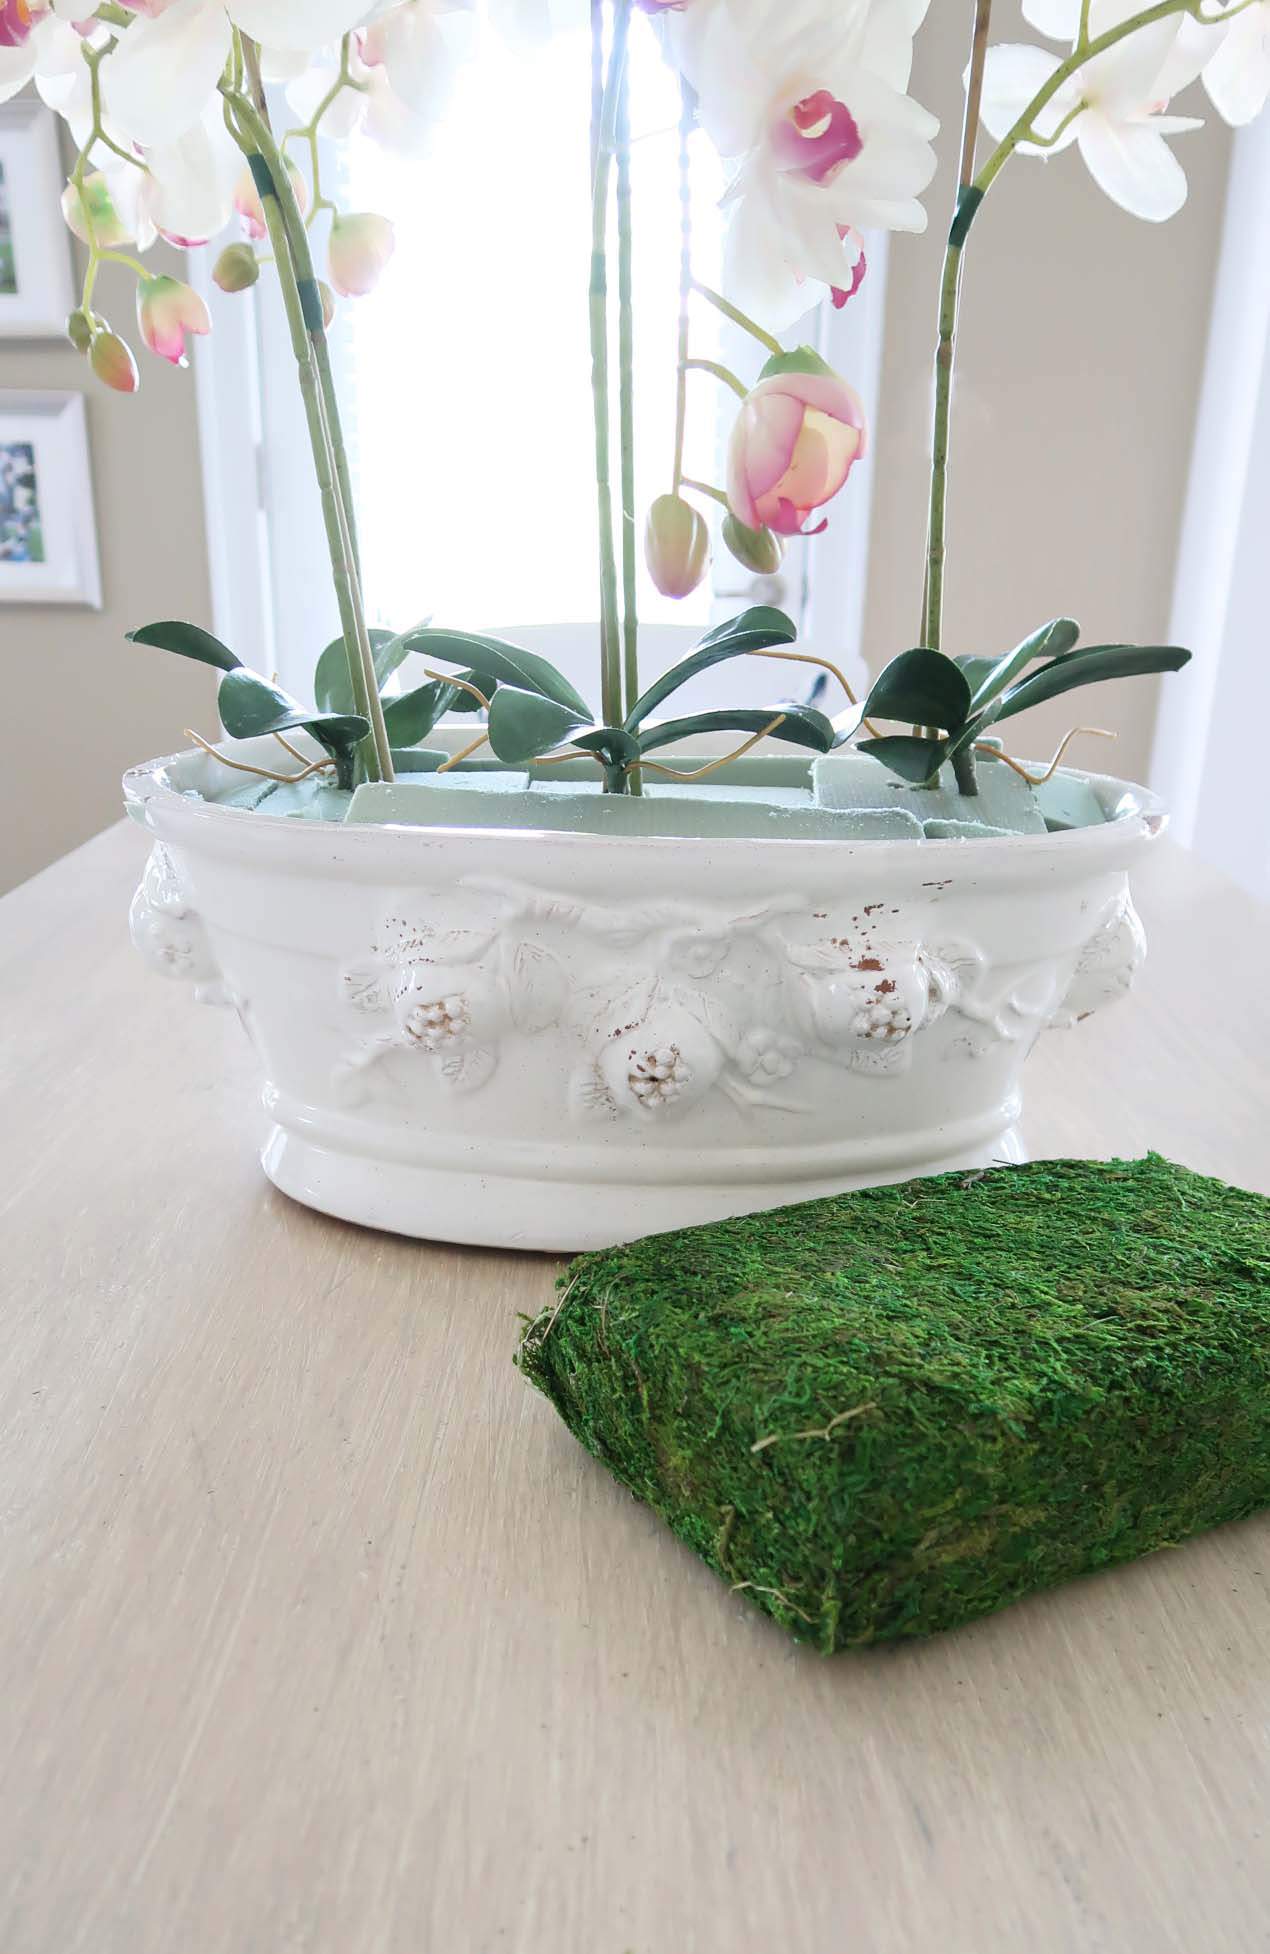
Cut the floral foam into pieces that fill the planter. It is scored to help you cut and I found it messy but EASY to cut. Try to keep the large pieces in the center. Cut smaller pieces to fill-in.
You need to create a full layer to add the moss at the end. It doesn’t have to look pretty.
Step 2
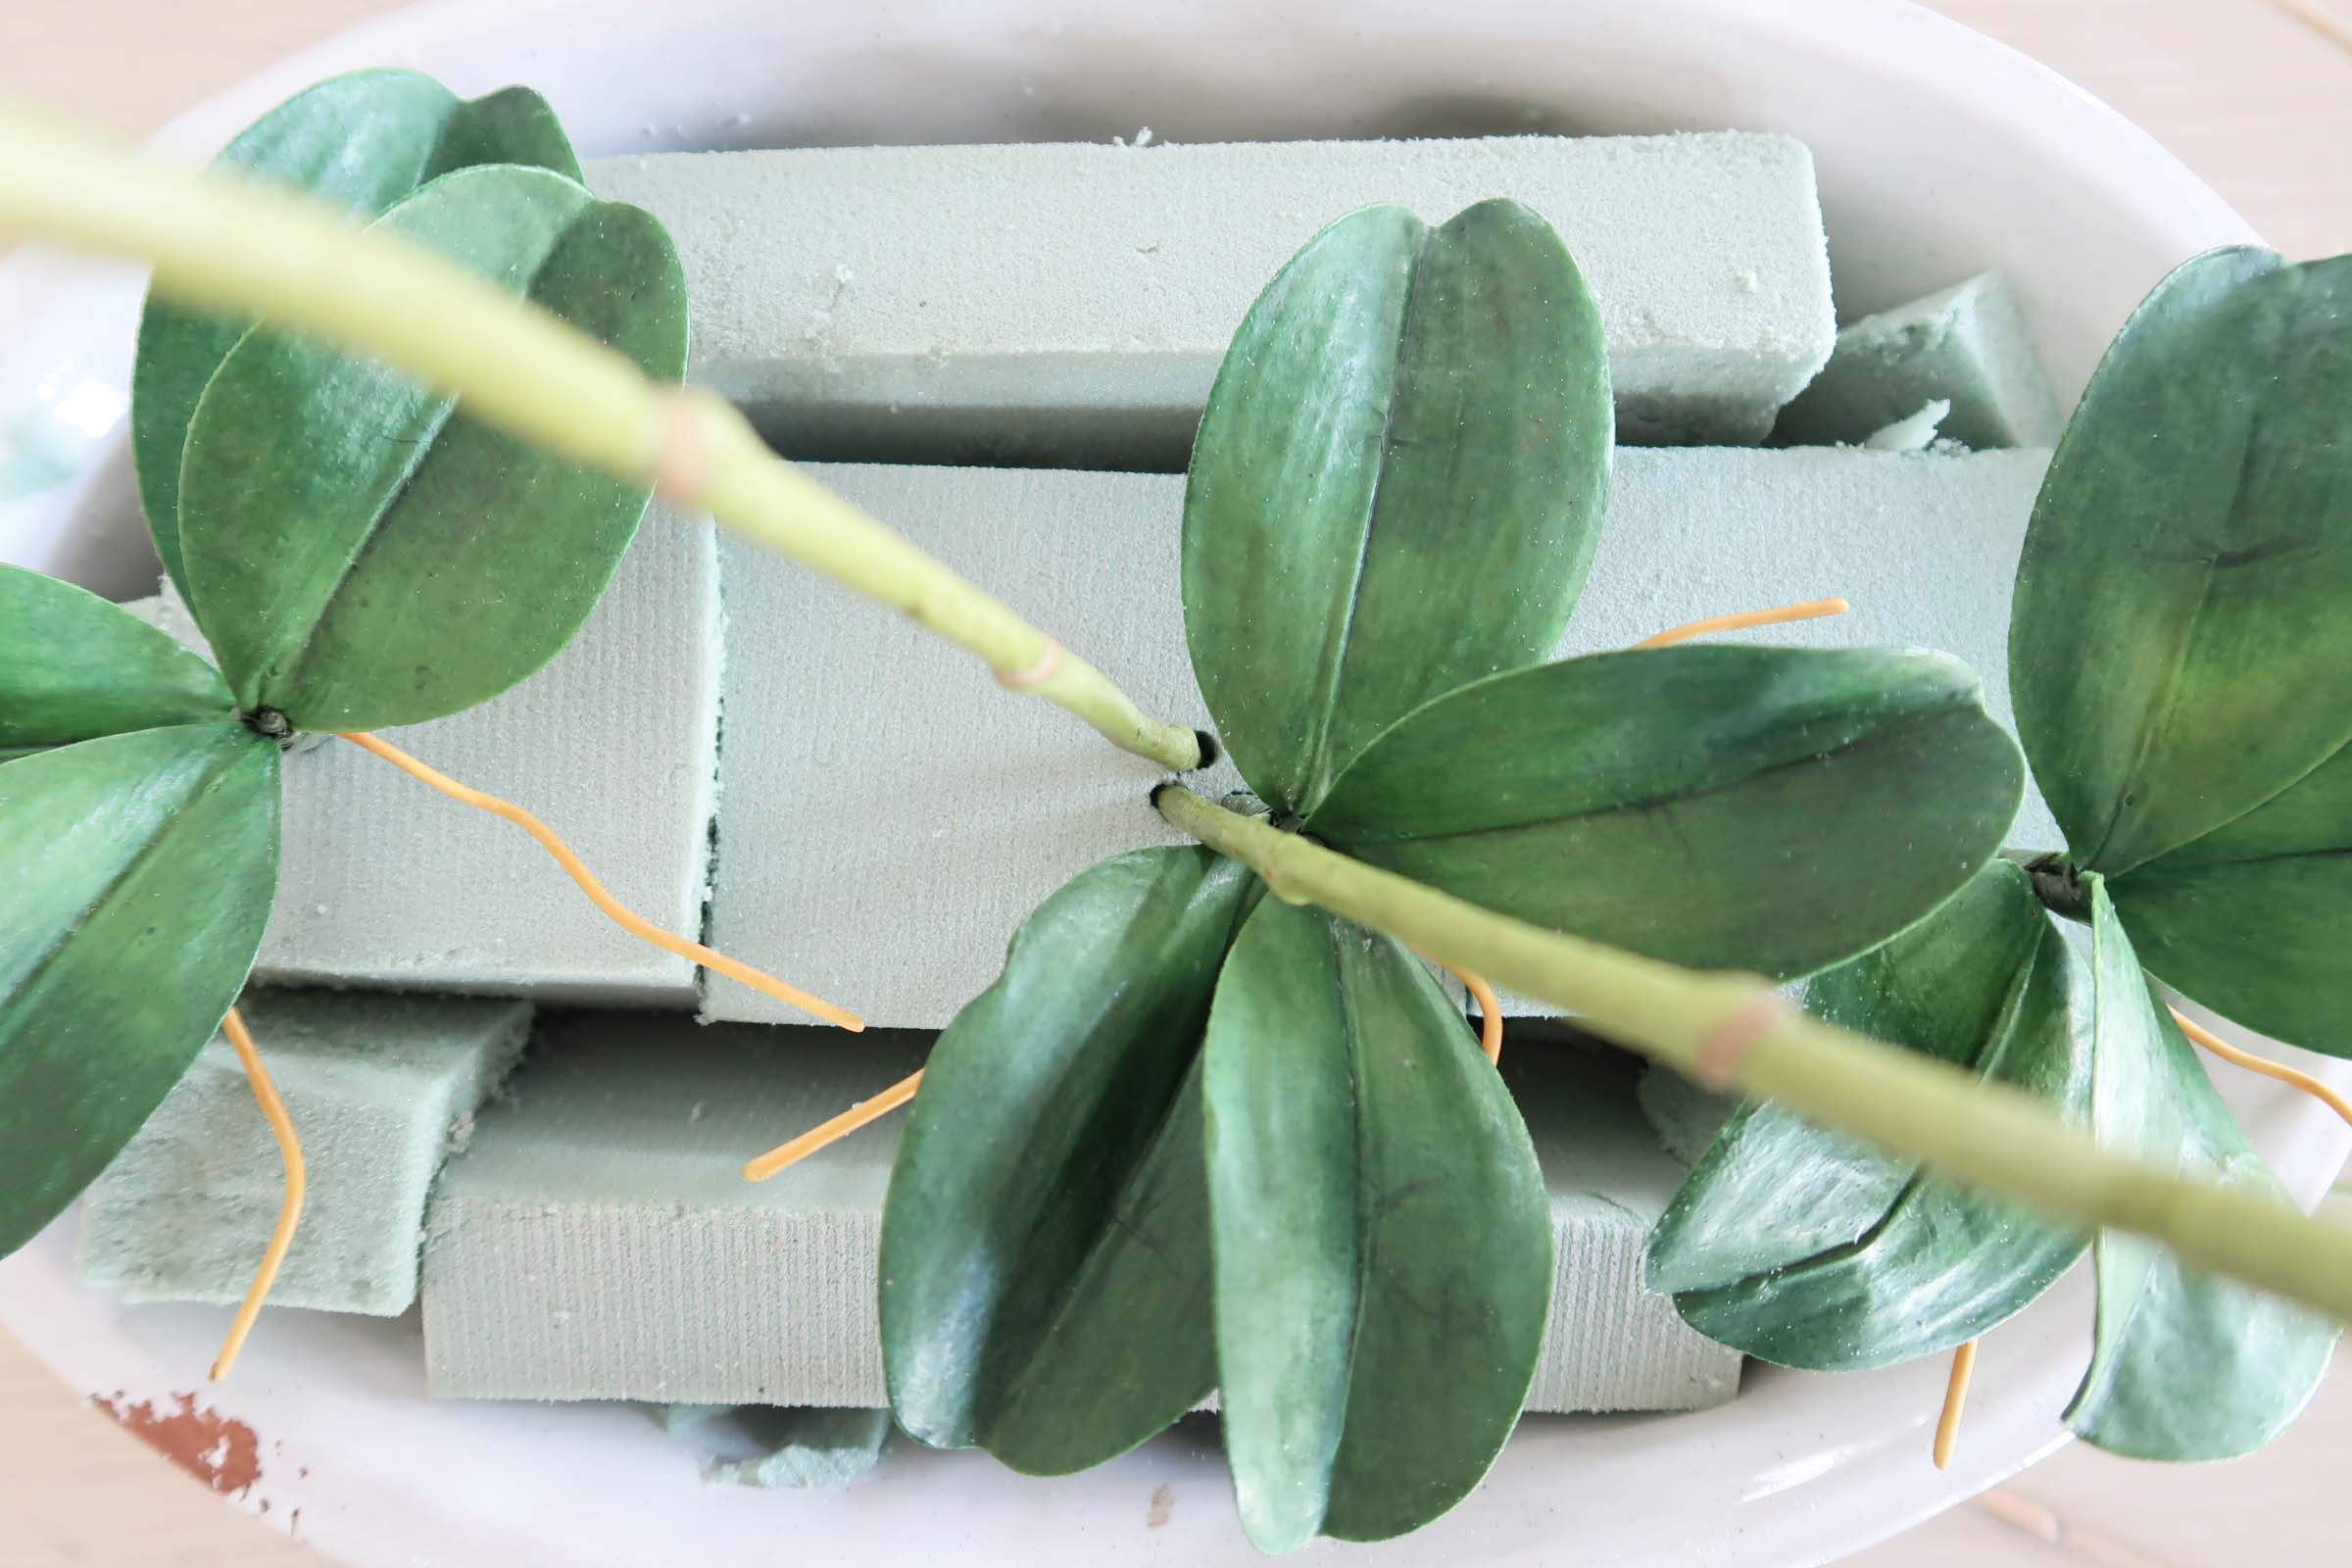
Place orchid leaves for spacing and think about the stems and bamboo at the same time. You will need to add 2 to 3 stem and stake combinations at the center of each leaf clump. The foam gives easily, so you don’t have to push very hard to get them into place.
Leave about a 1/4 inch between the foam and leaves for the moss to be inserted later.

Step 3
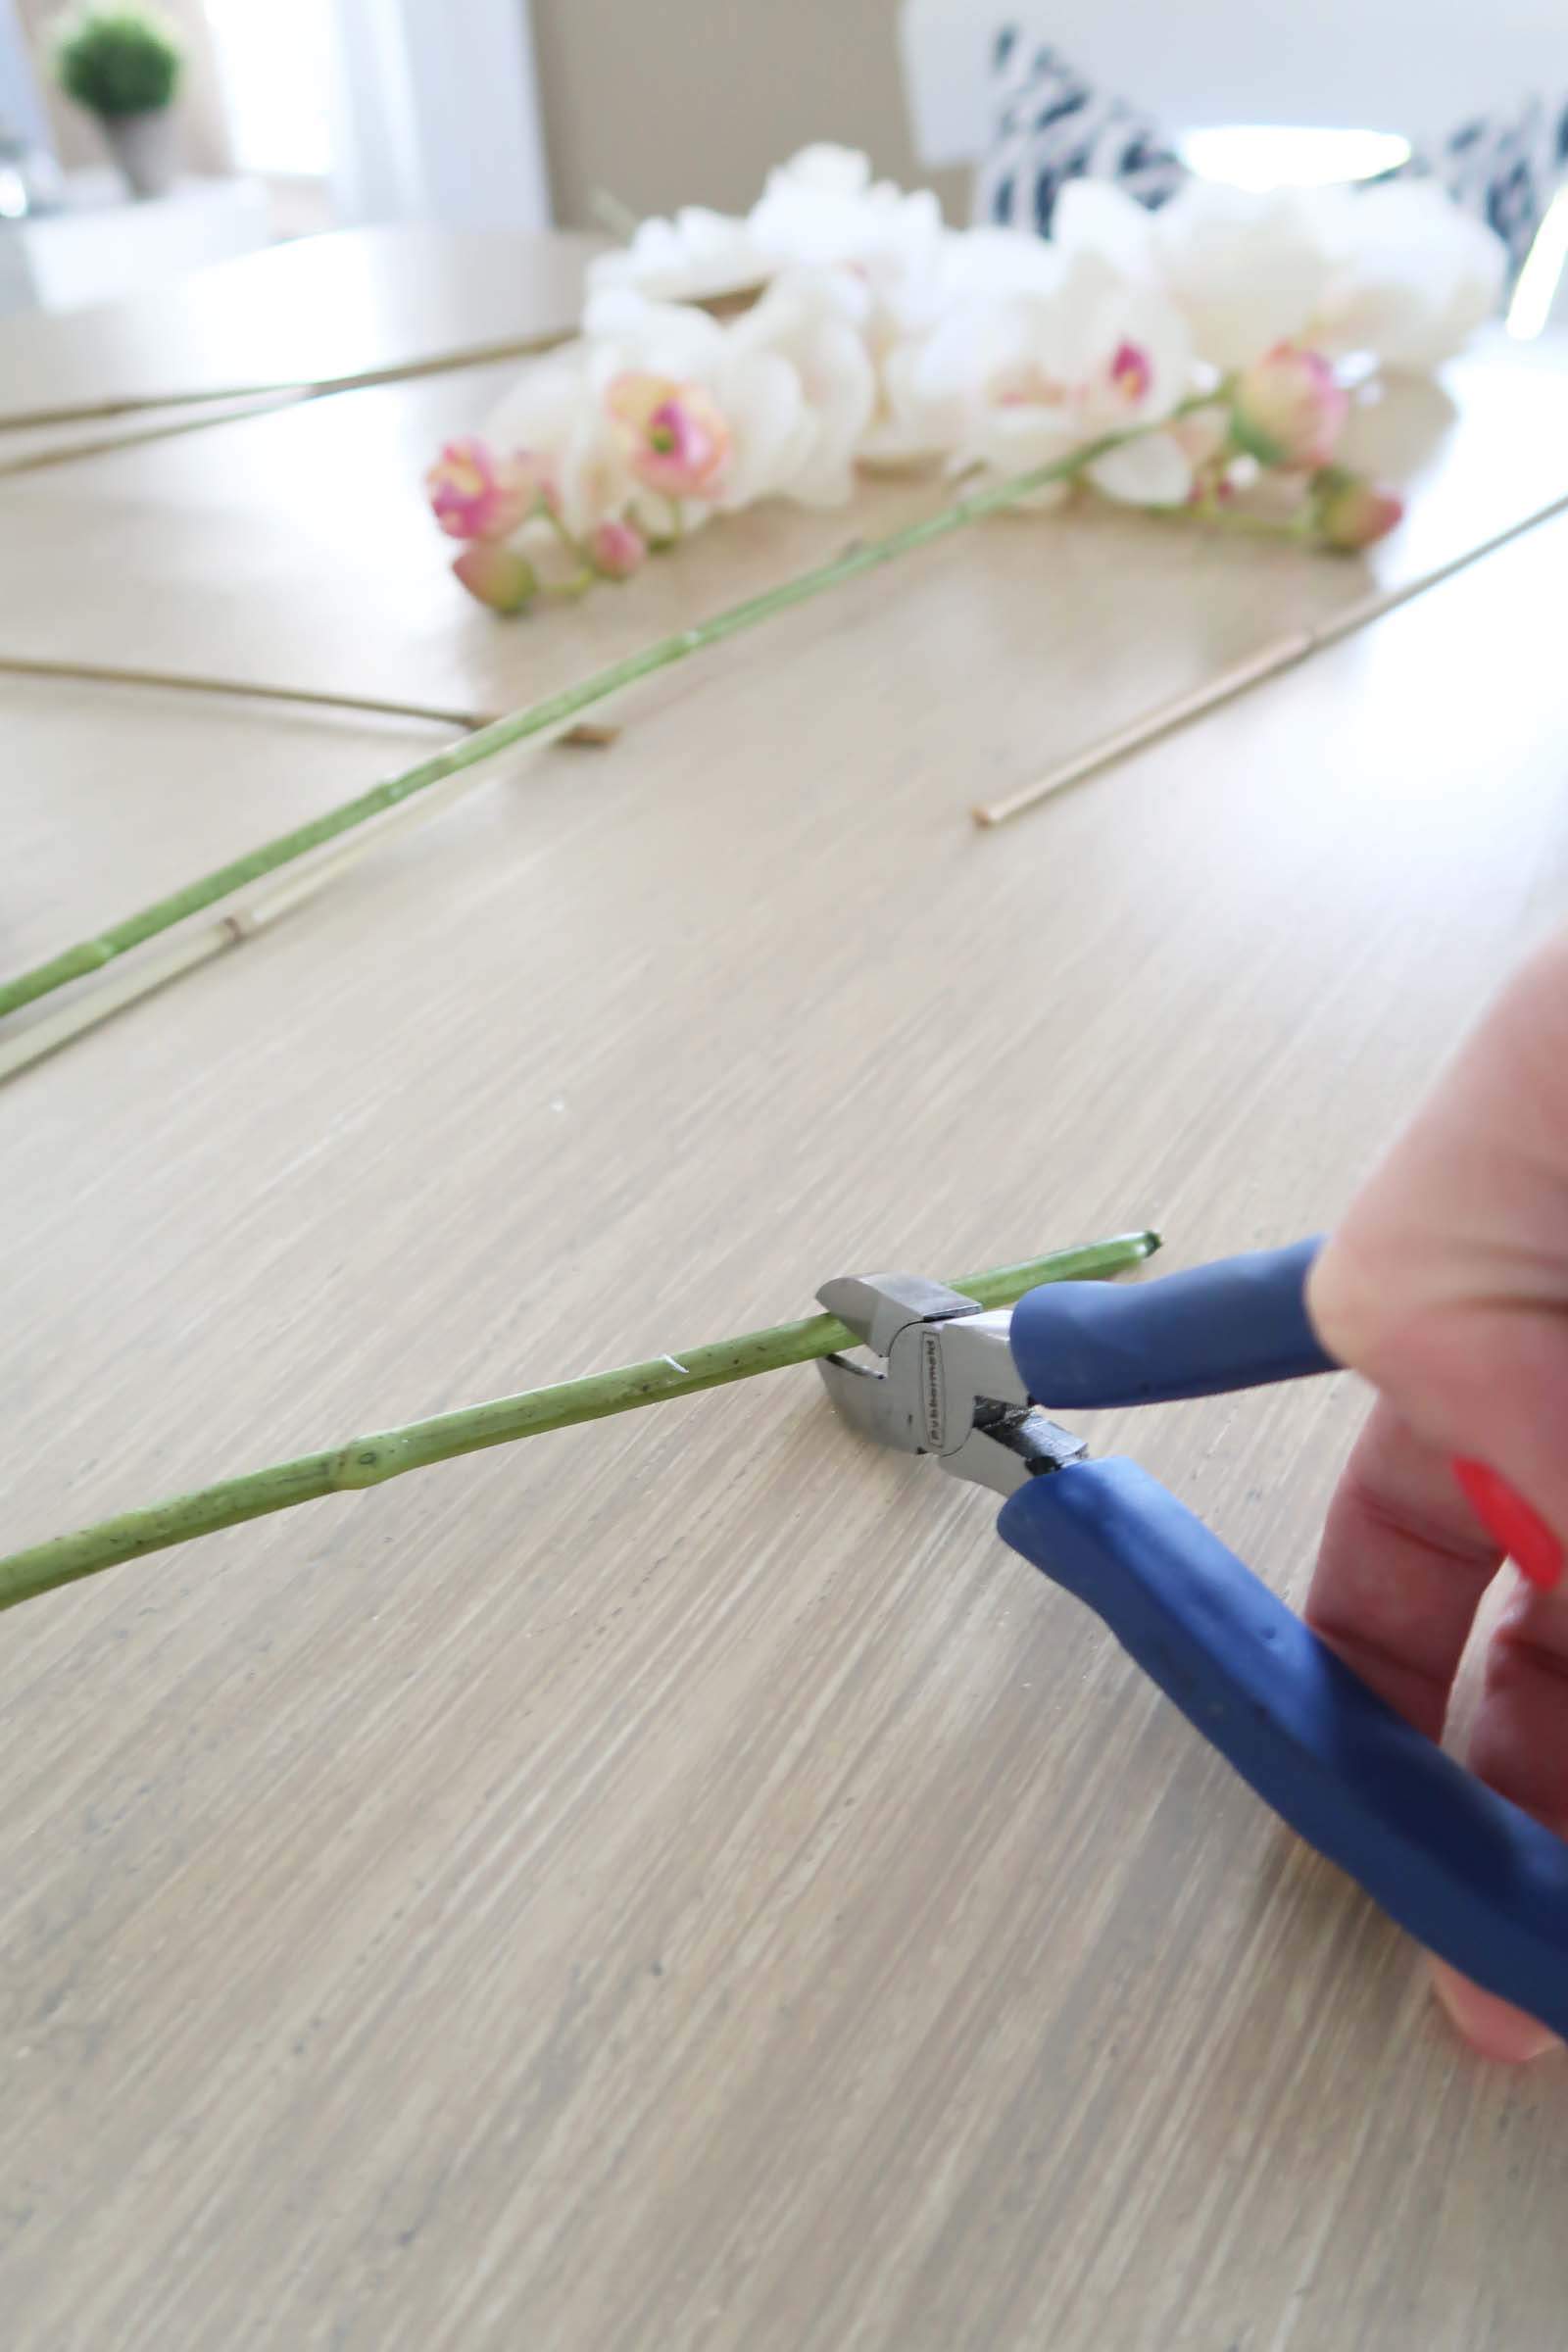
Decide where you want to group two stems together. I added two in the middle and two on the left. So the second orchid stem/flower appears lower than the first, I cut 1 inch off of the bottom with wire cutters.
Step 4
Insert each of the orchid stems. Move them around until you are happy with the arrangement.
Remember: they will stand taller once you attach them to the bamboo stakes for support.
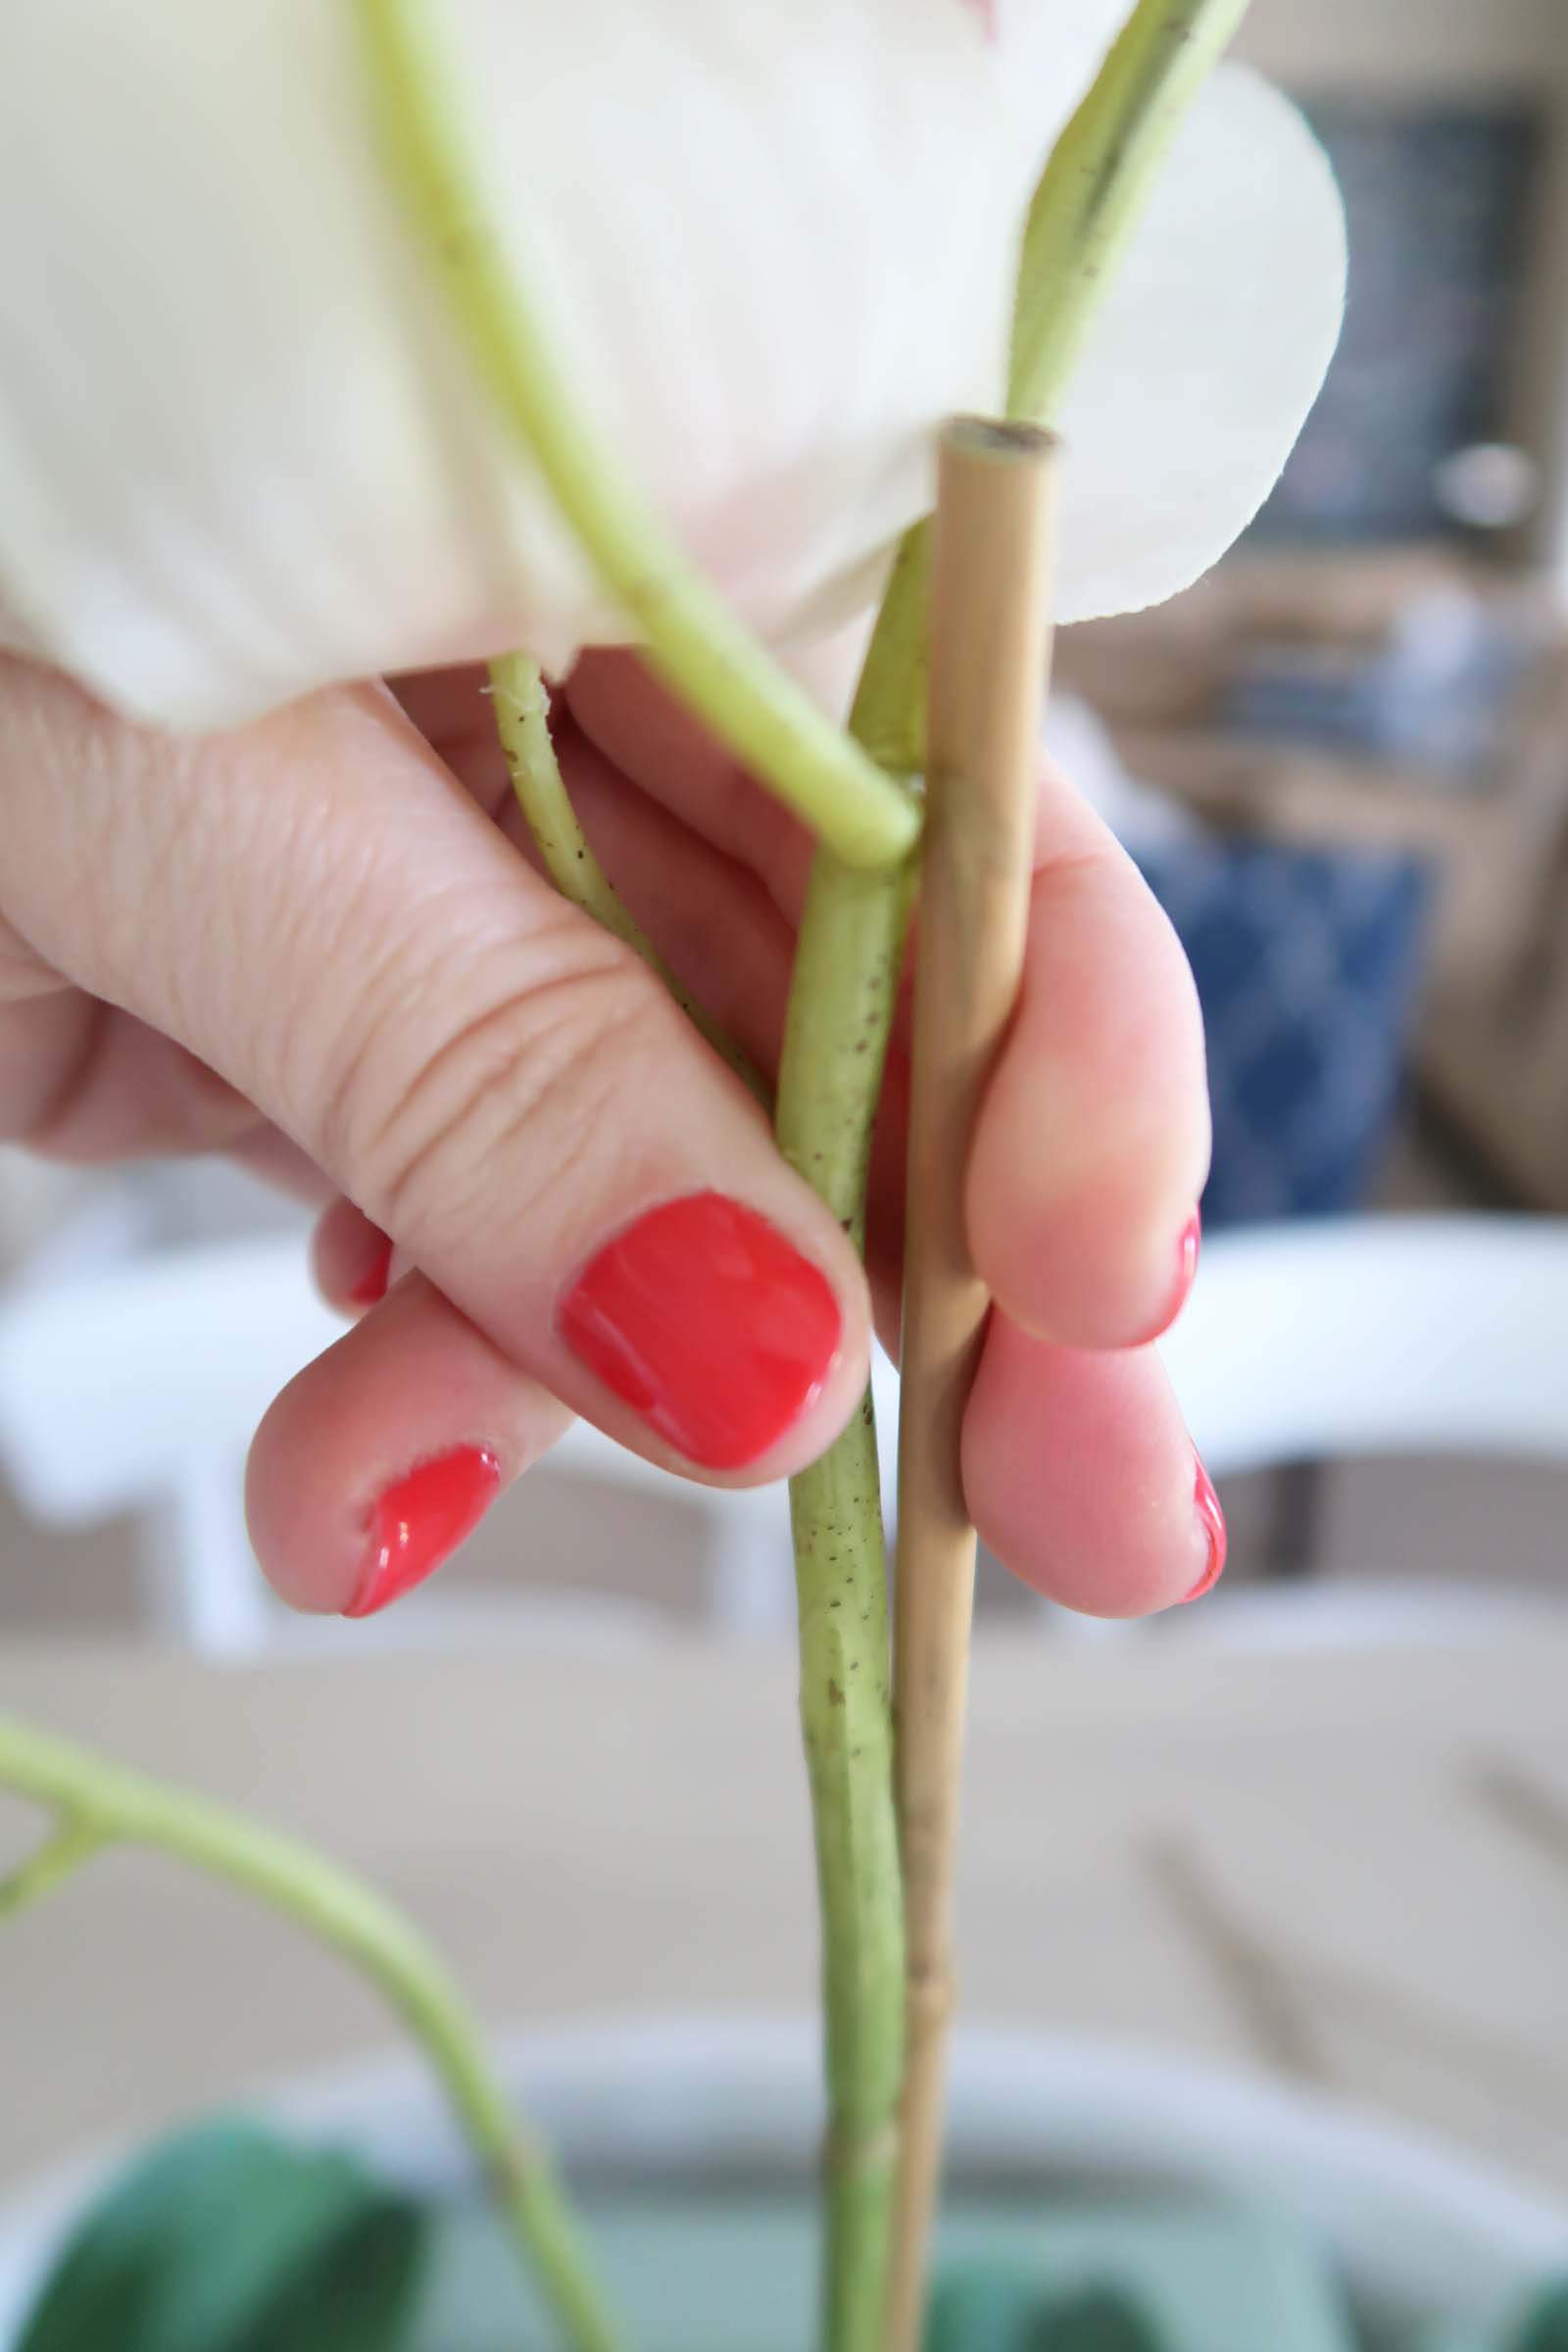
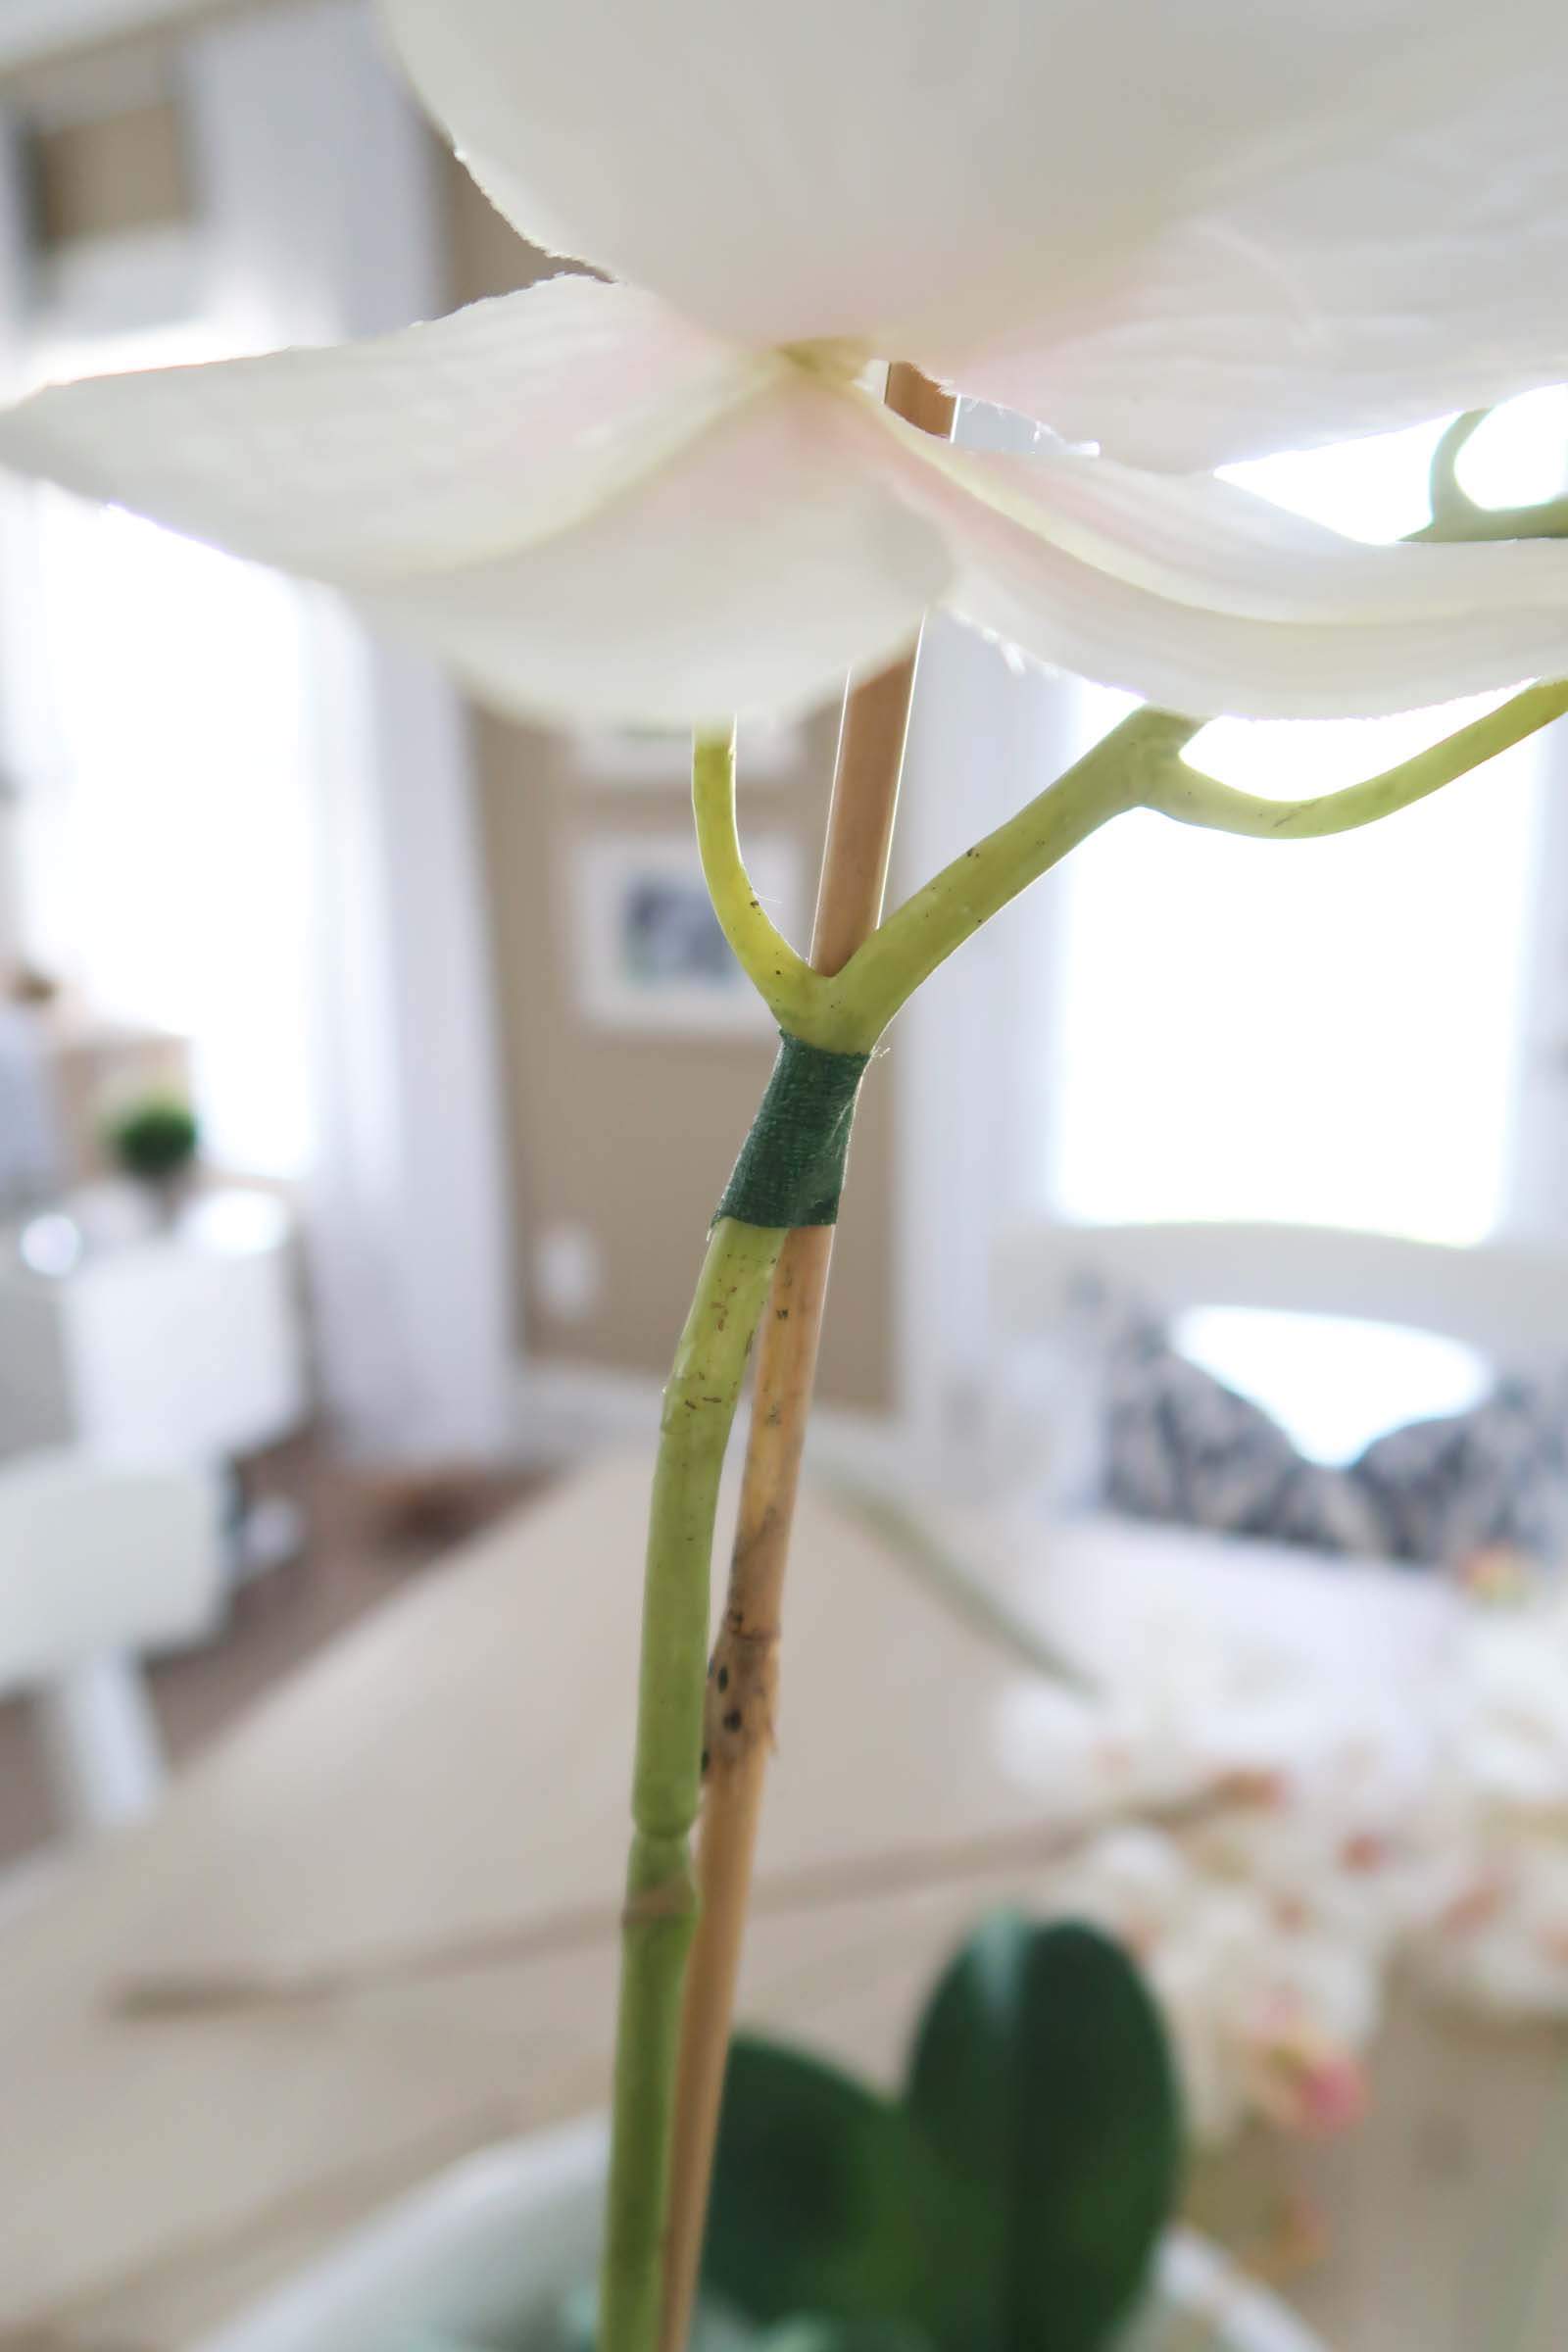
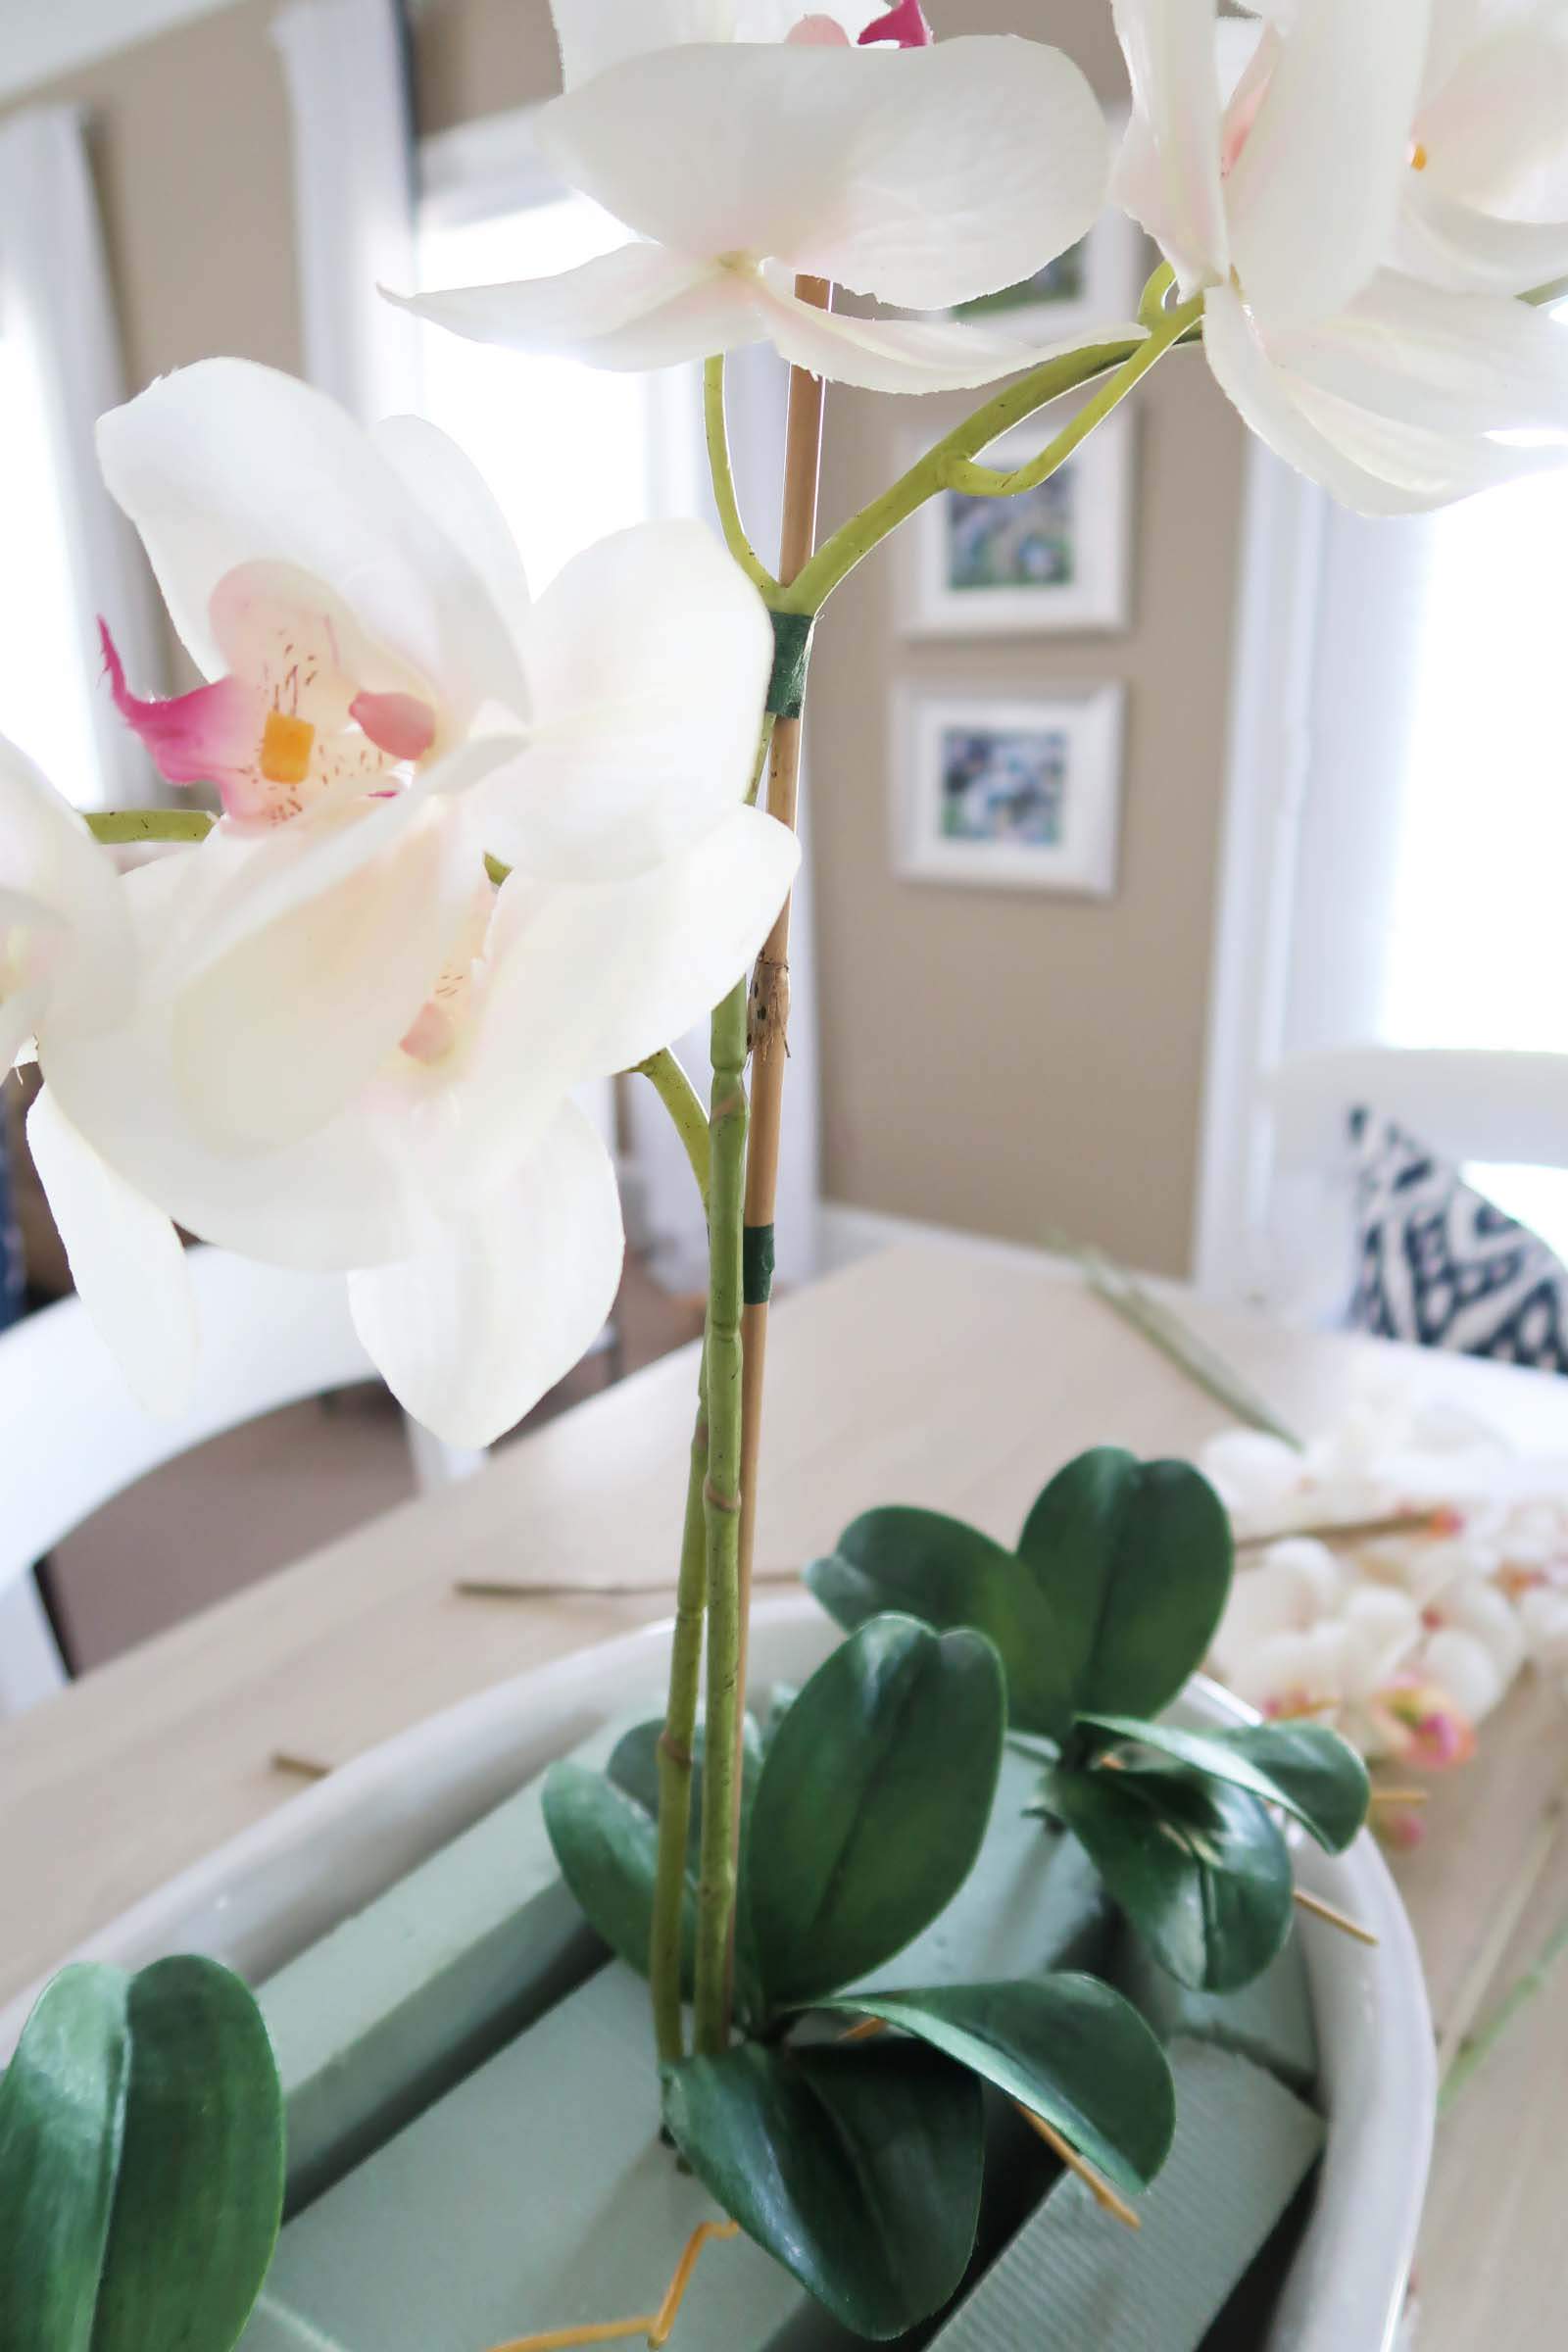
Step 5
Insert bamboo stake next to single or double orchid stems. If they seemed too tall, I used the wire cutter to trim the tops of the bamboo stakes.
Step 6
Using the floral tape secure stems to bamboo stakes. Floral tape has to be slightly stretched to release the adhesive.
Pull taught, wrap as tightly as you can without breaking the tape, and push down smooth with your fingers. Remember to attached both stems to the bamboo stake.
Step 7
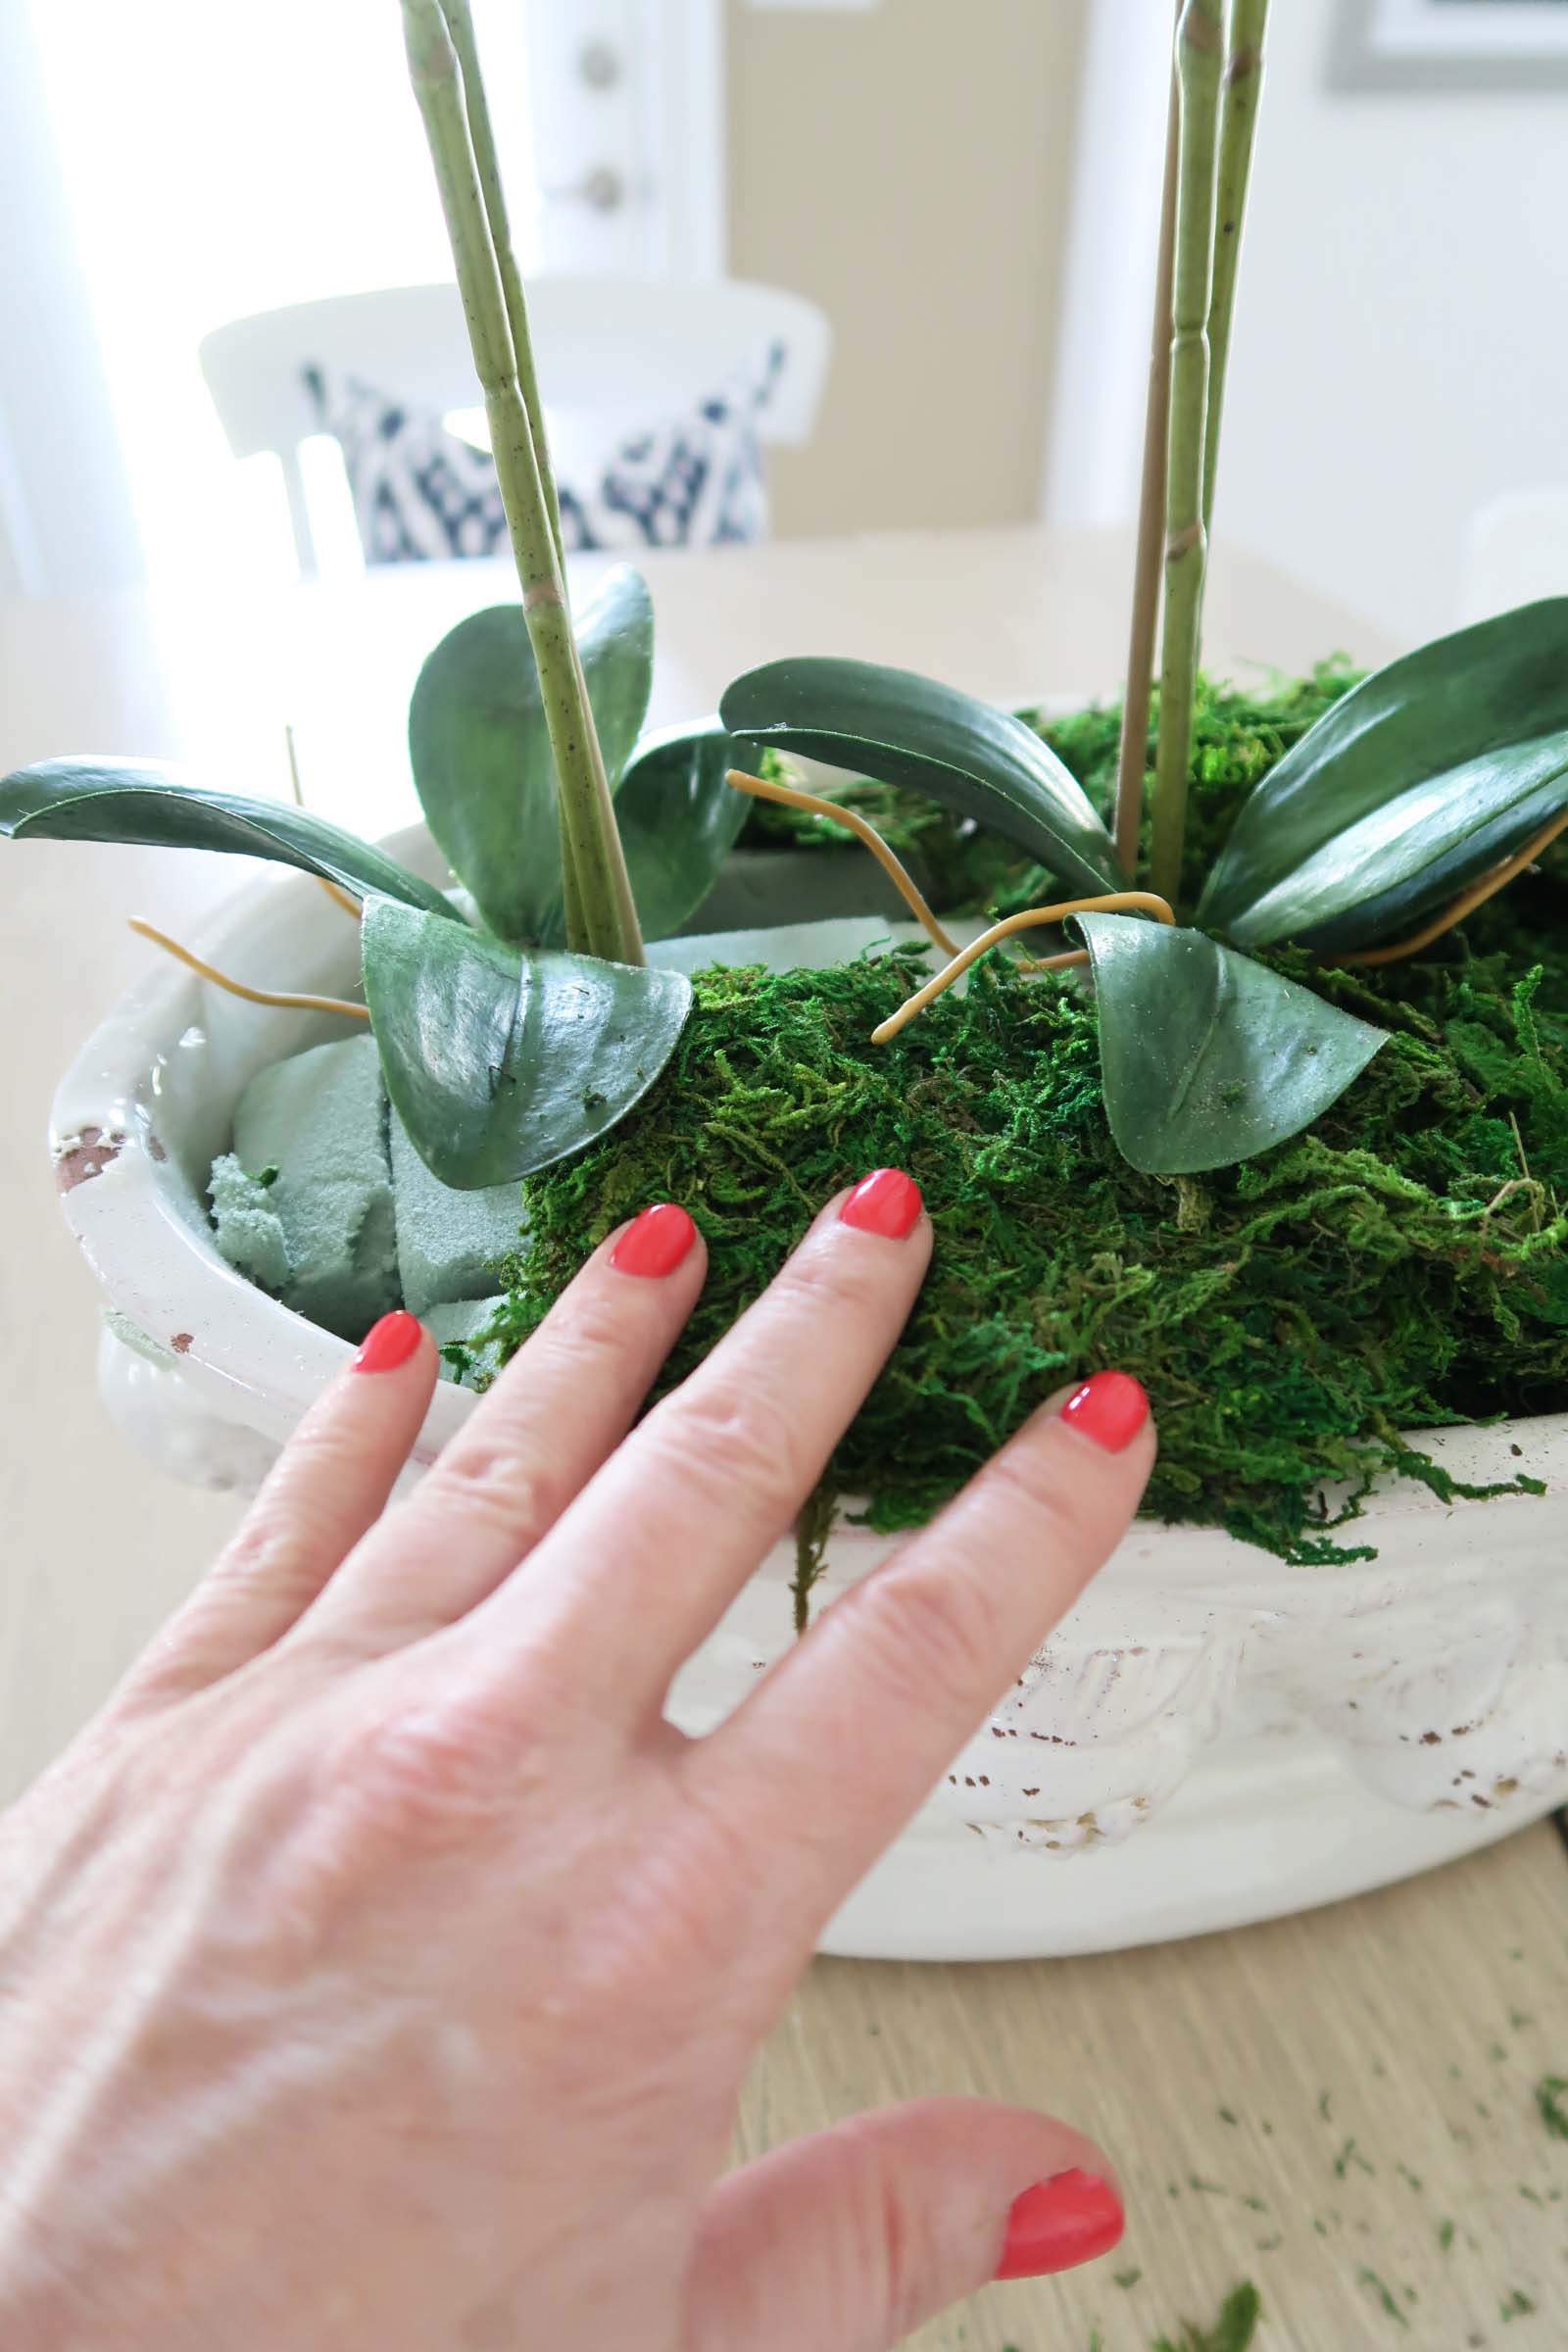
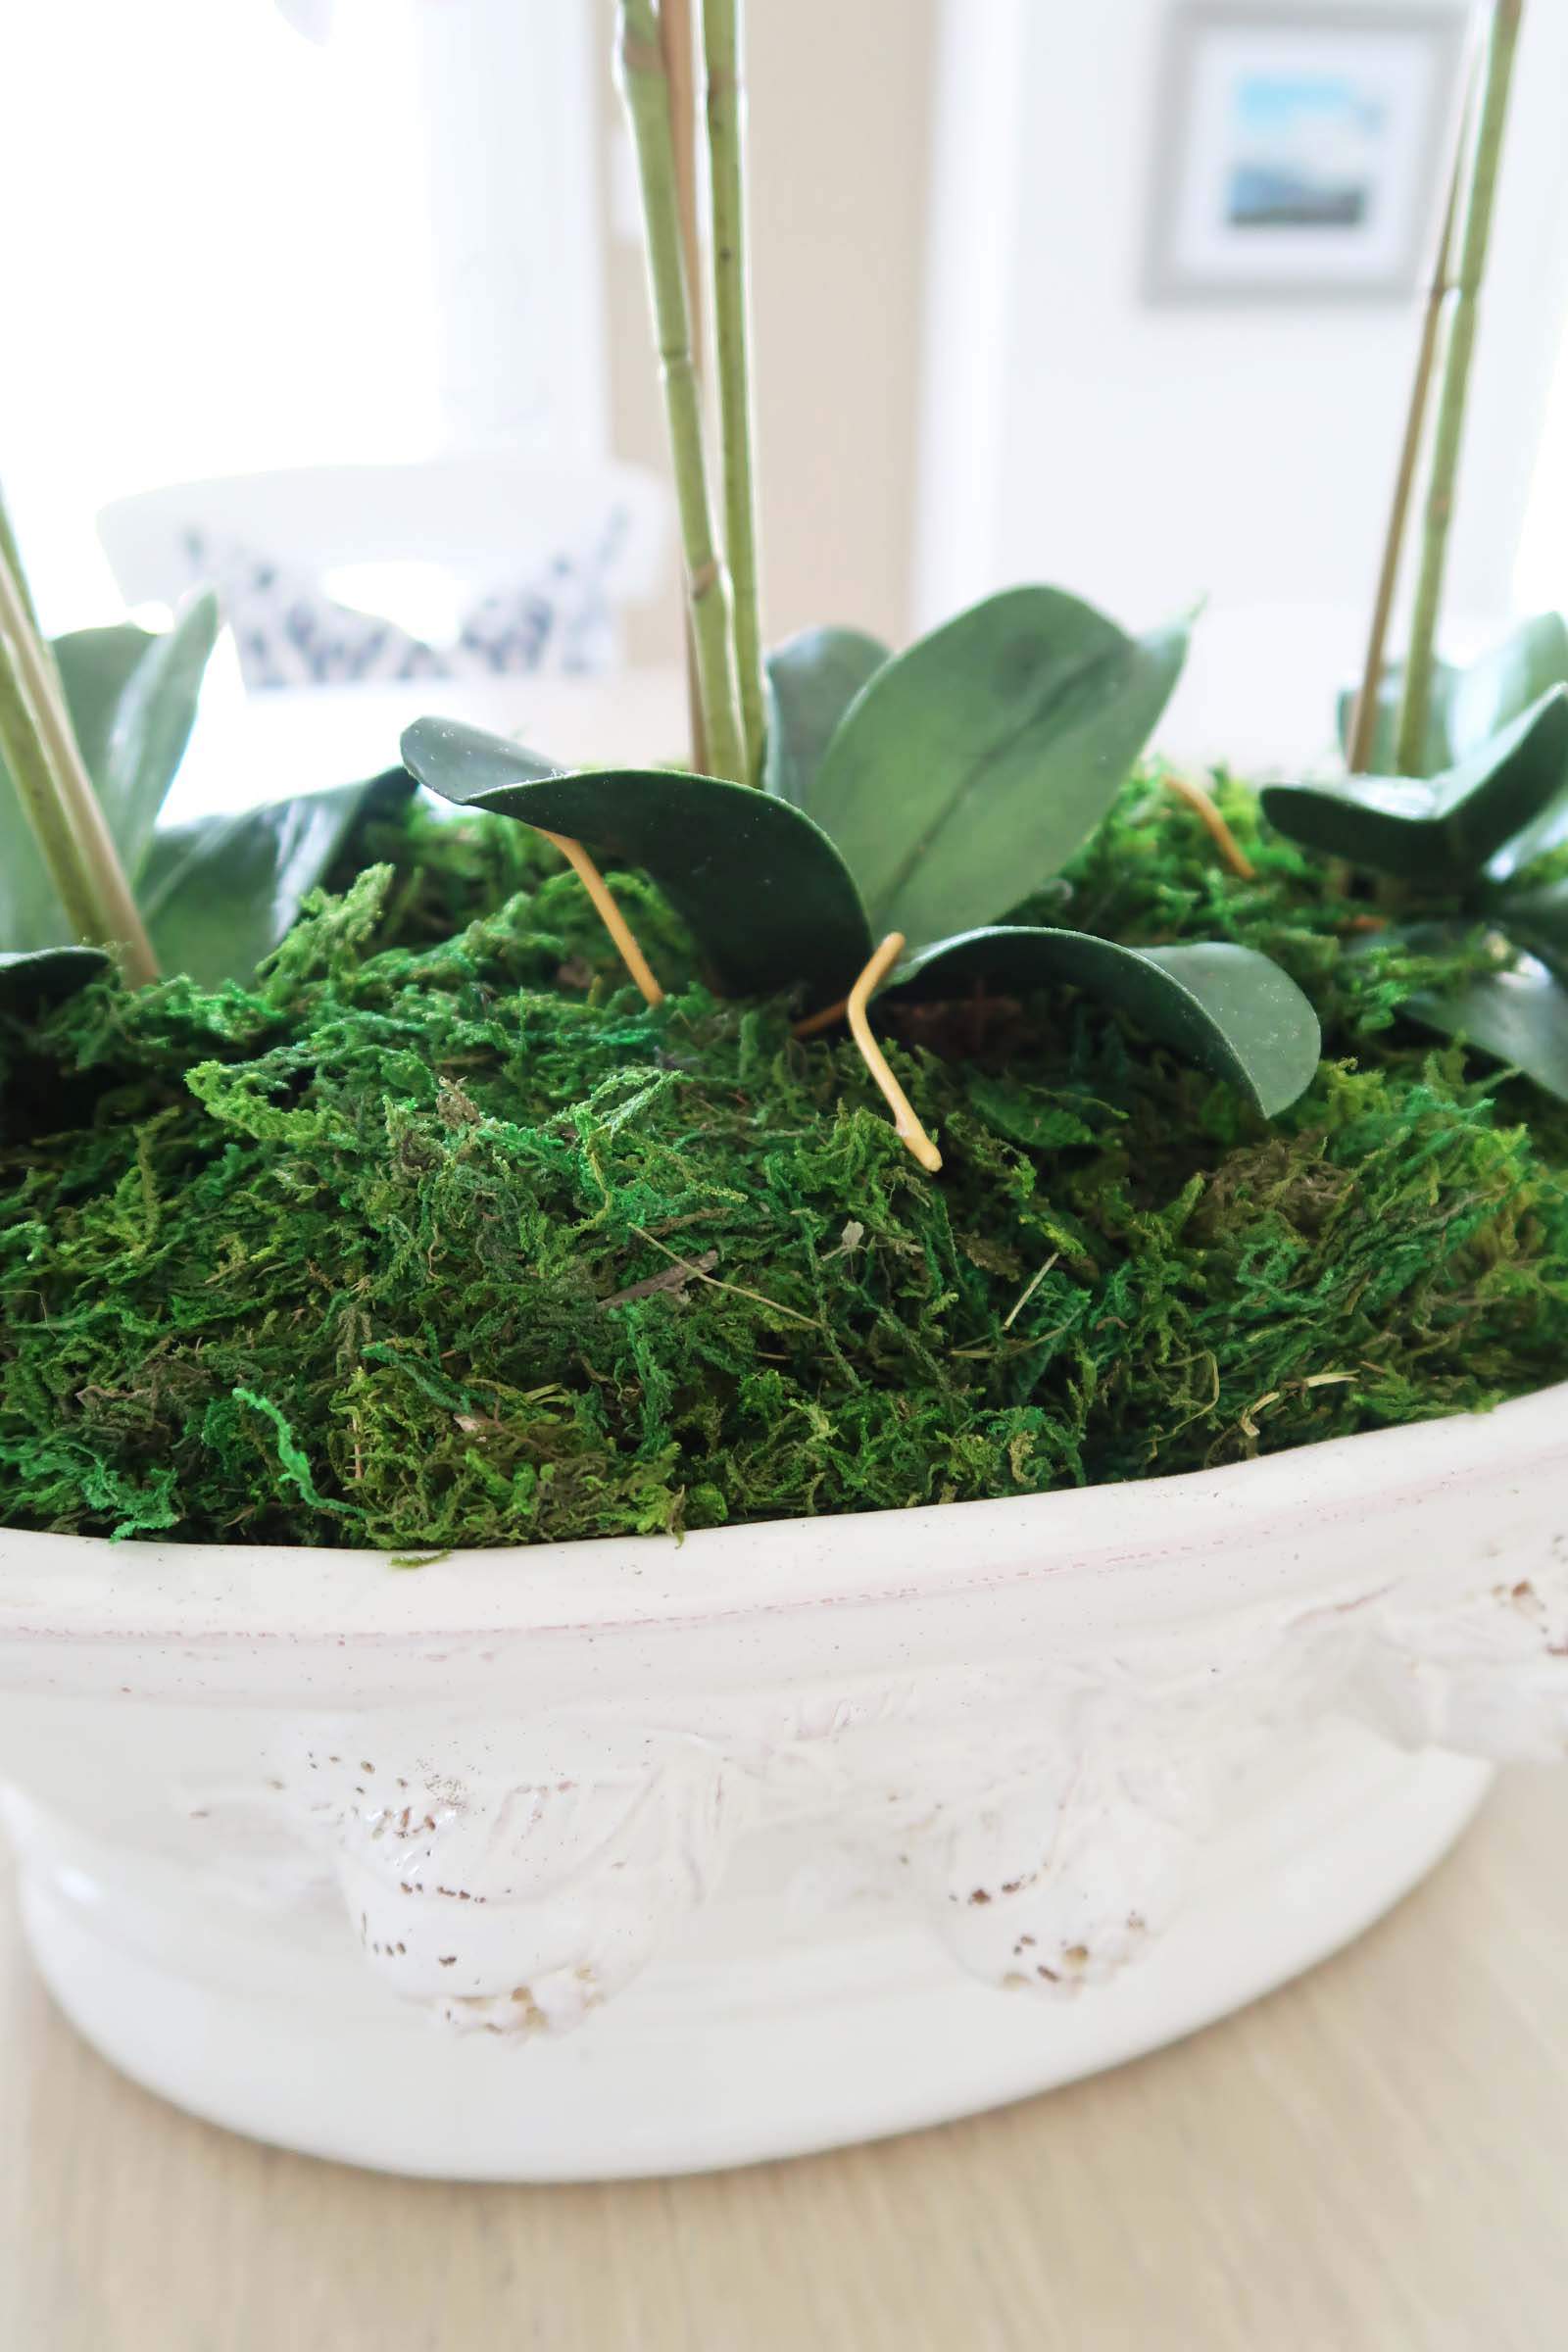
Once you are happy with the placement and all stems are secure, it is time to add the moss! This gets messy, but it is very easy. The moss is in a sheet and you just pull off pieces to insert under the leaves.
Make sure to cover over ALL of the floral foam. Tuck the moss under leaves and even around the edges of the planter.
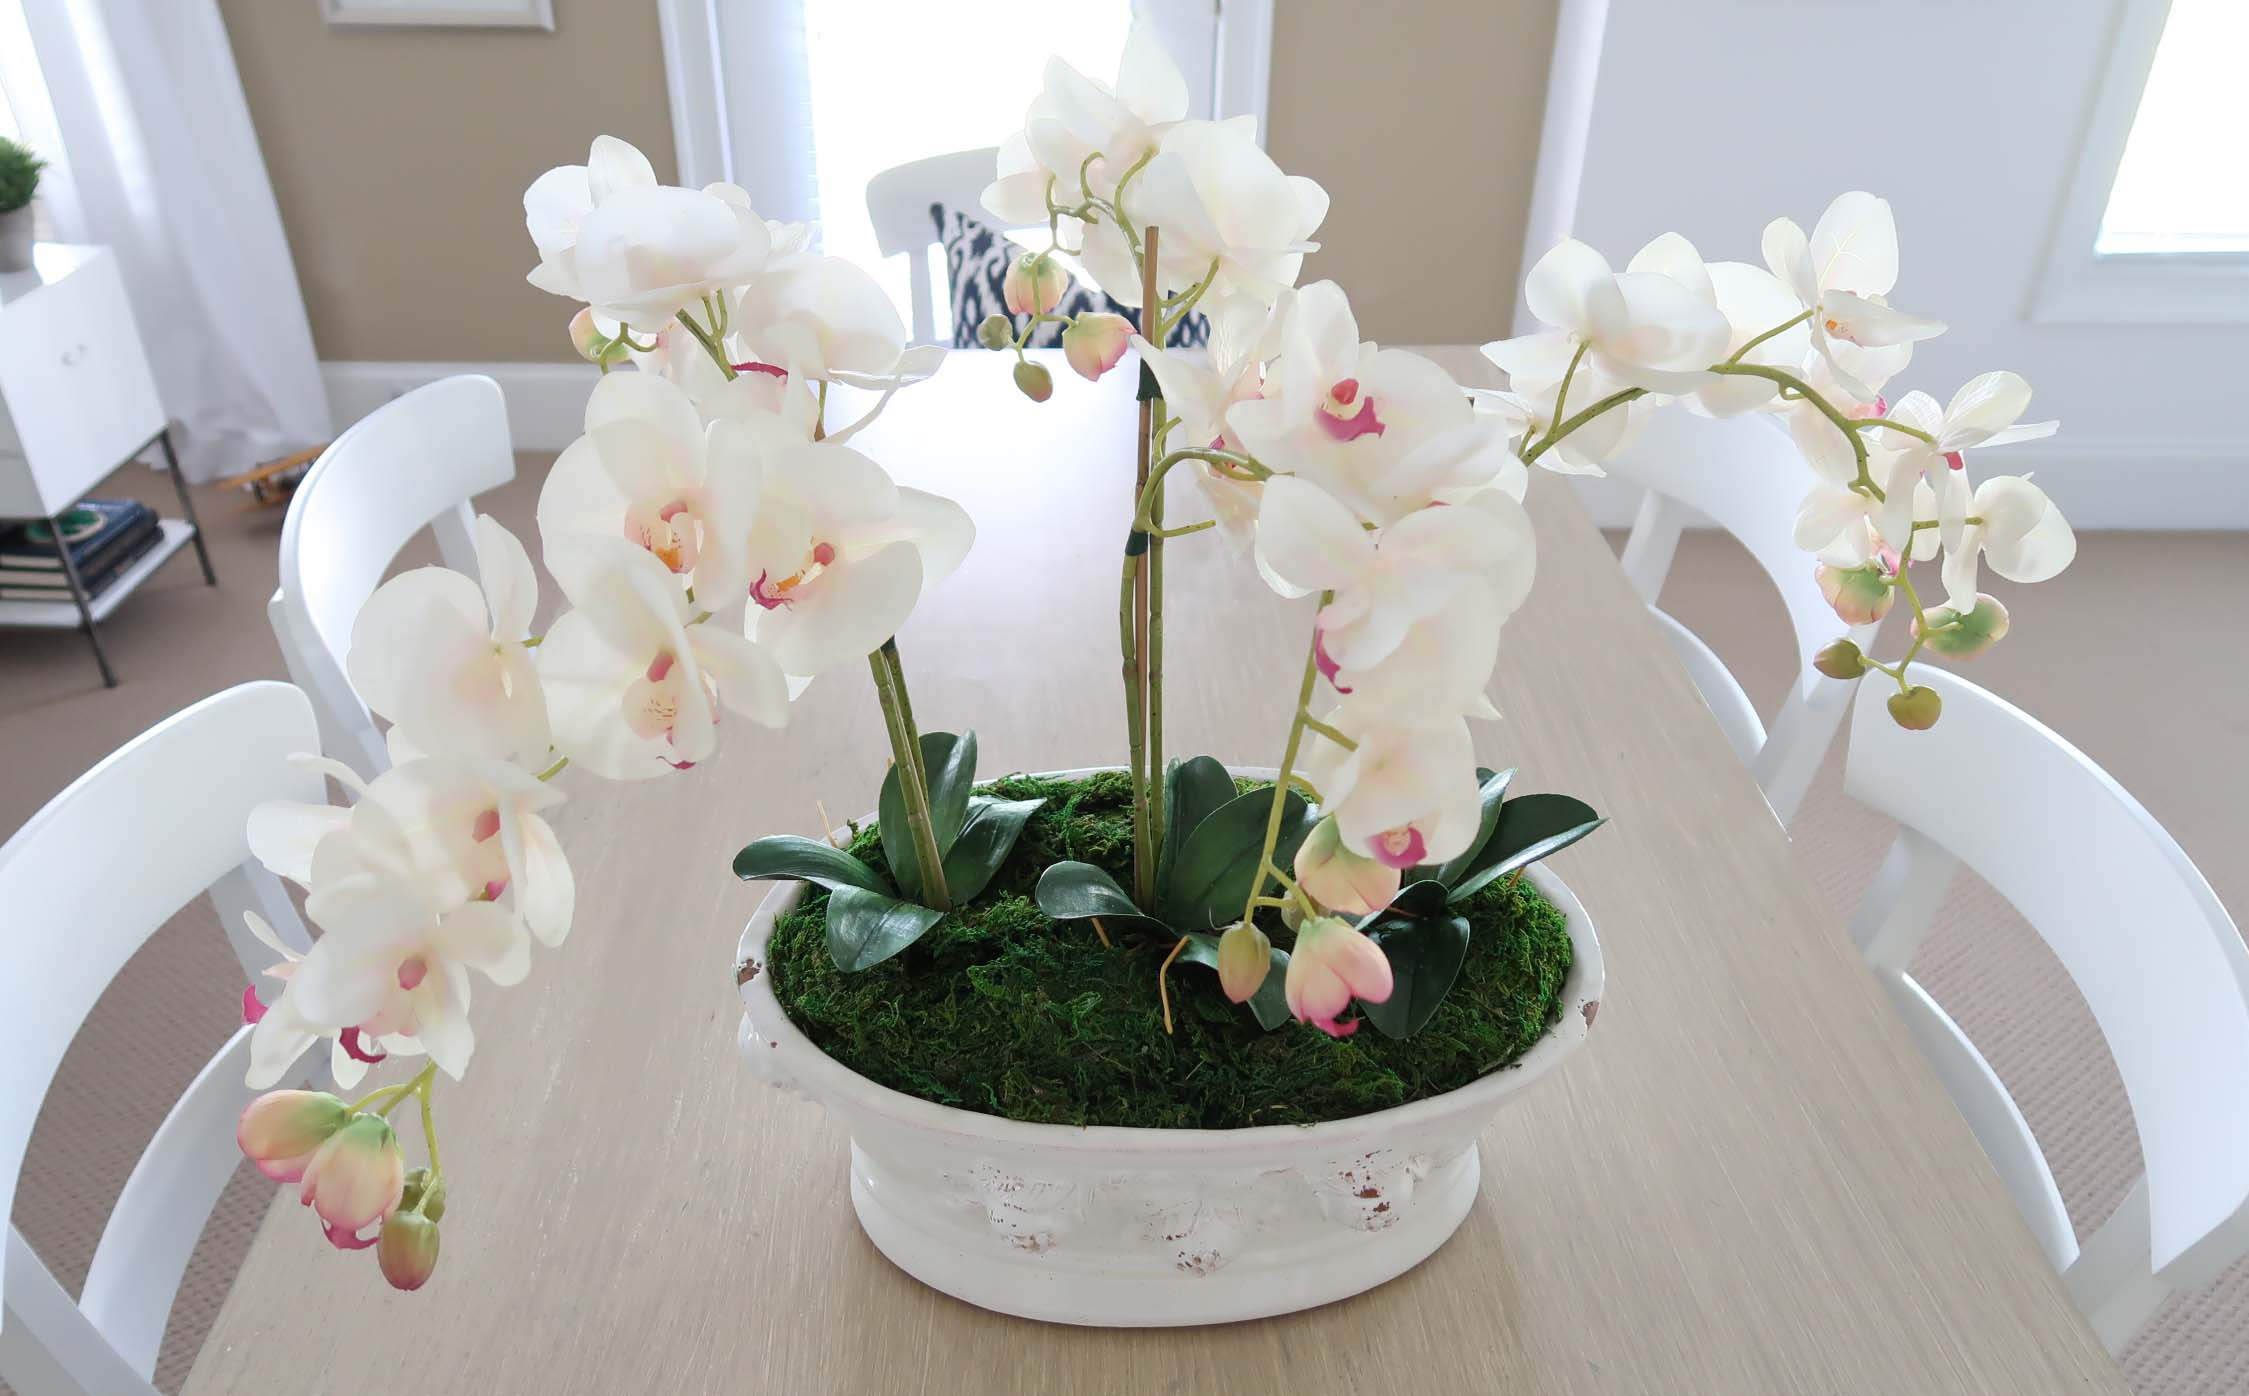
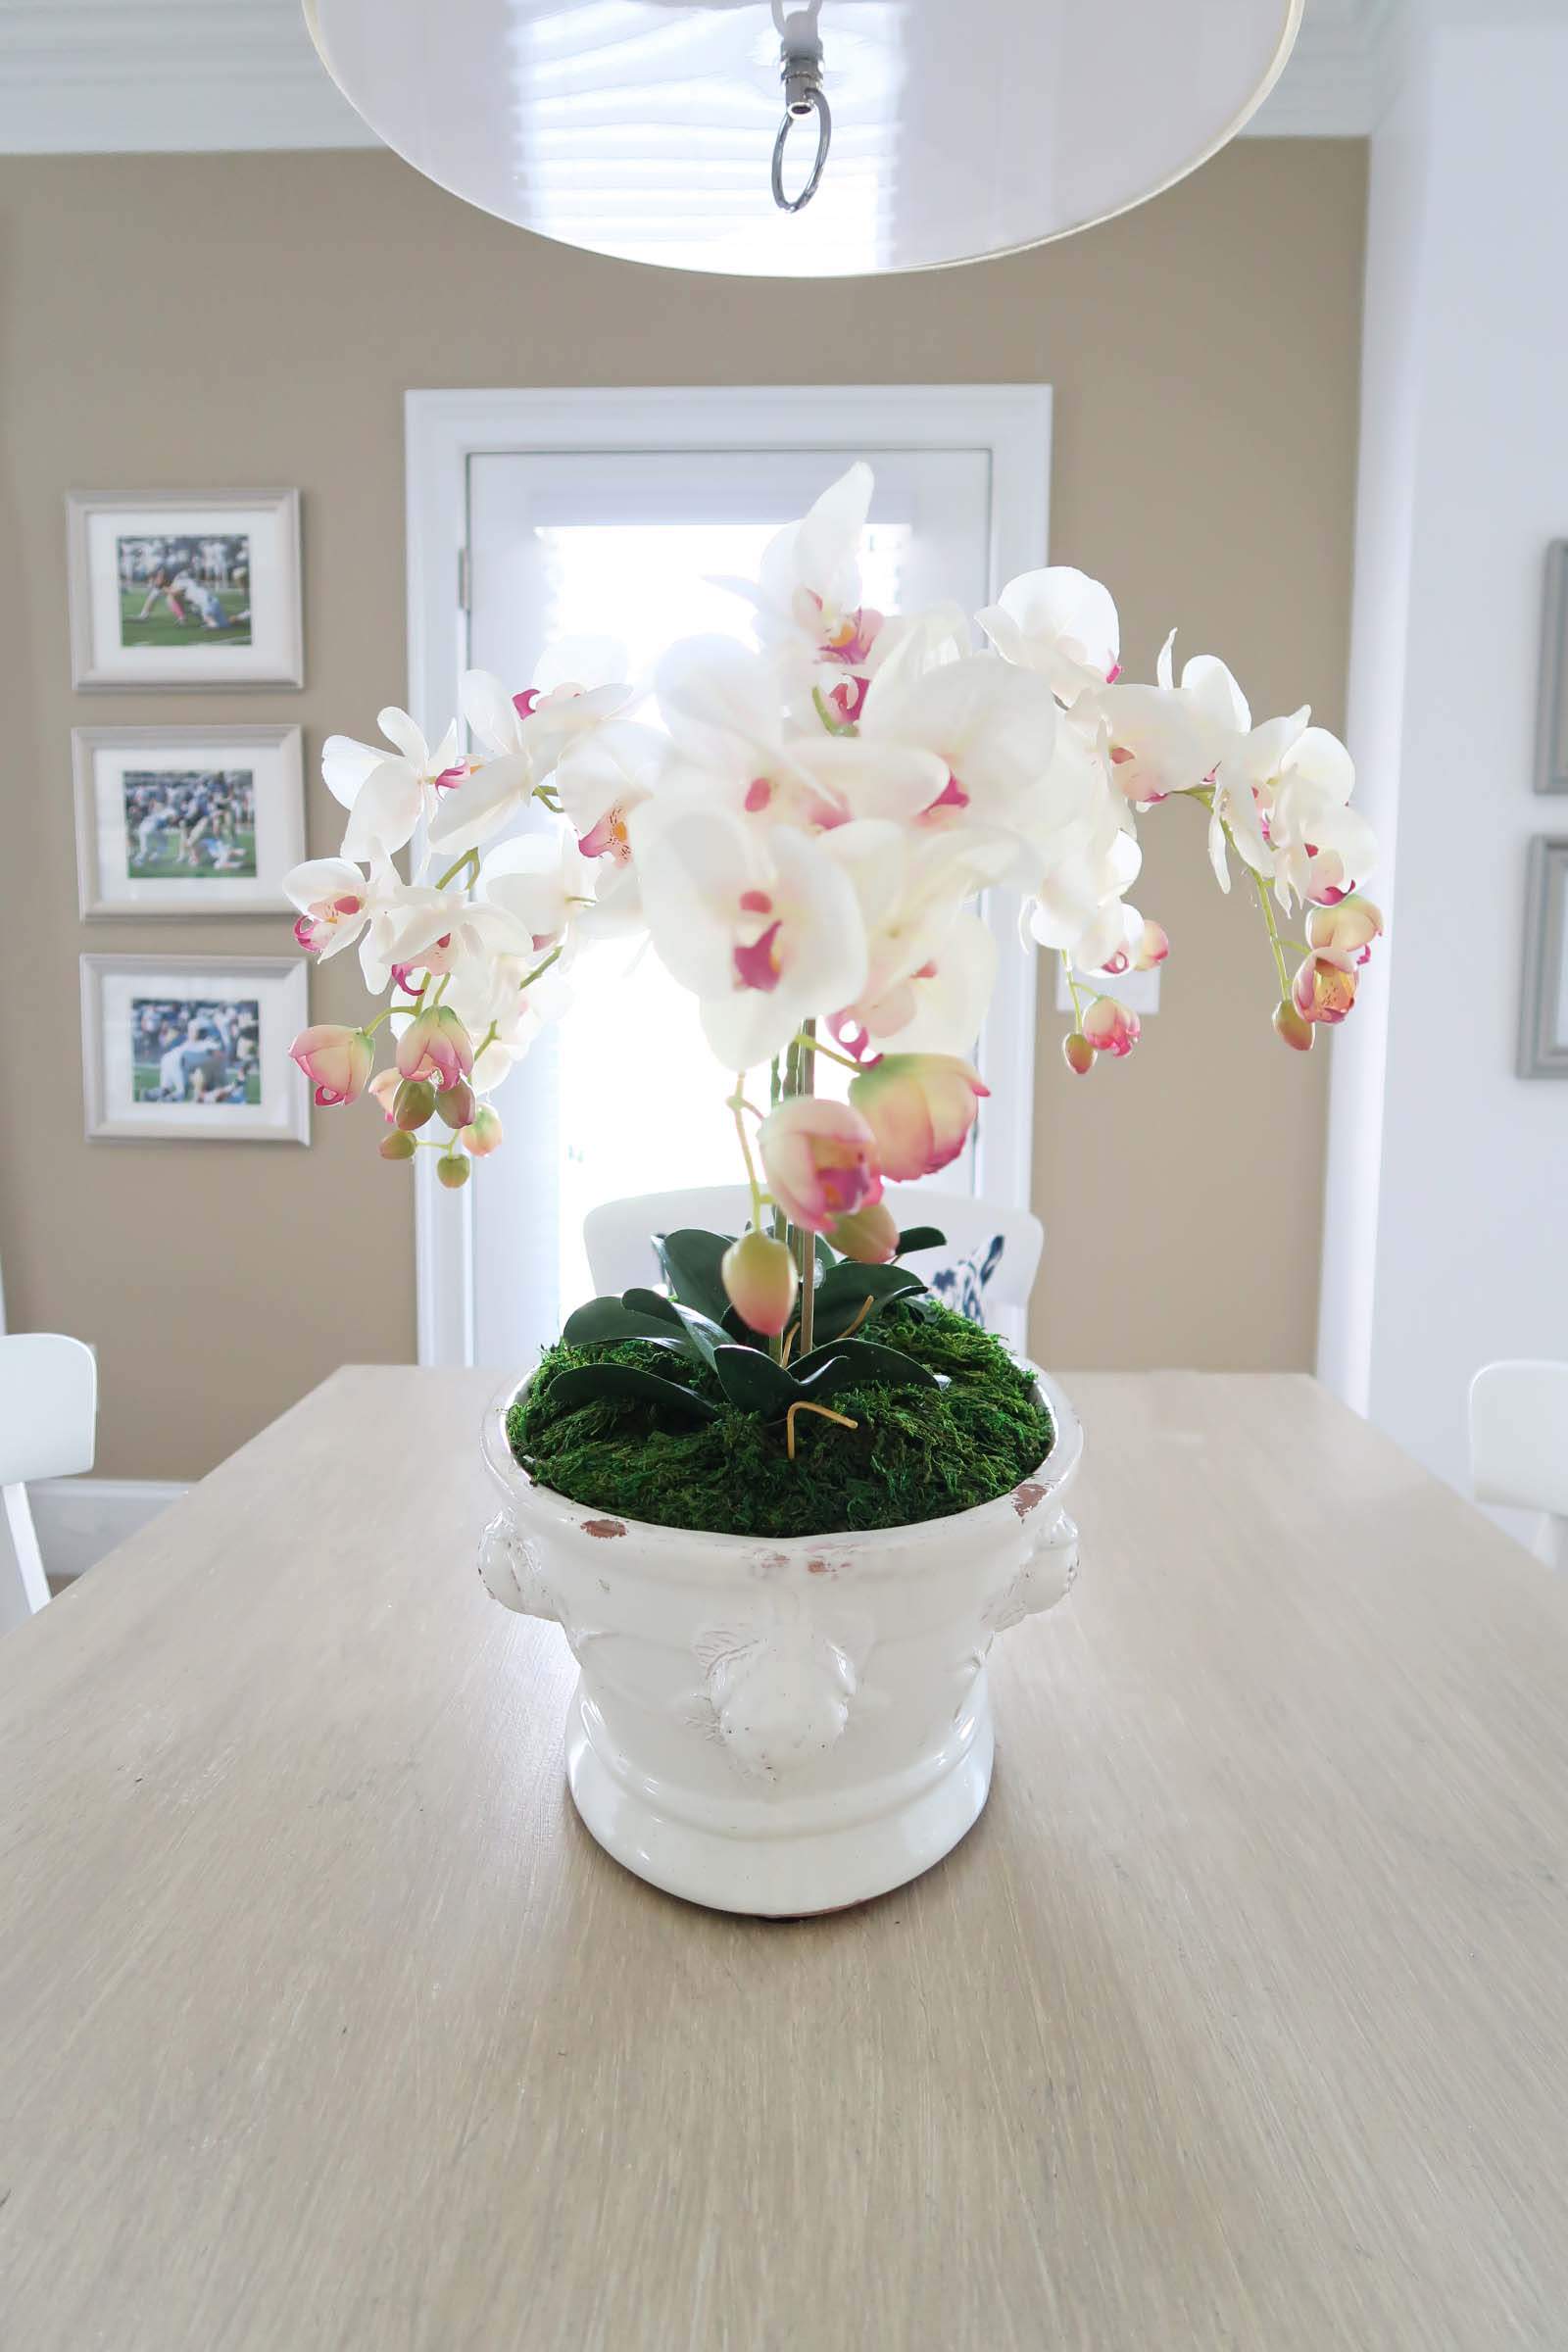
Enjoy your Orchid Arrangement!
Step back and enjoy! I made sure I liked how it looked from all angles. Once I placed it on the credenza, I turned the flowers into their final positions. Can’t do that with a real orchid 🙂
Optional Step:
Lastly, I replaced the green floral tape with clear jaw clips. I placed the clip and snipped the tape off with some scissors for the final version. I just liked how visually the clear clips “disappeared” versus the tape. This is solely up to you!
Pictured with green floral tape:

Pictured with clear jaw clips:
It’s hard to believe these are not real! I literally keep staring at the orchid arrangement and expect it to smell wonderful too 🙂 No watering these orchids or replacing them! They will live here until I do something different for the holidays.
Good luck and remember you can keep moving the stems around until you are happy, but do that before adding the moss!
Until next time…
Porch Daydreamer
Tracey
Wow, Tracey! What a great idea! Looks like a million bucks and so much cheaper than the store bought options. 🙂
Thanks, Jessica! I see a similar project in your future, with say palm fronds 🙂
Tracey, I have a suggestion: Use a serrated knife to cut the foam blocks. They don’t crumble as badly.
Thanks, Esther! I didn’t experience any crumbling, but will try a serrated knife next time. I found the blocks to leave a lot of “dust” and that was the messy part 🙂