
How-to Hang Artwork Evenly in a Row (without messing up walls)
Have three or more pictures you want to hang in a single line and have no idea how to space or hang them evenly? Here is an easy method that won’t mess up your walls!
Are you avoiding hanging a group of pictures because you don’t think you can make them even?
Or maybe you are scared you won’t get it right and make lots of holes in the wall?
Fortunately, after decorating many houses over the years and being a serial re-decorator I’ve perfected a way to hang artwork right the first time.
How-to Hang Artwork Evenly in a Row
In reality, I hang all of my artwork using this same method even if it isn’t a group of pictures.
This method is the perfect solution to determining the right placement of any artwork, BEFORE you ever put a hole in the wall!
It’s great because you can stand back and see exactly what it looks like on the wall and adjust the position quickly and easily.
Use this fool proof way to hang artwork for all types of projects:
- Hanging a gallery wall
- Stacked artwork groups
- Triology panels
- Mirrors
- Artwork in a row
- Group around a TV or entertainment center
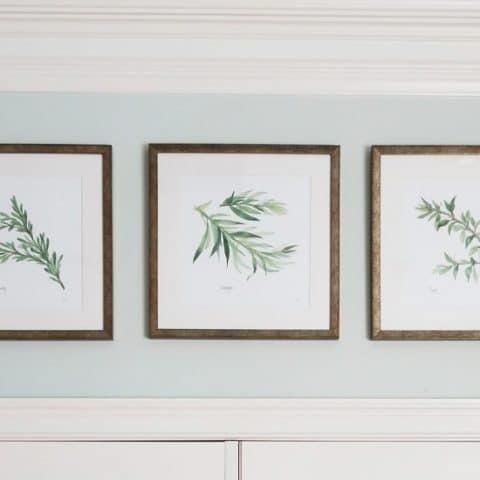
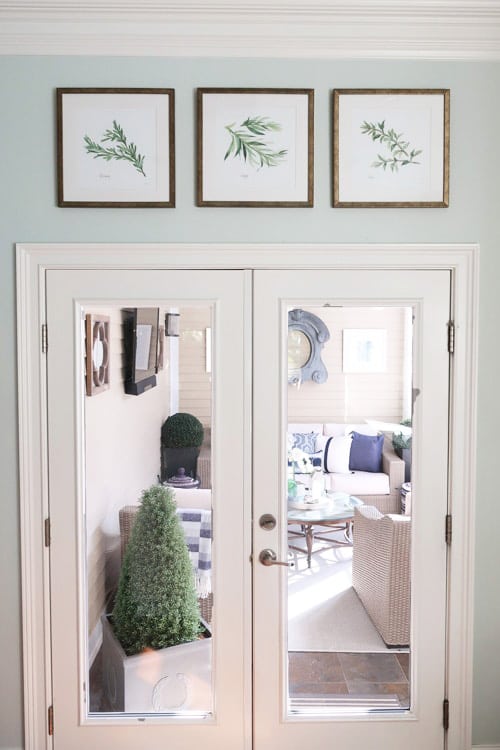
I’ll show you exactly how I hung this group of three pieces of artwork in a row over a door.
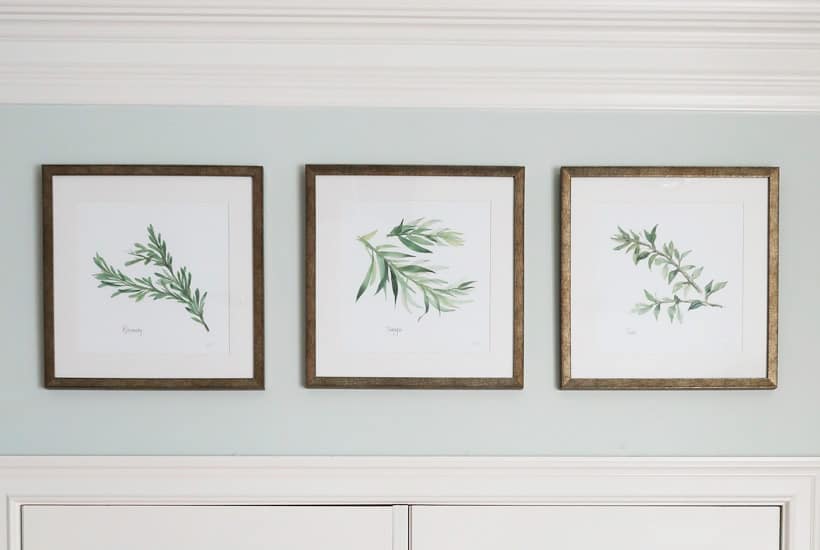
It only took me a half hour and just 3 holes in the wall, to get this perfectly level and spaced set of artwork!
This artwork hanging method is so simple!
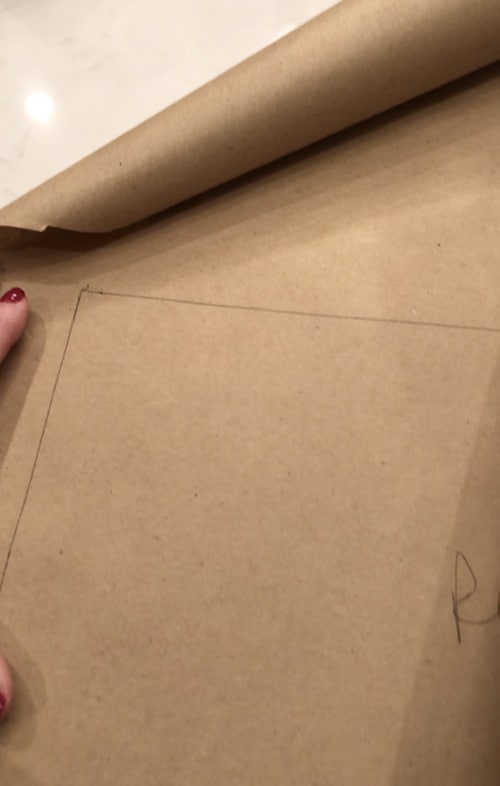
It starts with a paper cut out of the artwork.
Now onto my step by step tutorial and video of me hanging these pictures!
To turn on the video sound, check the volume icon and turn it way up.
How-to Hang Artwork Evenly in a Row
Fool proof and easy way to hang artwork in a evenly row! Works for hanging all types of artwork: groups of 3 pictures, gallery walls, or single pieces of artwork.
Materials
- Brown craft or wrapping paper
- Painter's tape
- Picture hanging wire
- Picture hanger
Tools
- Measuring tape
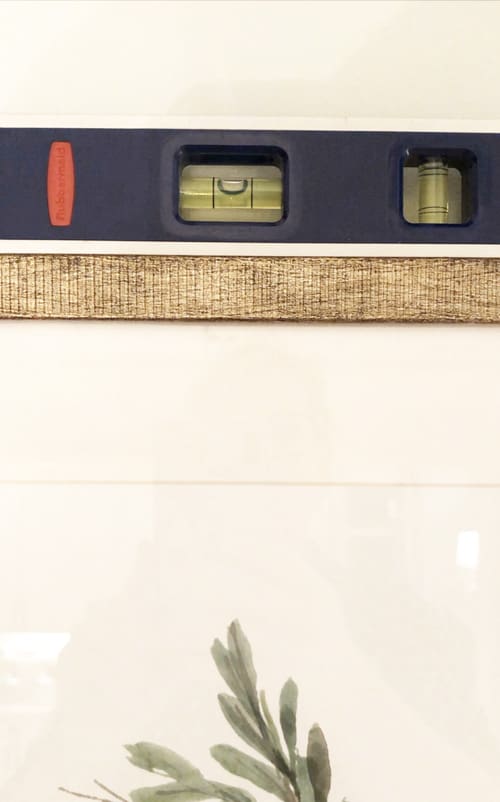
- Level
- Hammer
- Ladder
Instructions
- STEP ONE: Trace each frame on paper and cut out. Make sure to label each piece, so you place it on the wall in the right order.

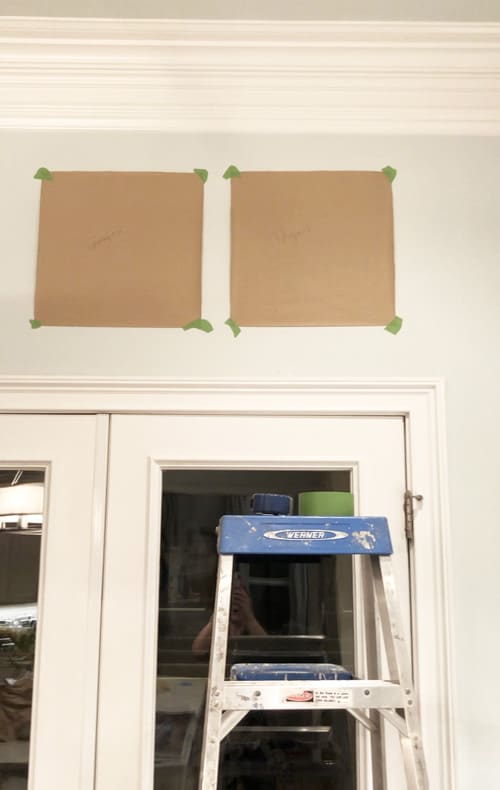
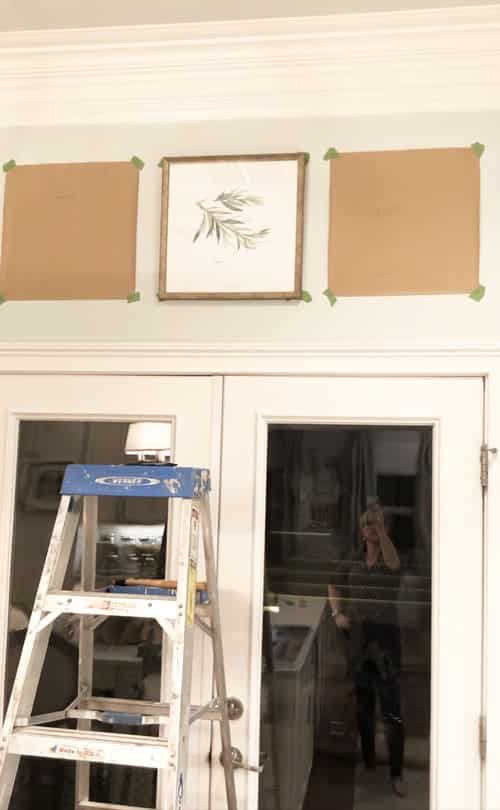
- STEP TWO: Using painter's tape place cut outs on the wall and adjust to the layout you like. Make sure to keep the spacing between the artwork the same by measuring. Ensure they are evenly in a line.

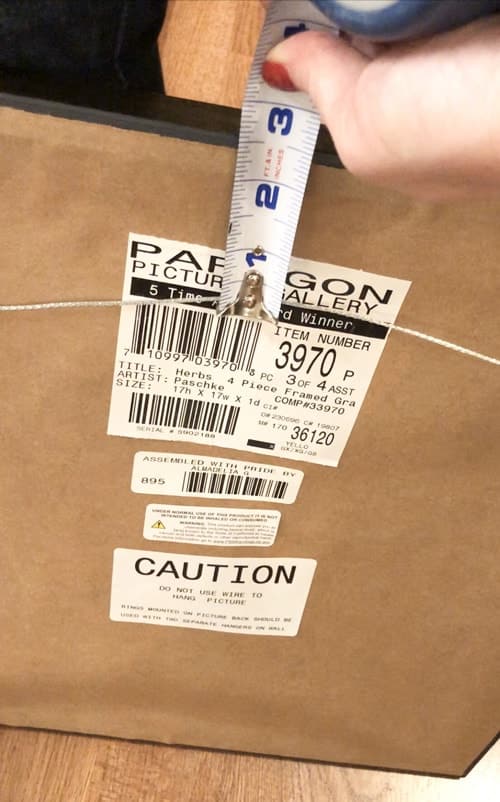
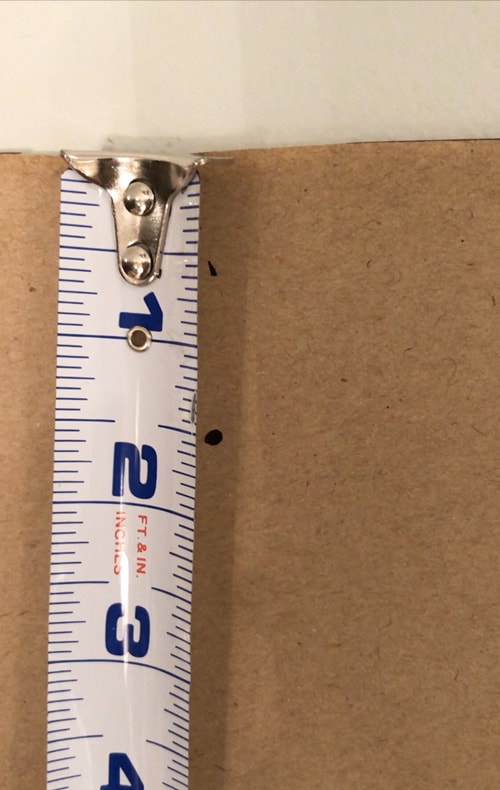
- STEP THREE: Measure EACH piece separately from the picture frame wire to the top of the frame putting some tension on the wire like it is hanging. Record center of frame and distance from wire to the top of the frame.

- STEP FOUR: Mark the same measurements to the corresponding piece of artwork paper on the wall.Remember to mark both the side to side center and top to bottom to find the center point for the picture hanger.
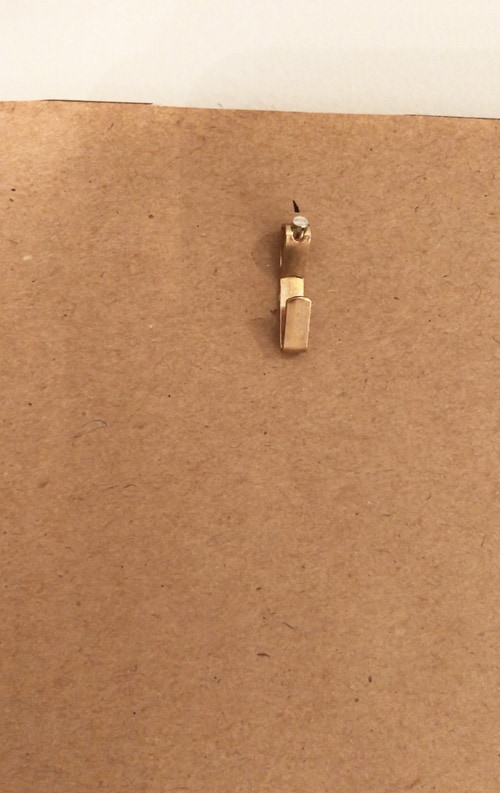
- STEP FIVE: Hammer in picture hanger making sure the bottom of the hook is on the mark you made.

- STEP SIX: Hang each piece of artwork OVER the paper. I like to leave the paper up in case one of the pictures is off I can adjust the paper easily.

- STEP SEVEN: When everything is hung perfectly, pull off paper and level each piece of art. If one is hung too high low, gently adjust the picture wire tighter to hang higher or loosen to hang lower.
- STEP EIGHT: Stand back and enjoy your perfect work!

Notes
The far right picture was about 1/8 inch too high, so I was able to push down on the frame itself to get it to the right height. Try that first, before pulling off the wall to correct the wire.
The 3 main benefits to using paper cut outs to hang artwork first:
- You only put holes in the exact spot you need them
- Artwork is perfectly spaced because you can easily measure and level, before hanging
- It shows you the size of the artwork in the space, so you can determine if it’s the right location
The new artwork over the door looks great and it’s perfectly even and straight.
Pin It for Later!
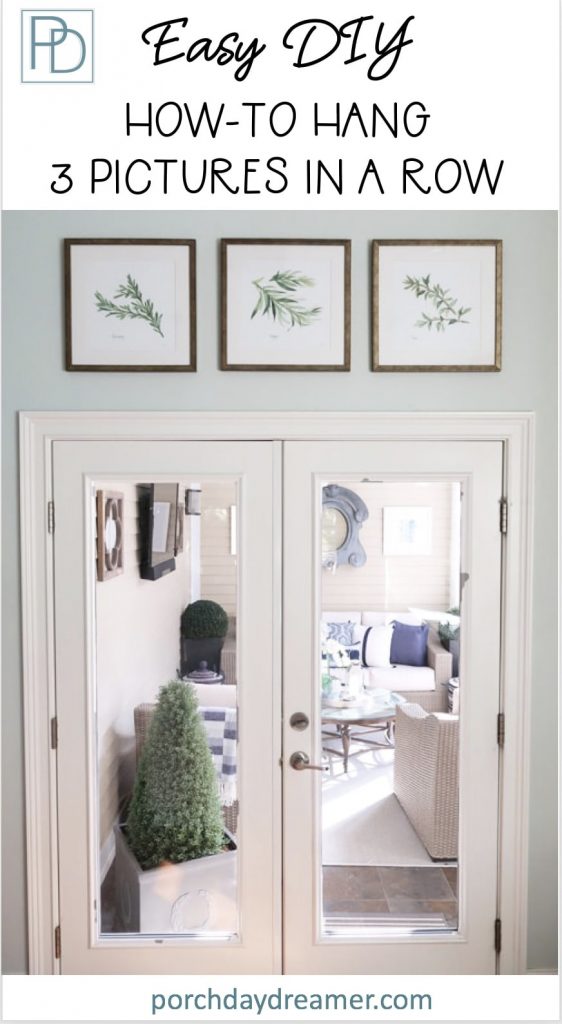
Adding larger herb artwork in a row really set off this end of the room and made it look really special!


Contains hand selected products, with affiliate marketing links where I may make a small commission if a purchase is made. {full disclosure here}
Hopefully, you’ve found this tutorial helpful and are ready to tackle hanging artwork in your home!
Wishing you the best of luck and let me know in the comments if this made your project easier 😉
You’ll feel like a pro, when you are finished.
Please consider following me on Pinterest and Instagram for daily inspiration.
Another great post that you may love around hanging artwork:
Create a Gallery Wall That Looks Like a Designer Did It!
Here are more decorating guides!
Please consider signing up for my weekly email newsletter and following me on Pinterest and Instagram for daily inspiration.
Until next time..
Porch Daydreamer
Tracey
Thank you so much! I just finishing hanging three framed prints and your method worked beautifully. I feel like you did most of the work.
Mary, I’m so glad! It’s amazing how a little prep makes it so much easier 😉